Your speakers were working fine yesterday, but today the sound is coming out of the wrong place: the monitor instead of your headset, the laptop speakers instead of the desk speakers, or nothing at all. Windows lets you pick exactly where your audio plays, and once you know where the setting lives you can flip between devices in seconds. This guide walks through every documented way to change your default audio output on Windows 11 (with the Windows 10 path noted alongside), plus what to do when a device refuses to make any sound.
Pick Your Output Device in Sound Settings
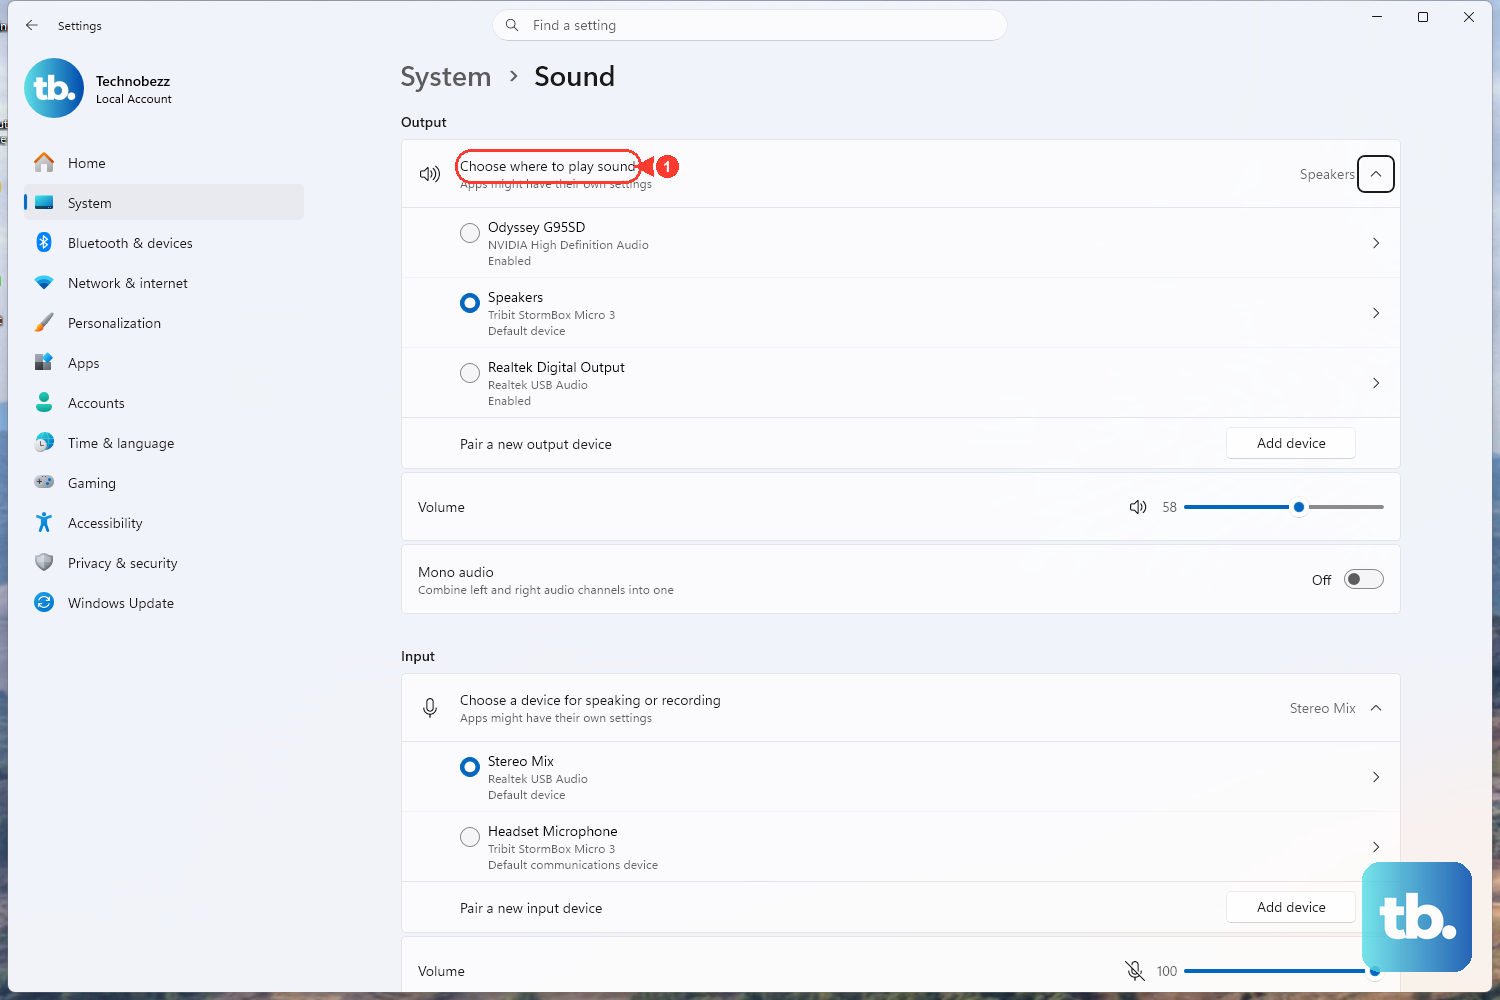
The fastest and most reliable way to change where audio plays is through Sound settings. Select Start > Settings > System > Sound, then look at the Output section near the top. Select the device you want to use for playback and Windows immediately routes sound to it.
If you are on Windows 10, the wording is slightly different. The list appears under Choose your output device, but the location is the same: Settings > System > Sound. Whichever device you pick here becomes the one Windows uses by default for everything from videos to system sounds.
Switch Outputs Instantly From the Taskbar
When you just want to jump between two devices that are already connected, you do not need to open Settings at all. Select the Speakers icon on the taskbar, then select the arrow to the right of the speaker volume slider.
That arrow opens a list of every audio device currently connected to your computer. Choose the one you want and the switch happens right away. This is the trick to keep in your back pocket for moving sound from speakers to a headset and back without breaking your flow.
Set a Device as Default in the Playback Tab
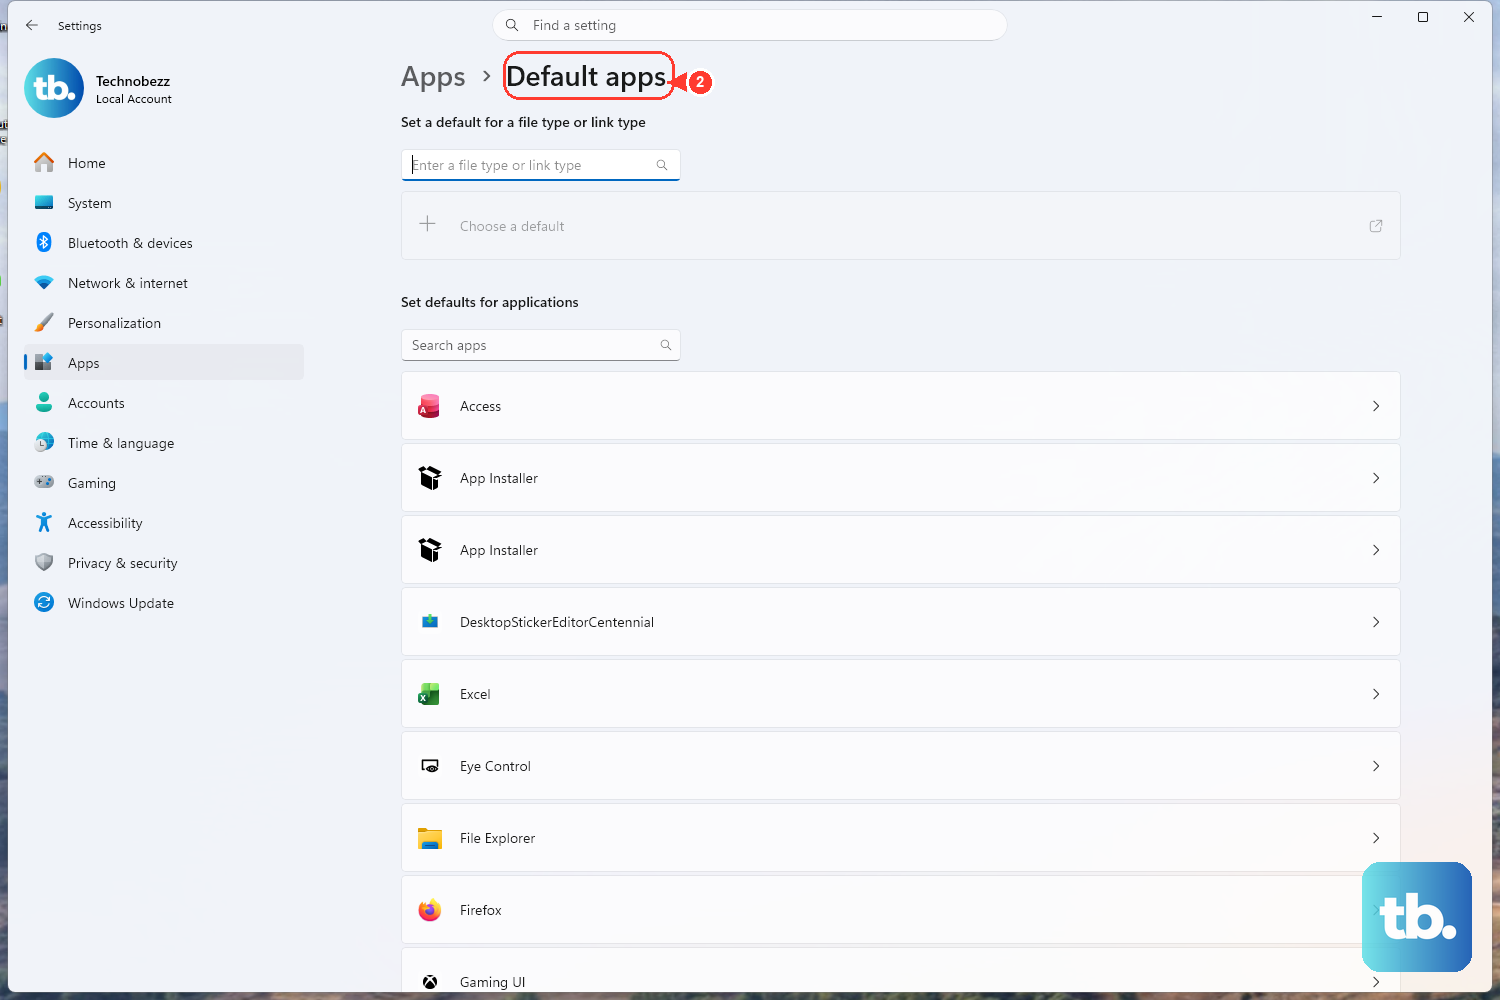
Some apps look at the classic Playback list rather than the modern Sound settings page, so it is worth setting your default there too. On Windows 11, select Start > Settings > System > Sound, then select More sound settings > Playback. Right-click the device you want and select Set as default.
On Windows 10, the route is a little longer. Select Start > Settings > System > Sound, then under Related settings select Sound Control Panel. On the Playback tab, select your audio device and select Set Default. Setting the default in both the modern and classic locations covers every app behavior.
Let the Audio Troubleshooter Find the Problem
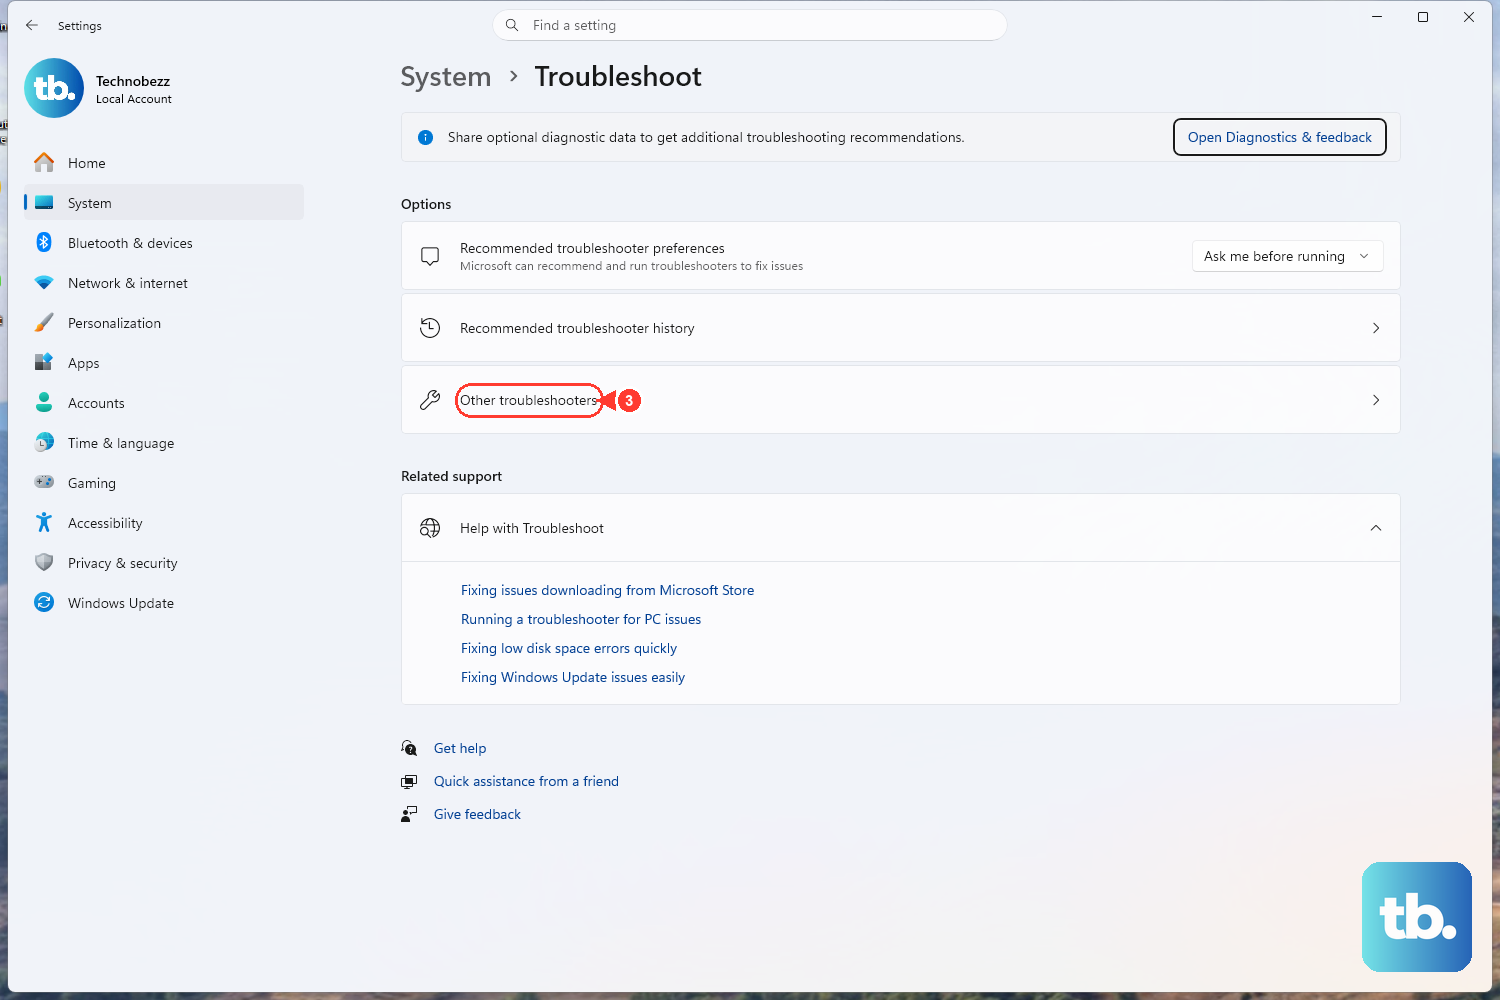
If sound is missing or you cannot get a device to behave, the built-in audio troubleshooter is the right first move. On Windows 11, select Start > Settings > System > Troubleshoot > Other troubleshooters, then next to Audio select Run.
On Windows 10, select Start > Settings > Update & Security > Troubleshoot, then under Find and fix problems select Playing audio and select Run the troubleshooter. On both versions you can also run the automated troubleshooter in the Get Help app, which walks through the same checks for you.
Restart the Windows Audio Services
Sometimes the audio system itself gets stuck, and a quick service restart clears it. In the search box on the taskbar, type services, then select it from the results to open the Services console.
Select each of these services one at a time, select Restart, and then select Yes if prompted:
- 1.Restart Windows Audio.
- 2.Restart Windows Audio Endpoint Builder.
- 3.Restart Remote Procedure Call (RPC).
Restarting all three resets the chain of services that Windows relies on to send sound to your hardware. If a device that was silent suddenly works after this, a stalled service was the culprit.
Update the Audio Driver in Device Manager
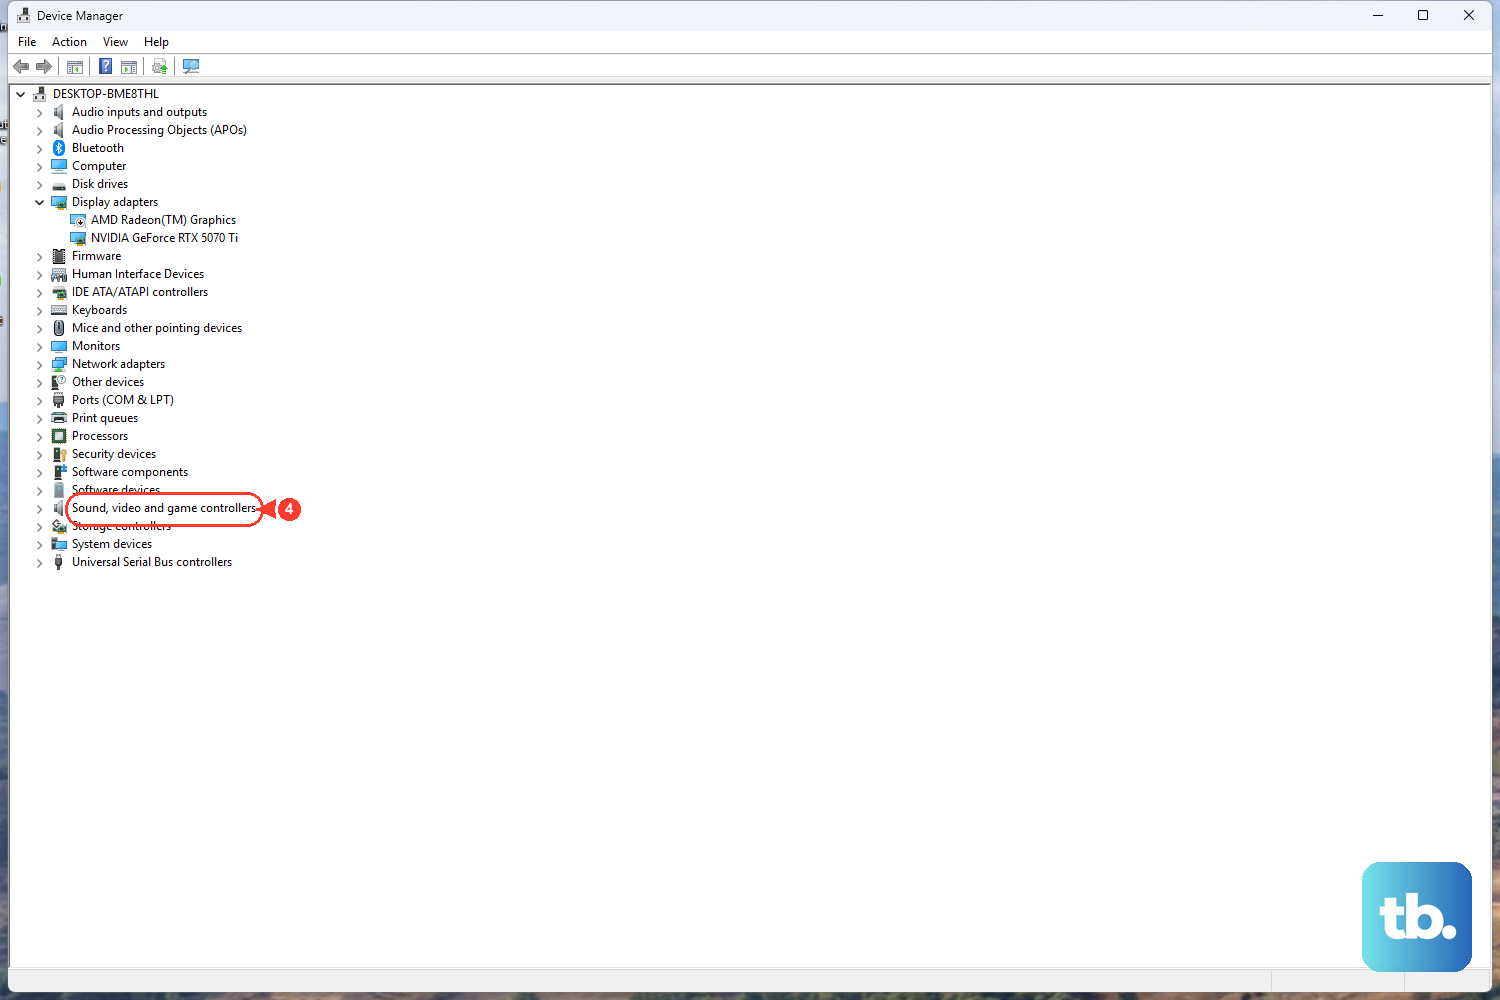
A device that will not appear or play correctly often points to a driver problem. Open Device Manager by typing device manager in the taskbar search box and selecting it. Select the arrow next to Sound, video and game controllers to expand that category.
Select and hold (or right-click) your sound card or audio device, select Update driver, then select Search automatically for drivers. Follow the on-screen instructions and restart your PC if you are prompted to. An up-to-date driver resolves a surprising number of output and device-detection issues.
Reinstall the Audio Driver
When updating does not help, reinstalling the driver gives Windows a clean slate. In Device Manager, expand Sound, video and game controllers, then select and hold (or right-click) your audio device and select Uninstall device.
Select the Attempt to remove the driver for this device check box, then select Uninstall. Restart your PC afterward, and Windows will attempt to reinstall the driver automatically on startup. This is the cleanest way to clear a corrupted driver without hunting down files yourself.
Roll Back a Driver That Broke Your Sound
If your audio stopped working right after a driver update, you can return to the previous version. In Device Manager, expand Sound, video and game controllers, select and hold (or right-click) your audio device, then select Properties.
Select the Driver tab, then select Roll Back Driver and confirm with Yes. Note that Roll Back Driver is unavailable if no previous driver version is stored on your PC, which happens when the driver has never been updated since installation.
Make a Bluetooth Headset Your Output Device
Bluetooth headsets and speakers add one extra wrinkle: they can be connected and yet produce no sound because Windows has not selected them for playback. Select the Speakers icon on the taskbar and make sure the correct Bluetooth device is selected from the list.
Then select Start > Settings > System > Sound and, under Output, confirm your Bluetooth device is set as the output. On Windows 10, look under Choose your output device and select your Bluetooth device there. A connected headset that still plays nothing almost always just needs to be picked as the output.
Confirm Bluetooth Is Actually Turned On
Before going further with a wireless device, make sure Bluetooth itself is enabled. On Windows 11, select Start > Settings > Bluetooth & devices and make sure Bluetooth is turned on.
On Windows 10, select Start > Settings > Devices > Bluetooth & other devices and make sure Bluetooth is turned on. It is easy to toggle Bluetooth off by accident, so this quick check saves time before you start troubleshooting the connection itself.
Run the Bluetooth Troubleshooter
If a wireless device keeps dropping or refuses to connect, Windows has a dedicated troubleshooter for it. On Windows 11, select Start > Settings > System > Troubleshoot > Other troubleshooters, then next to Bluetooth select Run.
On Windows 10, select Start > Settings > Update & Security > Troubleshoot, then select Bluetooth and select Run the troubleshooter. As with audio, both versions also offer the automated Bluetooth troubleshooter inside the Get Help app.
Remove and Re-Pair a Stubborn Bluetooth Device
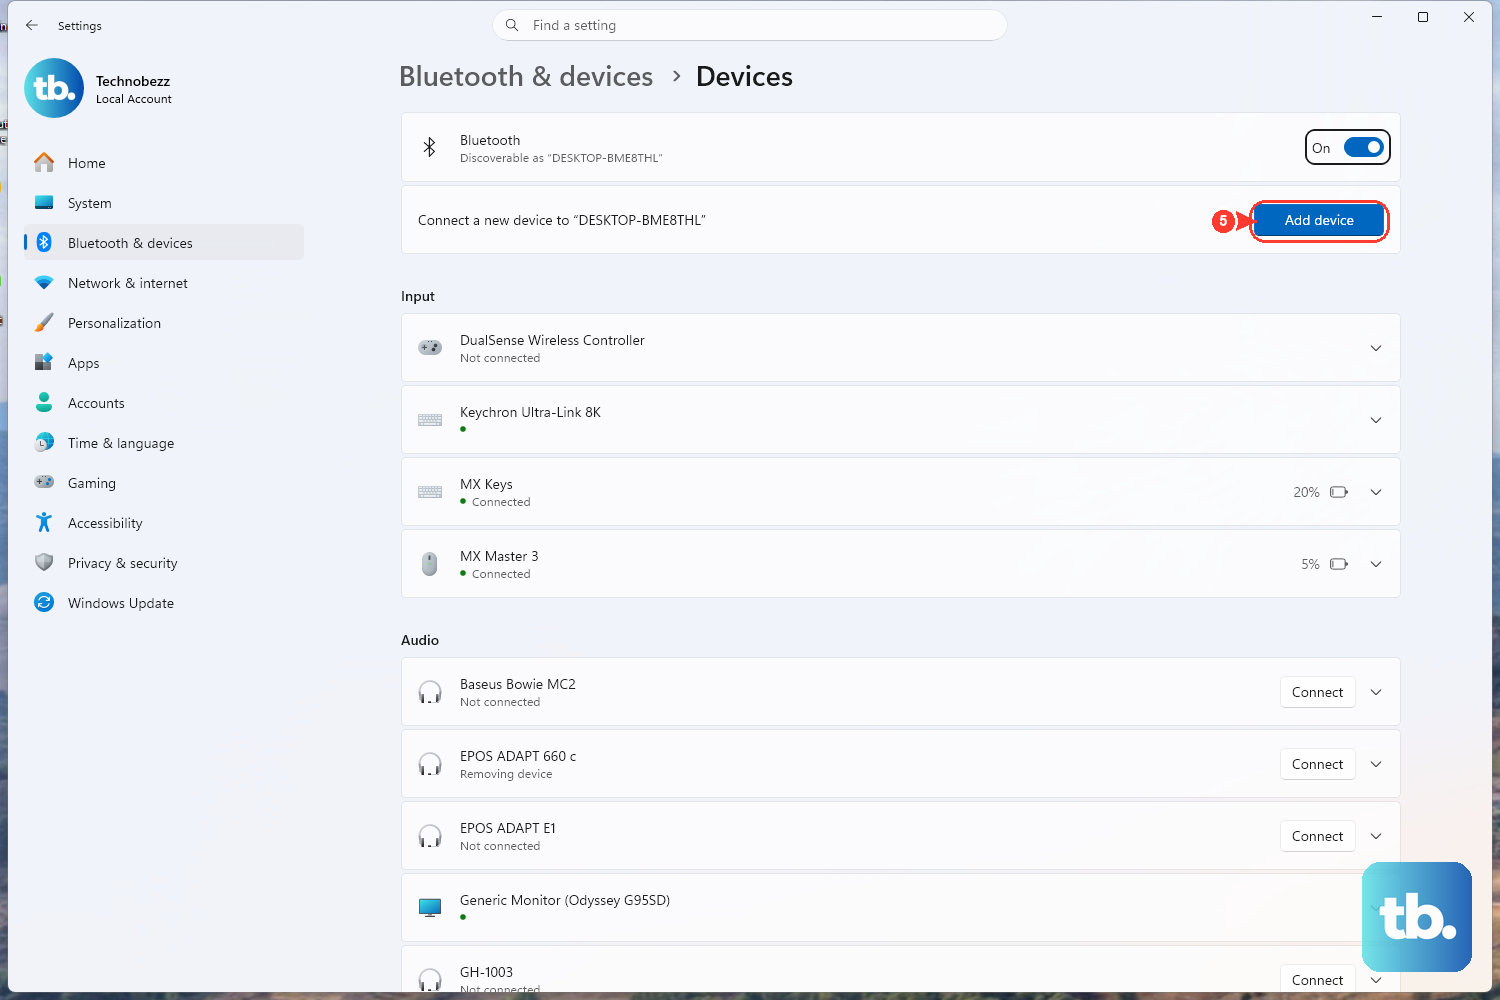
When a Bluetooth device is connected but never works right, removing and re-pairing it often clears the fault. On Windows 11, select Start > Settings > Bluetooth & devices > Devices, select More options for the problem device, then select Remove device > Yes. To add it back, make the device discoverable and pair it again from Settings > Bluetooth & devices > Add device.
On Windows 10, select Start > Settings > Devices > Bluetooth & other devices, select the device and choose Remove device > Yes, then re-add it with Add Bluetooth or other device > Bluetooth. Re-pairing rebuilds the connection from scratch and resolves the kind of glitches a restart alone cannot.
Pair a New Bluetooth Audio Device
To set up a wireless headset or speaker for the first time, turn on the Bluetooth device and put it into a discoverable mode. On Windows 11, select Start > Settings > Bluetooth & devices, switch Bluetooth On, then add the device.
On Windows 10, select Start > Settings > Devices > Bluetooth & other devices, select Add Bluetooth or other device, select Bluetooth, then choose your device from the discovered list and select Done. Once it is paired, return to Sound settings to confirm it is selected under Output.
Frequently Asked Questions
What is the quickest way to change my default audio output?
Select and hold (or right-click) the Speakers icon on the taskbar, select the arrow to the right of the volume slider, and pick the device you want. For a more permanent change, go to Settings > System > Sound and choose the device under Output.
Why is my Bluetooth headset connected but not playing sound?
A connected Bluetooth device is not automatically the chosen output. Select the Speakers icon in the taskbar and select the correct Bluetooth device, then open Start > Settings > System > Sound and confirm it is set under Output (under Choose your output device on Windows 10).
How do I undo a driver update that broke my audio?
Open Device Manager, expand Sound, video and game controllers, right-click your audio device, and select Properties. On the Driver tab, select Roll Back Driver. This option is unavailable if no previous driver version is stored on your PC.
Which Windows services should I restart for sound problems?
Type services in the taskbar search box to open the Services console, then restart these one at a time: Windows Audio, Windows Audio Endpoint Builder, and Remote Procedure Call (RPC).
Where is the audio troubleshooter on Windows 11?
Select Start > Settings > System > Troubleshoot > Other troubleshooters, then next to Audio select Run. You can also run the automated version inside the Get Help app.


