When your Dell XPS 16 suddenly goes silent, it's a jarring experience. The issue could be a simple software setting, a driver conflict, or a deeper hardware problem. Let's walk through the steps to get your sound back.
Run Dell SupportAssist
Before you dive into Windows settings, I'd start with Dell's support tool. Open the SupportAssist app from your Start menu and run the default hardware scan. Dell says that scan checks the laptop for hardware failures and can point you to troubleshooting steps; if it flags an audio hardware failure, treat that as a service issue rather than a Windows setting.
Check the Volume and Output
Click the speaker icon in your taskbar. Make sure the master volume slider isn't at zero and the mute icon isn't highlighted. Click the small arrow next to the volume slider to see all available output devices. If you recently unplugged headphones, Windows might still be trying to send audio to that port.
Restart Your XPS 16
This is the classic fix for a reason. A full restart reloads all audio drivers and clears any stuck processes. Click Start, then the power icon, and select Restart. It's especially effective if the sound cut out after a Windows update or coming out of sleep mode.
Update or Reinstall Audio Drivers
Press the Windows key + X and select Device Manager. Expand the "Sound, video and game controllers" section. Right-click on your audio device (on the XPS 16 9640, Dell lists Cirrus Logic audio for the internal controller; a Realtek USB audio entry may appear for a dock) and choose Update driver. Select "Search automatically for drivers."
If that doesn't work, right-click the device again and choose Uninstall device, then restart your laptop. If sound still does not return, install the latest XPS 16 audio driver from Dell Drivers & Downloads instead of relying on a generic Windows driver.
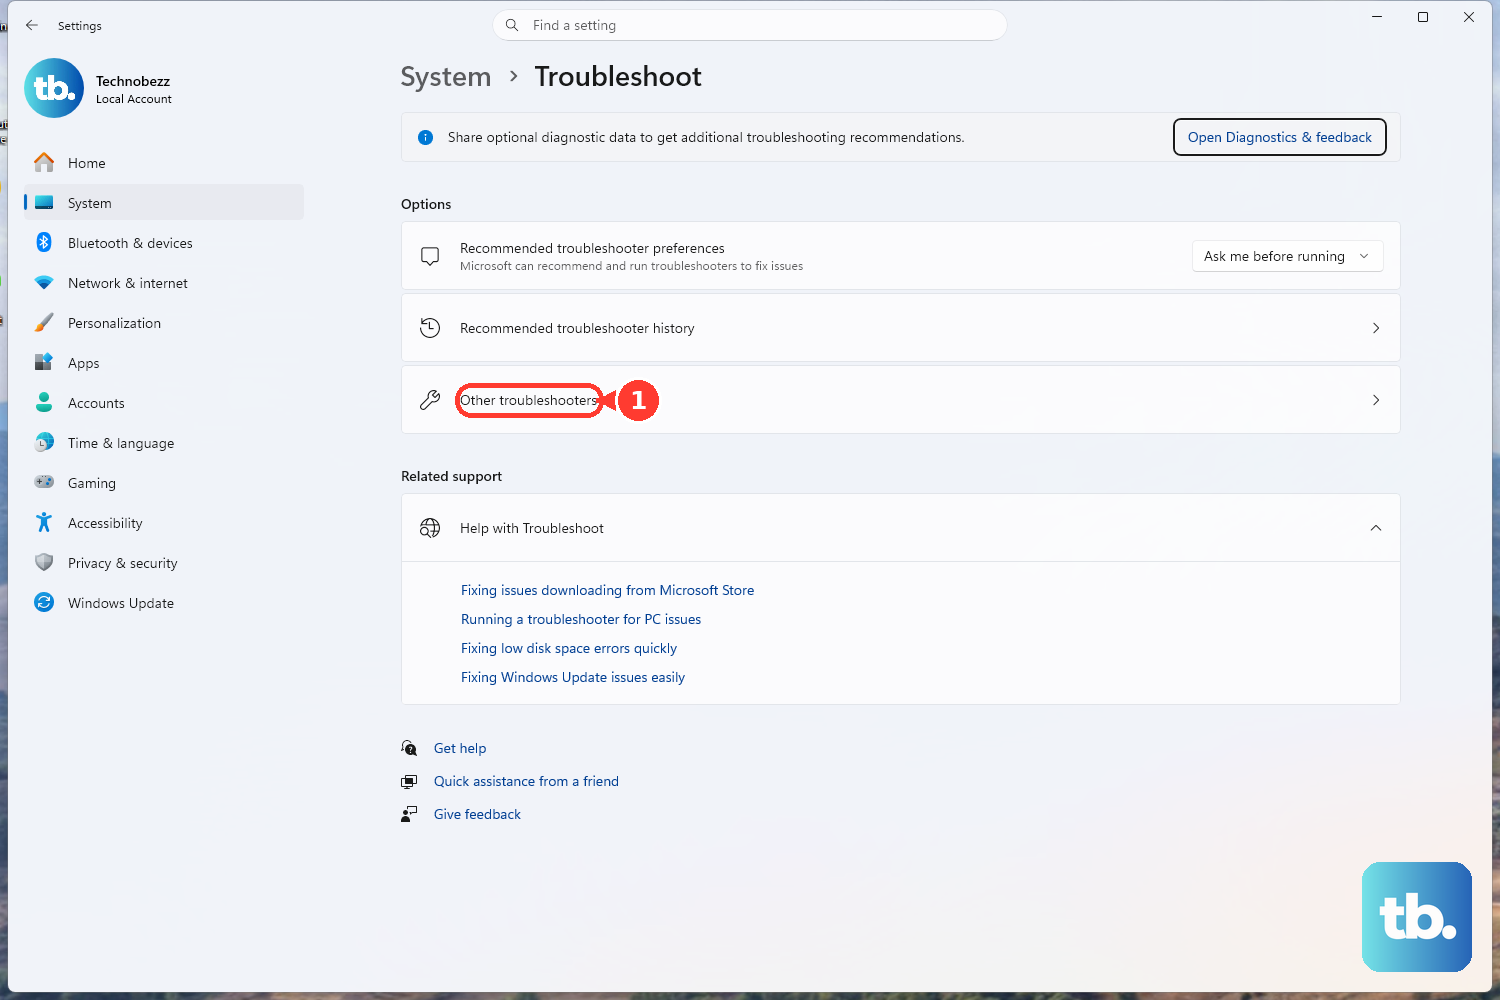
Use the Windows Audio Troubleshooter
Go to Settings > System > Troubleshoot > Other troubleshooters. Find "Playing Audio" and click the Run button. This built-in tool will scan for and attempt to fix common configuration problems, like disabled audio services or incorrect default devices.
Verify the Correct Playback Device
Open Settings > System > Sound. Under Output, select the correct device, such as the built-in speakers, headphones, HDMI/USB-C audio, Bluetooth, or a dock audio device. Make sure the device volume is up and not muted. Sometimes Windows defaults to a digital HDMI, USB-C dock, or Bluetooth output that isn't in use.
Disable Audio Enhancements
Go to Settings > System > Sound, select the output device you're using, then scroll to Advanced settings and set Audio enhancements to Off. If a separate Spatial sound option is enabled, turn that off as well while testing. These effects can sometimes conflict and cause audio problems.
Restart the Windows Audio Services
Press Windows key + R, type services.msc, and hit Enter. In the list, find "Windows Audio." Right-click it and select Restart. Do the same for the "Windows Audio Endpoint Builder" service. If either service was hung or stopped, this action will get them running again immediately.
Check App-Specific Volume Mixer
Right-click the taskbar speaker icon and choose "Open Volume mixer." You'll see individual volume sliders for each application. Make sure the app you're trying to use, like your web browser or media player, isn't muted or set to a very low volume independently of the system volume.
Run Pre-Boot Diagnostics
If you're still not hearing anything, it's worth checking the hardware directly. Restart your XPS 16 and immediately start tapping the F12 key to enter the one-time boot menu. Select "Diagnostics" and follow the prompts for the hardware check. If it fails, record the error code, validation code, and Service Tag before contacting Dell support.
Consider a BIOS/UEFI Check
On the XPS 16, some system settings are managed in the BIOS. Restart and tap F2 to enter the BIOS setup. While I wouldn't recommend changing settings randomly, look under Integrated Devices > Audio and make sure Enable Audio and Enable Internal Speaker are enabled. Also, note that the Thermal Management settings here can affect system performance, but not typically audio directly.
Roll Back a Problematic Driver
If the sound stopped right after a Windows or driver update, you can revert. Go back to Device Manager, right-click your audio device, and select Properties. Go to the Driver tab. If the "Roll Back Driver" button is clickable, use it. This will revert to the previous driver version that was working.


