Your PC freezes, flashes a blue screen, and the message CRITICAL_PROCESS_DIED appears before it restarts on its own. Sometimes it boots back to the desktop, and sometimes it loops the same crash before you can even sign in. The good news is that this stop error has a clear set of documented fixes, and most of them are safe and reversible. Work through the steps below in order, starting with the easiest and least disruptive. They apply to both Windows 11 and Windows 10.
What the CRITICAL_PROCESS_DIED Stop Code Actually Tells You
The CRITICAL_PROCESS_DIED stop code signals that a critical system process has terminated unexpectedly. Windows depends on a small set of core processes to keep running, and if the state of one of them is corrupted or damaged, the integrity of the operating system is in question.
Rather than keep running in an unstable state, Windows triggers the blue-screen bug check to protect your data. That is why the fixes below focus on repairing or replacing whatever corrupted the underlying system files, drivers, or settings.
Pull Any Recently Added Hardware First
If the crashes started right after you installed new hardware, that component is the first thing to rule out. Microsoft lists this as an early step for blue-screen and stop-code errors because it is fast and changes nothing inside Windows.
Shut down your PC, physically remove the hardware you added, such as a stick of RAM, a drive, a card, or a USB peripheral, then restart. If the blue screen stops, the hardware or its driver was the culprit. If it returns, move on to the next fix.
Reach the Recovery Environment When Windows Won't Boot
If the PC keeps blue-screening before you can sign in, you can force Windows into the recovery environment. As soon as the Windows or manufacturer logo appears during boot, press and hold the power button until the device shuts down. Repeat that, then turn the device on a third time to reach Automatic Repair and the recovery environment.
If Windows still boots normally, you do not need the power-button trick. Instead, go to Settings > System > Recovery > Advanced startup > Restart now on Windows 11, or Settings > Update & Security > Recovery > Advanced startup > Restart now on Windows 10. Every fix that mentions the recovery environment below starts from here.
Let Startup Repair Fix the Boot Automatically
Startup Repair is the safest automated first fix because it scans your computer for problems and tries to correct them without deleting any of your personal files. It is built into the Windows Recovery Environment.
From the recovery environment, select Troubleshoot > Advanced options > Startup Repair > Restart. The device reboots, scans for problems, and then attempts to fix them on its own. Give it time to finish, since the process can take several minutes.
Boot Into Safe Mode to Isolate the Cause
Safe Mode starts Windows with only essential drivers and services loaded, which makes it the ideal place to figure out whether a third-party driver, service, or app is behind the crash. If the blue screen does not happen in Safe Mode, you have a strong lead.
From the recovery environment, choose Troubleshoot > Advanced options > Startup Settings > Restart. When the list appears, press the matching key:
- 1.Press 4 or F4 for Safe Mode.
- 2.Press 5 or F5 for Safe Mode with Networking.
- 3.Press 6 or F6 for Safe Mode with Command Prompt.
If the system is stable in Safe Mode, you can run several of the remaining fixes from there without the crash interrupting you.
Update Windows and Repair Drivers in Device Manager
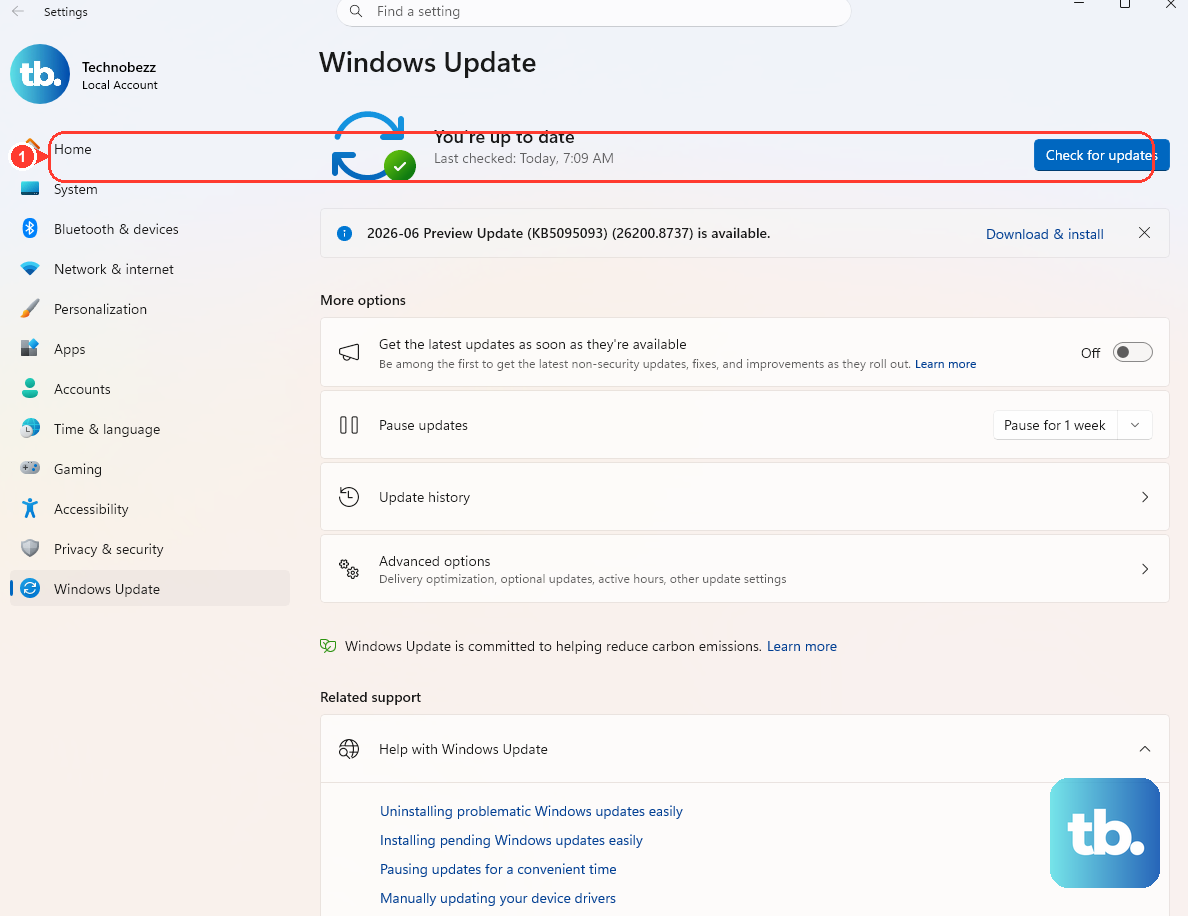
Faulty drivers are a leading cause of stop errors, so getting Windows and your drivers current is a documented and effective step. First, install the latest updates by going to Start > Settings > Windows Update > Check for updates.
Next, right-click the Start button and select Device Manager. Look for any device marked with an exclamation point, then right-click it and choose Update driver. If the crashes began soon after you added or updated a particular driver, updating or removing that driver is the most likely fix.
Uninstall a Recent Windows Update
If the blue screens began right after a Windows update installed, removing that update is the logical next move. This can be done from the recovery environment even when Windows will not start normally.
Select Troubleshoot > Advanced options > Uninstall Updates, then choose Uninstall latest quality update. After it finishes, let the PC restart and watch for the error.
Repair System Files With SFC
Because this stop code is often rooted in corrupted system files, the System File Checker is one of the most direct tools you have. It scans for corruptions in Windows system files and restores any corrupted files it finds.
Open an elevated Command Prompt: type cmd in the Search box, right-click Command Prompt in the results, and select Run as administrator. Then run:
- 1.Type
sfc /scannowand press Enter. - 2.Wait for the scan to reach 100 percent before closing the window.
- 3.Restart your PC and check whether the blue screen returns.
Repair the Windows Image With DISM
If SFC reports that it could not repair some files, the underlying component store may itself be damaged. The Deployment Image Servicing and Management tool, known as DISM, repairs that store using clean files, which by default it pulls from Windows Update.
In the same elevated Command Prompt, you can first check and scan, then repair:
- 1.Run
Dism /Online /Cleanup-Image /CheckHealthfor a quick report of whether the image is healthy, repairable, or non-repairable. - 2.Run
Dism /Online /Cleanup-Image /ScanHealthto scan for component-store corruption. - 3.Run
Dism /Online /Cleanup-Image /RestoreHealthto repair the image with clean files. - 4.After DISM finishes, run
sfc /scannowagain.
If the default Windows Update source is unavailable, an advanced form lets you point DISM at a known-good local source: Dism /Online /Cleanup-Image /RestoreHealth /Source:c:\test\mount\windows /LimitAccess. The /LimitAccess switch blocks Windows Update as a source, so only use this when you have a valid local image path.
Check the Disk for Errors With CHKDSK
File-system corruption on the drive can starve those critical processes of the files they need, so checking the disk is worthwhile. Run CHKDSK from an elevated Command Prompt with the /f parameter to fix logical errors. Microsoft's own example is chkdsk d: /f, so substitute the correct drive letter for the volume you want to check.
To go further and also locate bad sectors, add the /r switch, as in chkdsk /r. The /r option locates bad sectors, recovers readable information, and includes the functionality of /f. The disk must be lockable for repairs to run, so if the drive is in use, Windows will offer to check it on the next restart. Accept that prompt and reboot.
Roll Back With System Restore
If a recent change triggered the crashes and a restore point already exists, System Restore can wind the system back to a stable state. It reverts system files, registry settings, and installed programs to the chosen point without affecting your personal files.
From the recovery environment, select Troubleshoot > Advanced options > System Restore. Choose a restore point dated before the crashes began, then select Next and Finish to begin.
Still Crashing? Test Your Memory and Free Up Space
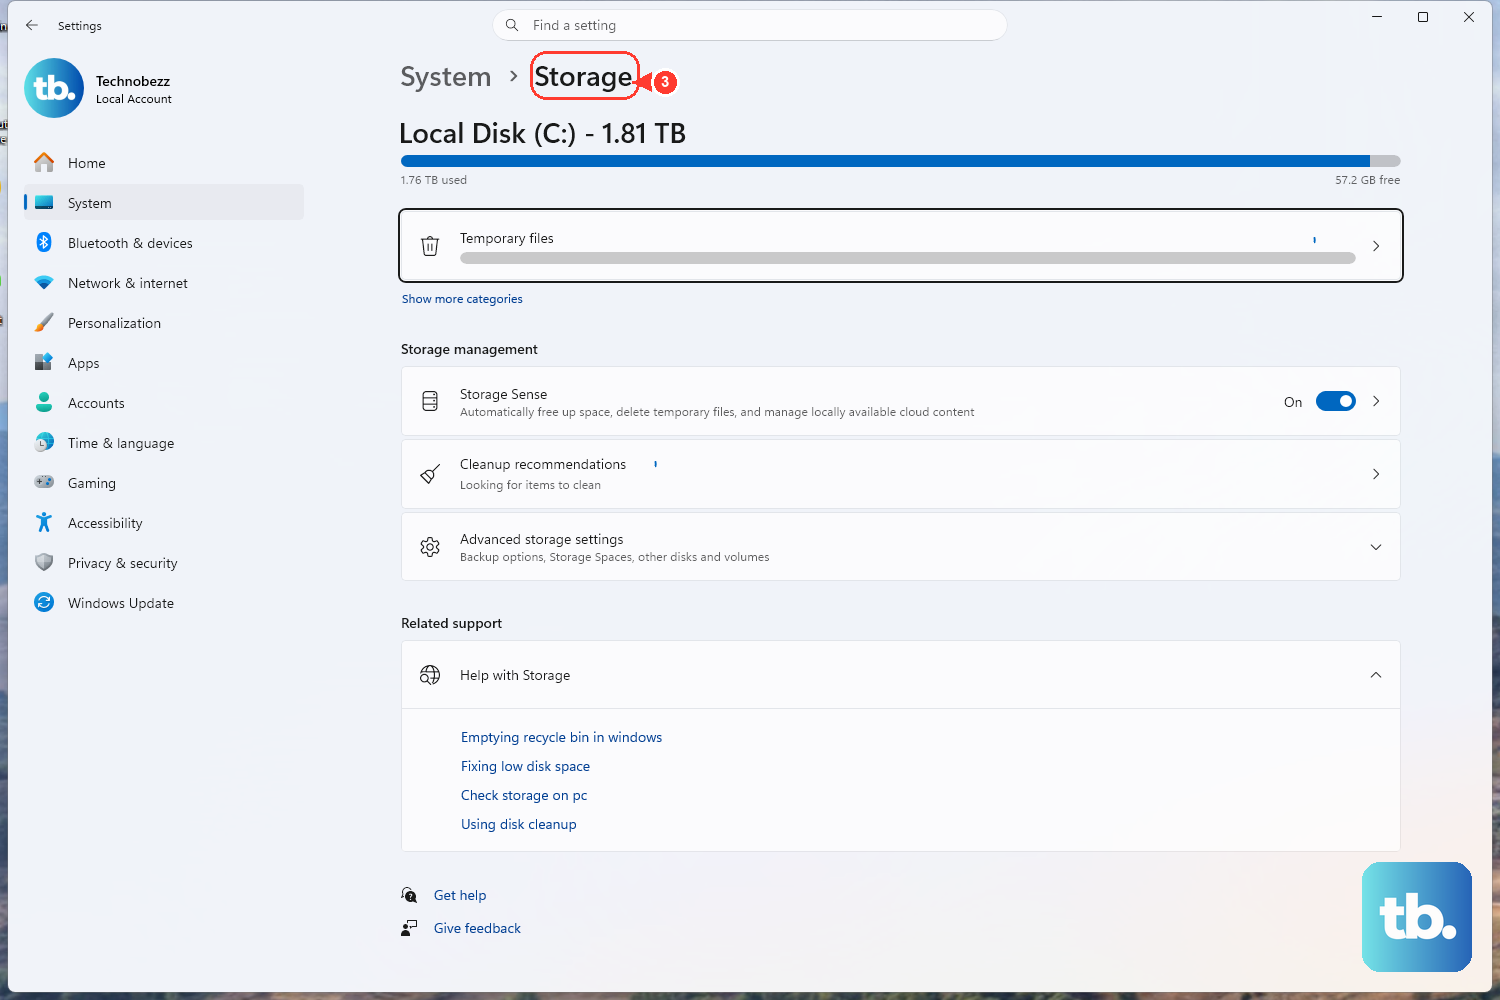
Microsoft's stop-code guidance also points to two physical-health checks. First, make sure the system drive has enough free space, since a nearly full disk can cause instability.
Second, rule out a RAM fault with the built-in memory tester. In the Search box, type Memory, then select Windows Memory Diagnostic. The tool restarts your PC and scans the installed memory for errors, which is useful when the blue screen keeps returning despite the software fixes above.
When Nothing Else Works: Reset or Reinstall Windows
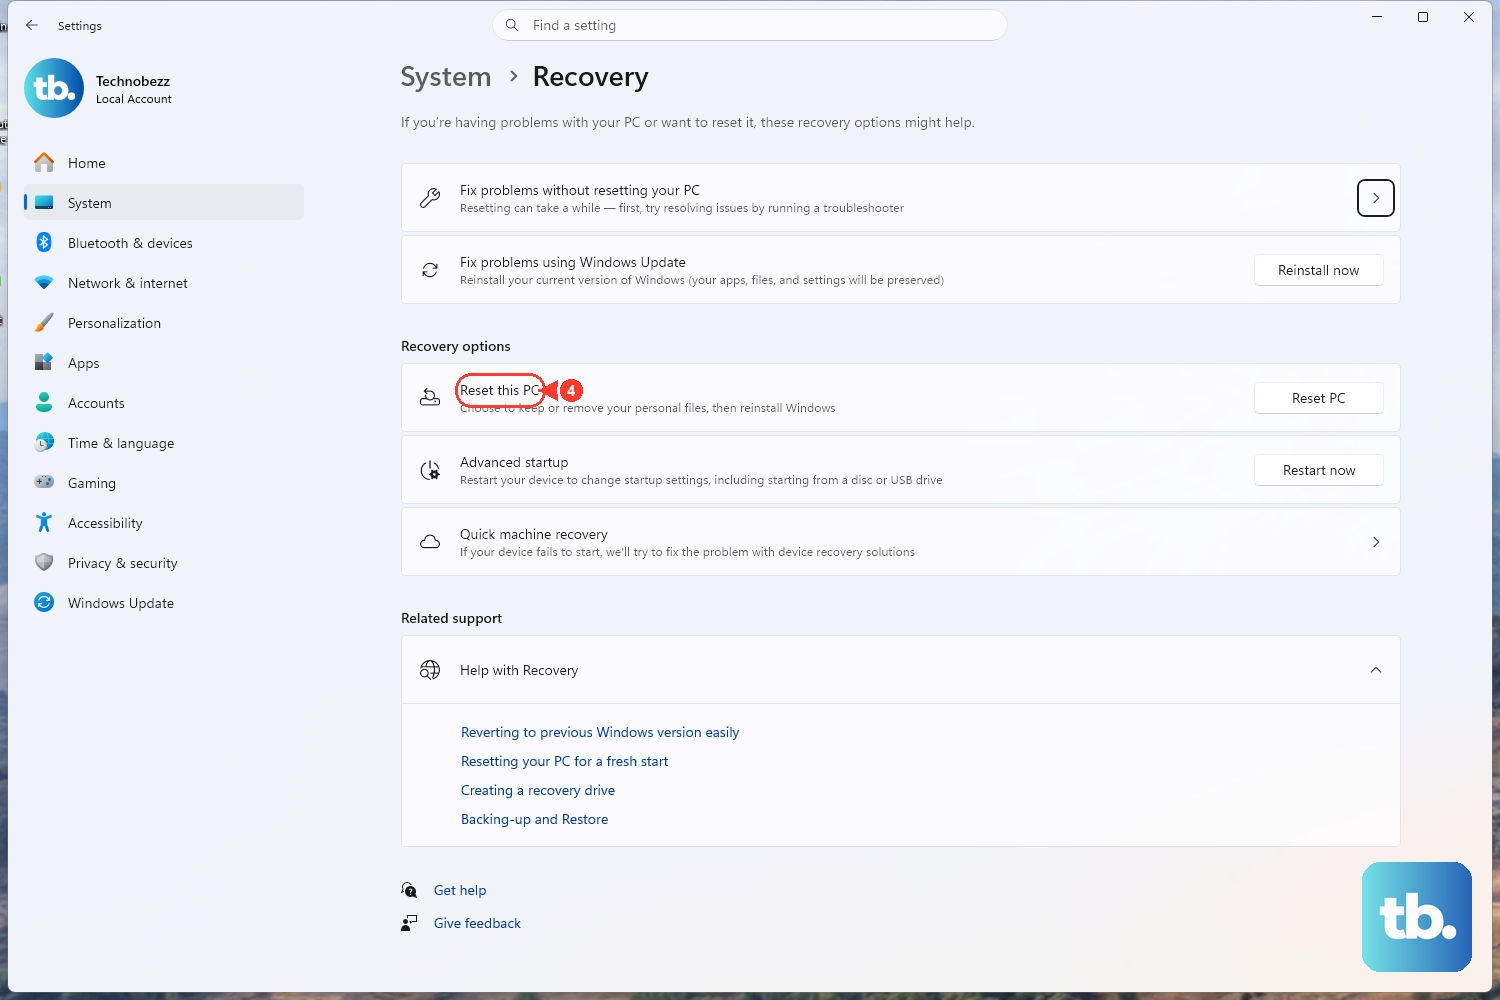
If every step so far fails, Microsoft's recovery options include resetting or reinstalling Windows. This is the final resort because it is the most disruptive of all the fixes, so treat it as the last lever to pull.
Warning: Reset this PC can either keep or remove your personal files, so read the on-screen choice carefully and back up anything important first. Reinstalling the current version of Windows is also available. Choose the option that keeps your files where possible, and confirm you have a backup before you commit.
Frequently Asked Questions
What does the CRITICAL_PROCESS_DIED error mean?
It is a blue-screen stop code that indicates a critical system process has terminated unexpectedly. Windows relies on a small set of core processes, and when one of them is corrupted or damaged, the operating system triggers the blue screen to protect itself rather than keep running in an unstable state.
Will fixing this error delete my files?
Most of the documented fixes are non-destructive. Startup Repair does not delete personal files, SFC and DISM only repair system files, and System Restore reverts system settings and programs without affecting your personal files. The exception is Reset this PC, which gives you the choice to keep or remove your files, so back up first.
What should I do if Windows won't boot at all?
Force the recovery environment by powering on and, as soon as the logo appears, pressing and holding the power button until the device shuts down. Repeat, then turn it on a third time to reach Automatic Repair. From there you can run Startup Repair, Safe Mode, Uninstall Updates, System Restore, and the Command Prompt repairs.
Should I run SFC or DISM first?
Run sfc /scannow first. If it reports that it could not repair some files, run Dism /Online /Cleanup-Image /RestoreHealth to repair the underlying Windows image, then run sfc /scannow one more time so it can use the freshly restored files.
Can faulty memory cause this blue screen?
Yes, a RAM problem can contribute to instability. Run the Windows Memory Diagnostic by typing Memory in the Search box and selecting the tool, which scans your installed memory for errors. It is also worth confirming the system drive has enough free space.


