You just got a notification that your Apple Account signed in on a device you don't recognize. Or a two-factor code arrived by text when you weren't trying to log in anywhere. Maybe your password suddenly stopped working, or you spotted a purchase you never made.
Once you regain control, replace the old password with one that cannot be guessed. A free password generator creates a long random password locally in your browser, and nothing you generate ever leaves your device.
Any one of these is a real warning sign that someone is trying to get into your account, or already has. The good news: Apple gives you everything you need to lock an intruder out and take the account back, and most of it takes only a few minutes.
This guide walks you through confirming the breach, then securing the account in the exact order Apple recommends, with the precise menu paths for the web, iPhone, iPad, Mac, and Windows. Work top to bottom; the fastest, highest-impact steps come first.
Confirm the Warning Signs First
Before you change anything, take ten seconds to recognize what a compromise actually looks like. Apple flags these specific signals:
A notification or email saying your account was signed in on a device you don't recognize, or that your password was changed when you didn't change it.
A two-factor verification code you did not request. This is one of the strongest signals: it means someone already has your password and is trying to sign in. Never share that code.
Activity you didn't do: messages you didn't send, items deleted, or account details changed.
Trusted devices on the account that you didn't add.
App Store, iTunes, or Apple purchases you don't recognize.
Your password no longer works even though you know it was correct, or your device was locked or placed in Lost Mode by someone else.
You can verify most of this in one place. Sign in at account.apple.com, open the Devices tab and look for anything unfamiliar, then check that the recovery email and phone numbers under Sign-In and Security are still yours.
Change Your Apple Account Password Immediately
This is step one and the single most urgent action. Choose a strong, unique password the attacker can't guess.
On iPhone, iPad, Apple Watch, or Apple Vision Pro:
Open Settings and tap your name at the top.
Tap Sign-In and Security.
Tap Change Password.
Follow the onscreen instructions; you may be asked for your device passcode.
On Mac:
Choose Apple menu > System Settings.
Click your name, then Sign-In and Security.
Click Change Password.
Enter your Mac login password, then follow the prompts.
On the web: Go to account.apple.com and sign in, open Sign-In and Security, choose Password, and follow the instructions.
Important: changing the password alone is not enough. An attacker may have added their own contact info or device, so keep going through the steps below.
Remove Devices You Don't Recognize
Signing an unknown device out cuts off its access to iCloud, Find My, and two-factor codes.
On the web (the most complete view):
Sign in at account.apple.com and select Devices. You may need to click View Details and authenticate.
Click a device name to see its model, serial number, software version, and whether it can receive verification codes.
Click Remove from Account, review the message, then confirm.
On iPhone or iPad: Open Settings, tap your name, scroll to the device list, tap a device, then tap Remove from Account and confirm.
On Mac: Apple menu > System Settings > your name, scroll to the device list, click a device, click Remove from Account, then confirm.
On Windows: Open iCloud for Windows and click Account Details to view the device list.
One gotcha: a removed device can reappear unless you also sign out of iCloud, Media and Purchases, iMessage, FaceTime, and Game Center on it, or erase it.
Fix Altered Personal and Security Information
Go to account.apple.com and review every detail. Update anything that isn't correct or that you don't recognize, because attackers often swap in their own recovery email or phone number to keep a foothold. Then check with your email provider and your cellular carrier to confirm you still control every email address and phone number tied to the account.
Use Account Recovery If You're Locked Out
If your password no longer works and you can't sign in to account.apple.com, the attacker may have changed it. Two-factor authentication must be enabled for this path to apply.
- 1.Go to iforgot.apple.com, click Reset Password, and follow the steps. On a borrowed device you can open the Apple Support app, scroll to Support Tools, tap Reset Password, then tap Help Someone Else and enter your email or phone number.
- 2.Stop using your other signed-in Apple devices during the request. If the account is in use while recovery is pending, the recovery is cancelled automatically.
- 3.Apple sends a confirmation email within 72 hours acknowledging the request.
- 4.Wait out the waiting period, which can be several days or more. Contacting Apple Support cannot shorten it.
- 5.When the wait ends, Apple sends a text or automated call with instructions to finish recovery.
You can return to iforgot.apple.com anytime to check how long remains. If you remember the password and sign in successfully, recovery cancels itself.
Turn On Two-Factor Authentication
If two-factor isn't already on, enable it now so a stolen password alone can't get anyone in.
On iPhone or iPad: Settings > your name > Sign-In and Security > Turn On Two-Factor Authentication, then enter a trusted phone number and the code sent to it.
On Mac: System Settings > your name > Sign-In and Security > Turn On Two-Factor Authentication, then follow the prompts.
On the web: Sign in at account.apple.com, tap Upgrade Account Security, and follow the steps.
Note that once an account uses two-factor authentication, the protection generally can't be removed; there is only a short window to lower security within two weeks of enrolling.
Review and Clean Up Trusted Phone Numbers
Make sure no unfamiliar number is listed to receive your codes, and keep at least one number you control.
iPhone/iPad: Settings > your name > Sign-In and Security > Two-Factor Authentication > Add a Trusted Phone Number.
Mac: System Settings > your name > Sign-In and Security > Two-Factor Authentication > Add a Trusted Phone Number.
Web: account.apple.com > Sign-In and Security > Account Security > Trusted Phone Number section.
Remove any number you don't recognize from the same screen. If your iPhone is your only trusted device and holds your only trusted number, add a second number so a lost phone doesn't lock you out.
Check Purchase History and Report Unauthorized Charges
If you saw unfamiliar purchases, review the record and act on anything you didn't authorize.
Web: Go to reportaproblem.apple.com, sign in, review the list, and use Report a Problem; you can search by charge amount.
iPhone/iPad: Open the App Store, tap your photo, tap Purchase History, and use the Last 90 Days dropdown for older items.
Mac: Open the App Store, click your name, click Account Settings, scroll to Purchase History, click See All.
Windows: Open Apple Music or Apple TV, click your name, choose View My Account, scroll to Purchase History, click See All.
For charges you don't recognize, request a refund if eligible, cancel unwanted subscriptions, confirm a Family Sharing member didn't buy it, change your password if needed, and contact your bank about anything on your statement.
Turn On Stolen Device Protection on iPhone
This adds a barrier even if someone knows your passcode, but it must be enabled before a device is lost or stolen and needs iOS 17.3 or later. First confirm two-factor authentication, a device passcode, Face ID or Touch ID, Significant Locations (under Location Services), and Find My are all on.
Go to Settings, then tap Face ID and Passcode.
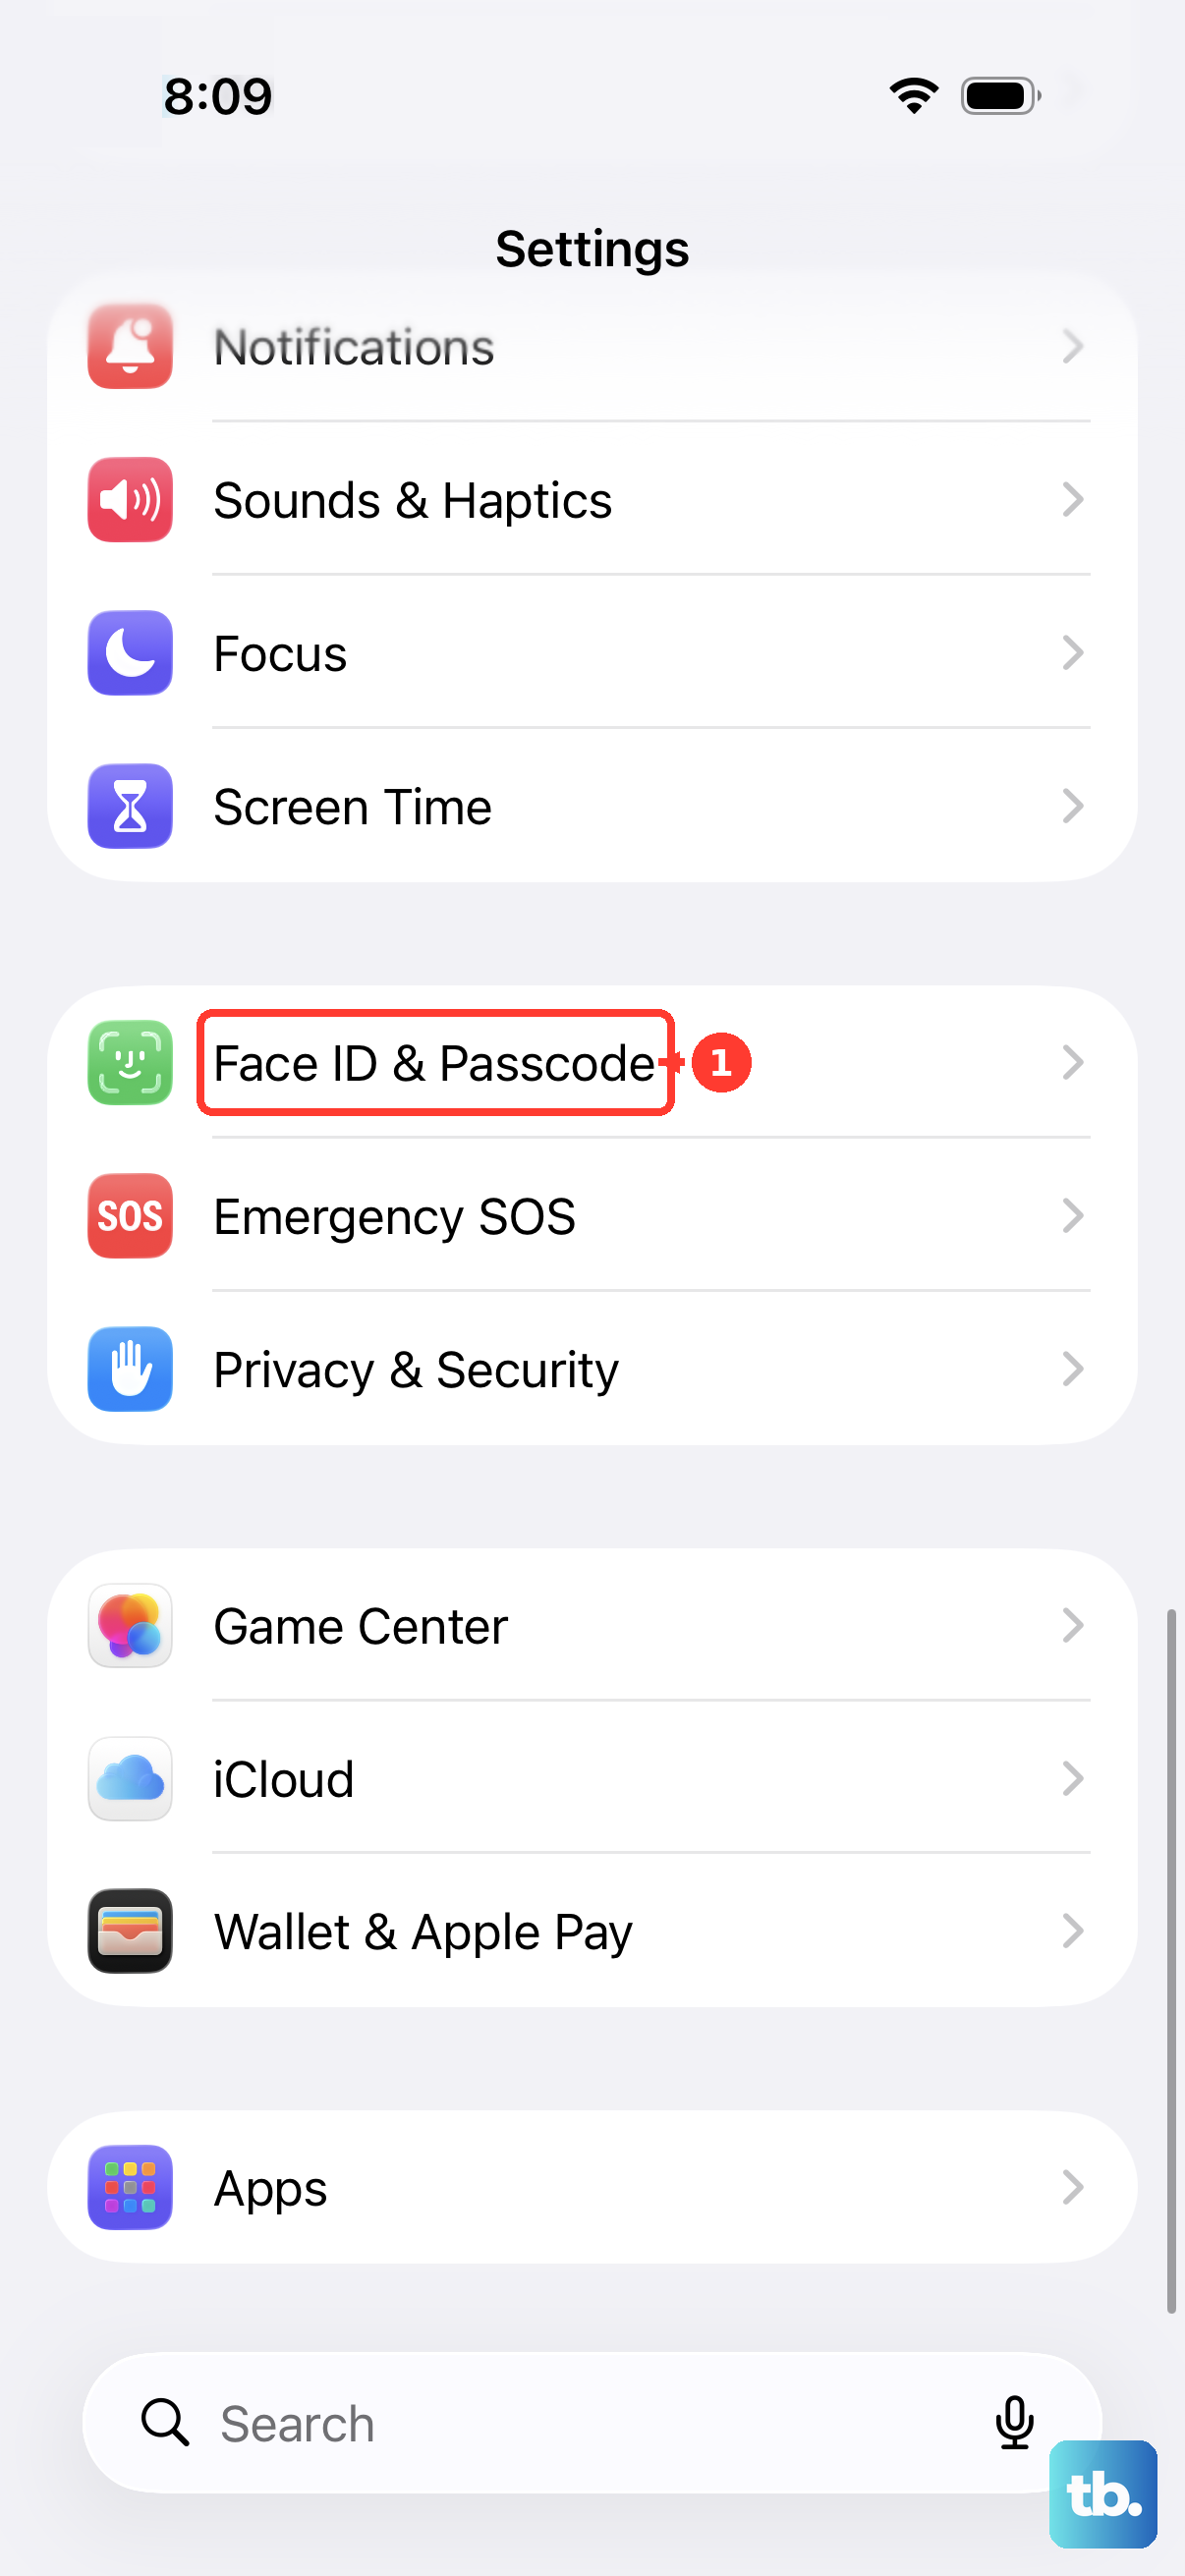
Enter your device passcode.
Tap Stolen Device Protection, then turn it on.
When you're away from familiar locations, sensitive actions like viewing saved passwords or erasing the device require Face ID or Touch ID with no passcode fallback, and changing your account password or security settings triggers a one-hour Security Delay plus a second biometric check.
Consider a Recovery Key for Extra Lockout Protection
A recovery key replaces account recovery with a code only you hold. On iPhone or iPad, go to Settings > your name > Sign-In and Security, tap Recovery Key, tap Continue, and follow the steps. On Mac, use Apple menu > System Settings > your name > Sign-In and Security > Recovery Key > Turn On.
Write the key down and store it somewhere safe. Warning: if you turn this on, then lose your password and can't provide the key, you can be locked out of your account permanently.
Report Any Phishing That Targeted You
If a message, email, or call tried to trick you into handing over credentials, report it so Apple can act.
Suspicious emails that look like Apple: forward to [email protected].
Suspicious text messages: send a screenshot to [email protected].
Suspicious FaceTime calls: report to [email protected].
Spam iMessages: tap Report Junk under the message. iCloud abuse: report to [email protected].
Remember that Apple will never ask for your password, verification or security codes, device passcode, or login credentials to provide support, and will never ask you to disable a security feature.
Frequently Asked Questions
I got a two-factor code I never requested. What does that mean?
It means someone already has, or is guessing, your password and is trying to sign in. Do not share the code. Treat it as a prompt to change your Apple Account password immediately and review your devices and contact info.
Is changing my password enough to secure a hacked account?
No. You also need to remove unrecognized devices, fix any altered personal or security information, and confirm the email addresses and phone numbers on the account are still yours, since an attacker may have added their own.
Why is account recovery taking so long, and can Apple speed it up?
Account recovery is slow by design. A confirmation email arrives within 72 hours, and the full wait can be several days or more. Apple Support cannot shorten the waiting period. Also avoid using your other Apple devices during the request, because activity on the account cancels recovery automatically.
Can I just turn off two-factor authentication to make this simpler?
Generally no. Once an account was created with two-factor authentication, that protection can't be removed. If you recently enabled it, there is only a short window of about two weeks to lower account security.
Should I set up a recovery key?
It adds strong lockout protection, but it cuts both ways. If you turn it on, then lose your password and don't have a trusted device, you must have the recovery key, or you can be locked out of your account permanently. Store it somewhere safe.
A device I removed keeps coming back in the list. Why?
Removing a device isn't always permanent. To stop it reappearing, sign out of iCloud, Media and Purchases, iMessage, FaceTime, and Game Center on that device, or erase it.