When your iPhone 17 Pro stops buzzing for calls and alerts, it's easy to miss important notifications. The good news is this is usually a quick software or settings fix you can handle yourself.
Force Restart Your iPhone
This is the first thing I'd try. A force restart clears out any temporary glitches in iOS 26 that might be freezing the vibration motor. It doesn't erase any data.
On the iPhone 17 Pro, you press and quickly release the Volume Up button, then quickly press and release the Volume Down button. Immediately after, press and hold the Side button until you see the Apple logo appear on the screen, then let go.
Check Your Ring/Silent Switch
It sounds obvious, but it's the most common reason. Look at the left side of your iPhone 17 Pro. If you see an orange stripe, the switch is in silent mode.
Flip the switch forward toward the screen. You should feel a haptic tap and the stripe will disappear. Your phone will now vibrate for calls and alerts according to your sound settings.
Verify Sound & Haptics Settings
Open the Settings app and go to Sounds & Haptics. Make sure the switch for Vibrate on Ring is turned on (green). If it's already on, try turning it off and back on.
While you're here, also check that Vibrate on Silent is enabled if you want haptics when the ring/silent switch is flipped to silent. Scroll down a bit and tap on Ringtone or Text Tone.
At the top of the tone selection screen, make sure Vibration is not set to "None." You can select a pattern like "Symphony" or create a custom one.
Test with System Haptics
Go back to the main Sounds & Haptics settings page. Scroll all the way to the bottom and ensure System Haptics is turned on.
This controls the subtle feedback you feel when using controls like the picker wheels or toggling switches. If this is off, it can sometimes indicate a broader issue. Toggle it off and on again to refresh the connection.
Review Focus Modes
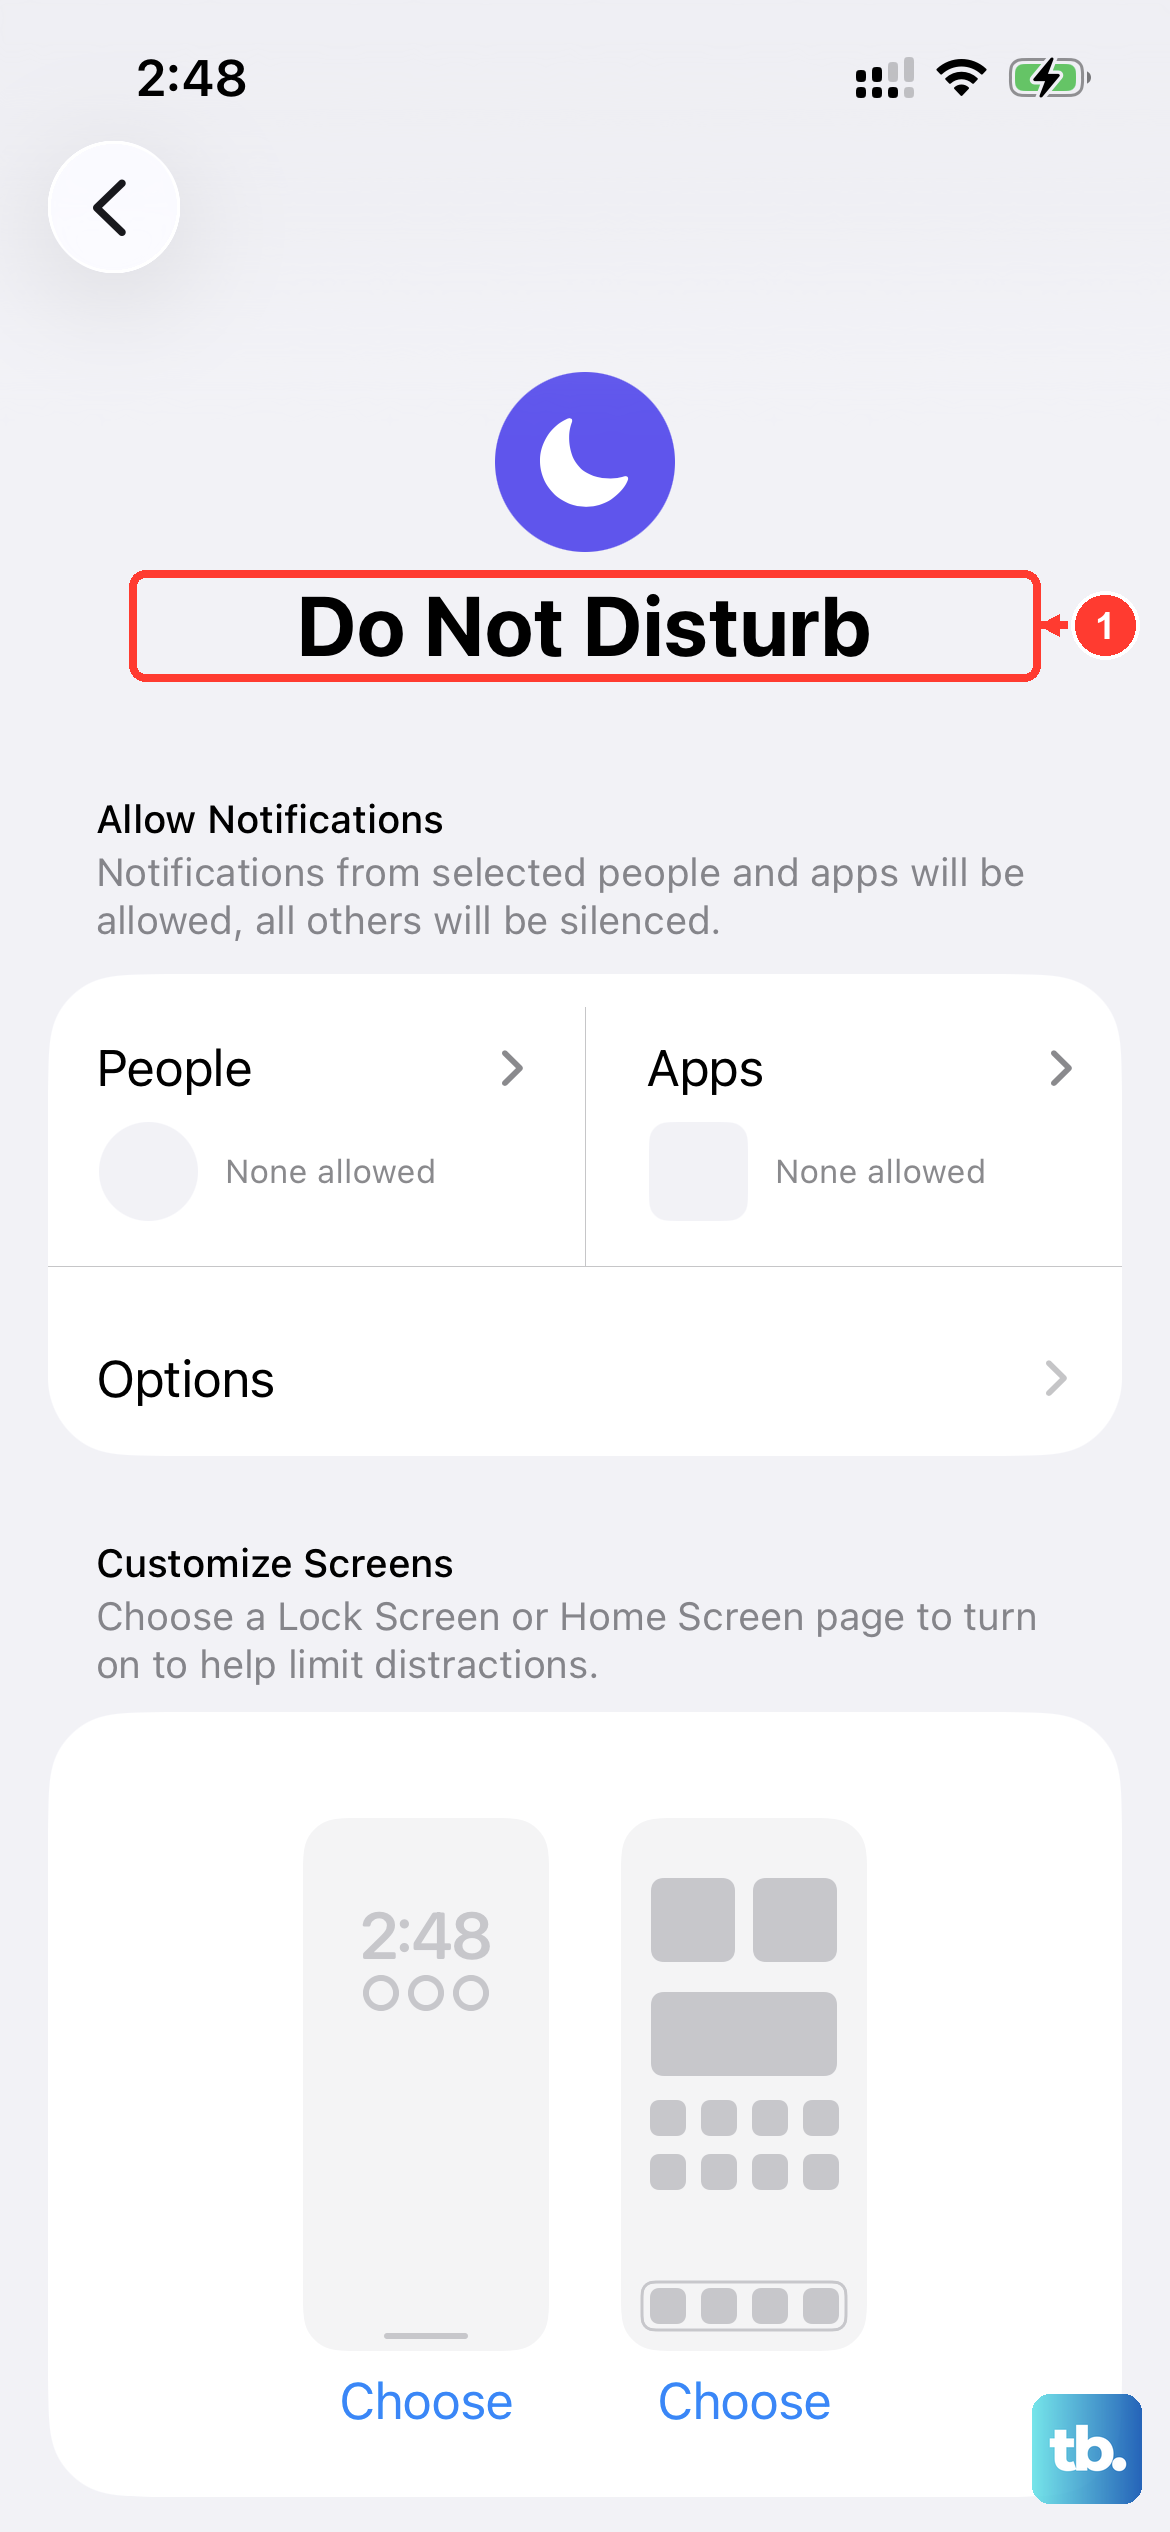
Focus modes in iOS 26 can silently filter notifications, including their vibrations. Swipe down from the top-right corner to open the Control Center and look at the Focus icon (like a crescent moon).
If a Focus is active, tap it to see which one. Open Settings > Focus and select the active mode. Tap on Options at the bottom and make sure Share Across Devices and Silence Notifications are configured the way you want.
You can also check the "Allowed Notifications" section within each Focus to ensure the people and apps you need can still get through with vibration.
Check App-Specific Notification Settings
If vibrations are only missing from a specific app like Messages or Mail, the problem is likely in that app's settings. Go to Settings > Notifications.
Find the problematic app in the list and tap on it. First, make sure Allow Notifications is enabled at the top. Then, ensure Sounds is turned on. The vibration for that app will follow the default pattern unless you tap Customize Notifications and set a specific one.
Update iOS
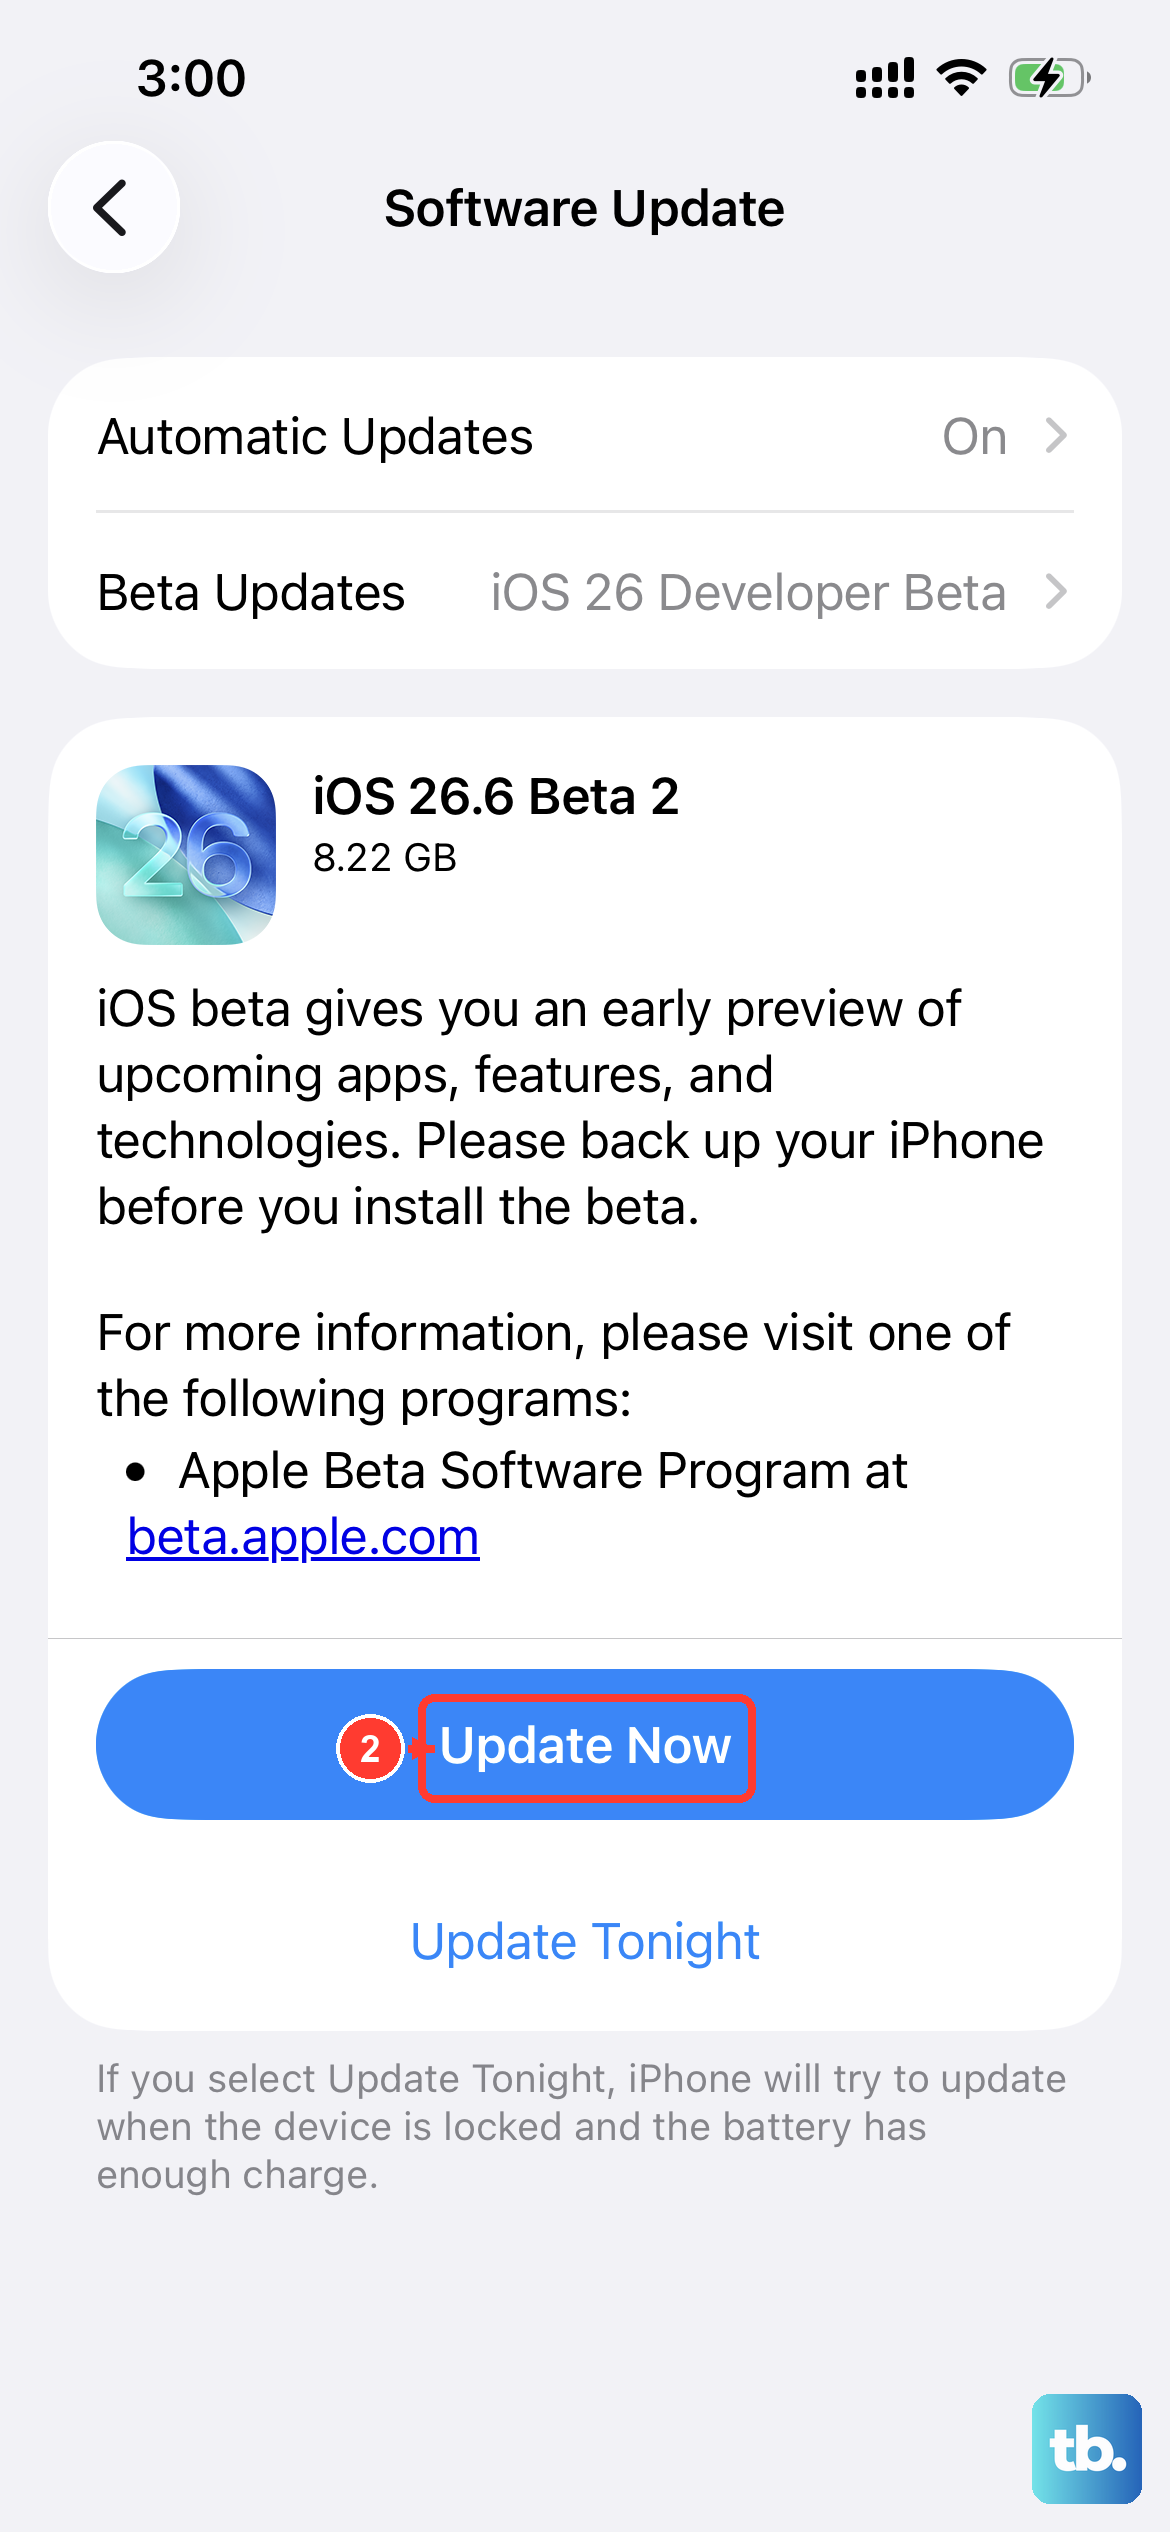
A bug in your current version of iOS 26 could be interfering with the haptic engine. Apple releases updates to fix these kinds of issues.
Go to Settings > General > Software Update. If an update is available, tap Download and Install. It's best to do this while your iPhone 17 Pro is connected to Wi-Fi and has more than 50% battery, or is plugged into your charger.
Reset All Settings
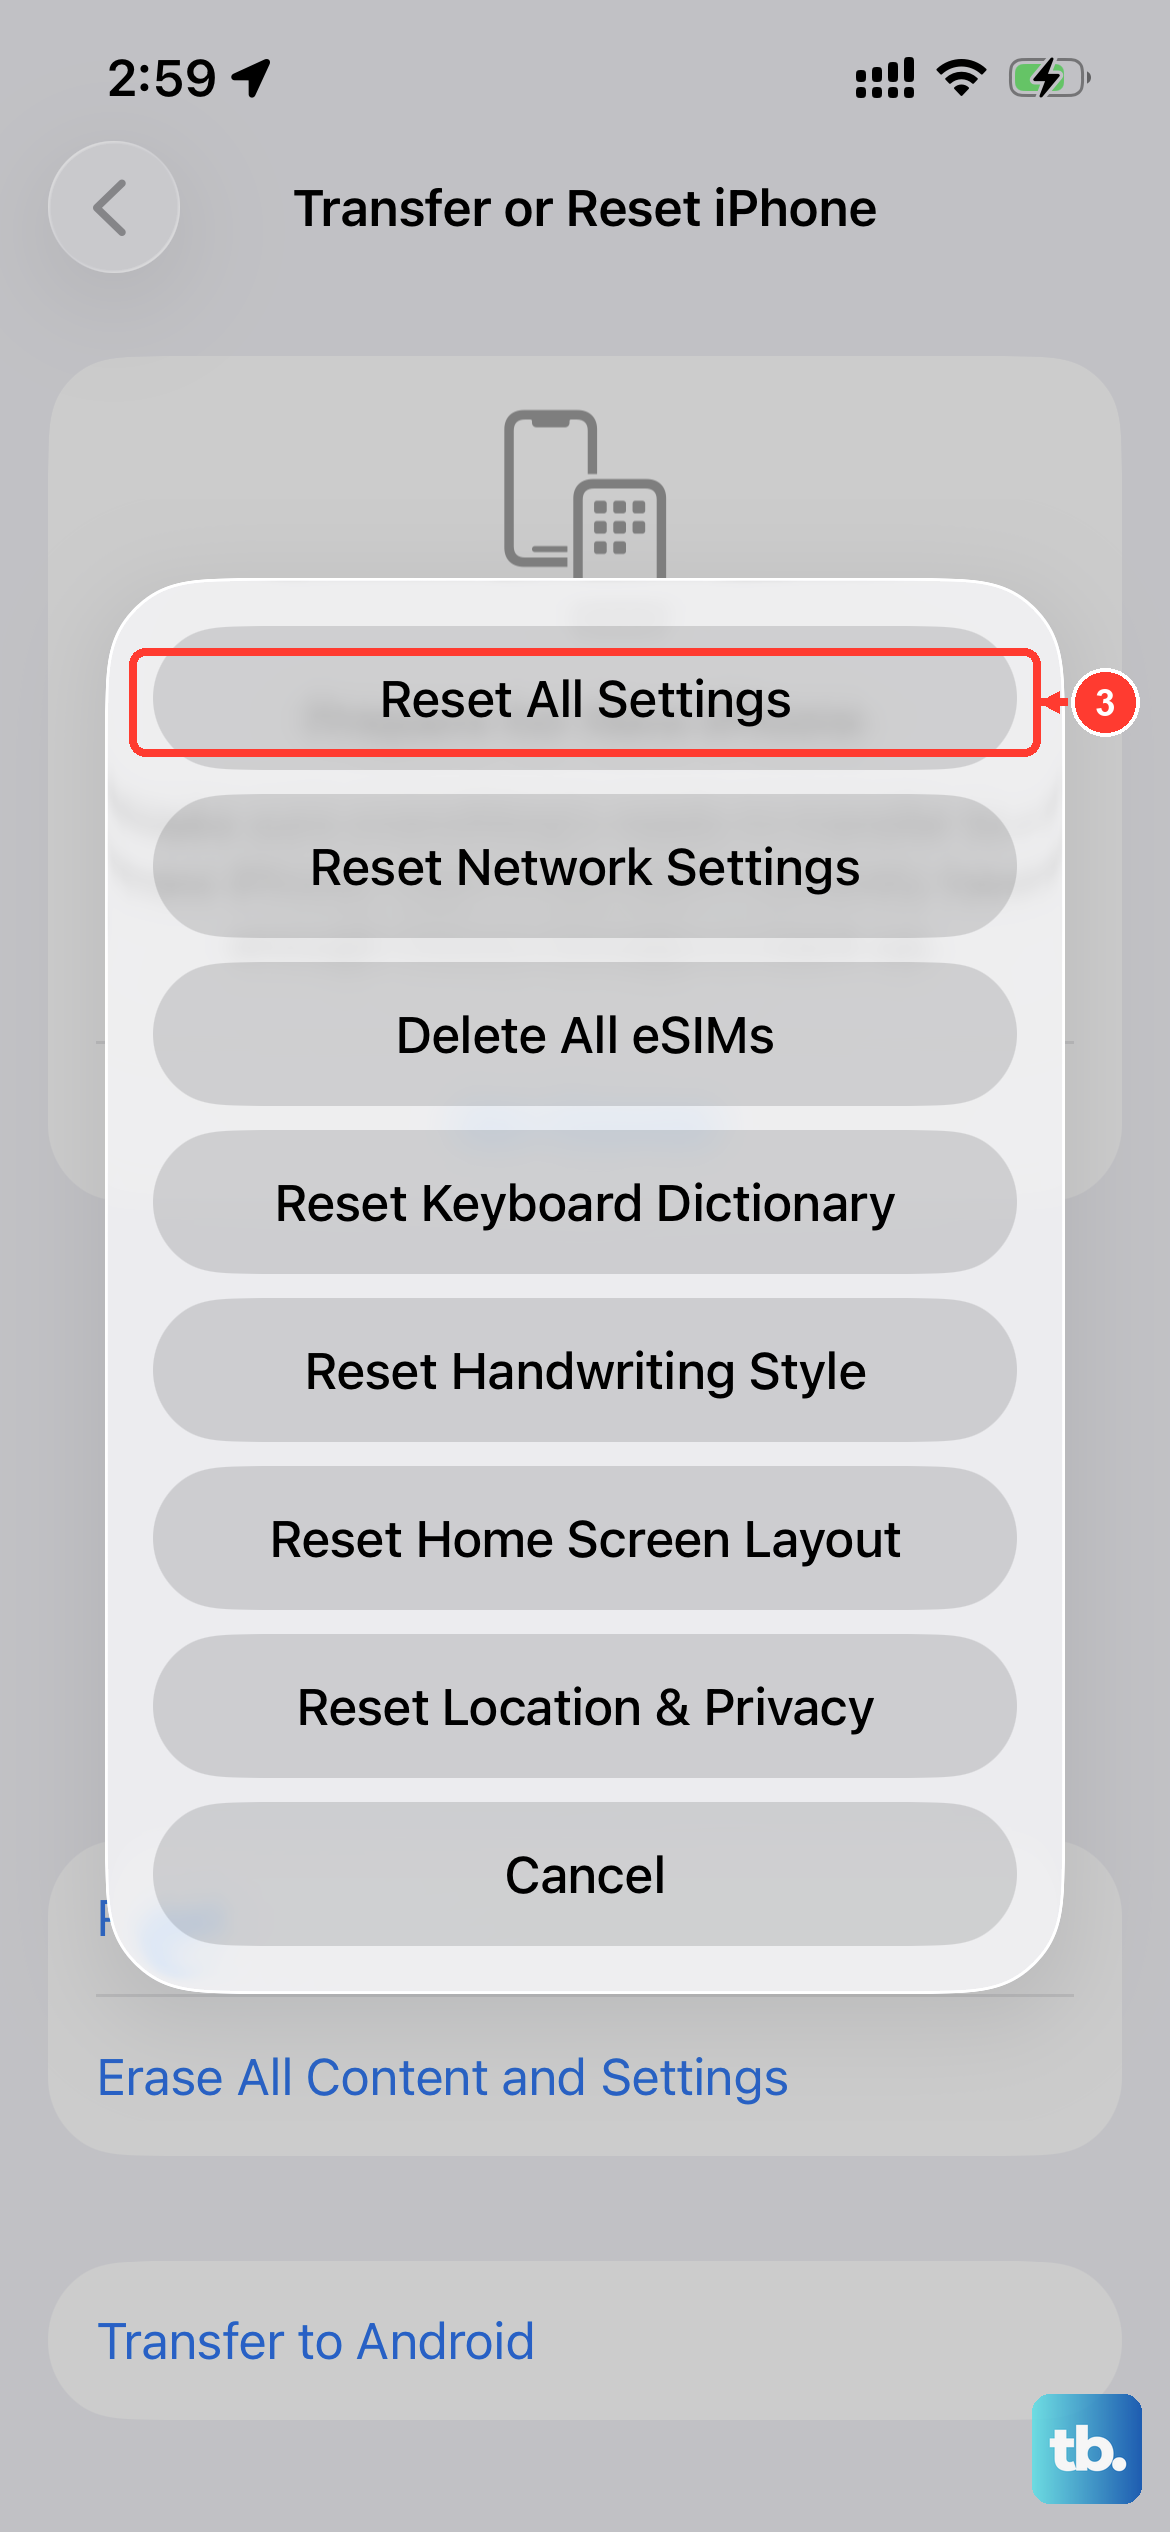
This will revert all your preferences, like wallpaper, network settings, and privacy permissions, back to factory defaults without deleting any of your personal data or media.
Go to Settings > General > Transfer or Reset iPhone. Tap Reset and then choose Reset All Settings. You'll need to enter your passcode and confirm. After the phone restarts, you'll need to re-join Wi-Fi networks and re-adjust any custom settings, but it often clears persistent glitches.
Test in Safe Mode (Diagnostic State)
If a recently downloaded third-party app is causing a conflict, you can check by restarting your iPhone 17 Pro into a diagnostic state. Quickly press and release the Volume Up button, then the Volume Down button, then press and hold the Side button.
Keep holding the Side button even after you see the Apple logo. When you see the recovery mode screen (showing a cable pointing to a computer icon), let go. This doesn't erase anything. Simply try to use your phone normally here; if vibrations work, a third-party app is the culprit.
To exit, just force restart your phone again using the same Volume Up, Volume Down, hold Side button sequence.
Consider a Hardware Check
If none of the software fixes work, the Taptic Engine (Apple's name for the vibration motor) might have a connection issue. The iPhone 17 Pro's motor is very reliable, but physical damage is possible.
Think back to whether the problem started after a drop or exposure to moisture. You can use Apple's built-in diagnostics remotely if you contact support, or use the Apple Support app to run a hardware test. If it is a hardware fault, it would typically require a repair at an Apple Store or authorized service provider.


