
When your iPhone 17 Pro stops syncing emails, it can leave you waiting on important messages or unable to send replies. A connection, account, or settings problem may be the cause. I'd start by checking the most common fix first.
Before anything else, make sure you have a solid internet connection. Try loading a webpage in Safari to confirm. It's also worth a quick check on your email provider's status page, as outages with services like iCloud, Gmail, or Outlook do happen.
Restart the Mail App and Your iPhone
Close the Mail app completely. On your iPhone 17 Pro, swipe up from the bottom of the screen, pause in the middle, and find the Mail app card. Swipe it up to close it. Wait a moment, then reopen it from your Home Screen.
If that doesn't help, give your phone a full restart. Press and hold the side button and either volume button until the power-off slider appears, drag the slider, wait 30 seconds, then press and hold the side button until the Apple logo appears. Restarting may help with temporary software problems that interrupt mail fetching.
Check Your Mail Fetch and Push Settings
Your iPhone's fetch settings control how often it checks for new mail. Go to Settings > Apps > Mail and tap Fetch New Data. If you don't see it there, look under Mail Accounts. Make sure "Push" is turned on if your email provider supports it.
If Push isn't available, your account will use Fetch. Choose "Automatically," "Manually," or a schedule for checking for new messages. With "Automatically," your phone fetches new data in the background only when it's charging and connected to Wi-Fi.
Verify Your Network Connection
Email sync issues are often network-related. Start by toggling Airplane mode on and off. Swipe down from the top-right corner to open Control Center and tap the airplane icon. Then tap it again to turn it off.
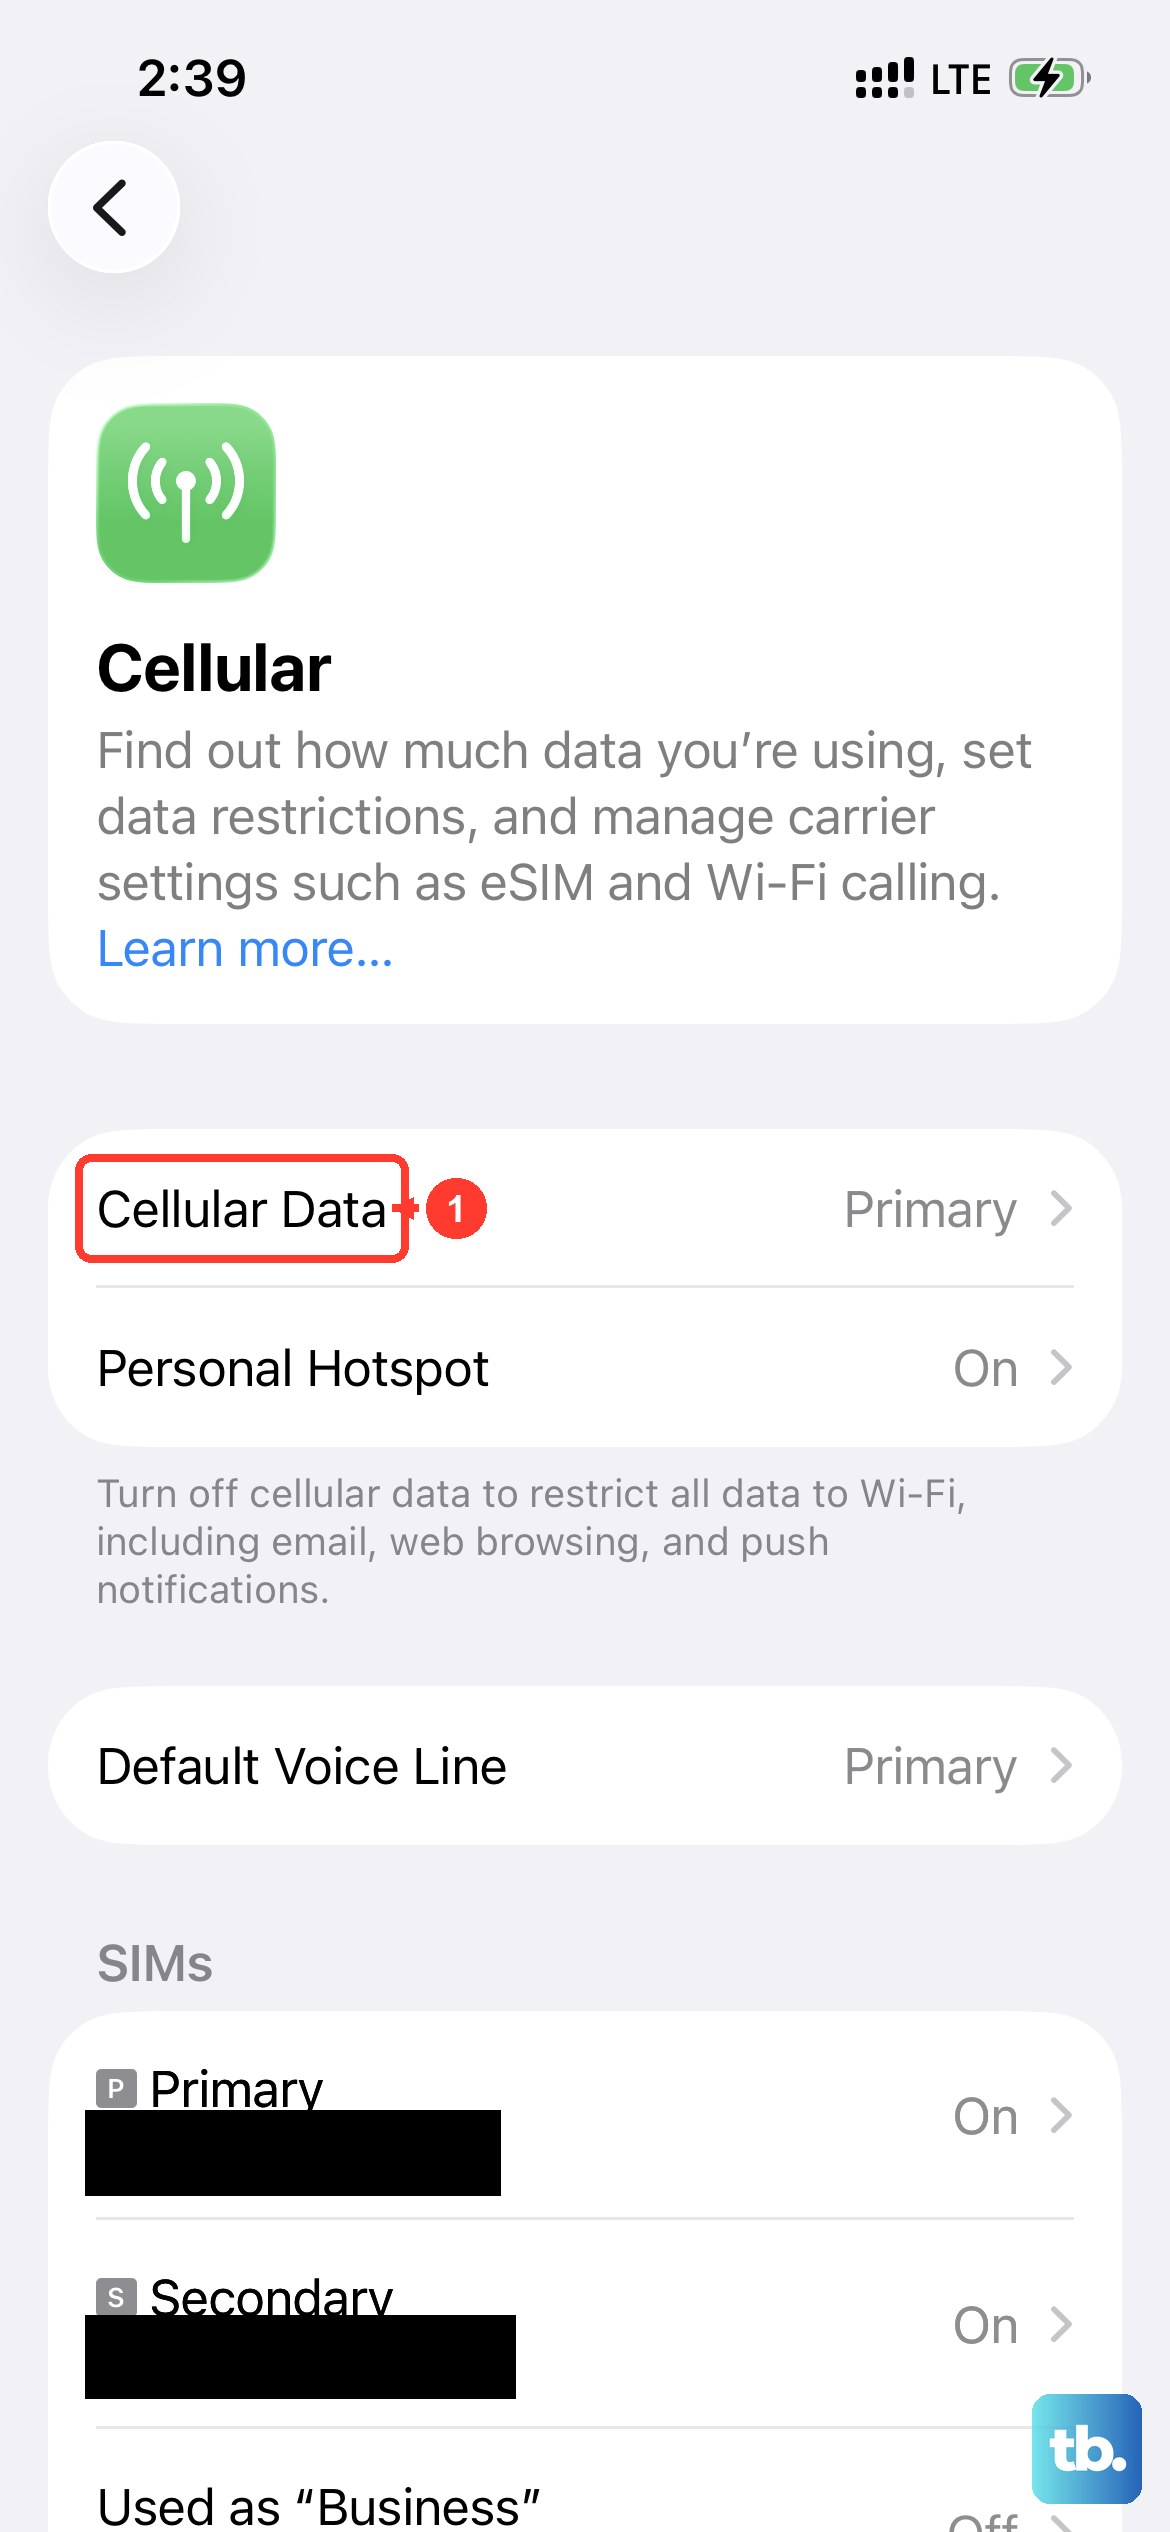
Next, switch between Wi-Fi and cellular data. Sometimes a problematic Wi-Fi network can block mail ports. Turn off Wi-Fi temporarily and see if mail starts flowing over your cellular connection. Also, go to Settings > Cellular, scroll down, and ensure the toggle for Mail is enabled.
Confirm Background App Refresh is On
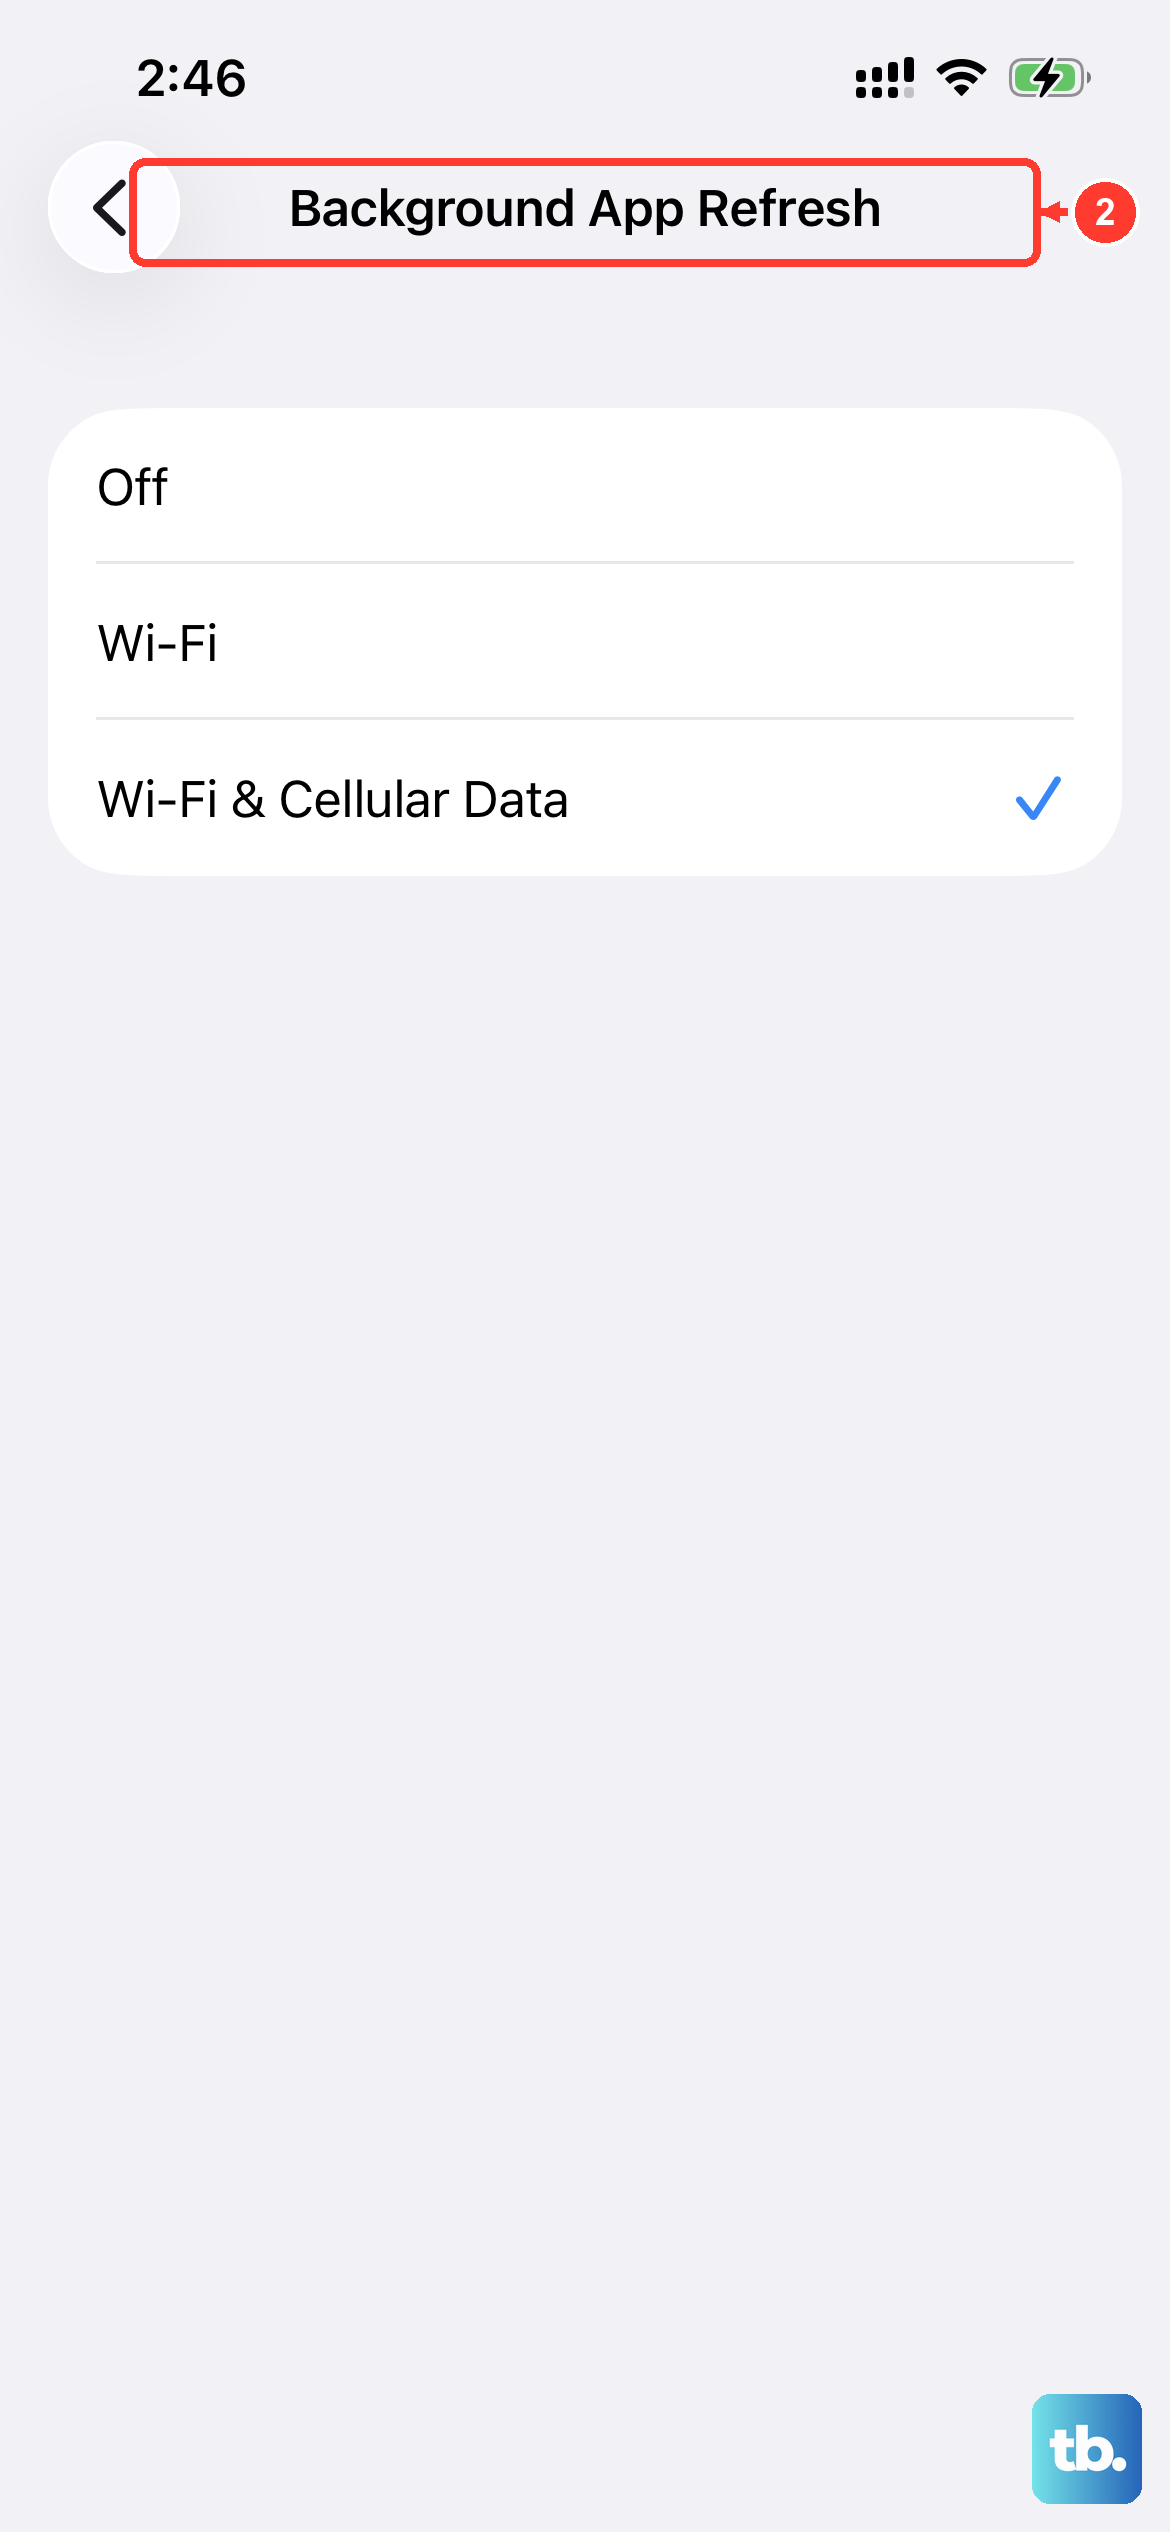
Background App Refresh allows apps to update content when you're not actively using them. Check this by going to Settings > General > Background App Refresh, then tap Background App Refresh again and choose "Wi-Fi & Cellular Data."
For Mail, also check your fetch schedule under Settings > Apps > Mail > Fetch New Data. If you don't see it there, look under Mail Accounts. With "Automatically," background fetching happens only when your phone is charging and connected to Wi-Fi.
Re-enter Your Email Account Password
Passwords can expire or change, especially if your account uses two-factor authentication or you've recently changed your password on another device. An incorrect password can prevent your account from receiving mail.
If Mail asks for your account password, enter your current password. Check it first by signing in to your email provider's website. If the error continues, contact your provider or system administrator. With two-step verification, you may need a special password or authorization to send and receive email on your phone.
Check for iOS and App Updates
Apple frequently releases iOS updates that patch bugs affecting core services like Mail. Go to Settings > General > Software Update to see if an iOS update is available. Install it if there is.
If you're using a third-party email app like Outlook or Gmail, make sure it's updated too. Open the App Store, tap your profile icon, then tap App Updates and choose Update next to the app or Update All.
Disable VPN or Private Relay Temporarily
VPNs and iCloud+ Private Relay can sometimes interfere with the connection to your email server. If you're using either, try turning them off briefly to test. For a VPN, go to Settings > General > VPN & Device Management and toggle it off.
For iCloud Private Relay, go to Settings > [Your Name] > iCloud > Private Relay. Turn it off, check your mail, then you can turn it back on. Some corporate or school email systems have compatibility issues with these privacy features.
Set the Date and Time Automatically
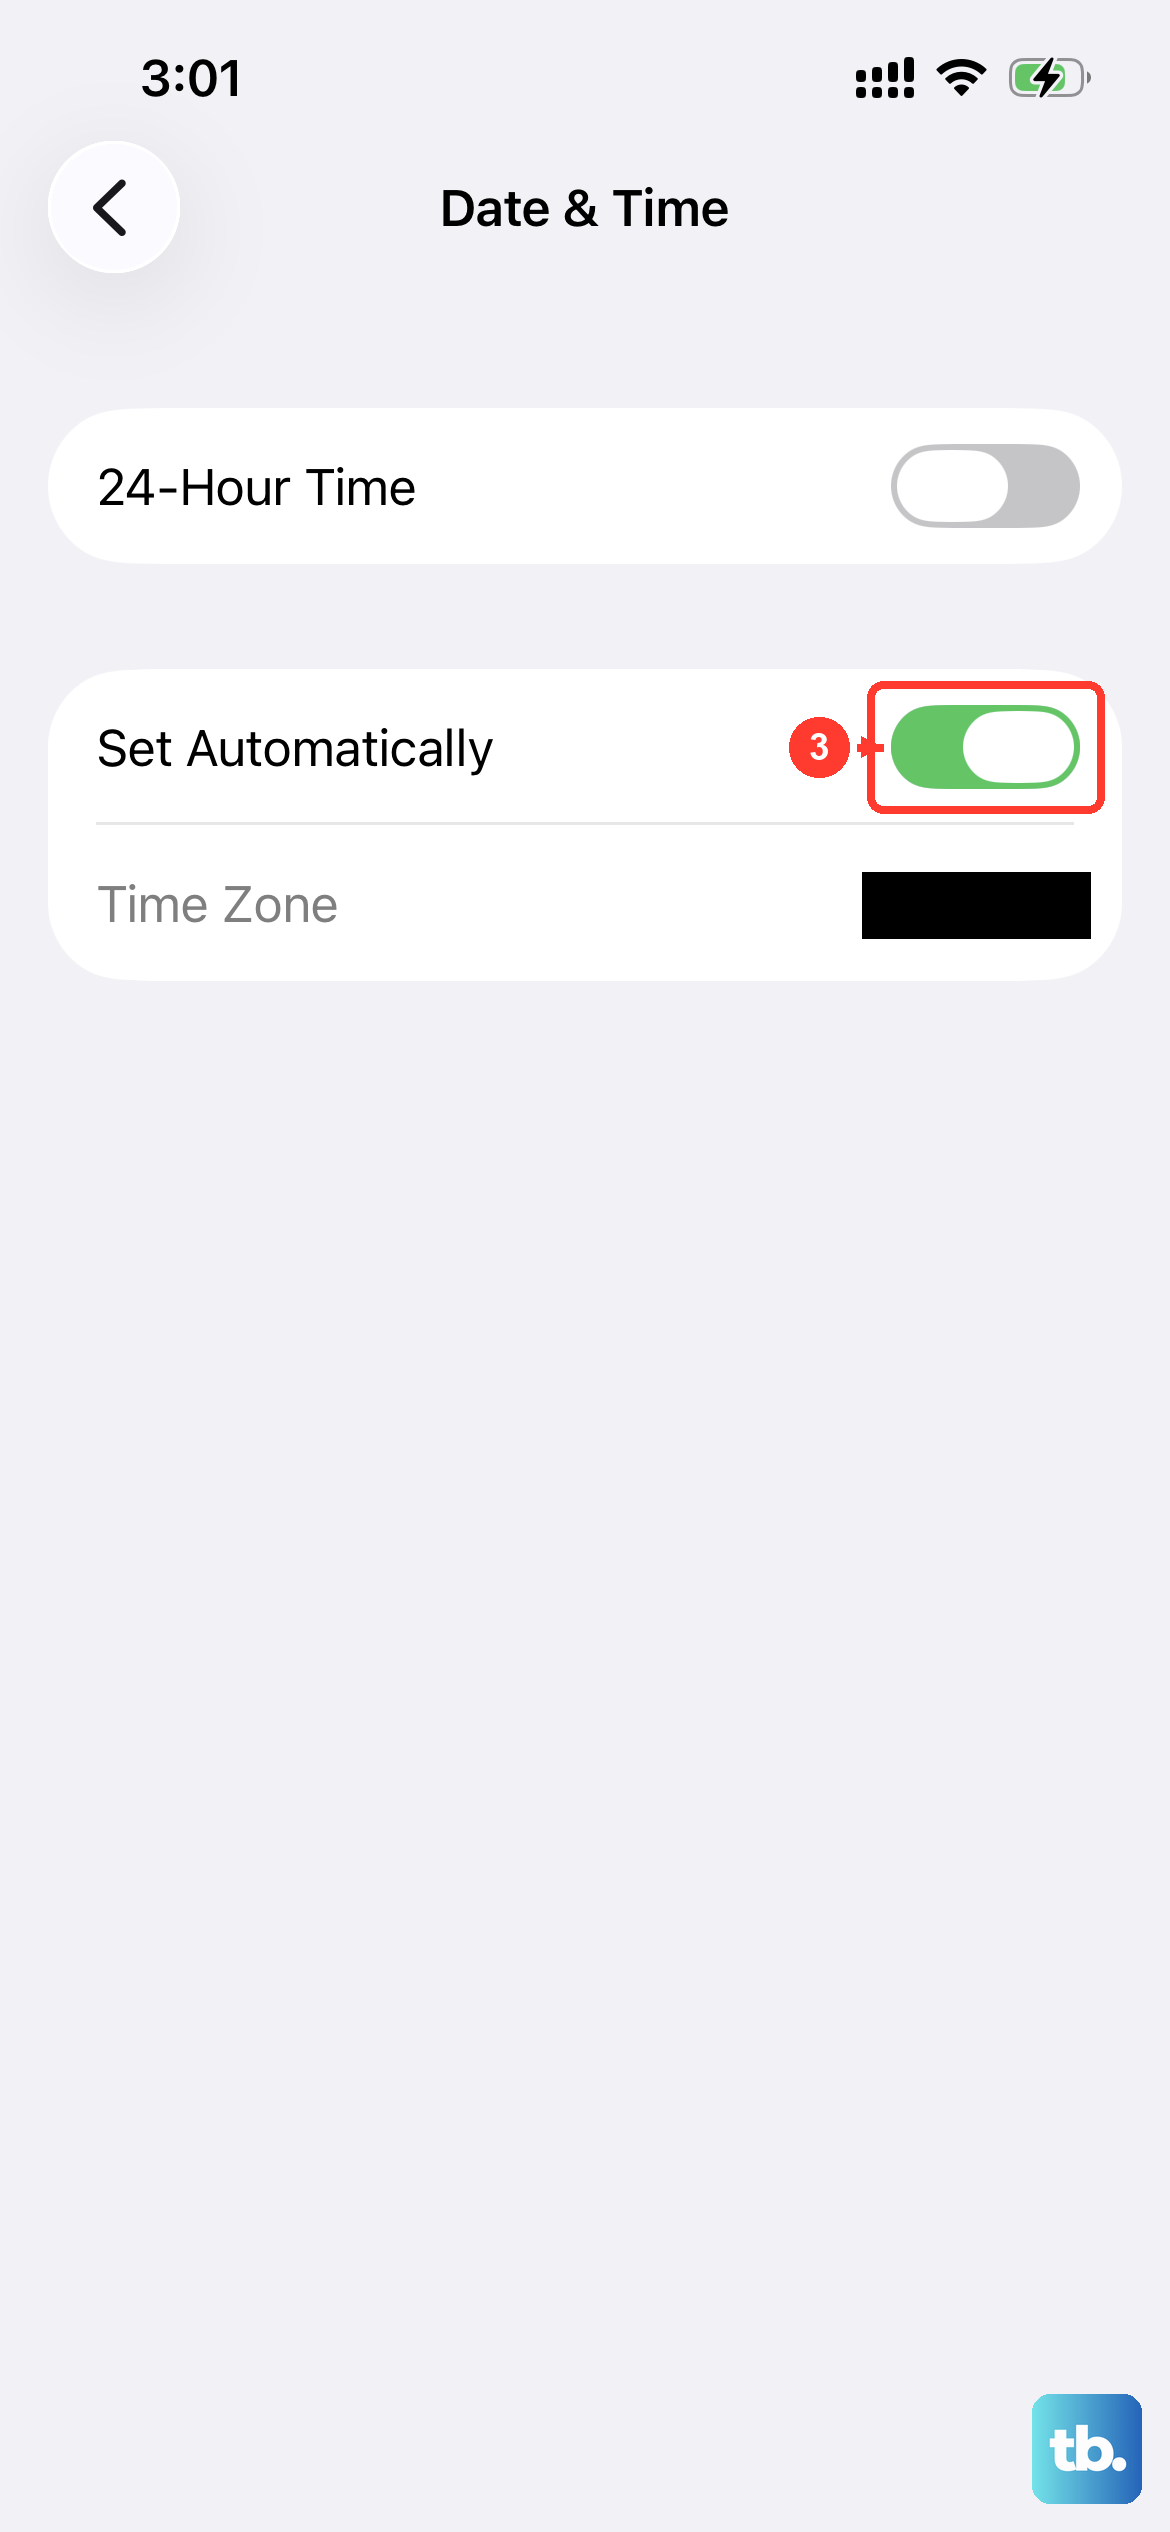
Incorrect date and time settings can break secure connections to email servers. This is an easy one to overlook. Go to Settings > General > Date & Time and make sure "Set Automatically" is switched on.
Your iPhone 17 Pro needs this to be accurate for SSL certificates to validate correctly. An incorrect clock can prevent your mail account from authenticating.
Delete and Re-add Your Email Account
Removing and adding your account again may help with persistent sync issues. First, sign in to your email provider's website and make sure all your email is there or saved somewhere other than your phone. Note your important server settings (like IMAP/POP details) if it's a custom account. Then go to Settings > Apps > Mail > Mail Accounts.
Tap the account, tap "Delete Account," and confirm. Previously downloaded emails may be removed from your phone. Then, go back to "Mail Accounts," tap "Add Account," and enter your email address. Follow the prompts to choose your provider if necessary and enter your password. Tap "Next" or "Save" if prompted.
Review Mail Notification Settings
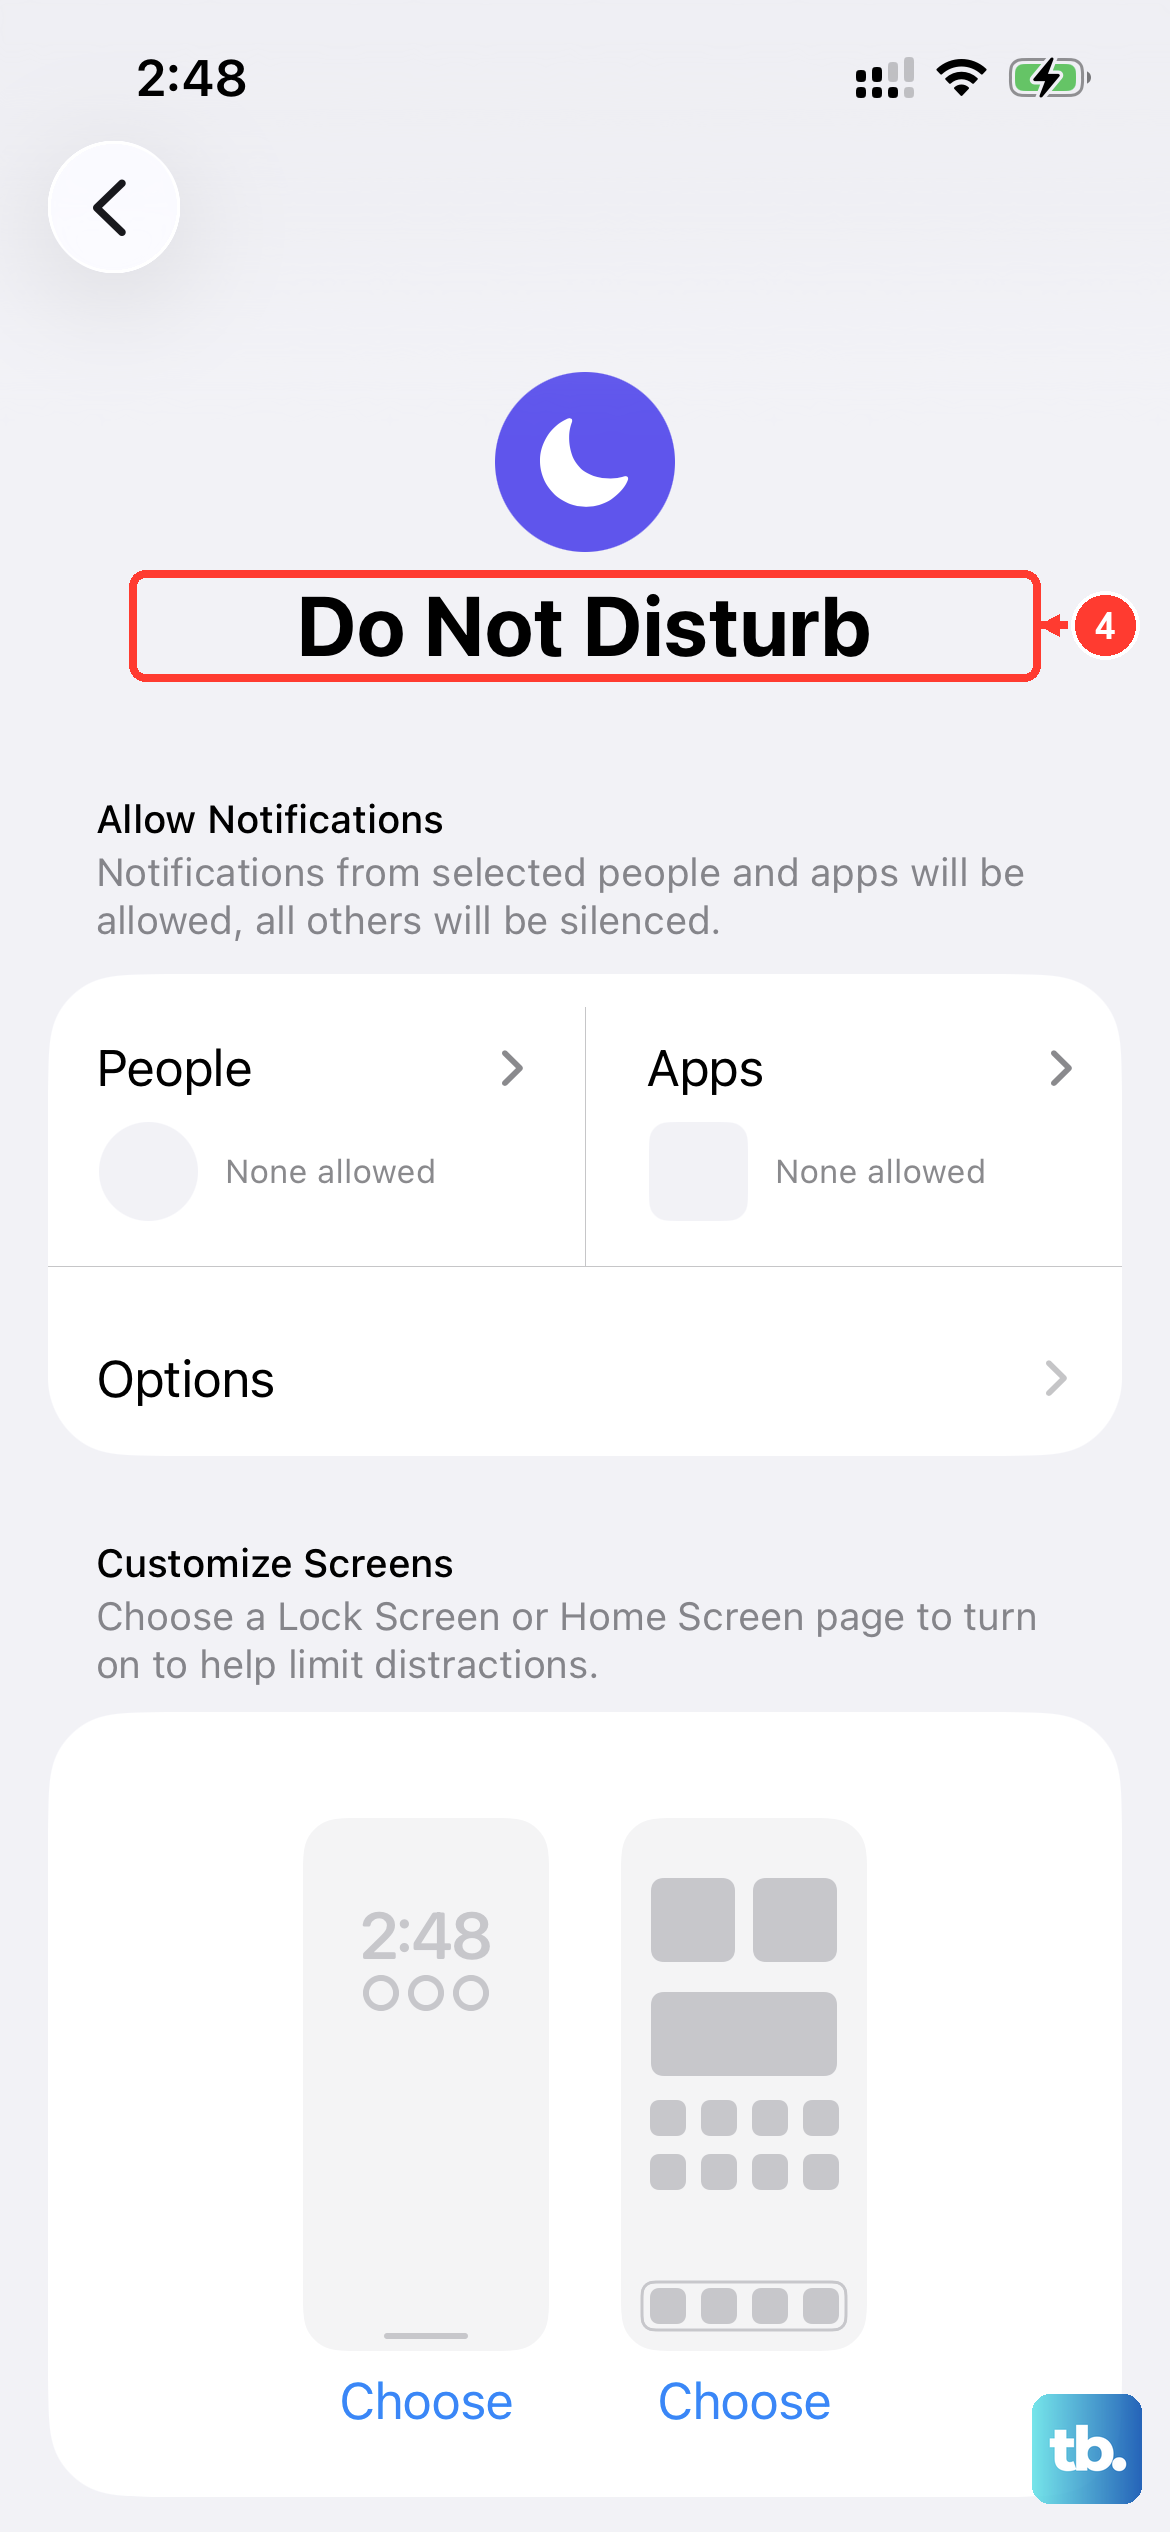
If emails are arriving but you're not getting alerts, the issue is with notifications, not syncing. Go to Settings > Notifications > Mail. Ensure "Allow Notifications" is on, then adjust your Alerts, Sounds, and Badges.
Check the alert style and sounds. Also, make sure you haven't accidentally turned on a Focus mode (like Work or Sleep) that silences Mail notifications. You can check this in Control Center or under Settings > Focus.
Reset All Network Settings
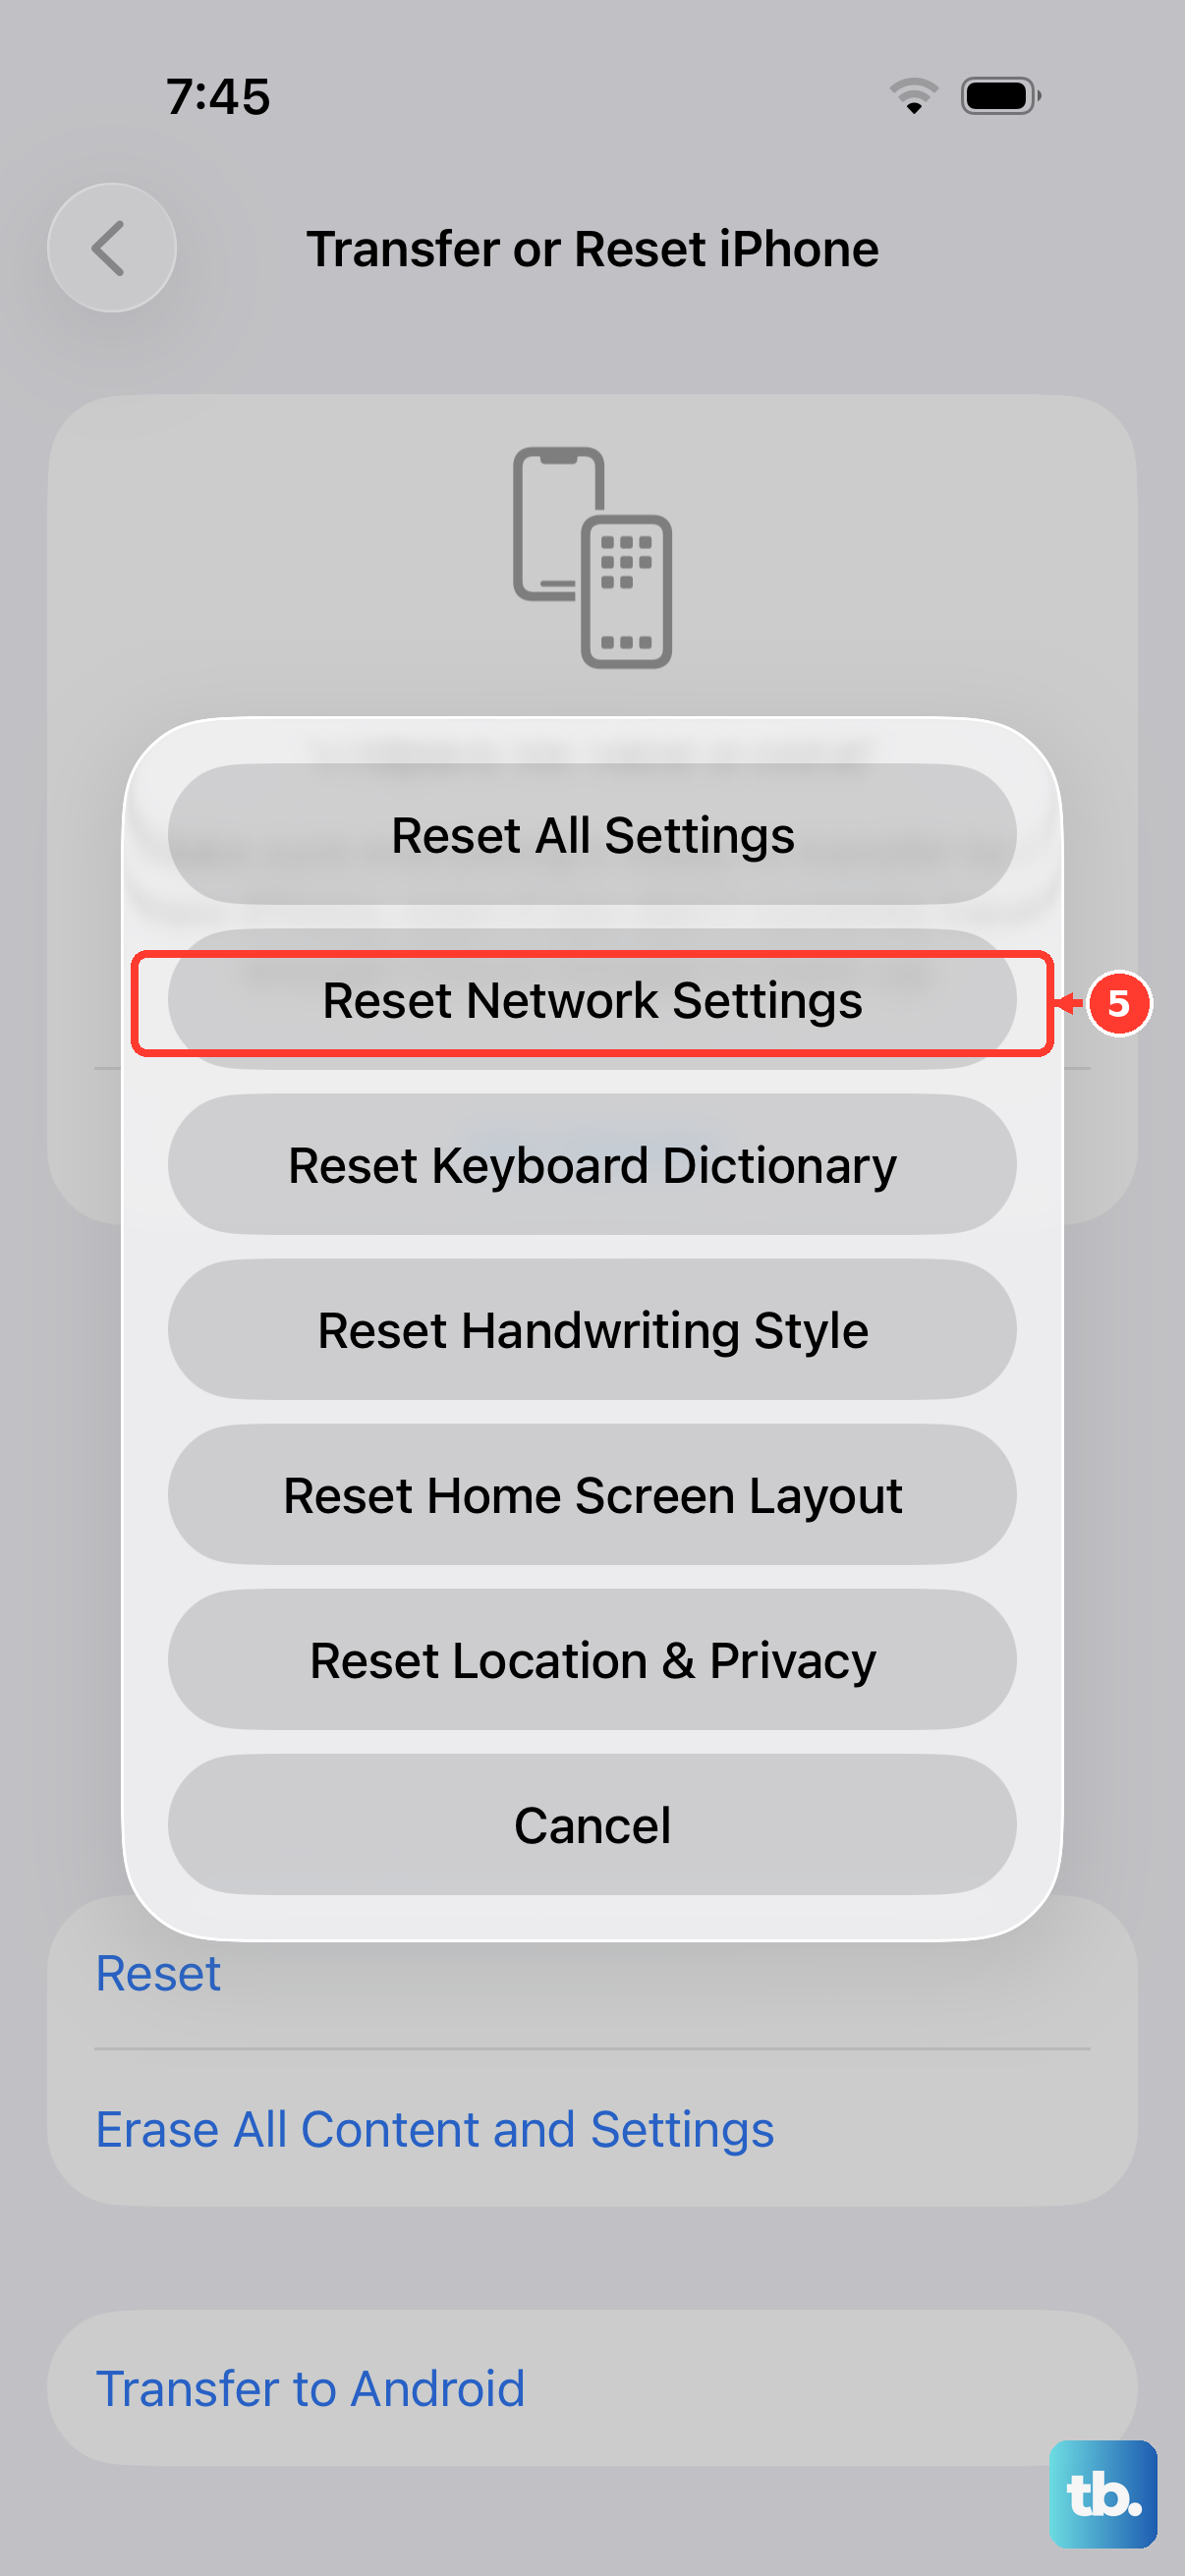
This clears all Wi-Fi networks, passwords, cellular settings, and VPN configurations. Use this only if the other fixes haven't helped with network-related sync problems. Go to Settings > General > Transfer or Reset iPhone > Reset.
Tap "Reset Network Settings." You'll need to re-join Wi-Fi networks afterward, but it won't delete your personal data or emails. This can resolve deep-seated network conflicts that affect the Mail app.
Check for Custom Mail Settings or Rules
If you're using an email account through work or school, check with your IT administrator. They may have specific security policies, required MDM profiles, or server-side rules that are affecting delivery to your iPhone 17 Pro.
Also, log into your email via a web browser. Check if there are any filters, forwarding rules, or "sweep" settings that might be archiving or deleting messages before they ever reach your phone.
Perform a Force Restart
As a last resort before more drastic measures, try a force restart. This uses a different button sequence from a normal shutdown. On the iPhone 17 Pro, quickly press and release the Volume Up button, then quickly press and release the Volume Down button.
Immediately after, press and hold the Side button. Keep holding it until you see the Apple logo appear, then release. This doesn't erase any data, but it gives the system a fresh start, which can sometimes kick a stuck mail process back into gear.