Seeing a "SIM Not Provisioned" message on your iPad can stop you from using cellular data or making calls right when you need to. This usually means your iPad can't connect to your carrier's network, often because the SIM card isn't fully activated or there's a hiccup in the system.
Let's jump straight into the most common fix. If you just got a new SIM card or plan, it probably needs activation. The quickest way to check is to contact your carrier directly. They can look up your account and see if the SIM is properly registered on their end, which solves the issue more often than not.
Restart Your iPad
A simple restart can clear out temporary software glitches that might be preventing the network connection. The method depends on your iPad model. For iPads without a Home button, quickly press and release the Volume Up button, then the Volume Down button, then press and hold the Top button until you see the Apple logo.
If your iPad has a Home button, just press and hold both the Home button and the Top button at the same time until the Apple logo appears. Wait for it to boot back up and see if the error is gone.
Reinsert the SIM Card
Sometimes the SIM card isn't seated perfectly in the tray. You'll need the SIM eject tool that came with your iPad, or a small paperclip. Turn off your iPad first, then gently push the tool into the small hole on the SIM tray to pop it out.
Take a look at the gold contacts on the SIM card. If you see any dust or debris, gently wipe them with a soft, dry cloth. Carefully place the SIM back into the tray, making sure it's oriented correctly, and slide the tray back into your iPad. Power it on again.
Toggle Airplane Mode
Turning Airplane Mode on and off forces your iPad to search for the cellular network again. Swipe down from the top-right corner of the screen to open Control Center and tap the airplane icon. Wait about 15 seconds, then tap it again to turn Airplane Mode off.
You should see the cellular signal bars reappear in the status bar. If the "SIM Not Provisioned" message is still there, move on to the next step. I've found this often works for temporary network hiccups.
Check for a Carrier Settings Update
Unlike iPhones, iPads don't always get automatic carrier updates in the same way, but it's worth checking your general software. Go to Settings > General > Software Update. If an update for iPadOS is available, install it.
These updates can include important carrier configuration files that help your iPad communicate properly with the network. After updating, your iPad will restart, which is another chance for it to reconnect.
Reset Your Network Settings
This will clear all your saved Wi-Fi passwords, VPN settings, and cellular network preferences, so be prepared to re-enter your Wi-Fi details afterward. It's a deeper refresh that can resolve persistent provisioning errors.
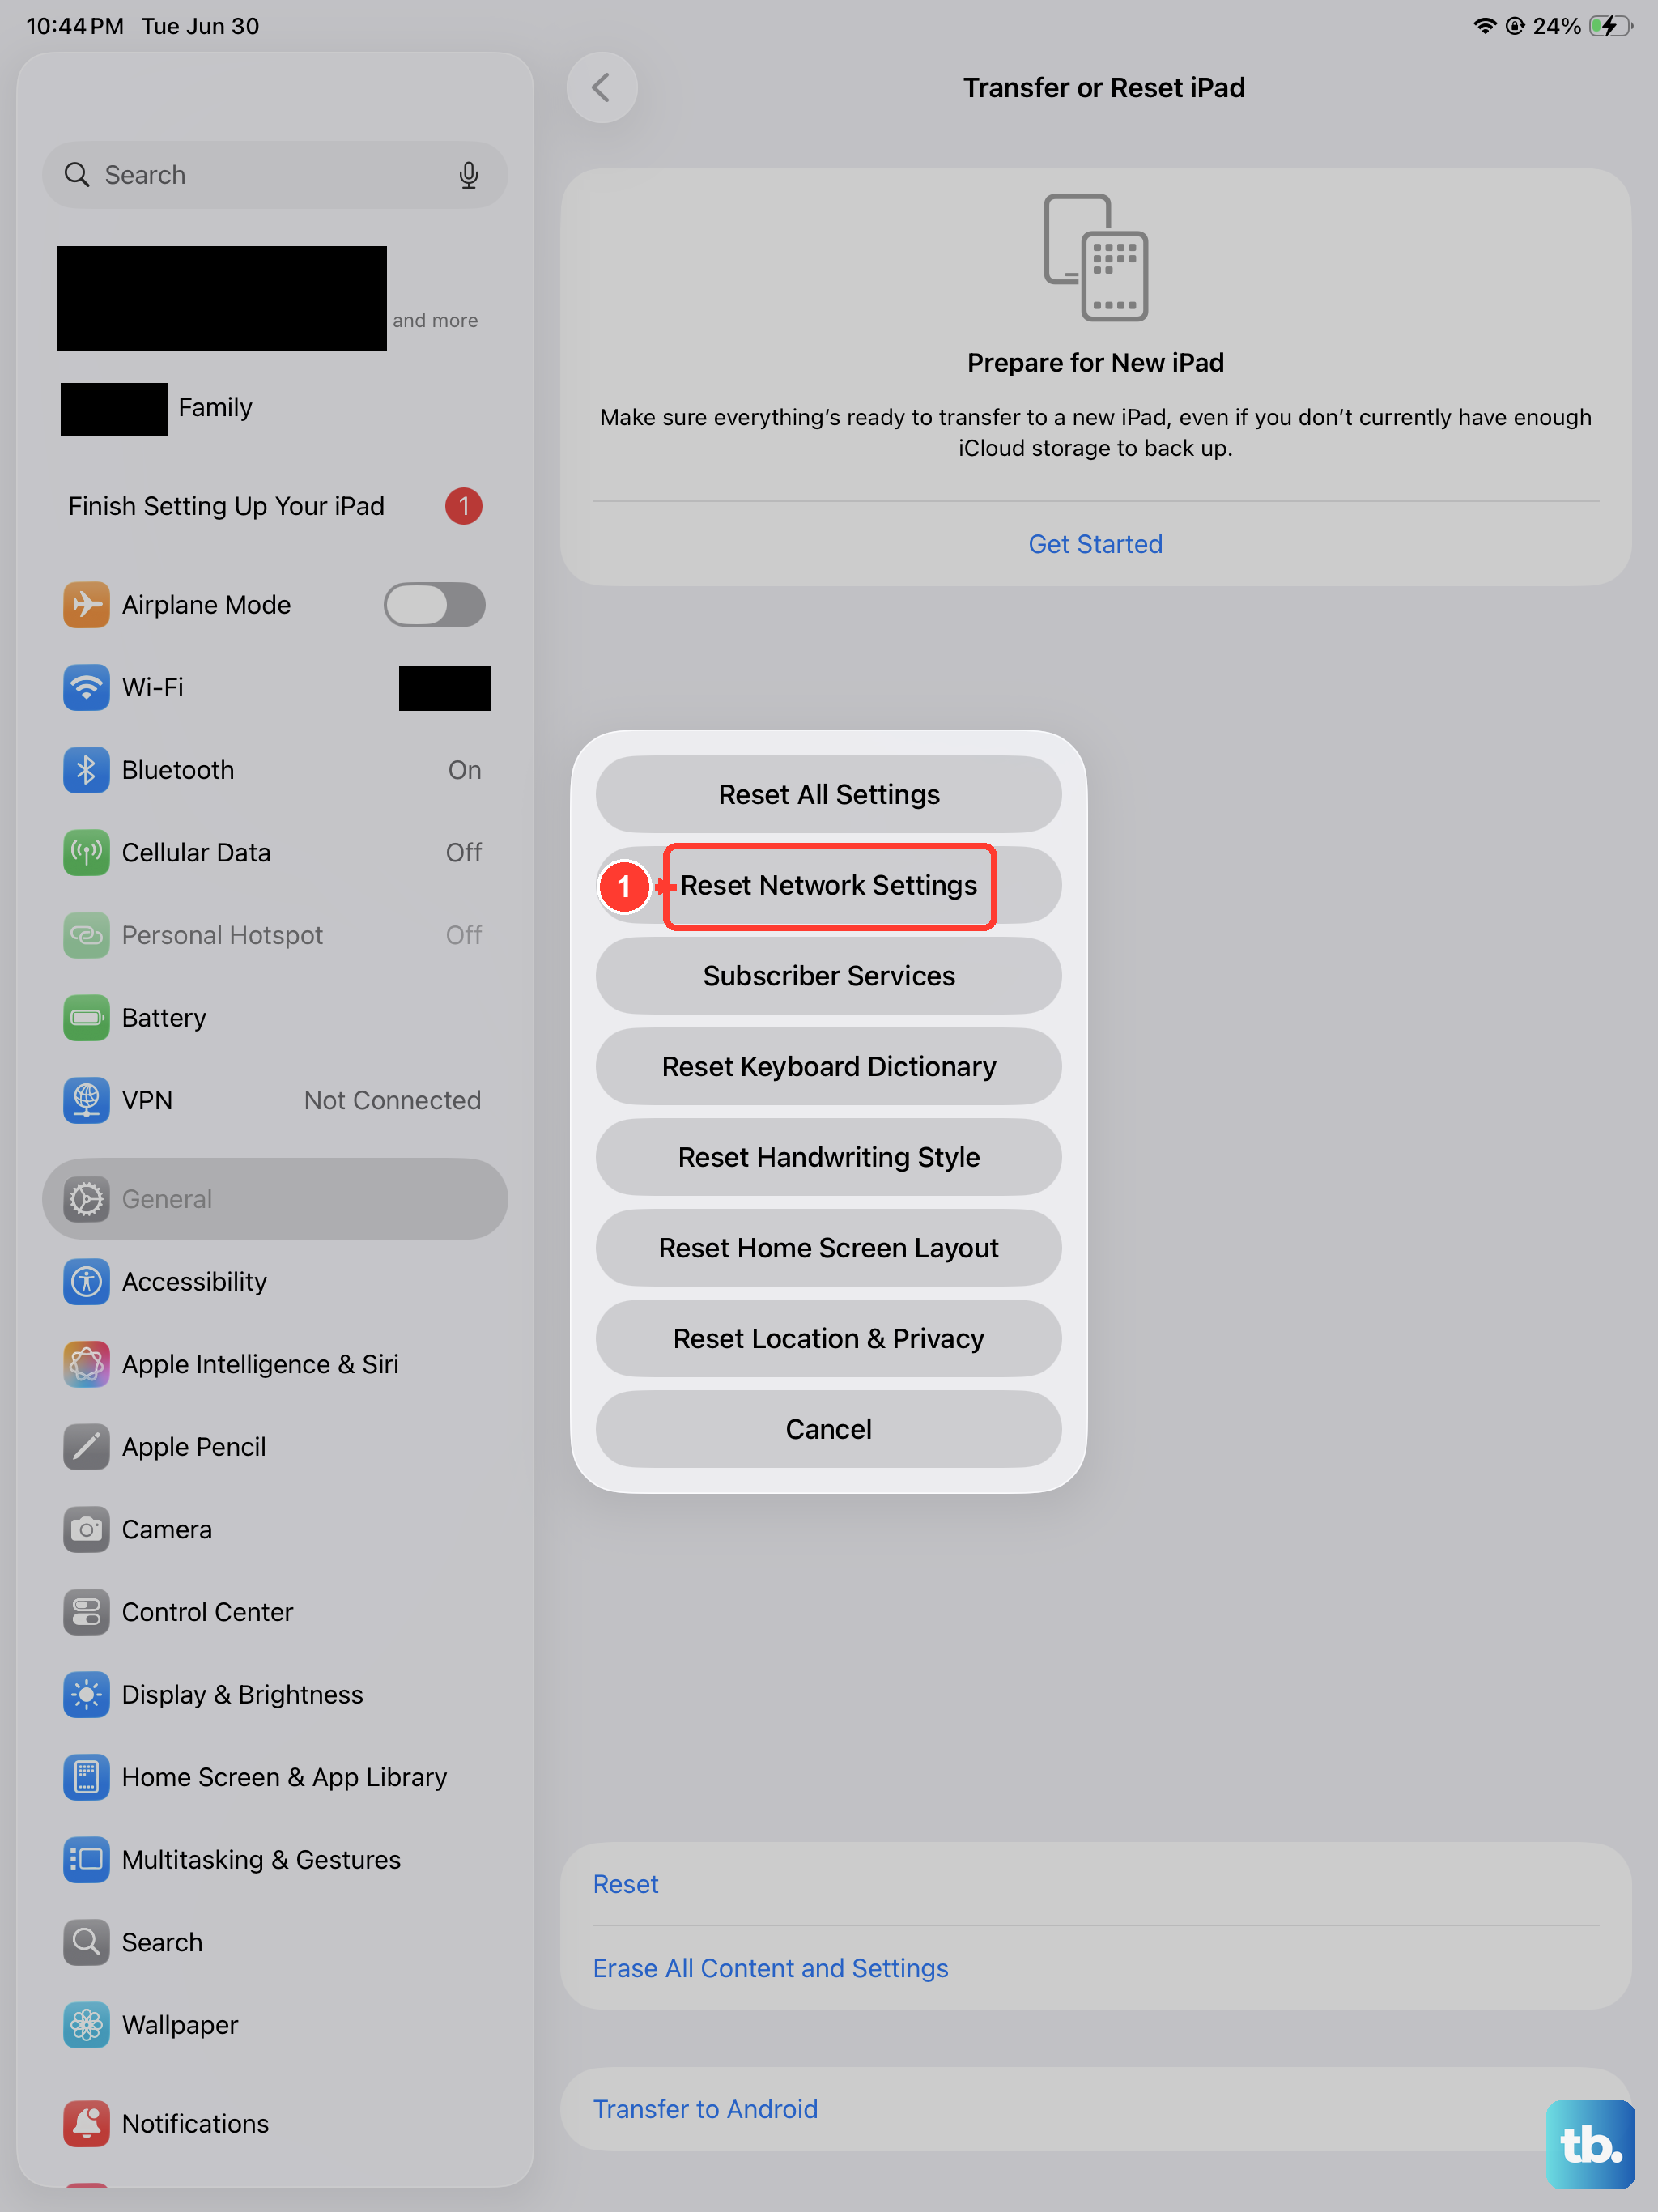
To do this, open Settings, tap General, then scroll down and tap Transfer or Reset iPad. Tap Reset and then choose Reset Network Settings. Enter your passcode if prompted and confirm. Your iPad will restart.
Manually Select Your Network
Your iPad usually picks the best network automatically, but sometimes manual selection helps. Go to Settings > Cellular > Network Selection. Turn off the "Automatic" toggle.
Your iPad will search for available networks. After a moment, a list will appear. Look for your carrier's name in that list and select it. Wait a minute to see if the connection establishes. If it doesn't work, you can turn "Automatic" back on.
Verify Your Account Status with Your Carrier
This is a crucial step. The error often points to an account issue rather than a device problem. If you're on a prepaid plan, your balance might be empty, suspending service. For postpaid plans, there could be a billing issue.
Call your carrier's customer service or use their mobile app to check your account status. They can tell you if the line is active, suspended, or if the SIM itself needs to be reactivated. They can often push a reprovisioning signal to your iPad over the air.
Test the SIM Card in Another Device
If you have access to another cellular-enabled iPad or an unlocked iPhone, you can test where the problem lies. Turn off the other device, insert your iPad's SIM card, and turn it back on.
If the "SIM Not Provisioned" error appears in the other device too, the issue is definitely with the SIM or your carrier account. If the other device connects to the network just fine, the problem is likely specific to your original iPad.
In that case, contacting Apple Support or your carrier for further device-specific troubleshooting is the best path. They can run diagnostics to see if there's a hardware issue with the cellular modem in your iPad.


