If your iPad Air M3 shows "Not Registered on Network" when you try to make a call or use cellular data, your cellular radio can't connect to your carrier. This usually happens after a software update, a SIM swap, or sometimes out of nowhere. While the iPad Air M3 runs iPadOS 18, the cellular modem behaves a lot like an iPhone's the fixes here are all tested on iPadOS and should get you back online without a trip to the Apple Store.
Restart the iPad Air M3
A fresh restart forces the cellular modem to re-register with the nearest tower. It clears temporary glitches that might be blocking the network. Use the force restart method on your iPad Air M3: press and quickly release Volume Up, then Volume Down, then press and hold the Top button until the Apple logo appears. Let the iPad boot completely, then check if the network error is gone.
Toggle Airplane Mode
Airplane Mode disconnects all wireless radios. Turning it back on triggers a fresh handshake with your carrier. Swipe down from the top-right corner to open Control Center, tap the Airplane icon, wait about 10 seconds, then tap it again. This is faster than a full restart and often resolves temporary registration hiccups.
Remove and Reinsert Your SIM Card
A SIM card that's slightly out of place can cause network registration failures. Power off your iPad Air M3, then locate the SIM tray on the right side (or left if you're holding it landscape). Use the SIM eject tool or a paperclip to pop the tray open. Take out the SIM, blow gently on the contacts and the tray, then reinsert it firmly. Power the iPad back on and see if it connects.
Check Your Cellular Plan Status
Sometimes the problem isn't the iPad it's your account. An expired prepaid plan, a past-due bill, or a suspended line will show the exact same error. Log into your carrier's app or website from another device, or call customer support. Confirm your plan is active and your eSIM (if you're using one) hasn't been deactivated. If you're on a physical SIM, make sure it hasn't been reported lost or stolen.
Reset Network Settings
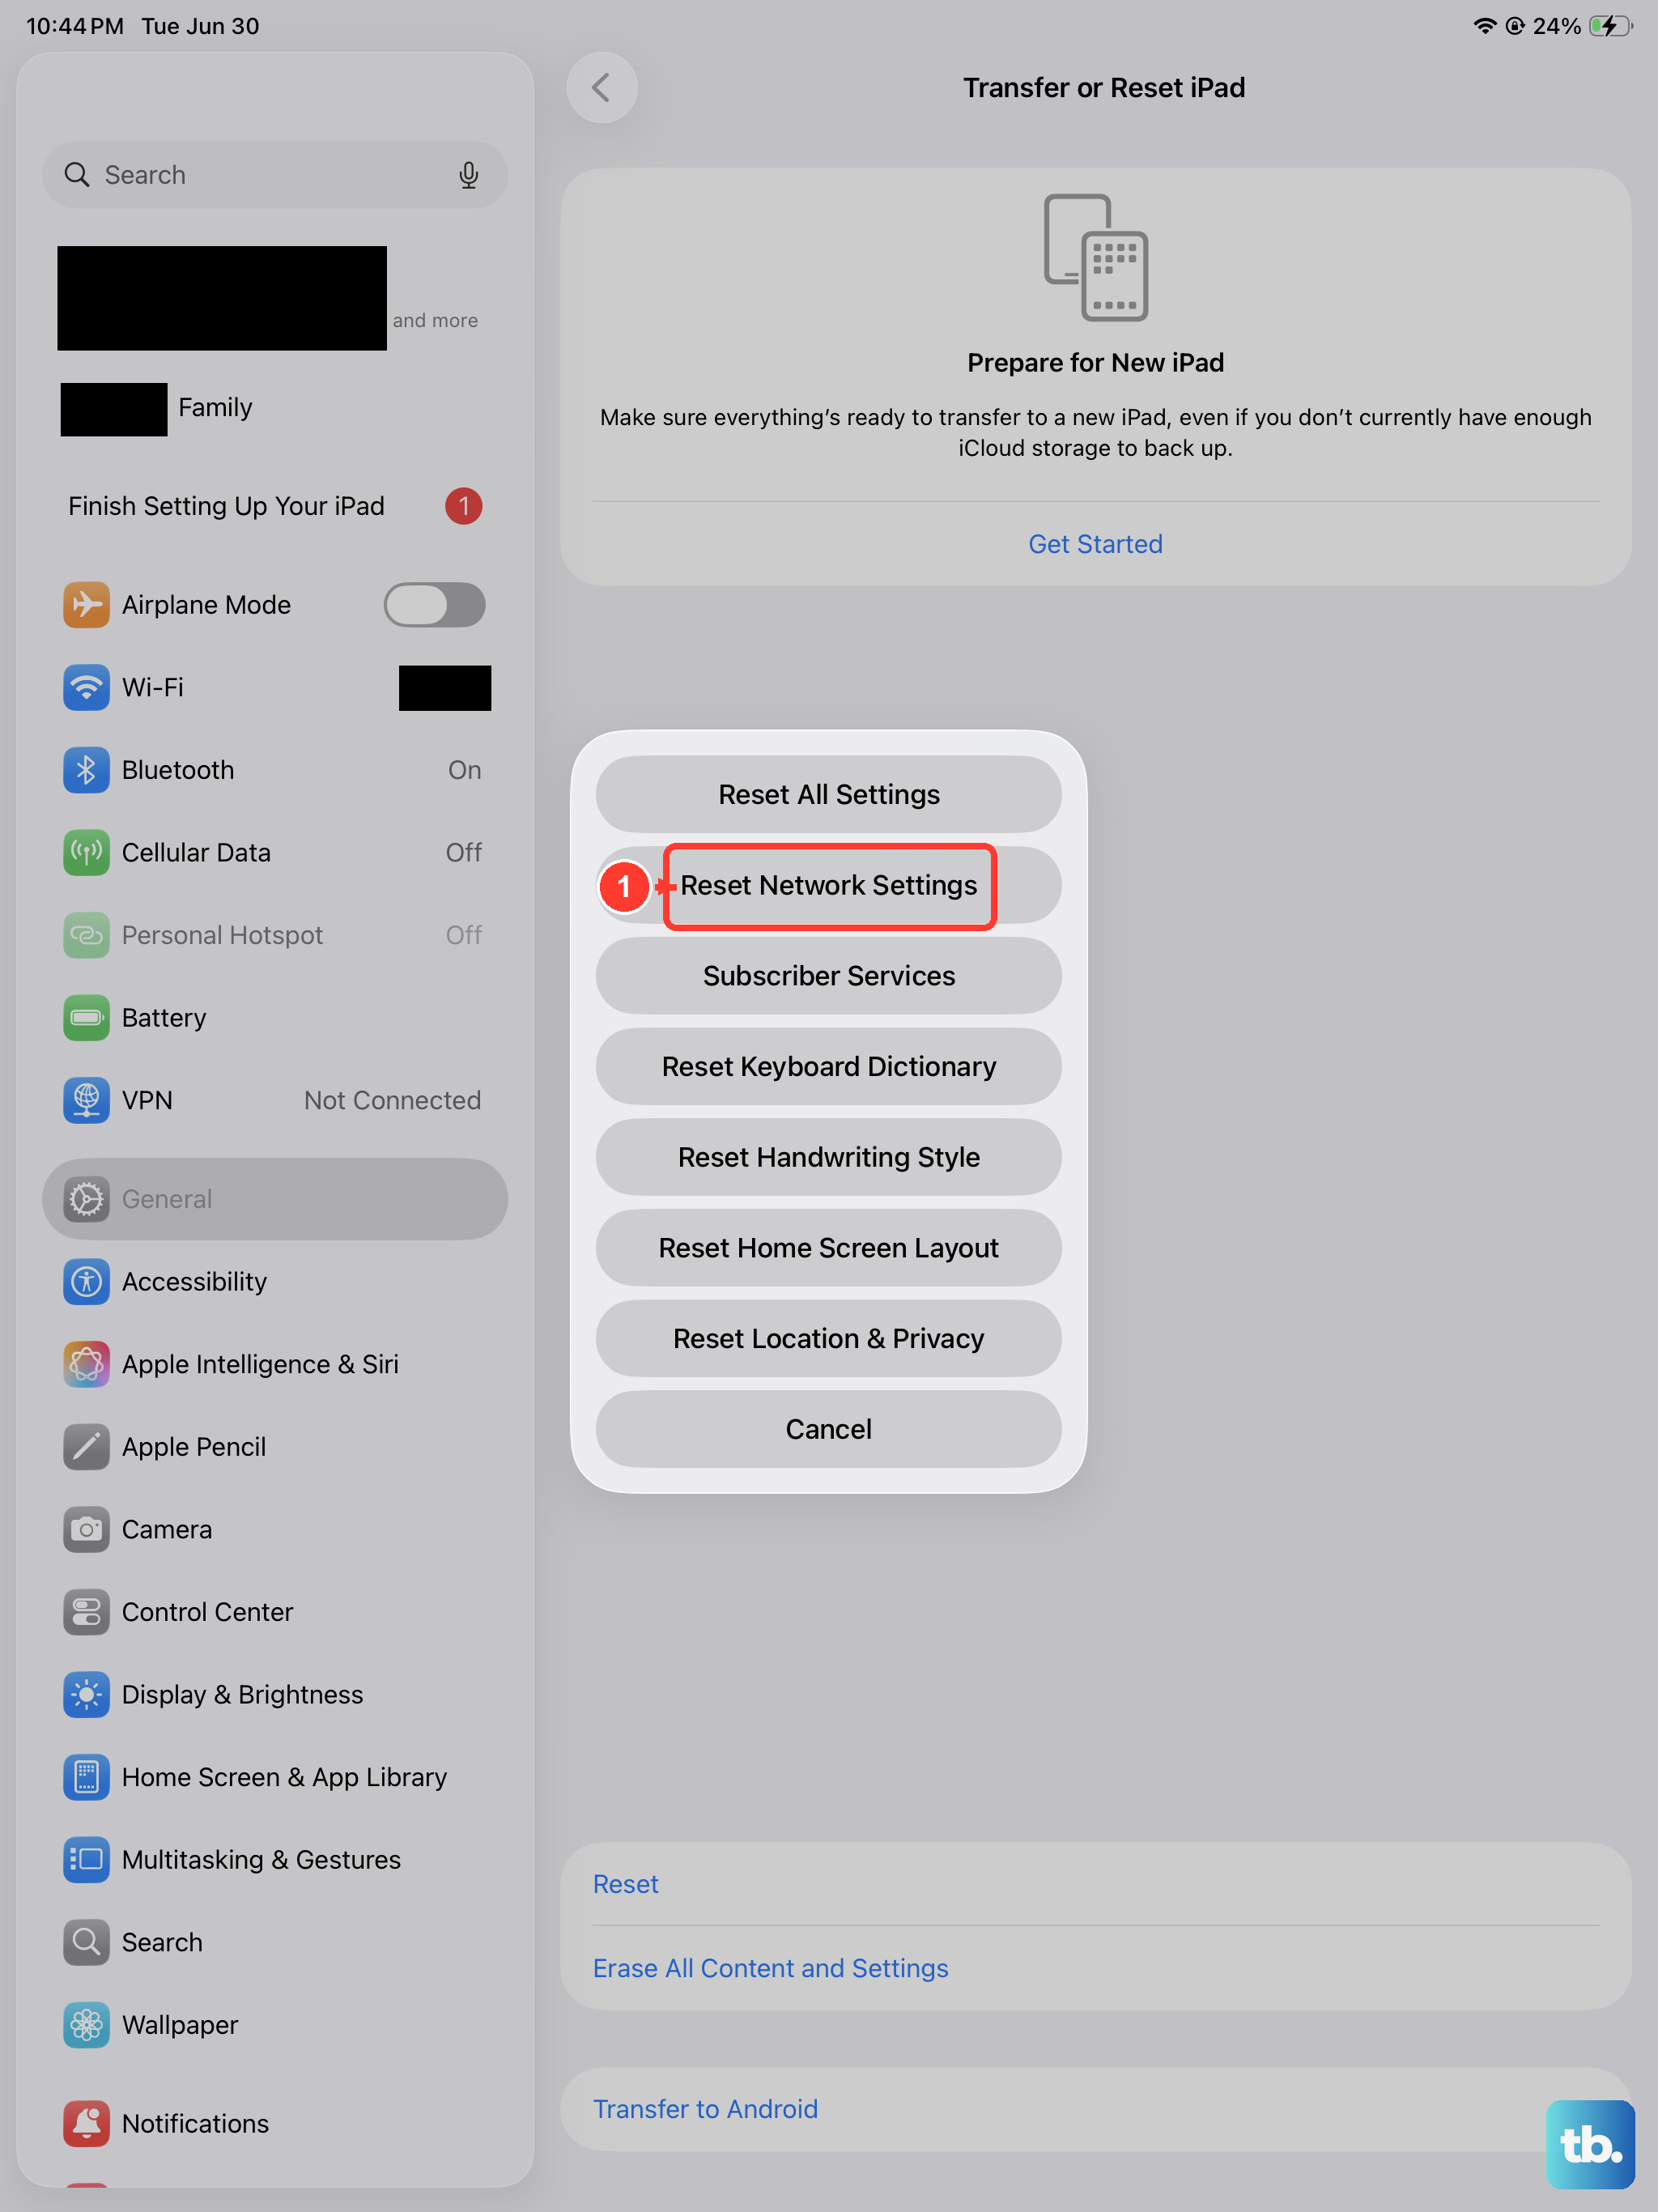
Resetting network settings wipes saved Wi-Fi passwords, Bluetooth pairings, and cellular configurations. It's not as extreme as a factory reset, but it clears out corrupted network data. Go to Settings > General > Transfer or Reset iPad > Reset > Reset Network Settings. Enter your passcode if prompted. The iPad will restart and attempt a clean connection to your carrier. You'll need to rejoin Wi-Fi networks afterward.
Manually Select Your Carrier
Your iPad Air M3 might be trying to connect to a different carrier network that isn't available in your area. Forcing it to use your home carrier often fixes registration errors. Open Settings > Cellular > Network Selection. Turn off Automatic, wait for the list of available networks to appear, then tap your carrier's name. If it connects, leave manual selection on. If it doesn't, switch back to Automatic.
Update iPadOS
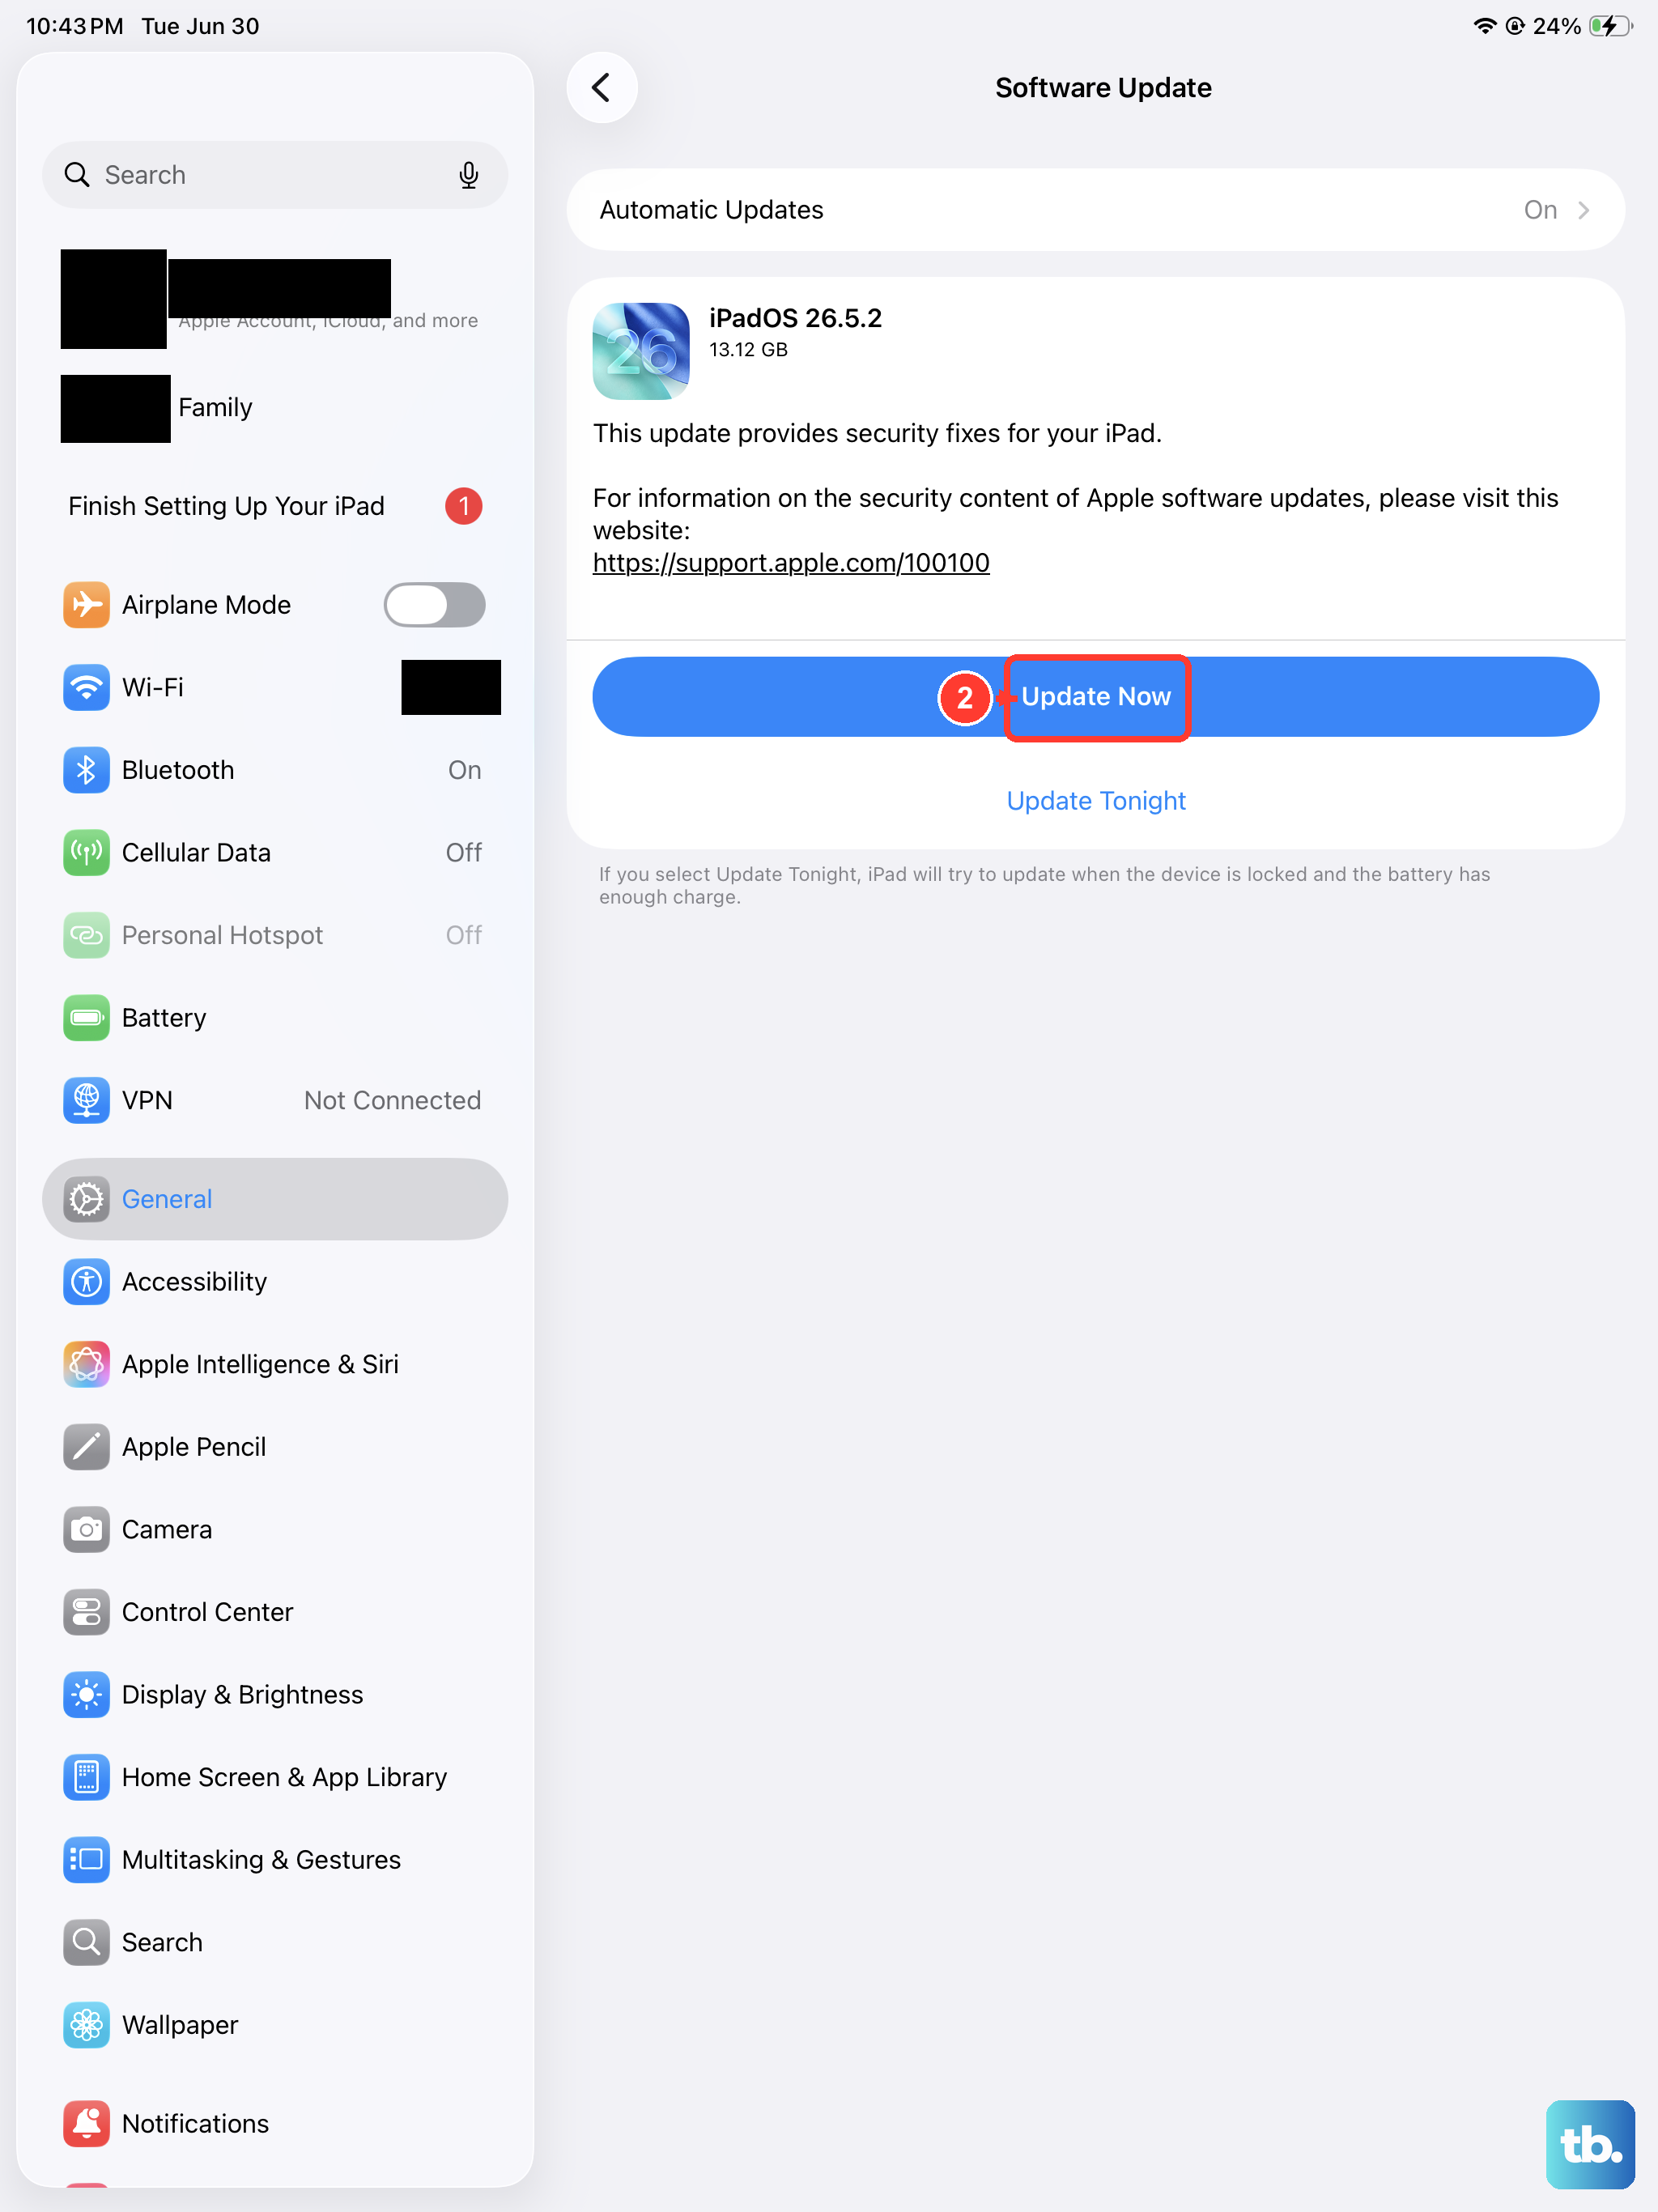
Apple regularly releases software updates that squash bugs in the cellular stack. An outdated iPadOS can have known network registration issues. Go to Settings > General > Software Update. If an update is available, download and install it. Your iPad Air M3 will restart once or twice during the process. After the update, test the network connection again.
Update Carrier Settings
Carriers also push small configuration updates to your iPad. These updates often include changes to network settings that improve registration. Open Settings > General > About. If a carrier settings update is available, you'll see a pop-up asking you to tap Update. If there's no pop-up, your settings are current. You can also try toggling Airplane Mode after checking sometimes that triggers the update prompt.
Turn Cellular Data Off and On
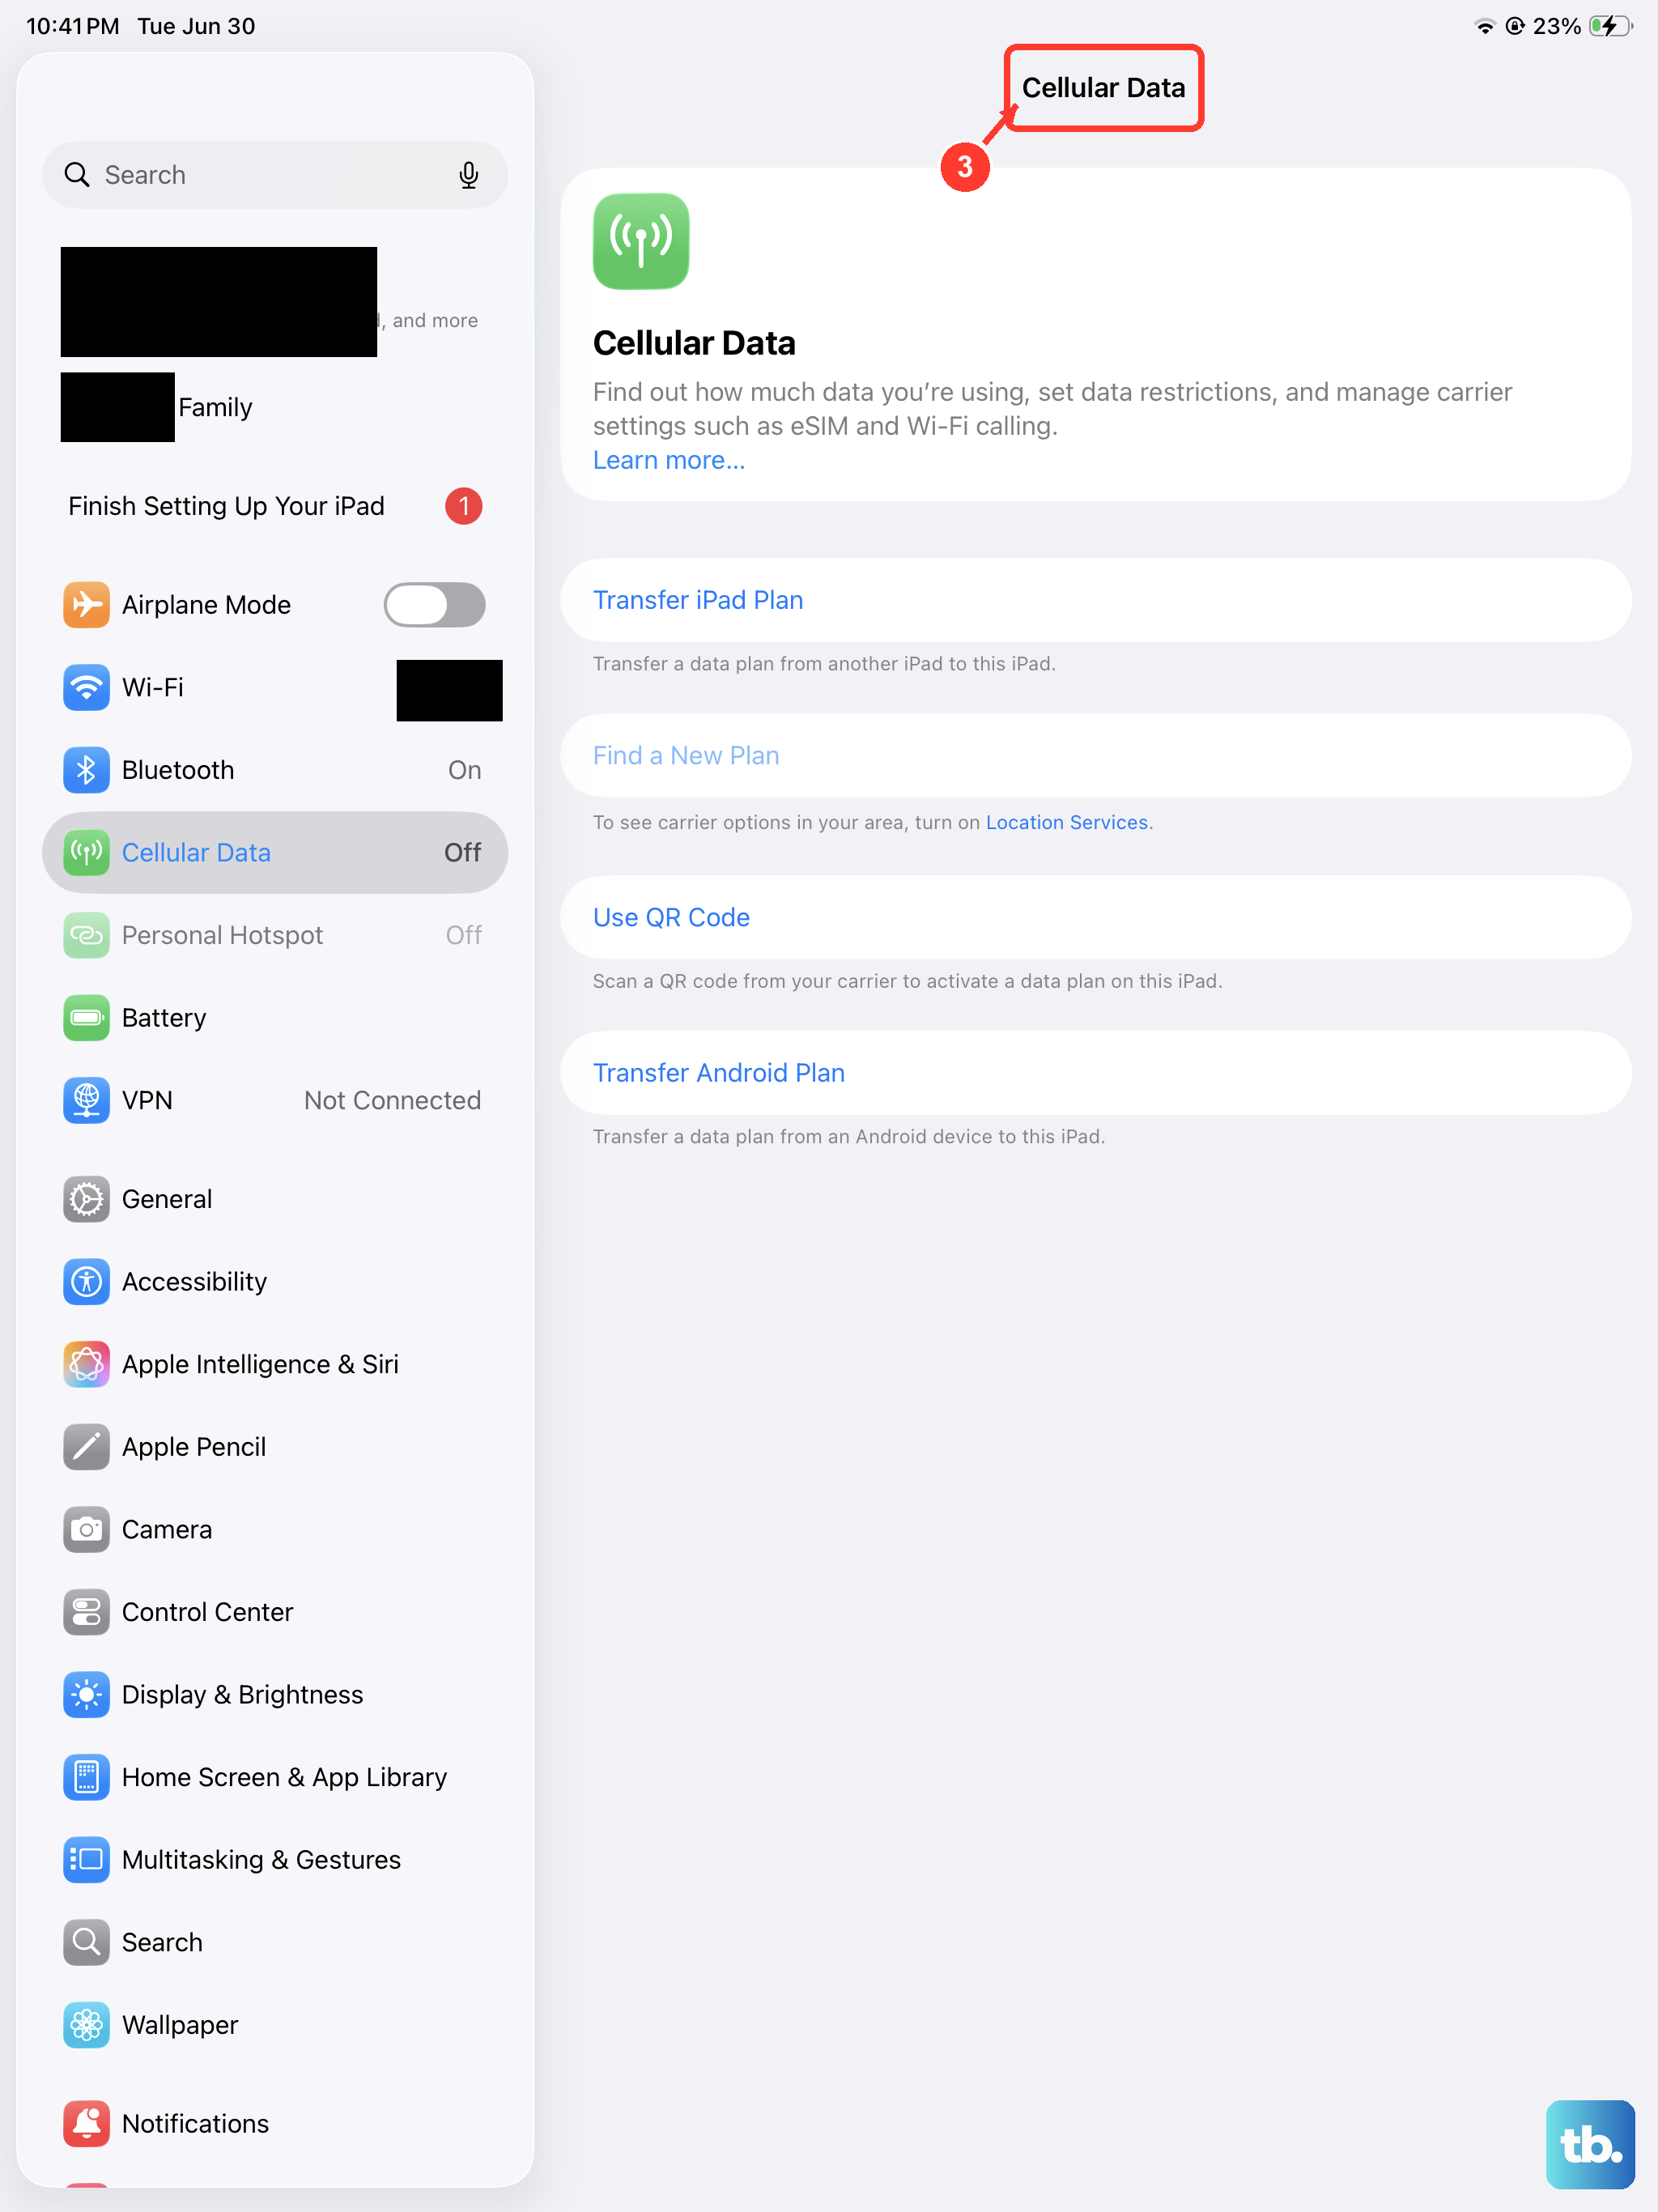
A quick toggle of the cellular data switch can refresh the connection without a full reset. Go to Settings > Cellular and turn off Cellular Data. Wait 10 seconds, then turn it back on. This forces the iPad to renegotiate data connectivity with the tower. If you're using an eSIM, you can also turn off your cellular plan under the same menu and turn it back on after a few seconds.
Factory Reset as a Last Resort
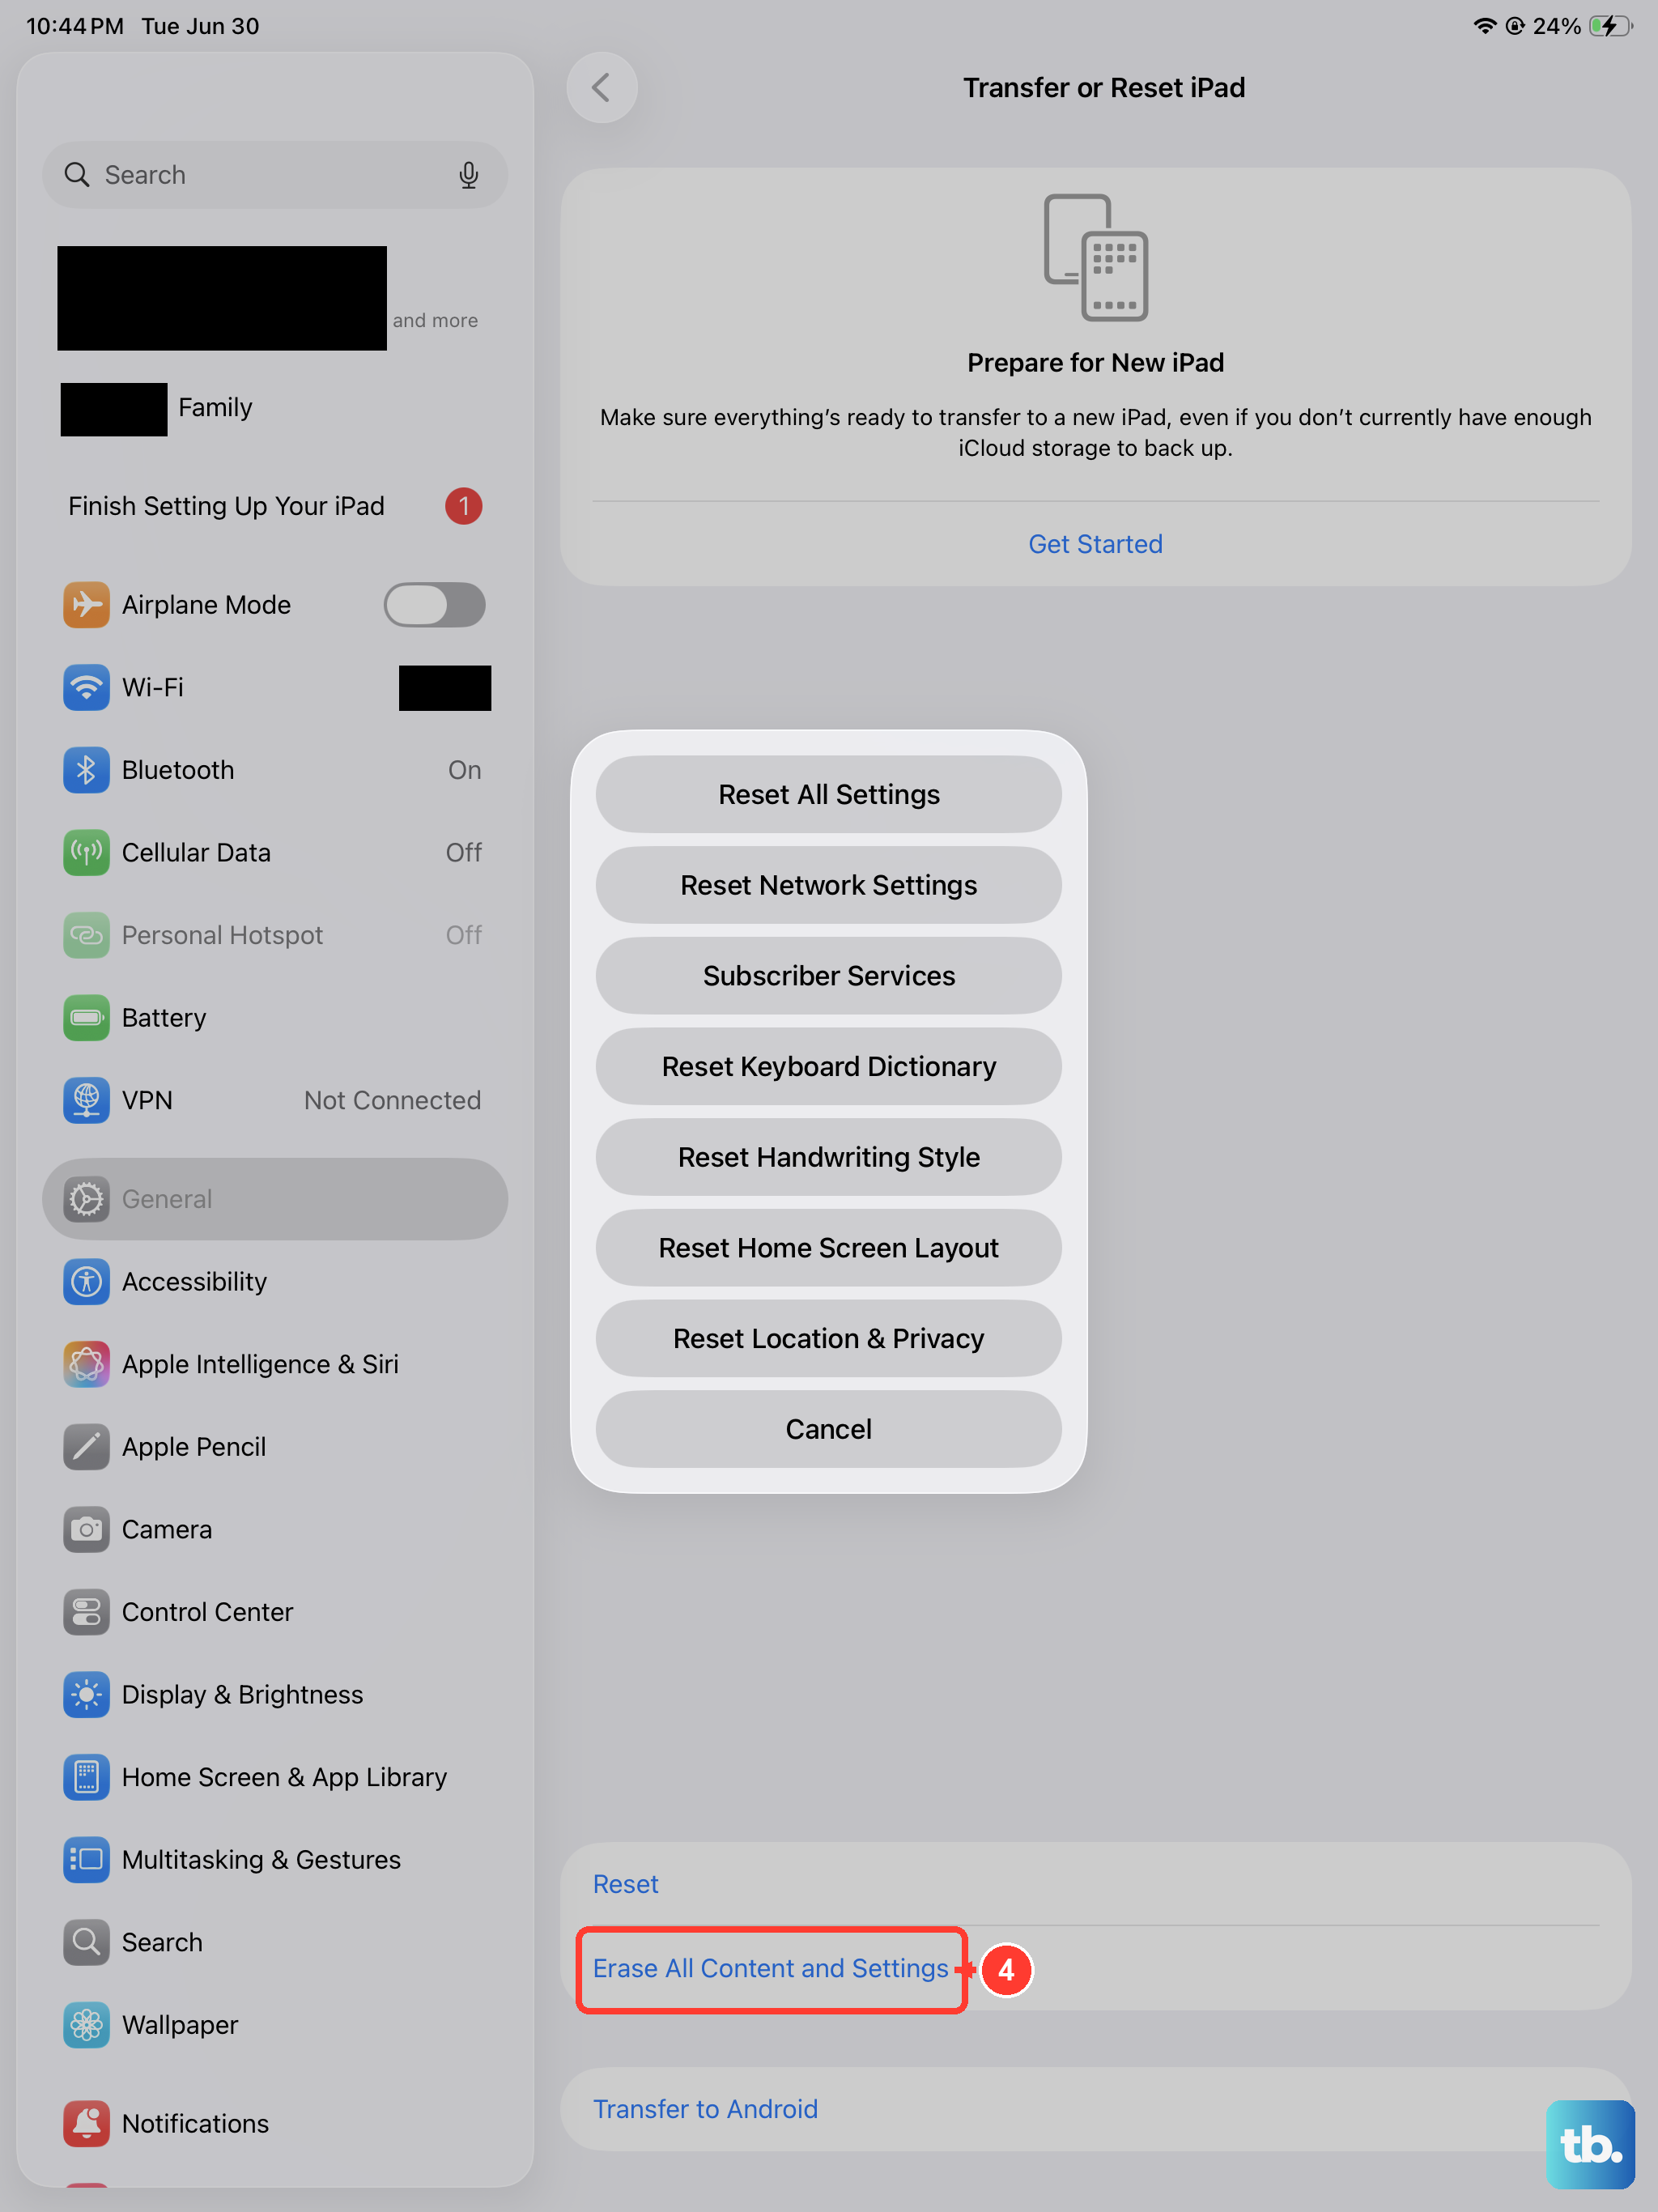
If none of the above works, a factory reset wipes the iPad clean and restores all system files to their original state. This is the final software fix. Back up your data first go to Settings > [Your Name] > iCloud > iCloud Backup and tap Back Up Now. Then go to Settings > General > Transfer or Reset iPad > Erase All Content and Settings. Follow the prompts. After the reset, set up the iPad as new (or restore from backup) and check if the network error is resolved. If the error persists, the cellular hardware might need service contact Apple Support or visit an Apple Store.


