Your iPhone has a built-in document scanner that's been hiding in plain sight since iOS 11 launched in 2017. You don't need to download any additional apps - the Notes app handles everything.
Getting Started with the Notes Scanner
Open the Notes App
Start by opening the Notes app on your iPhone. If you can't find it, swipe down on your home screen and type "Notes" in the search bar.
Create a New Note
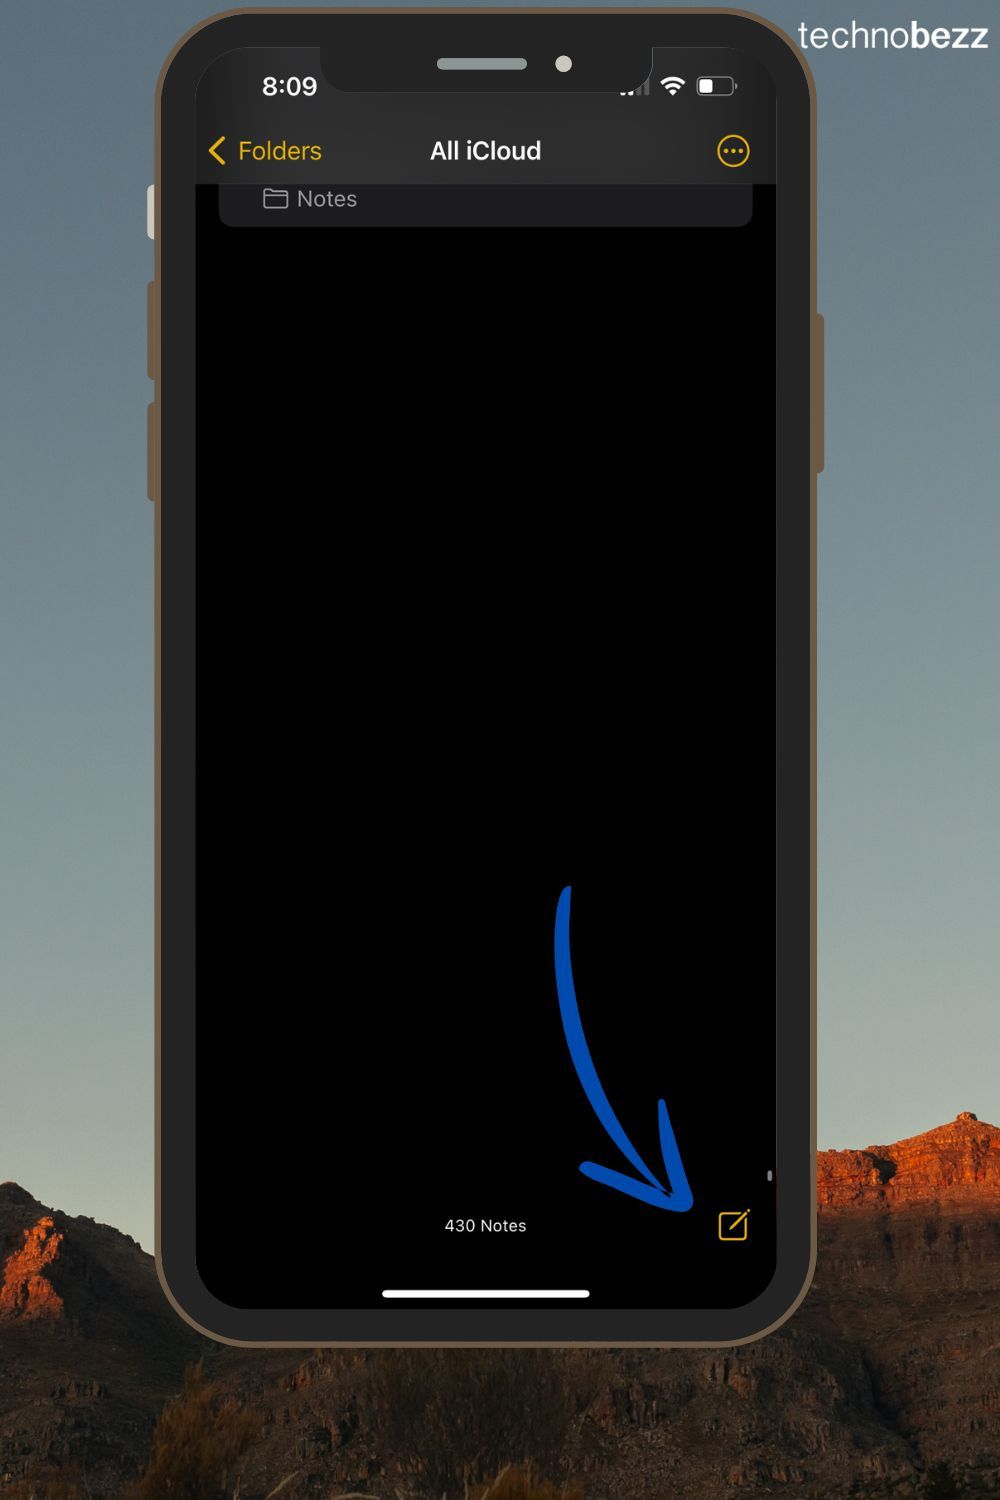
Tap the compose button (a square with a pencil) at the bottom right to create a new note.
Access the Scanner
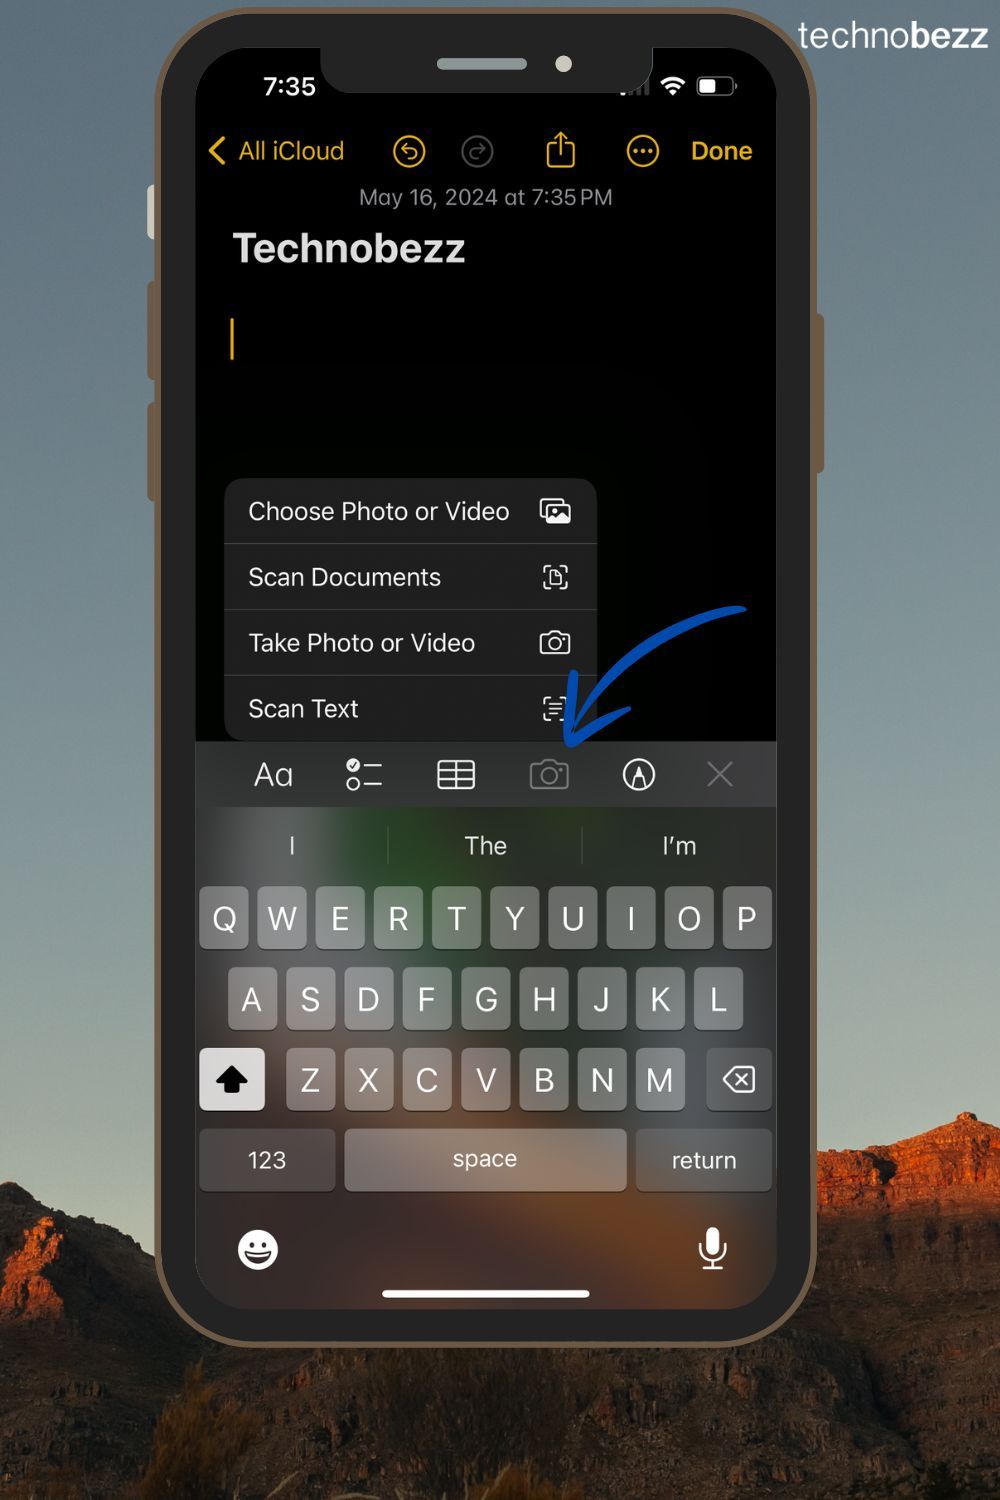
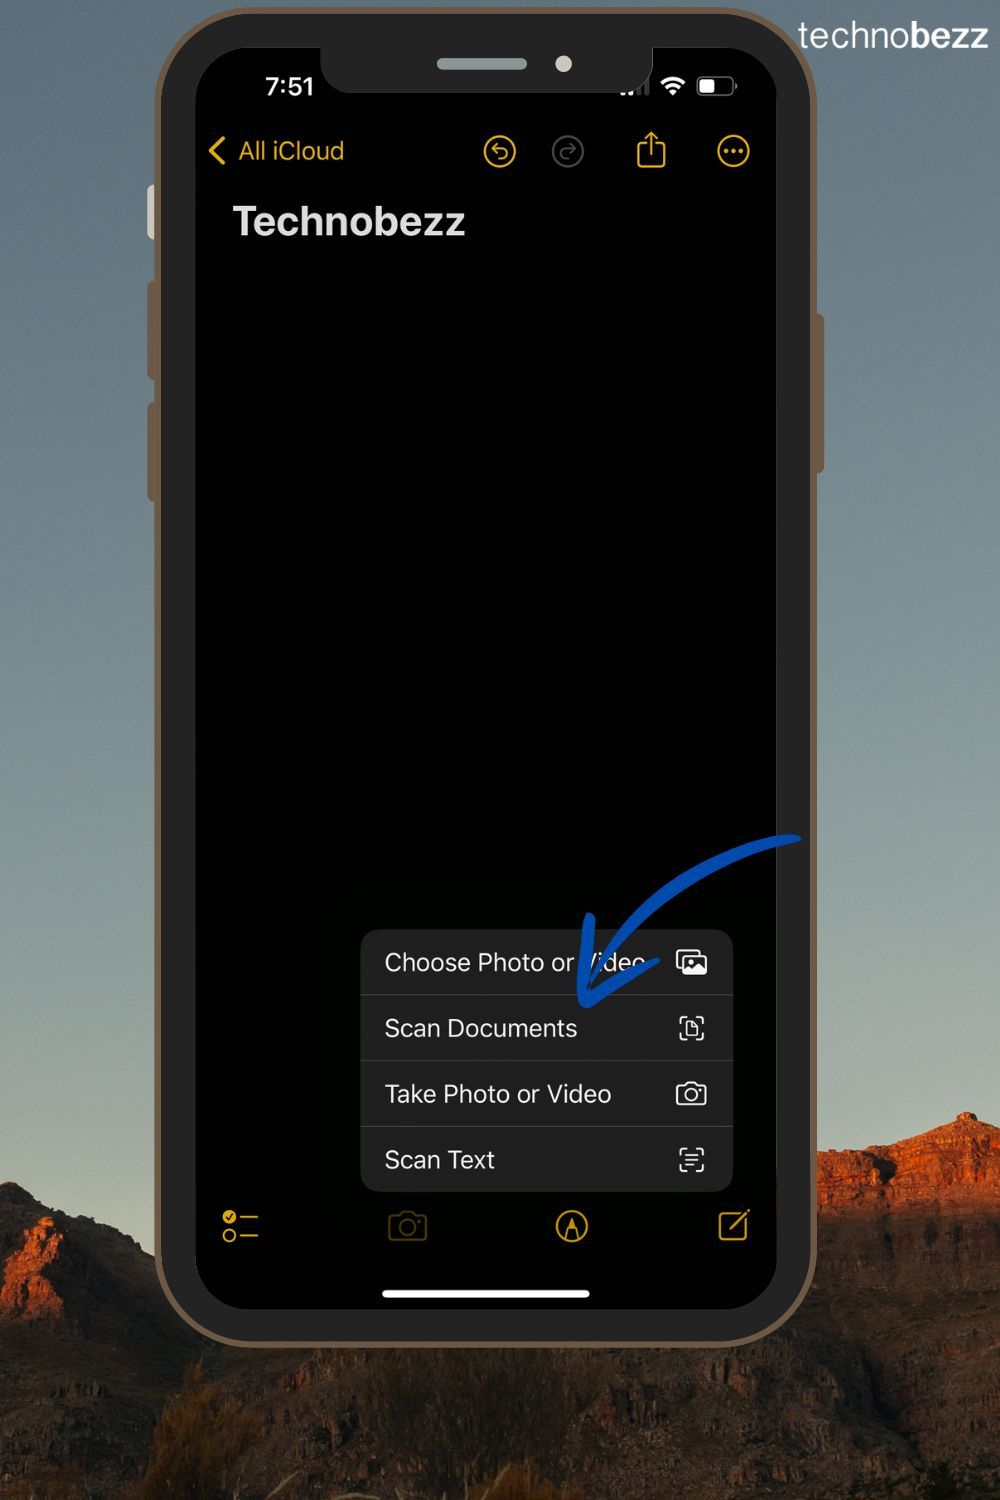
In the new note, tap the camera icon located above the keyboard. From the menu that appears, select "Scan Documents."
Note for iOS 18 users: If you're running iOS 18, the camera button has been replaced with an Attachments button (paperclip icon). Tap this instead, then select "Scan Documents."
Scanning Your Document
Position Your Document
Place your document on a flat surface in a well-lit area. Hold your iPhone over the document so it's entirely within the viewfinder.
Capture the Scan
If your iPhone is set to Auto mode, it will automatically detect the document and capture it. A yellow rectangular layer will appear over the document showing what will be captured. If not in Auto mode, manually capture by pressing the shutter button or one of the volume buttons.
Adjust the Scan
After capturing, you can adjust the corners to fit the document perfectly. Once satisfied, tap "Keep Scan." You can continue scanning additional pages by repeating this process.
Edit Your Document
Once all pages are scanned, you can edit them. Use the crop tool to adjust the scan, or switch between color modes like greyscale or black and white. You can also rotate pages as needed.
Save or Share Your Scan
When finished editing, tap "Save." Your scanned document will be saved within the note. To share it, tap on the scanned document, then tap the share icon (square with an arrow pointing up) to send via email, messages, or save to your Files app or cloud storage.
Additional Features
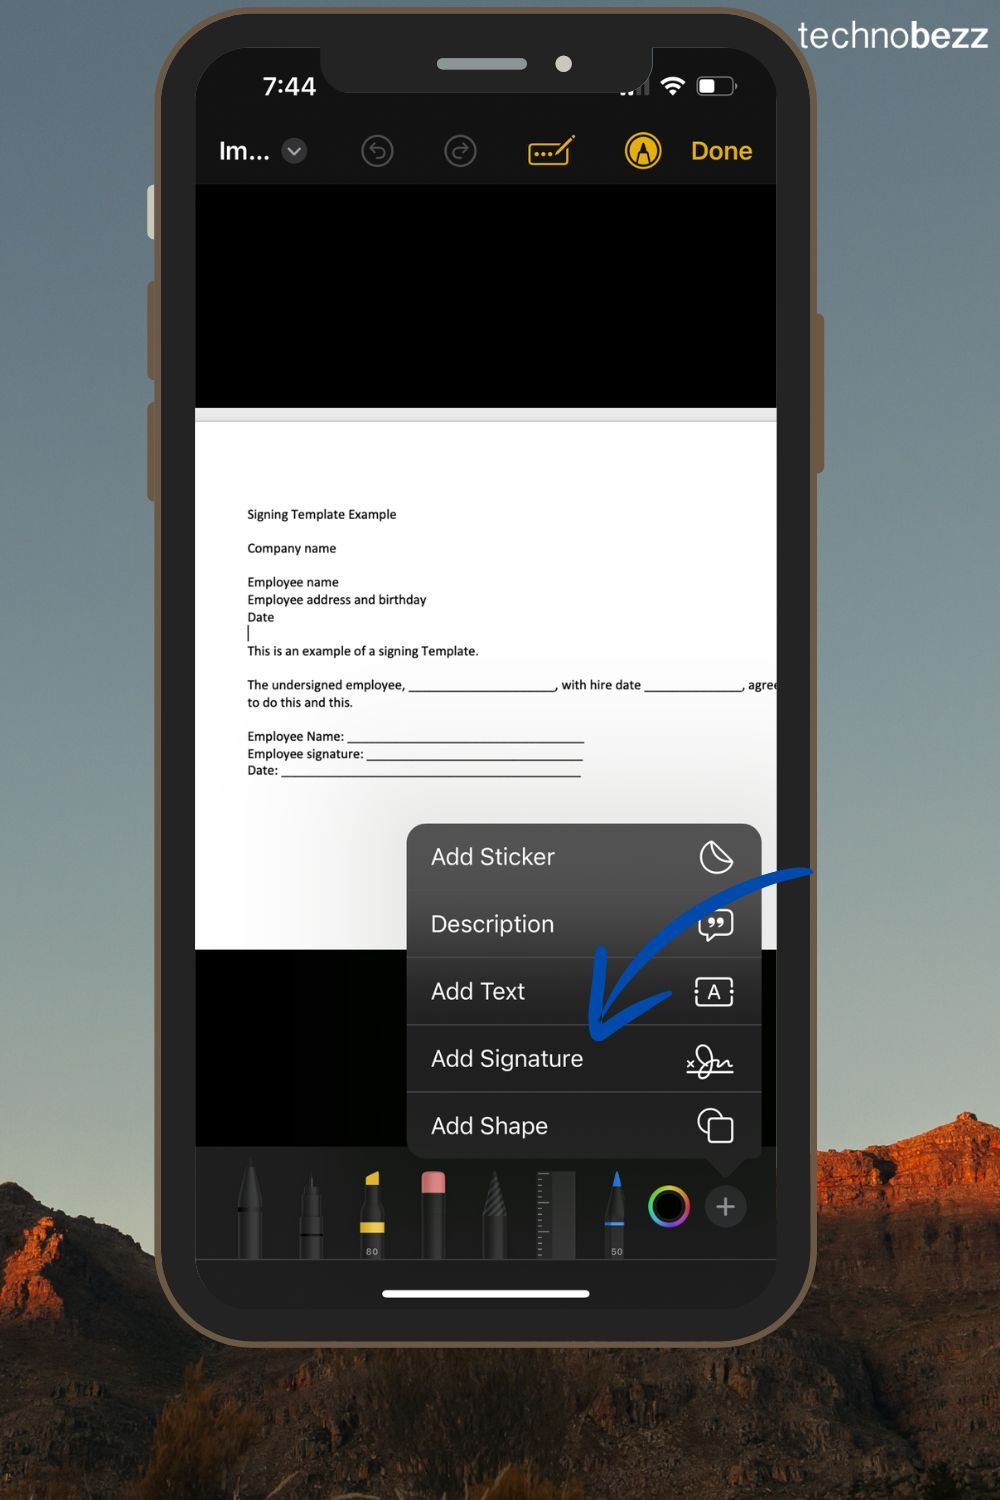
Sign Documents
You can sign documents directly within the Notes app. Open the scanned document, tap the share icon, and select "Markup." Tap the plus icon and choose "Signature" to add a saved signature or create a new one. Place it on the document, adjust its size, and tap "Done."
Convert to PDF
By default, scanned documents are saved as images within Notes, but you can easily convert them to PDF. Tap the scanned document, then tap the share icon, and select "Create PDF."
For iOS 17 and older, you can also tap "Print" and then use the share button at the top to share your PDF-converted document.
Using your iPhone's built-in scanner is a convenient way to manage documents without downloading additional apps. This feature is especially useful for quickly digitizing paperwork, signing documents, and keeping everything organized digitally.