Erasing everything on your iPhone 13 is a powerful way to fix deep software issues or prepare it for a new owner. It completely wipes the device back to its original factory state, removing all your apps, photos, accounts, and settings. I'd always start by making sure you have a recent backup, so you don't lose anything important in the process.
Back Up Your iPhone 13 First
Before you touch the erase button, secure your data. The easiest way is through iCloud. Go to Settings > [Your Name] > iCloud > iCloud Backup and tap Back Up Now. Make sure you're connected to Wi-Fi and have enough iCloud storage.
For a more complete backup, use your computer. Connect your iPhone 13 to a Mac or PC with a Lightning cable. On a Mac with macOS Catalina or later, open Finder, select your device, and click Back Up Now. On a Windows PC or older Mac, you'll use iTunes for the same process.
Sign Out of Your Apple ID
This step is non-negotiable if you're giving the phone away. If you don't sign out, Activation Lock will remain active, making the phone unusable for the next person. To do it, open Settings and tap your name at the top.
Scroll all the way down and tap Sign Out. You'll need to enter your Apple ID password and choose whether to keep a copy of your keychain and other data on the phone. For a full erase, you should turn everything off.
Factory Reset Directly from Settings
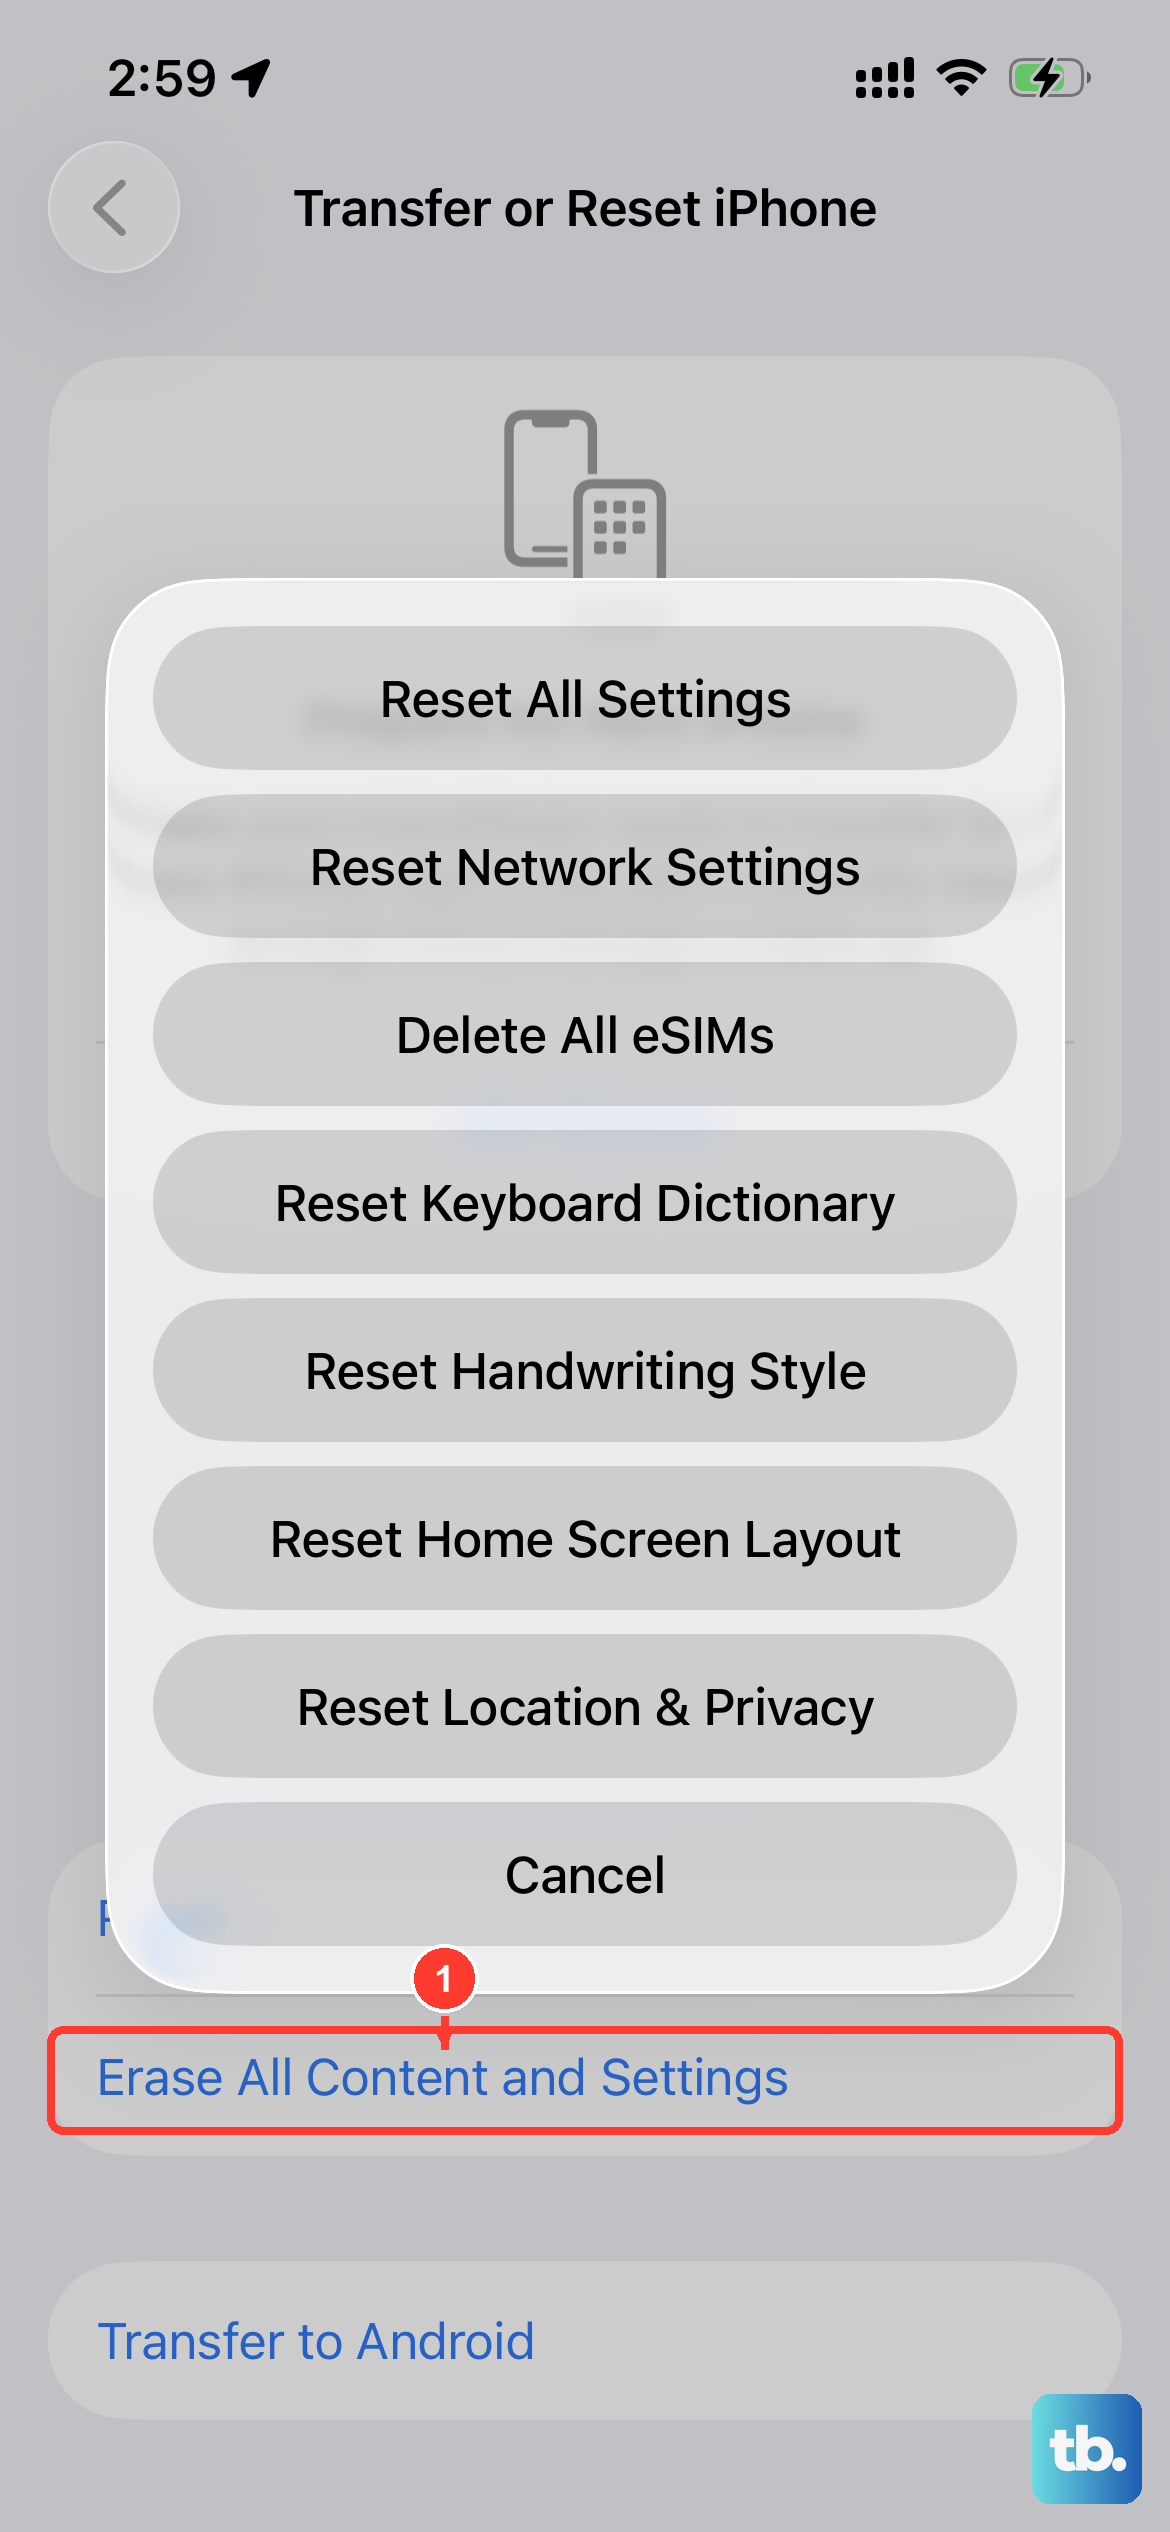
This is the standard method when your phone is working. Open Settings > General > Transfer or Reset iPhone. At the very top, tap Erase All Content and Settings.
Your iPhone 13 will ask for your passcode and then your Apple ID password to confirm. After you enter them, it will show a final warning screen listing what will be deleted. Tap through to confirm, and the phone will begin the erase process, which takes a few minutes.
Reset Using a Computer
If your iPhone 13 is unresponsive, locked, or stuck in a boot loop, use a computer. This method, often called a restore, downloads a fresh copy of iOS 18 and installs it, which also erases everything. Connect your phone to your computer with a Lightning cable.
Open Finder (on Mac) or iTunes (on Windows) and select your iPhone. Click Restore iPhone. If the computer doesn't recognize the device, you'll need to put it into Recovery Mode first.
For the iPhone 13, quickly press and release the Volume Up button, then quickly press and release the Volume Down button. Immediately press and hold the Side button. Keep holding it until you see the recovery mode screen (a cable pointing to a computer icon), then let go.
Try a Targeted Reset First
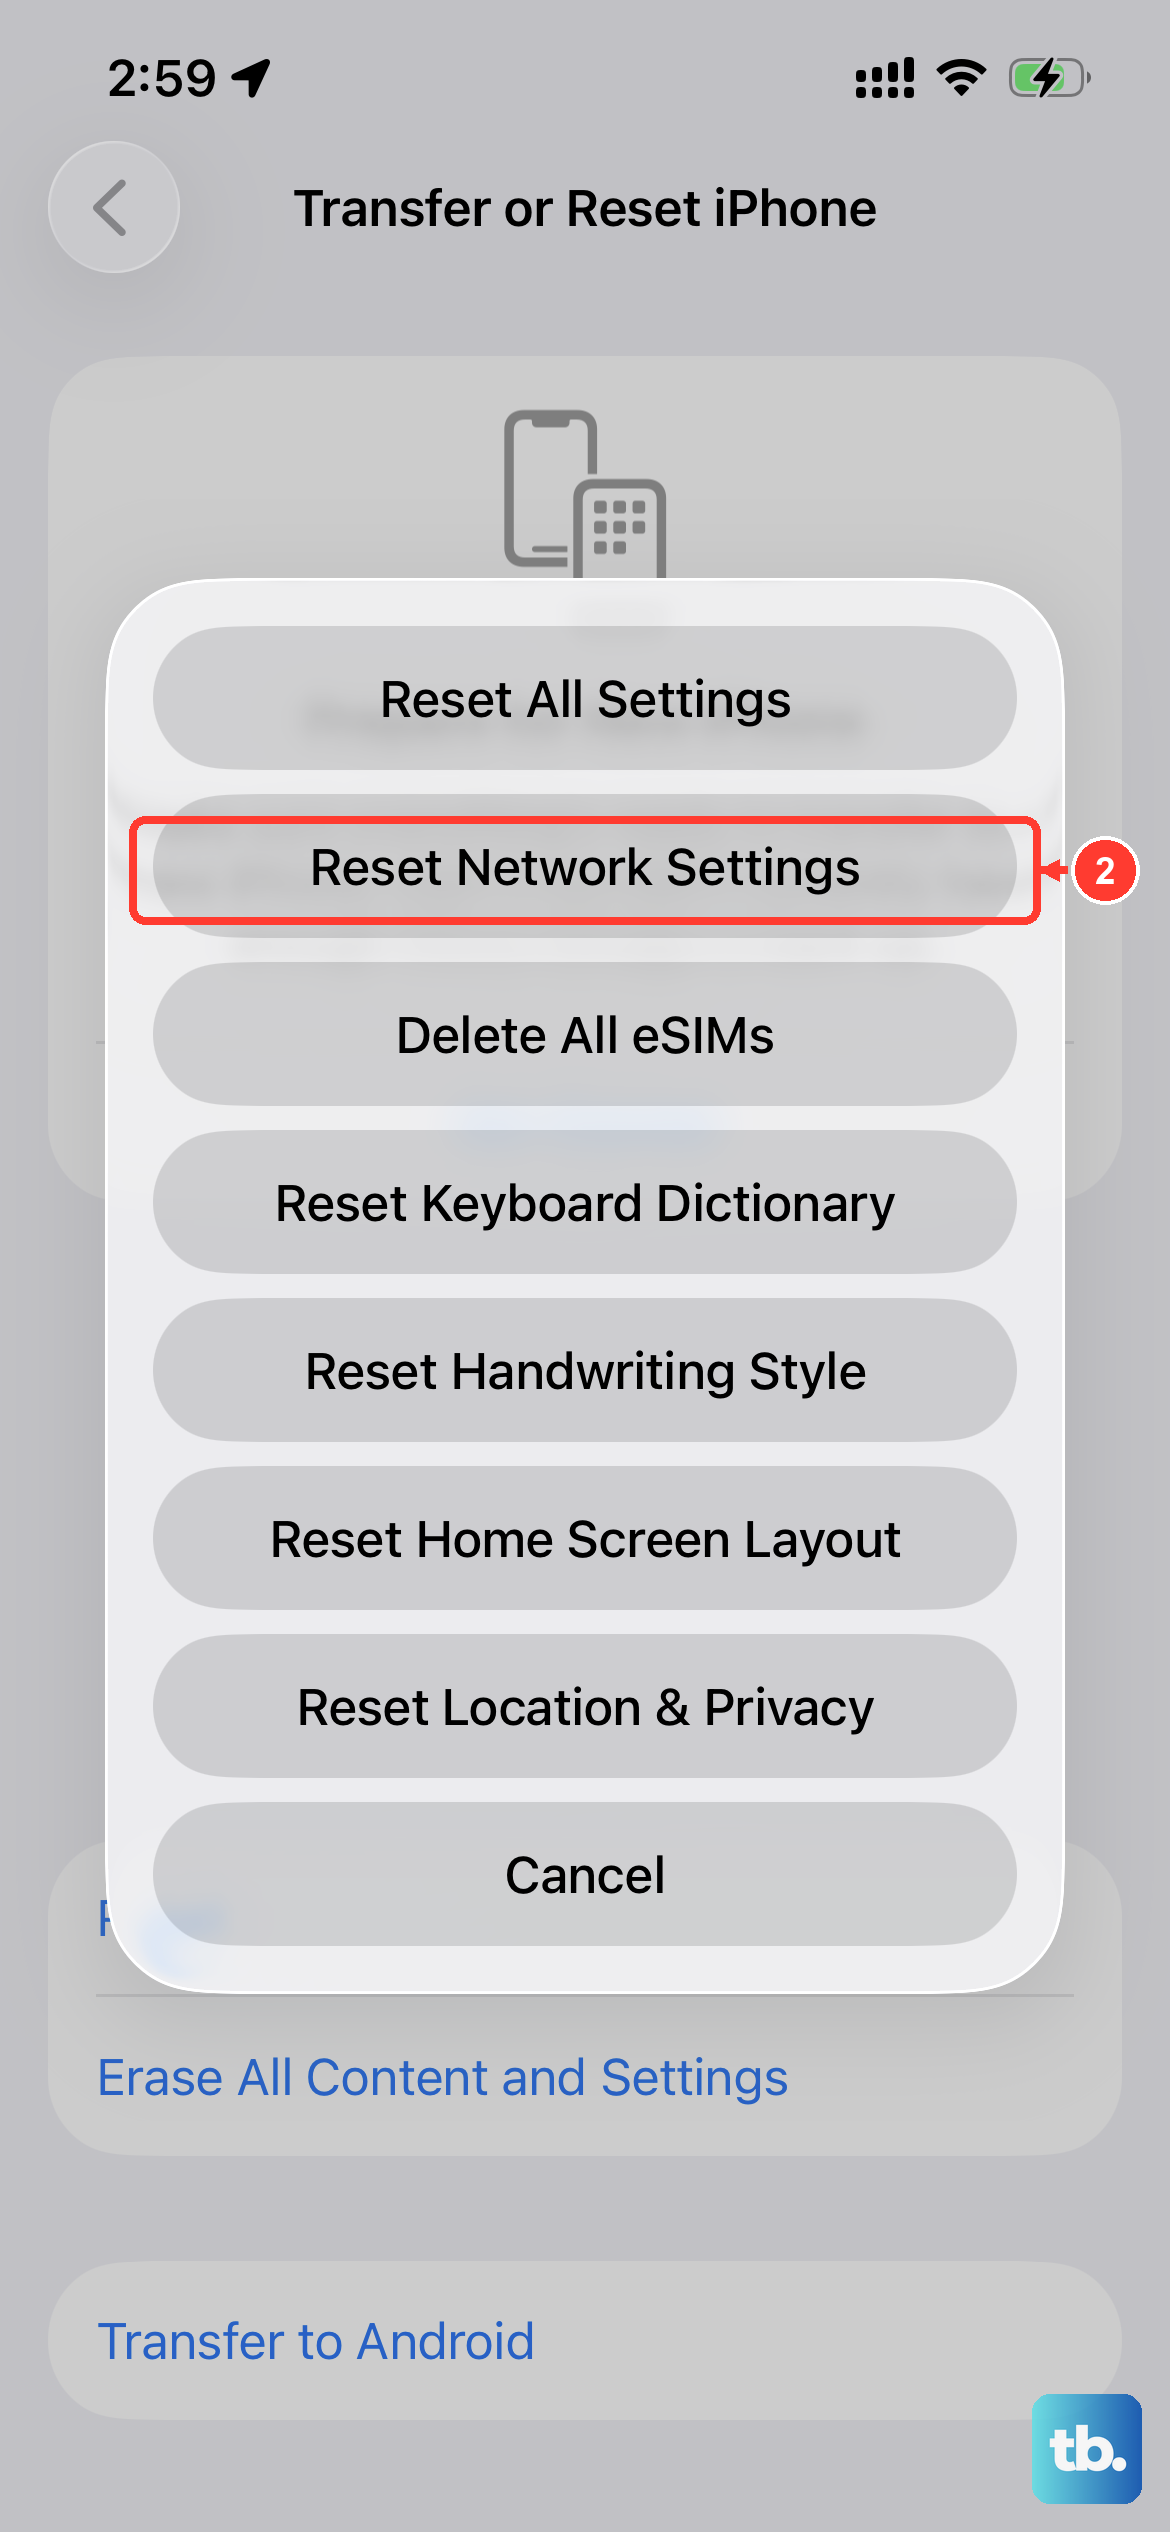
You might not need to erase everything. If you're dealing with Wi-Fi problems, Bluetooth glitches, or a laggy keyboard, a partial reset can help. Go to Settings > General > Transfer or Reset iPhone > Reset.
Here you'll find options like Reset Network Settings, Reset Keyboard Dictionary, and Reset Location & Privacy. These fix specific issues without touching your personal photos, messages, or apps.
Set Up Your Phone After Erasing
Once the erase is complete, your iPhone 13 will restart to the "Hello" screen, just like it was new. Follow the on-screen steps to choose your language and connect to Wi-Fi. When you get to the Apps & Data screen, you can set it up as new or restore from your backup.
Tap Restore from iCloud Backup, sign in with your Apple ID, and choose the most recent backup you created. Your phone will download your data, apps, and settings. This can take a while depending on your backup size and internet speed.


