
That "No SIM" message on your iPad Pro (M4) can stop you in your tracks, especially when you need cellular data on the go. It's a common hiccup that usually comes down to a few simple things you can check yourself.
Start With a Force Restart
This is the go-to first step for any weird iPadOS glitch, including SIM detection problems. It clears the device's memory without touching your data. Press and quickly release the Volume Up button, then quickly press and release the Volume Down button. Immediately after, press and hold the Power button until you see the Apple logo appear on the screen.
Let the iPad boot up completely and check if it now sees the SIM. I'd start with this one, as it resolves a lot of temporary software issues.
Check and Toggle Airplane Mode
Swipe down from the top-right corner of the screen to open Control Center. Tap the airplane icon to turn Airplane Mode on. Wait about ten seconds, then tap it again to turn it off.
This forces the iPad's cellular modem to completely reinitialize and reconnect to the network. It's a quick refresh that often kicks things back into gear.
Inspect and Clean the Physical SIM
If you're using a physical nano-SIM card, power off your iPad completely first. Locate the SIM tray on the frame, it will likely be on one of the sides. Use the SIM ejector tool (or a small, unwound paperclip) to gently pop the tray out.
Carefully remove the SIM card and look at the gold contacts. If you see any dust, lint, or slight discoloration, gently wipe them with a soft, dry, lint-free cloth. Blow any dust out of the SIM tray slot as well. Reinsert the SIM, making sure it's seated correctly in the tray, and push the tray back in until it clicks.
Verify the SIM is Enabled in Settings
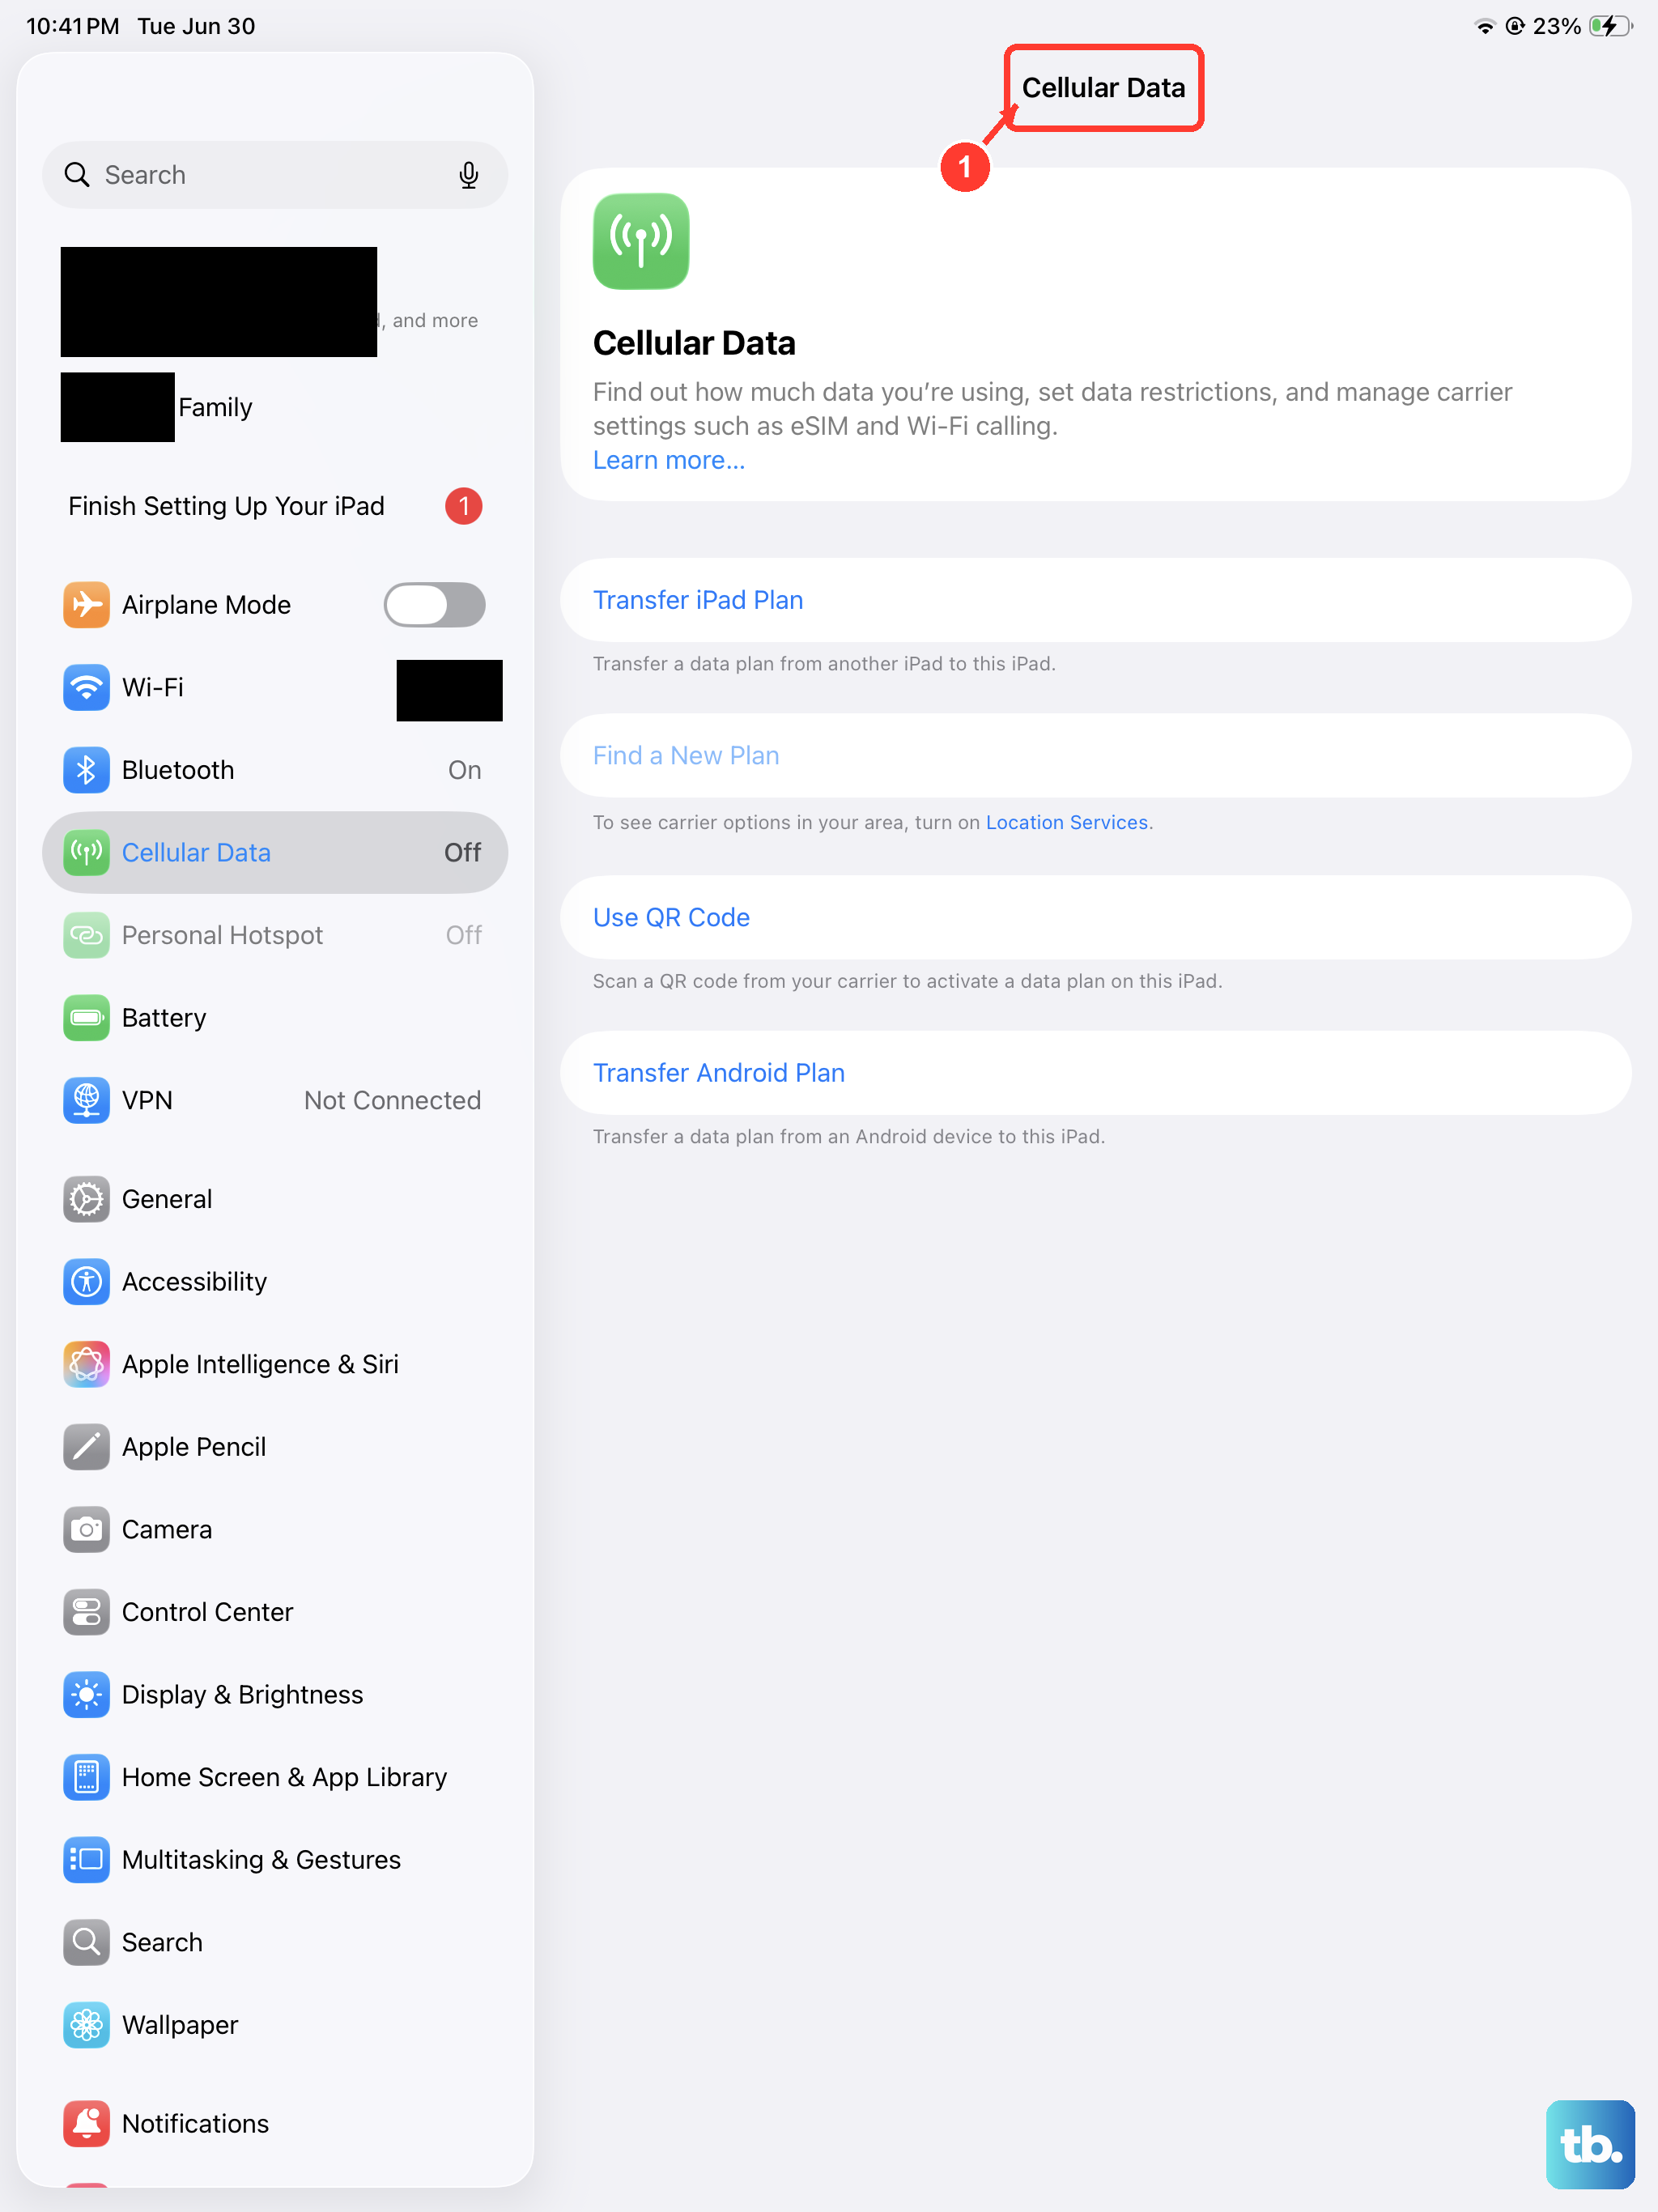
Sometimes the cellular line can get turned off in software. Open the Settings app and tap Cellular Data. Make sure the Cellular Data switch at the top is turned on.
If you have multiple lines (like an eSIM and a physical SIM), tap SIMs and ensure the line you want to use is turned on and set as the default for cellular data.
Update Your iPadOS Software
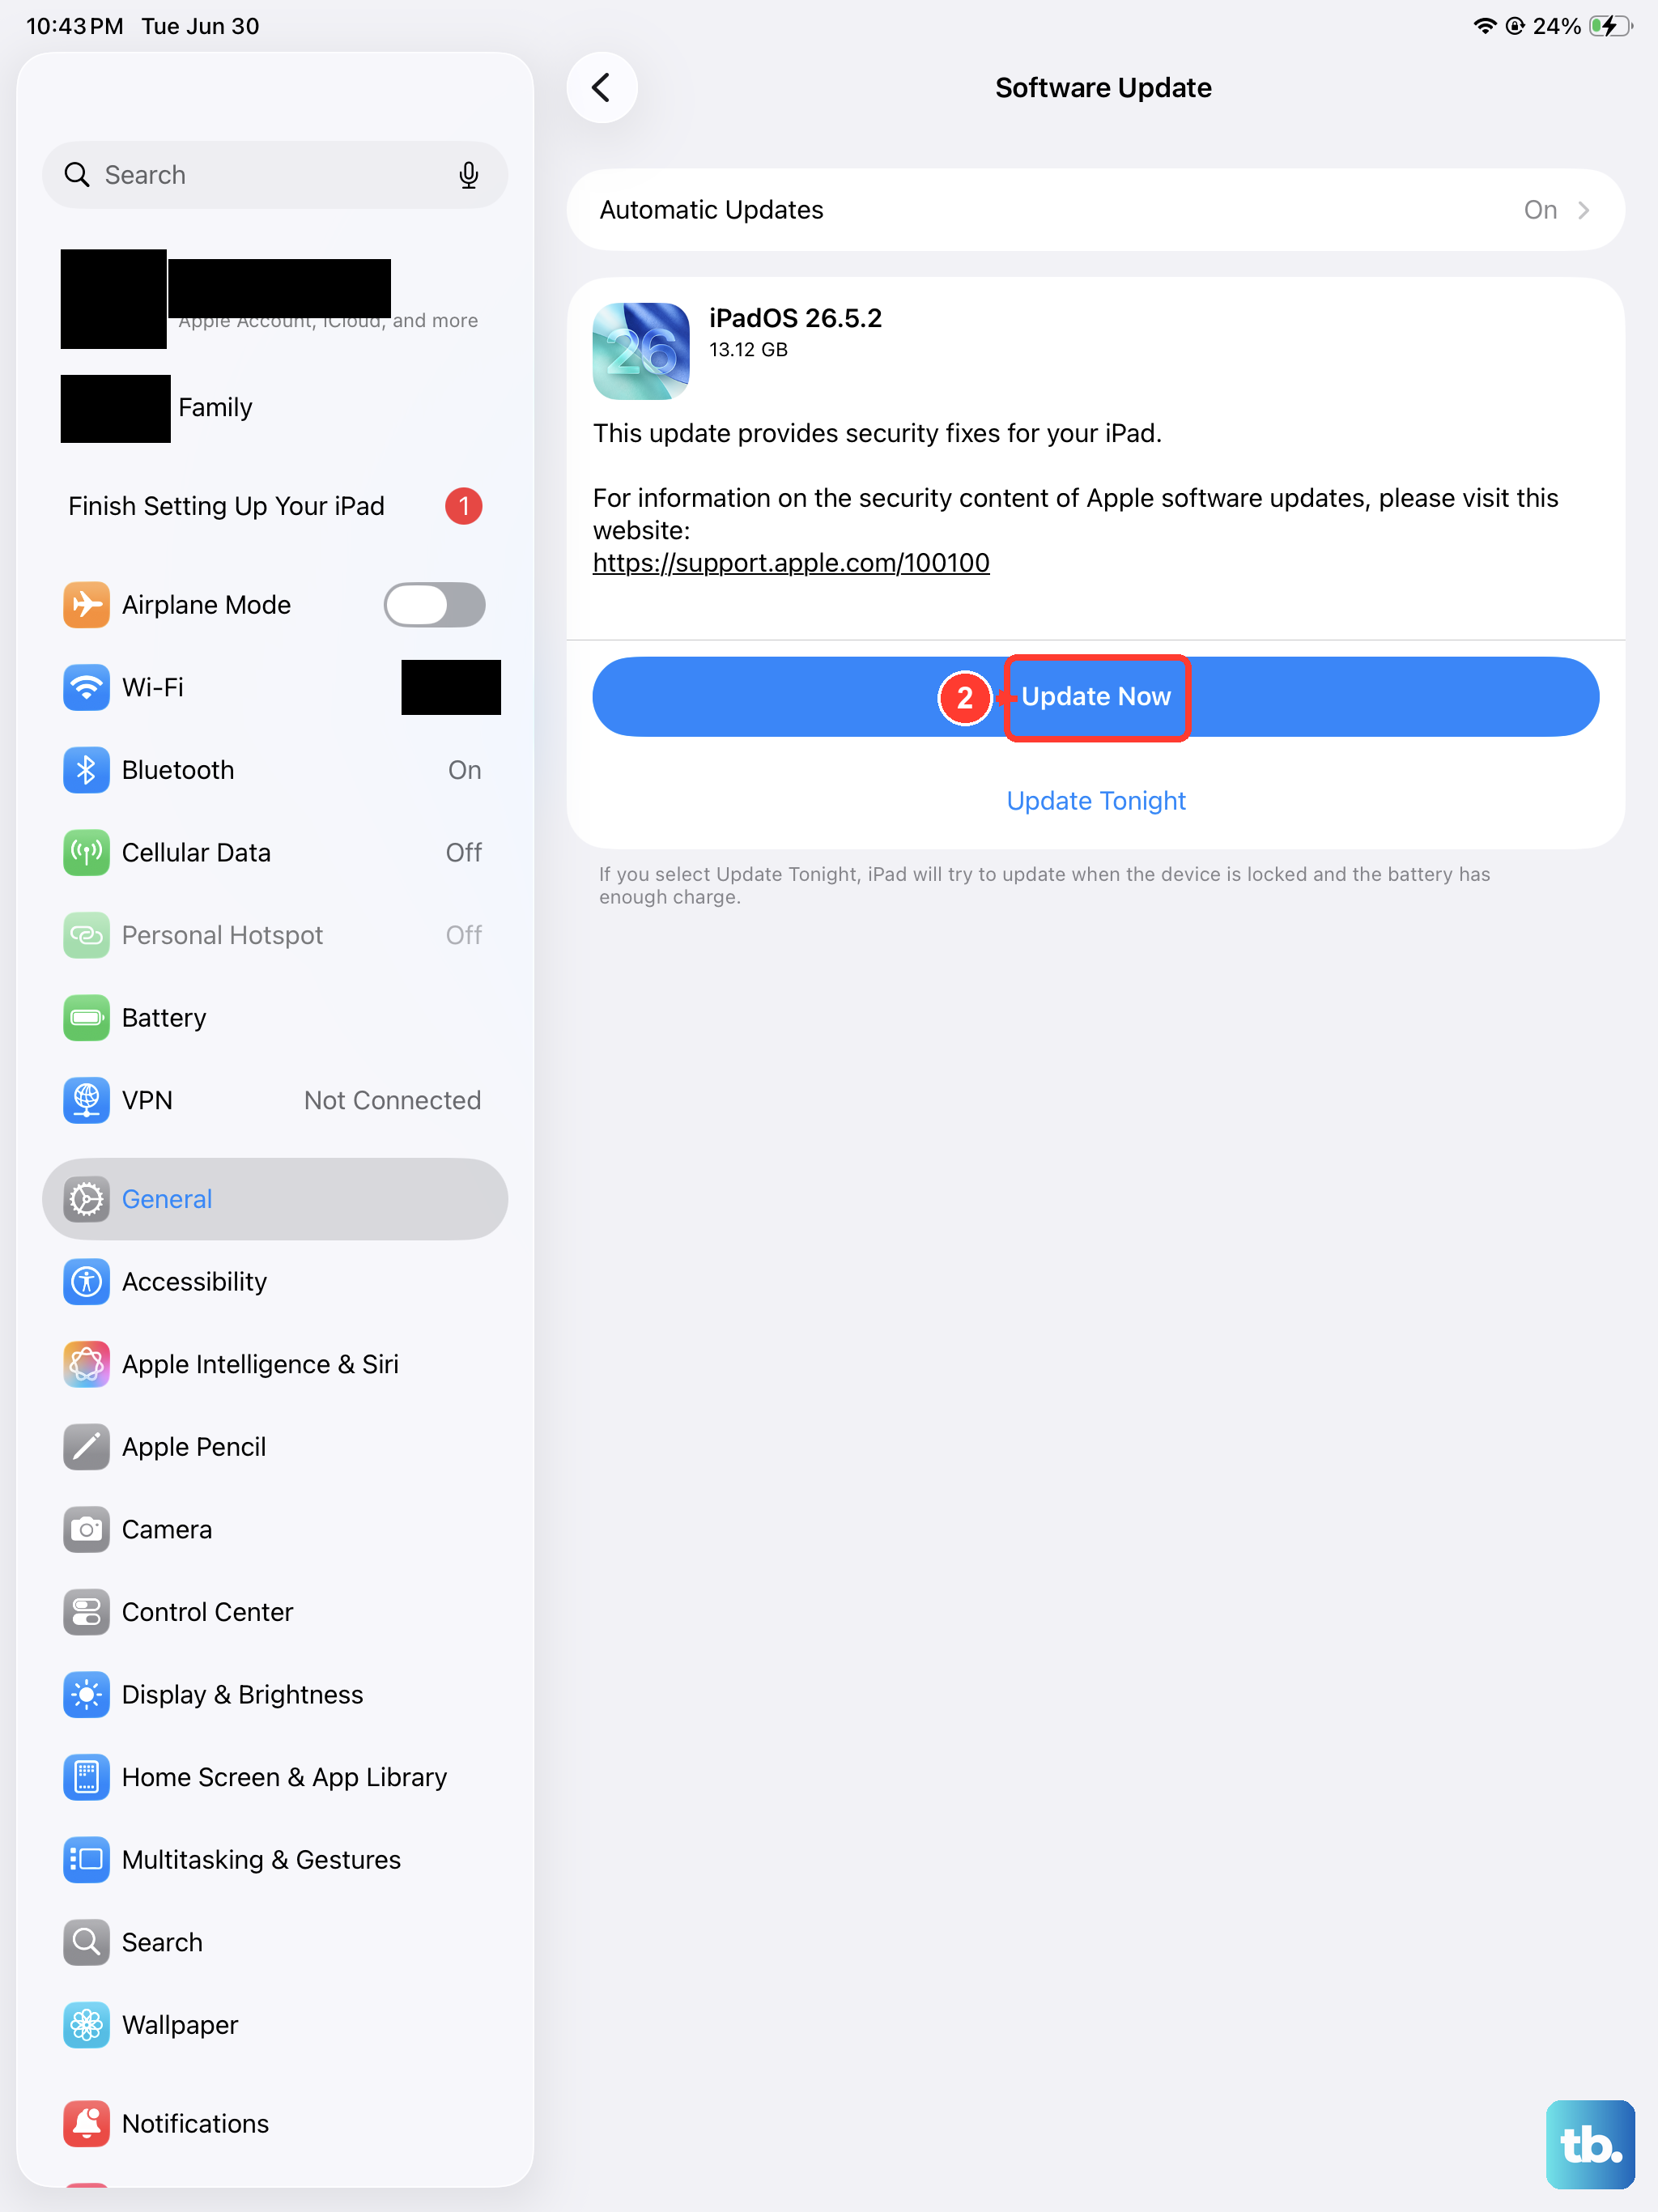
Bugs in the system software can sometimes cause the cellular modem to act up. Apple frequently releases updates that include fixes for connectivity issues. Go to Settings > General > Software Update.
If an update is available, install it. Make sure your iPad is connected to Wi-Fi and has sufficient battery, or plug it into a charger using an Apple-certified USB-C cable. A 30W or higher USB-C PD charger will speed this up.
Reset Your Network Settings
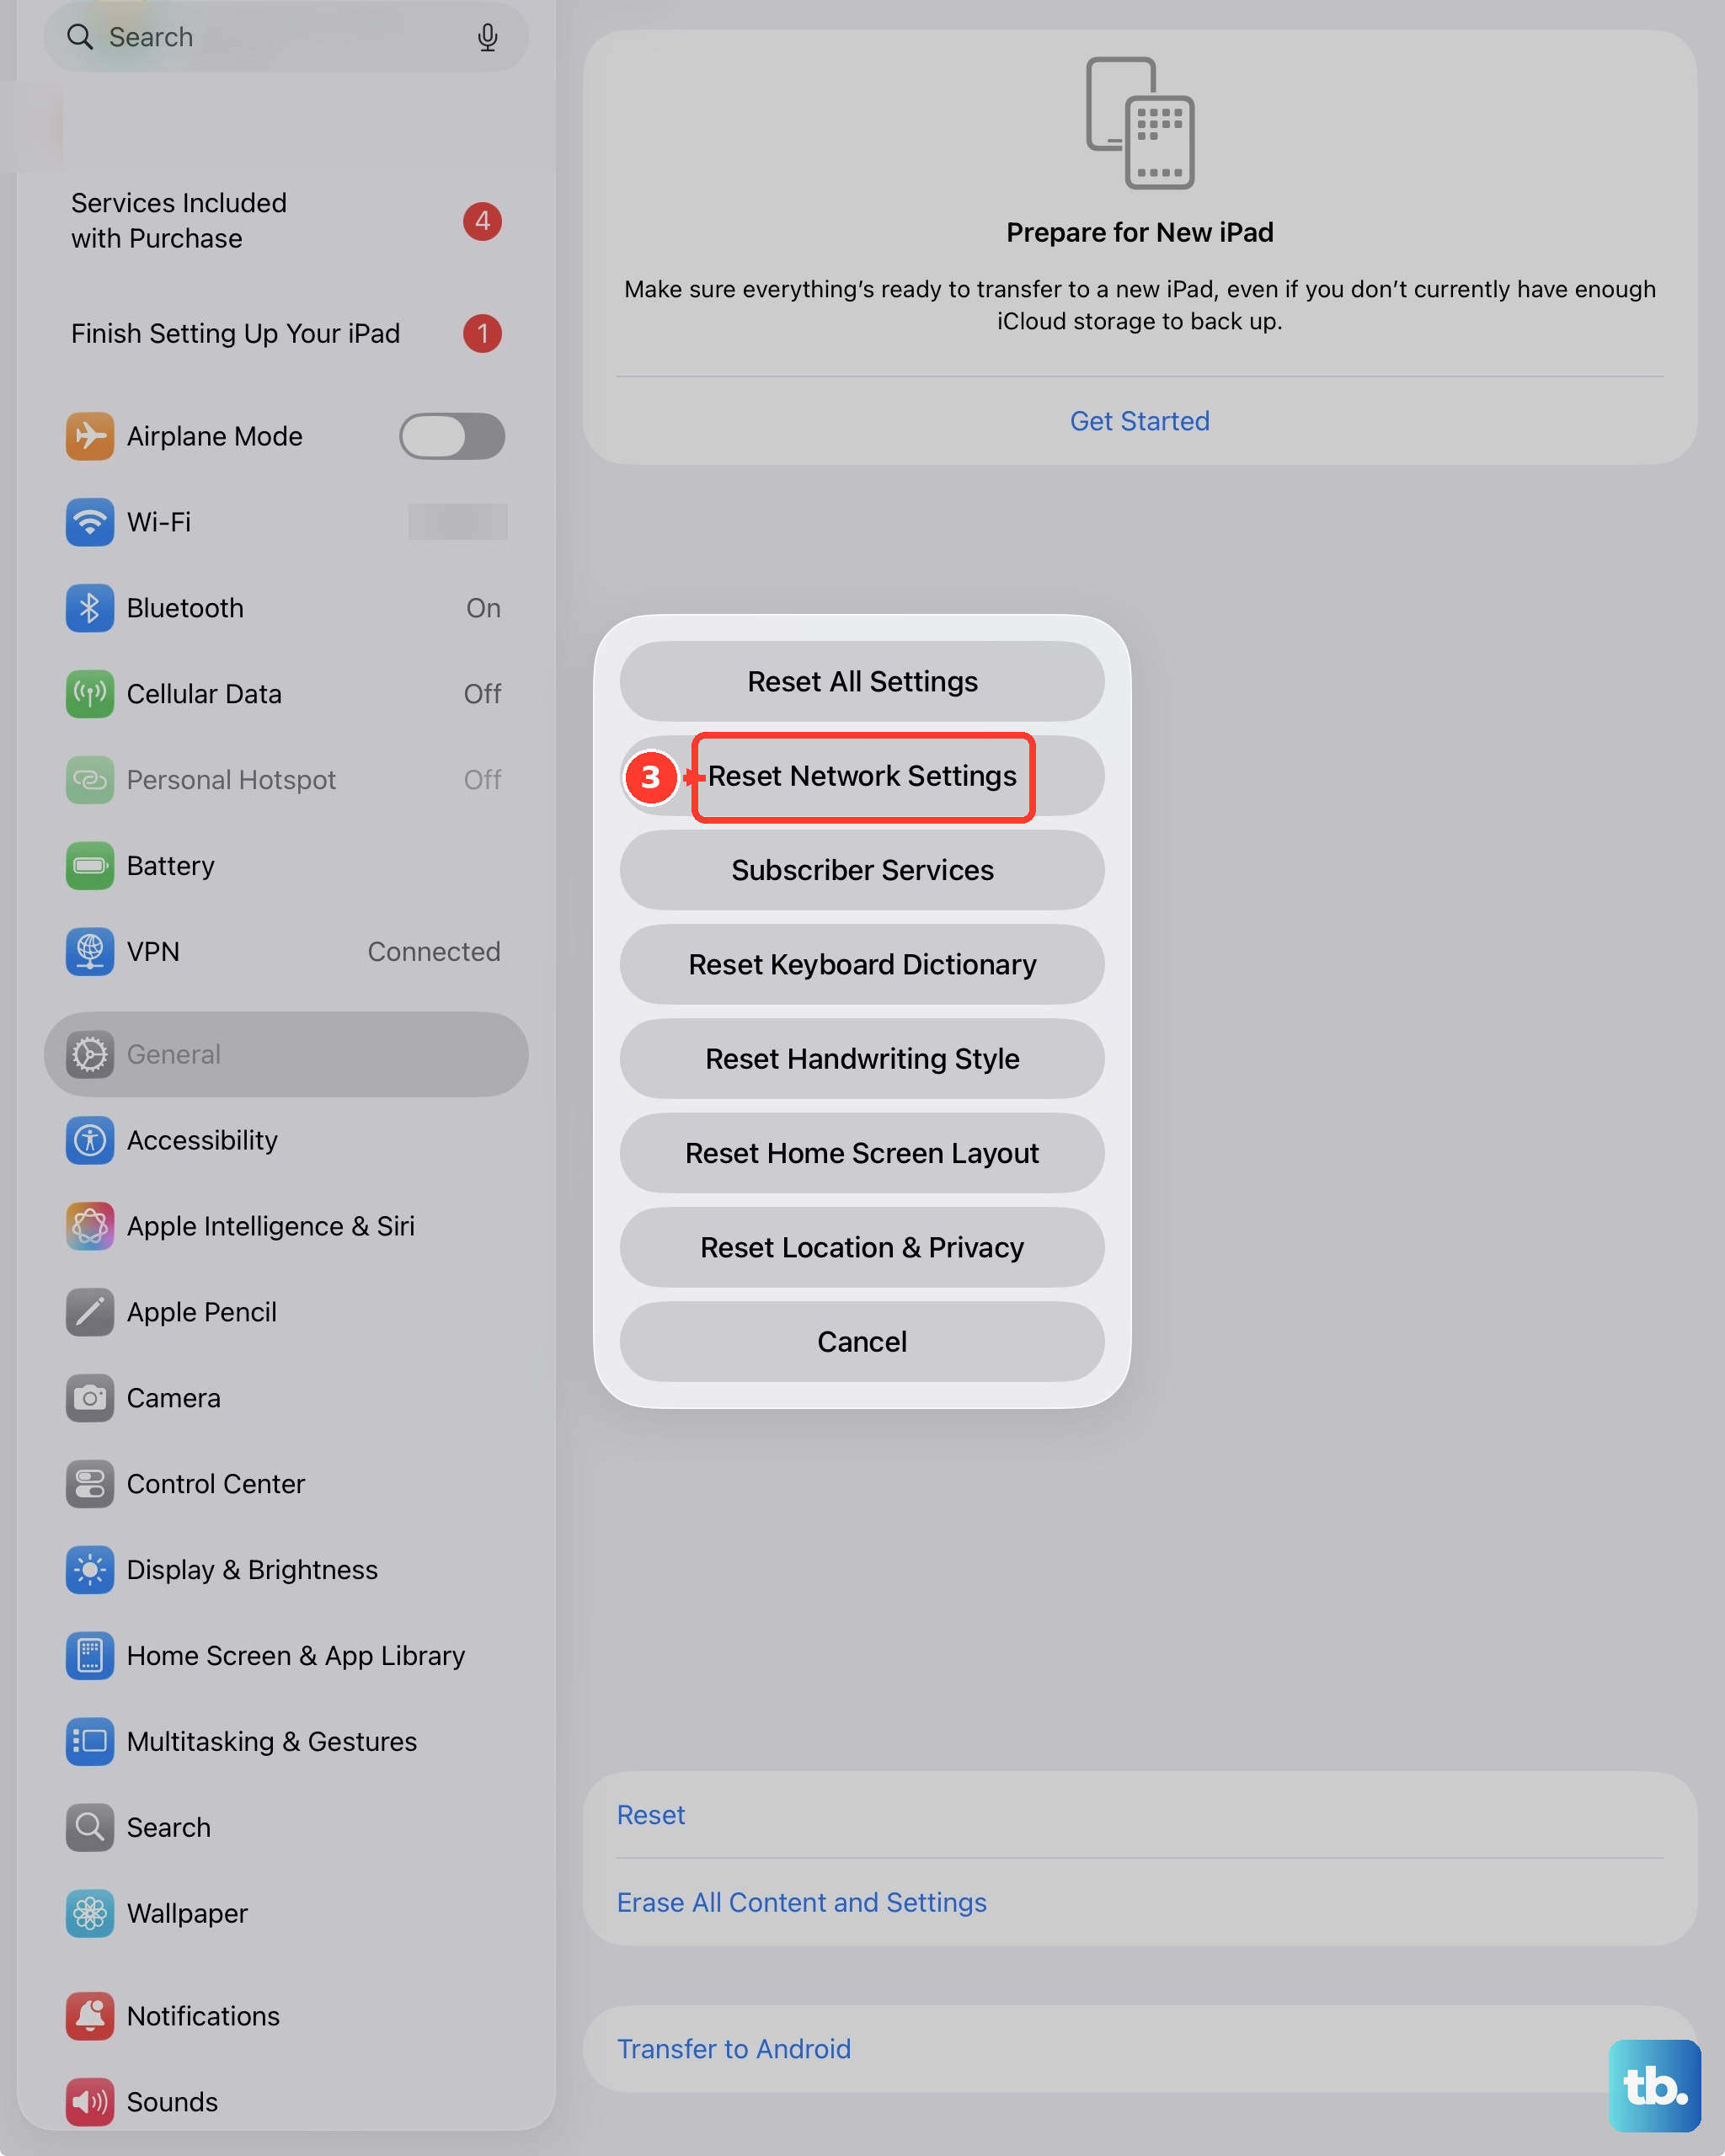
This clears all network-related configurations back to factory defaults. It will erase saved Wi-Fi passwords, Bluetooth pairings, and VPN settings, but it won't touch your personal data or apps.
To do this, go to Settings > General > Transfer or Reset iPad. Tap Reset and then choose Reset Network Settings. You'll need to enter your passcode to confirm. After the iPad restarts, you'll need to reconnect to Wi-Fi and re-pair Bluetooth devices.
Try Manual Network Selection
Your iPad usually picks the best network automatically, but sometimes telling it exactly which one to use can help. Go to Settings > Cellular Data > Network Selection.
Turn off the Automatic switch. Your iPad will search for available networks. After a moment, a list will appear. Select your carrier's network from the list. If it connects, you can try turning Automatic selection back on later.
Test the SIM in Another Device
This is the best way to figure out if the problem is with your iPad or the SIM card itself. If you have another cellular-enabled iPad or an unlocked iPhone, power it off, insert your SIM, and turn it back on.
If the other device also says "No SIM" or has no service, the issue is almost certainly with the SIM card. If the SIM works perfectly in the other device, then the problem is isolated to your iPad Pro.
Contact Your Carrier
If testing points to a SIM card issue, your carrier is your next stop. They can check if the line is active and provisioned correctly on their network. They can also perform a remote refresh of your connection.
If the SIM is old, damaged, or faulty, they can issue a replacement. They can also help you set up an eSIM if your iPad Pro (M4) model supports it, which is a great digital alternative to a physical card.
Check for eSIM Compatibility and Setup
If you're tired of physical SIM issues, switching to an eSIM is a solid option. First, confirm with your carrier that they support eSIM activation for tablets and that your specific data plan is eligible.
If it is, you can usually activate it right from your iPad. The carrier will provide a QR code to scan. Go to Settings > Cellular Data > Add Cellular Plan and use your iPad's camera to scan the code. The digital plan will download and activate, bypassing the physical SIM tray entirely.