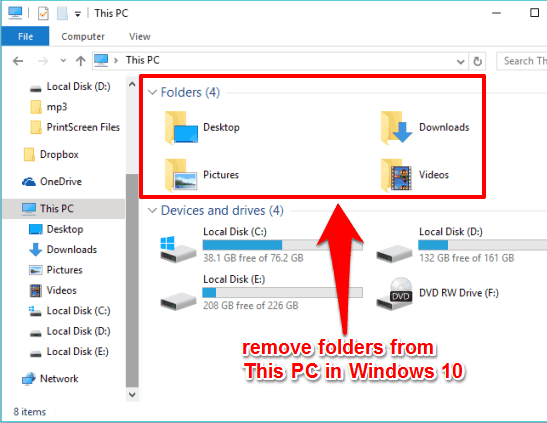
Windows 10's "This PC" view shows more than just your hard drives and devices. It also displays folders like Desktop, Documents, Downloads, Music, Pictures, and Videos. If you prefer the cleaner look of Windows 7's Computer view, you can hide these folders from This PC.
You have two main options: a simple click method that doesn't require any system changes, or a registry edit for permanent removal.
Quick Method: Collapse the Folders Section
If you don't have administrator access or prefer not to edit system settings, you can simply collapse the folders section.
Look for the arrow next to the word "Folders" at the top of the This PC view and click it. This will collapse the entire folders section, giving you a cleaner interface similar to older Windows versions. Windows remembers this setting, so it will stay collapsed each time you open File Explorer.
Permanent Method: Remove Folders via Registry
For a permanent solution that completely removes the folders from This PC, you'll need to edit the Windows Registry. This method requires administrator privileges.
Step 1: Check Your Windows Version
First, determine whether you're using 32-bit or 64-bit Windows 10:
- 1.Go to Settings > System > About
- 2.Look for "System type" under Device specifications
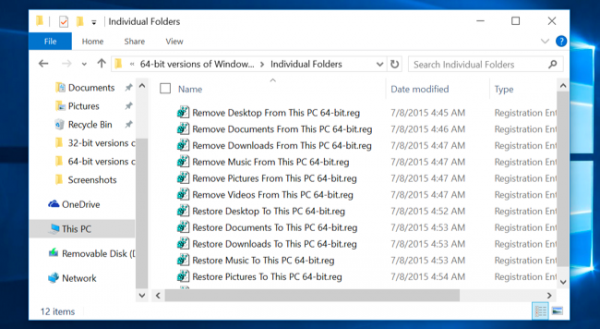
Step 2: Use Registry Files
The easiest way to remove the folders is by using pre-made registry files. You can find these files online that will automatically remove all the folders from This PC when you run them.
For 64-bit systems, use "Remove All Folders From This PC 64-bit.reg"
For 32-bit systems, use "Remove All Folders From This PC 32-bit.reg"
After running the appropriate file, restart File Explorer for the changes to take effect:
- 1.Press Ctrl + Shift + Esc to open Task Manager
- 2.Go to the Processes tab
- 3.Find "Windows Explorer"
- 4.Click "Restart"
The folders will immediately disappear from your This PC view.
Manual Registry Method
If you prefer to edit the registry manually, navigate to:
HKEY_LOCAL_MACHINE\SOFTWARE\Microsoft\Windows\CurrentVersion\Explorer\MyComputer\NameSpaceIn this section, you'll find several keys with complex names that correspond to the different folders. You can delete the specific keys for the folders you want to remove.
Restoring Folders
If you change your mind later, you can restore the folders using similar registry files designed for restoration. Look for "Restore All User Folders to This PC" files that will add the folders back to your This PC view.
Both methods are effective for cleaning up your This PC interface. The collapse method is safer and reversible, while the registry method provides a permanent solution for those who prefer the classic Computer view without the extra folders.