Connect your MacBook to an external monitor with a compatible HDMI, USB-C or Thunderbolt cable, then open System Settings > Displays to choose how you want to use it. If the ports do not match, use a compatible video adapter between the MacBook and the monitor. Power on the monitor and select the input that matches your cable.
Your connection depends on your MacBook’s ports and the monitor’s video inputs. For more than one external screen, check your exact MacBook’s display support before choosing a dock or extra cables.
The short version
- Match the ports: Connect directly through HDMI, USB-C video or Thunderbolt, or use a compatible adapter.
- Check the cable: A charging-only USB-C cable cannot carry the monitor’s picture.
- Choose your desktop: Open System Settings > Displays and use Use as to extend or mirror your screen.
- Respect the limit: A native Thunderbolt dock does not increase your MacBook’s supported number of external displays.
- Recover a missing screen: Check the monitor input and accessory approval, then hold Option in Displays and click Detect Displays.
| Connection | What you need | Main catch |
|---|---|---|
| Direct HDMI | MacBook HDMI port and HDMI cable | Resolution and refresh rate depend on the Mac and cable |
| Direct USB-C video | USB-C video input and video-capable cable | A charging-only cable will not work |
| Direct Thunderbolt | Compatible Thunderbolt display and cable | Matching connector shapes do not prove compatibility |
| USB-C to HDMI | Compatible HDMI adapter or cable | The MacBook port must support video output |
| USB-C to DisplayPort | Compatible DisplayPort adapter or cable | The MacBook port must support video output |
| USB-C to VGA | Compatible VGA adapter and monitor cable | Confirm Mac and display compatibility |
| USB-C to DVI | Compatible DVI adapter or cable | Confirm Mac and display compatibility |
| USB-C to Mini DisplayPort | Compatible Mini DisplayPort adapter or cable | Confirm Mac and display compatibility |
| Native Thunderbolt dock | Powered compatible dock and display cables | The MacBook’s native display limit still applies |
| DisplayLink dock or adapter | DisplayLink hardware and DisplayLink Manager | Requires software and screen-recording permission |
Check your MacBook and monitor ports
Start by checking which video connections your MacBook and monitor support. Open the Apple menu > System Settings, then choose Help > [your Mac’s name] Specifications in the menu bar. Read Display Support or Video Support for the supported display count and configurations.
If your MacBook Pro has built-in HDMI, you can connect directly to a monitor’s HDMI input. For a USB-C monitor, both the MacBook port and the cable must support video output. A compatible Thunderbolt display needs the appropriate Thunderbolt connection, even though its connector can look like USB-C.
When the ports differ, choose an adapter for the monitor’s actual input. Video-capable USB-C and Thunderbolt ports can connect to HDMI or DisplayPort through compatible adapters or cables. For VGA, DVI or Mini DisplayPort monitors, confirm that the adapter manufacturer supports your Mac and display before buying it.
Connect the cable and select the monitor input
Power on the monitor, then connect the cable between its video input and the matching MacBook port. With HDMI, connect the MacBook’s HDMI output to the monitor’s HDMI input. With USB-C video or Thunderbolt, use the appropriate video-capable cable and compatible ports.
If you need an adapter, plug the compatible USB-C-to-HDMI or USB-C-to-DisplayPort adapter into the MacBook, then connect the monitor’s cable to the adapter. For VGA, connect a compatible USB-C-to-VGA adapter and then the monitor’s VGA cable. For DVI or Mini DisplayPort, connect the manufacturer-confirmed adapter or cable between the MacBook and the matching monitor input.
For a Thunderbolt dock, supply power to the dock and connect its host Thunderbolt connection to the MacBook. Connect the monitor to one of the dock’s supported video or downstream Thunderbolt outputs.
Use the monitor’s physical buttons or joystick to select the input matching the cable. On supported BenQ monitors, open Input Settings and choose the connected input. Other monitors use their own input labels and button layouts.
Your Mac normally detects a compatible connected display automatically. Unlock the MacBook and click Allow when an accessory approval prompt appears. Choosing Don’t Allow can leave charging working while blocking the display or dock connection.
Choose an extended or mirrored desktop
Open the Apple menu > System Settings > Displays and select the external monitor. Open Use as and choose the extension, mirroring or main-display option you want.
Extend the desktop when you want separate space for windows on each screen, or choose mirroring to show the same picture on both. Select the external monitor as your main display if that is where you want the main desktop.
For an extended desktop, click Arrange and drag the display representations to match their physical positions on your desk. Put the external display on the same side of the MacBook in the arrangement as it is in front of you. You can also relocate the menu bar here.
Adjust picture size and monitor sound
Select the external monitor in Displays, then choose a resolution that gives you a comfortable picture size. Turn on Show all resolutions to see additional choices. Your available options depend on the monitor, MacBook, cable and adapter.
To view resolutions as a list, open Advanced and enable Show resolutions as list. Use Refresh rate to choose a supported rate when the control is available for your display.
If changing the resolution makes the screen go black, wait 15 seconds or press Esc to revert. If the picture does not return, start your Mac in safe mode, open Displays, select Default, then restart normally.
For an HDMI monitor or TV with audio support, open the Apple menu > System Settings > Sound > Output. Select the HDMI device to send sound through that connection.
Use the monitor with the MacBook lid closed
Connect the monitor, supply power to the MacBook, and connect an external keyboard and mouse or trackpad. A compatible display’s USB-C power delivery can supply that power. Close the lid and use the external controls to operate the MacBook.
Approve the display and input accessories while the lid is open before switching to closed-lid use. Your model’s display limits still apply, so check its specifications before connecting another monitor.
Base-M3 MacBooks have a specific two-display setup that requires the lid to stay closed. On an M3 MacBook Air with macOS 14.3 or later, or a base-M3 MacBook Pro with macOS 14.6 or later, connect external controls and power, connect the first display, close the lid, then connect the second. Opening the lid disables the second external display.
Add another external monitor
Check your MacBook’s display limit before connecting a second monitor. M4 and M5 MacBook Air models support two external displays alongside the built-in screen, and closing the lid does not increase that limit. MacBook Pro support varies by chip and supported resolution combinations.
A compatible native Thunderbolt dock provides monitor connections within your MacBook’s native display-count limit. Dual video outputs also do not guarantee two separate desktops. For example, the HDMI and DisplayPort outputs on the MST-based CalDigit SOHO Dock show the same image on macOS.
DisplayLink is a separate USB graphics option that requires actual DisplayLink hardware. Download the version of DisplayLink Manager matching your macOS version, install it, and connect the DisplayLink dock or adapter when its setup wizard asks. A generic USB hub does not provide DisplayLink graphics.
At Allow Screen Recording, click Open System Settings, enable the required permission, and restart DisplayLink Manager. The current permission path is System Settings > Privacy & Security > Screen & System Audio Recording. Complete Allow Background Activity when the wizard requests it, then click Finish.
Protected streaming content can fail through DisplayLink. If that happens, disconnect the DisplayLink device and connect the display through native HDMI, DisplayPort, USB-C video or Thunderbolt before trying the content again.
Get a missing or black monitor working
Check that the monitor is powered on and its selected input matches the cable. Confirm that your USB-C cable supports video, then unlock the MacBook and approve the connected accessory. For a MacBook Neo, use the USB-C port on the left when facing the MacBook’s left side, because that is its video-capable port.
Next, open the Apple menu > System Settings > Displays. Hold Option so Night Shift changes to Detect Displays, then click Detect Displays.
Disconnect the display from both the MacBook and power, then reconnect it. If a hub or dock is involved, try a direct connection to the MacBook.
Try closing the MacBook briefly and reopening it, then restart your MacBook or Mac if the display remains missing. Recheck the supported display count when one monitor works but another does not. An extra dock port cannot make an unsupported native display configuration work.
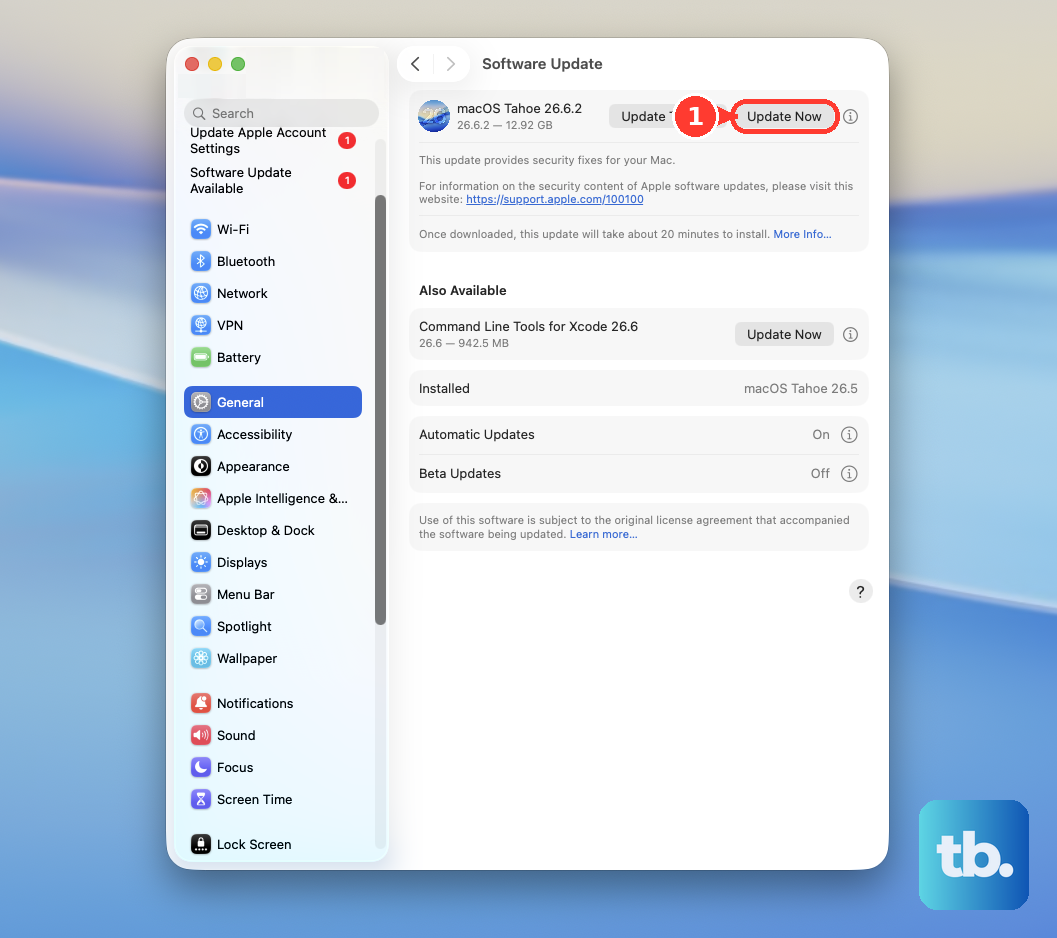
For a remaining compatibility problem, open the Apple menu > System Settings > General > Software Update. Install the available compatible macOS update and follow the installation and restart controls. Reconnect the monitor afterward and return to Displays to configure it.
Frequently Asked Questions
Can you connect a MacBook to a monitor wirelessly?
Yes, you can use AirPlay with an Apple TV or a compatible AirPlay television or receiver attached to the display. Connect both devices to the same Wi-Fi network, open Control Center > Screen Mirroring, and select the receiver. Enter the displayed four-digit code when requested, then choose mirroring or extension through the onscreen controls.
Can an iPad work as a second MacBook screen?
Yes, you can use Sidecar with a compatible Mac and iPad signed into the same Apple Account using two-factor authentication. For wireless use, keep the devices nearby, enable Wi-Fi, Bluetooth and Handoff, and turn off internet sharing. Select the iPad in System Settings > Displays > Add Display. You can also connect a compatible USB cable, approve Trust on the iPad when requested, and start Sidecar through the same controls.
Can you connect an Apple Thunderbolt Display to a newer MacBook?
You can connect an older Thunderbolt 1 or 2 display to a compatible Thunderbolt-equipped Mac using Apple’s Thunderbolt 3 (USB-C) to Thunderbolt 2 Adapter. That adapter does not support Mini DisplayPort displays. Check your display’s actual connection type before choosing it.
Can you use an iMac as a monitor for a current MacBook?
You can use a compatible iMac through AirPlay to Mac, Duet or Luna Display; Target Display Mode does not support current MacBooks and current macOS. For AirPlay to Mac, enable AirPlay Receiver on the receiving Mac under System Settings > General > AirDrop & Continuity, then select it from the MacBook’s Screen Mirroring control. Duet requires its software on both computers and an appropriate subscription, while Luna requires its hardware and apps. Check compatibility with your devices and macOS version before choosing either product.
How can you make DisplayLink monitors work before login?
Install the optional Login screen extension offered through DisplayLink Manager to make DisplayLink screens available at the login screen before the app loads. If FileVault is turned on, DisplayLink screens still do not show the login screen when the Mac starts up. You can also enable Launch automatically after logging-in to start the app after you sign in. Both features require compatible DisplayLink hardware and software.