Your laptop is plugged in and online, but the moment you unplug the Ethernet cable the internet disappears, and when you open the network settings the Wi-Fi switch is nowhere to be found. The taskbar shows only a wired connection icon, and the usual Wi-Fi flyout either lists no networks or is missing entirely. This is a frustrating but very common Windows problem, and in most cases the wireless adapter has simply been turned off, disabled, or knocked out by a driver issue rather than physically failing.
The fixes below work on both Windows 10 and Windows 11, and they are ordered from the quickest, safest checks to the more involved repairs. Start at the top and only move down the list if the Wi-Fi option is still missing. The few places where Windows 10 and Windows 11 use different menu paths are called out as you go.
Start With Airplane Mode and the Wi-Fi Switch
Before anything more technical, rule out the simplest cause. Airplane mode can turn off wireless communications, including Wi-Fi, cellular, Bluetooth, and NFC, but it remembers your previous Wi-Fi and Bluetooth settings and can leave those enabled. It is surprisingly easy to toggle by accident with a keyboard shortcut or a stray click.
Select the Network, Sound, or Battery icons on the right side of the taskbar and make sure Wi-Fi is turned on.
Confirm Airplane mode is off: select the Network, volume, or battery icon on the taskbar and select Airplane mode to toggle it off.
Alternatively, go to Network & internet settings > Airplane mode and set the toggle to Off.
If Airplane mode was the culprit, the Wi-Fi switch and your list of networks should reappear immediately. If the option is still missing, move on to the built-in troubleshooter.
Let the Network and Internet Troubleshooter Do the Work
Windows includes an automated tool that disables and re-enables the network adapter and attempts other common repairs on its own. This is often enough to bring a missing Wi-Fi adapter back without you touching any deeper settings.
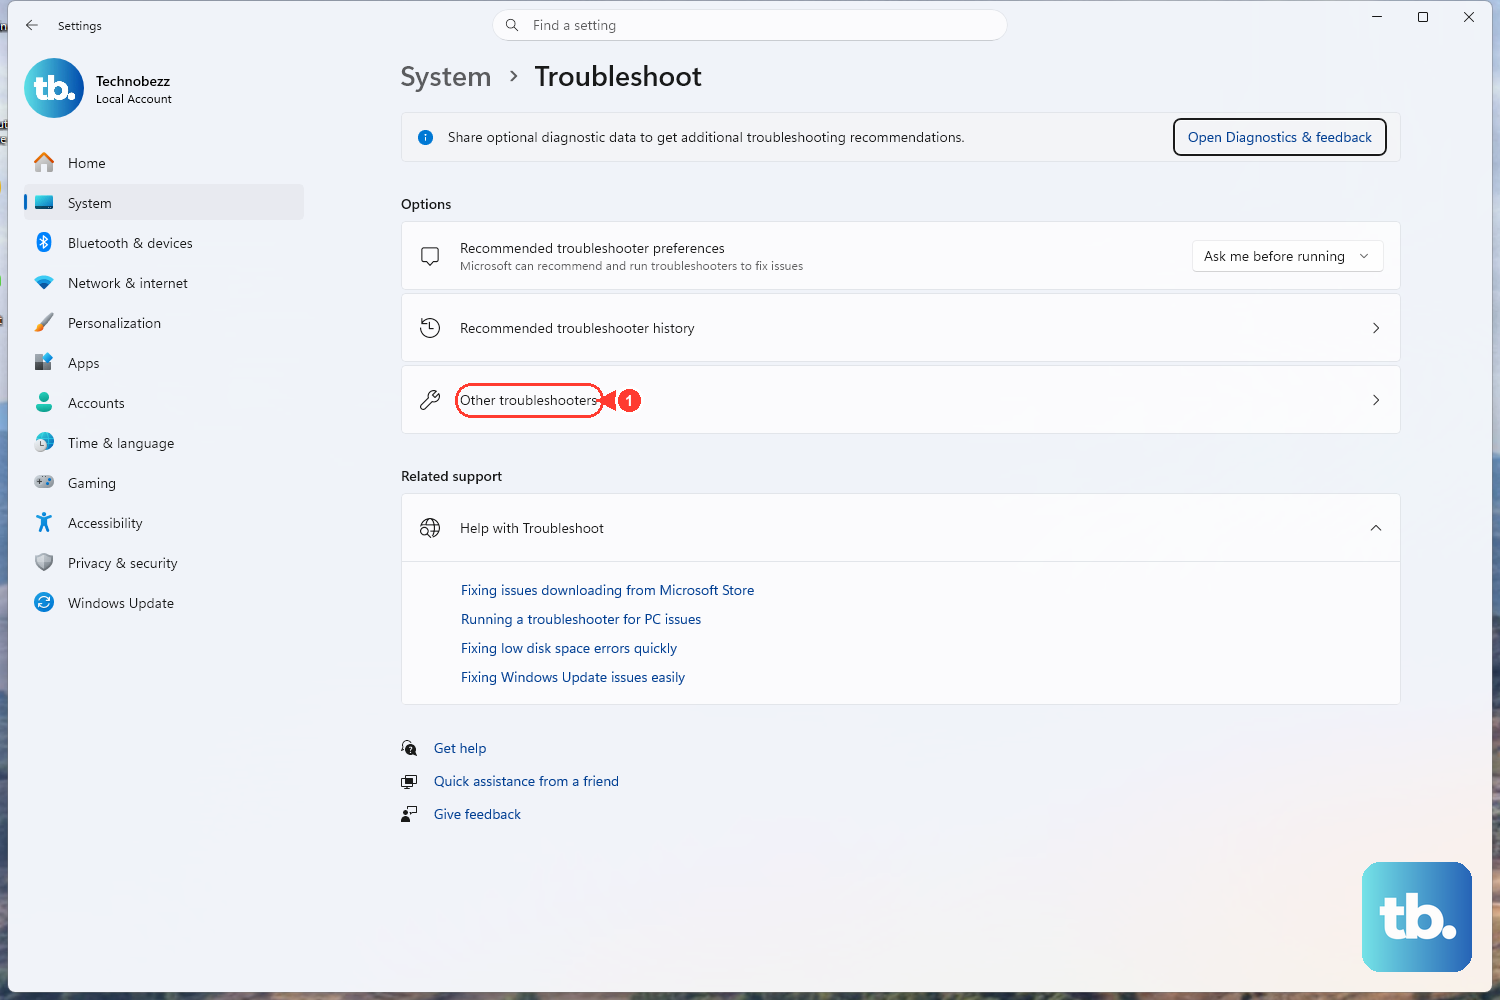
On Windows 11, run the automated Network and Internet troubleshooter in the Get Help app. On Windows 10, select Start > Settings > Network and Internet > Status, then scroll down and select Network troubleshooter.
Follow the prompts and let the tool run to completion. Because it cycles the adapter off and on automatically, the Wi-Fi option may return as soon as the troubleshooter finishes.
Check Device Manager for the Wireless Adapter
If the troubleshooter cannot fix it, the next question is whether Windows still recognizes your wireless hardware at all. Device Manager will tell you, and it also lets you re-enable an adapter that has been switched off.
Select Search on the taskbar, enter Device Manager, and select it.
Select the arrow next to Network adapters to expand the list and confirm a wireless adapter is listed.
If the adapter appears greyed out or marked as disabled, right-click it and select Enable device.
If you need to reset it, right-click the adapter, select Disable device, confirm Yes in the warning box, then right-click it again and select Enable device.
Restart the PC by selecting Start > Power > Restart.
If you can see a wireless adapter in the list, re-enabling it and restarting often restores the Wi-Fi option. If no wireless adapter appears anywhere under Network adapters, the driver may be missing. Download the correct driver from your PC or adapter maker's site; the Device Manager steps below require the adapter to be listed.
Update the Network Adapter Driver
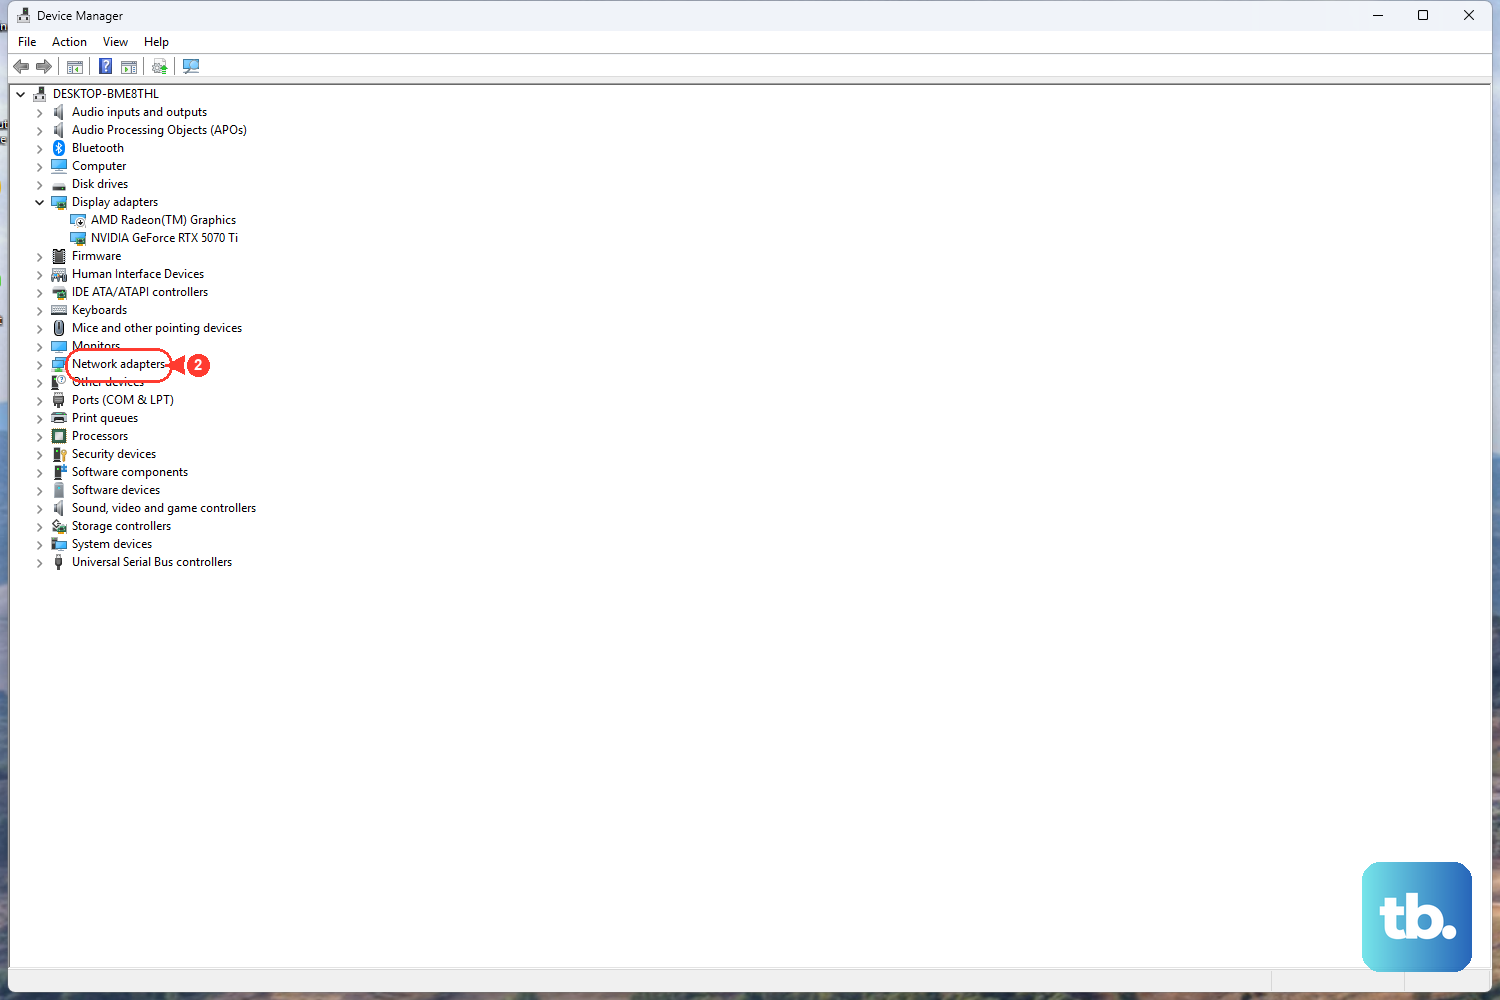
A corrupted or outdated driver can make the wireless adapter disappear from the interface even when the hardware is fine. Updating the driver gives Windows a fresh, working version to use.
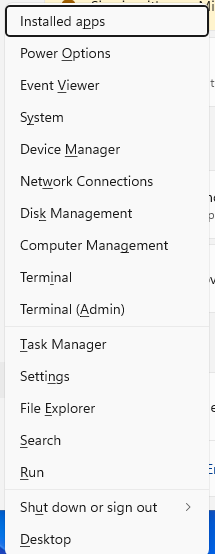
Right-click the Start menu and select Device Manager.
Select the arrow next to Network adapters to expand the category, right-click your wireless adapter, and select Update driver.
In the Update Drivers window, select Search automatically for updated driver software.
Let Windows search for and install any available update, then select Close.
If Windows does not find anything and you already have the correct driver downloaded from your PC or adapter maker's site, you can install it manually instead. Choose Browse my computer for drivers, browse to the folder that holds the driver, select OK, then Next to install it.
Reinstall the Adapter by Uninstalling It
When an update does not help, removing the adapter and letting Windows put it back is the next move. This clears out a broken installation so the system can reinstall the adapter and its driver cleanly after a restart.
Before you start, it is wise to download backup drivers from your PC manufacturer's website and save them locally, in case the automatic reinstallation does not succeed. Note one important exception: on Surface Pro X devices, do not uninstall the driver this way, because the only way to restore it afterward is a full system reset. Skip this step on that hardware.
In Device Manager, expand Network adapters and locate your adapter.
Press and hold (or right-click) it, then select Uninstall device.
Check the Attempt to remove the driver for this device check box, then select Uninstall.
Select Start > Power > Restart.
Windows attempts to reinstall the driver automatically after the restart. If it does not reinstall, use the manufacturer's driver you downloaded earlier. If the wireless adapter and the Wi-Fi option are back, you are done; if not, the connection plumbing itself may need a reset.
Reset the Network Stack From an Elevated Command Prompt
Sometimes the adapter is present but the underlying network configuration is corrupted. Resetting the TCP/IP stack, the Winsock catalog, and the DNS cache rebuilds those components. You must be signed in as an administrator for these commands to run.
To open an elevated Command Prompt, type cmd on the Start screen, right-click Command Prompt in the results, and select Run as administrator. At the prompt, run these one at a time, pressing Enter after each:
- 1.
netsh winsock reset - 2.
netsh int ip reset - 3.
ipconfig /release - 4.
ipconfig /renew - 5.
ipconfig /flushdns
The command ipconfig /release releases the current IP address configuration, ipconfig /renew renews the DHCP configuration for all adapters, and ipconfig /flushdns clears the DNS resolver cache. The Winsock and TCP/IP resets rebuild the rest of the stack.
You can also run the TCP/IP reset with a log file, which some Windows versions require for the manual command to complete. Use netsh int ip reset c:\resetlog.txt to write the actions to a log at C:\resetlog.txt, or netsh int ip reset resetlog.txt if you do not want to specify a directory path for the log. Restart the computer after running these commands so the changes take effect.
Try Different DNS Servers
This step is optional and aimed at cases where the Wi-Fi option is back but the connection is unreliable once you reconnect. Switching to manual DNS servers can help when name resolution is the weak link.
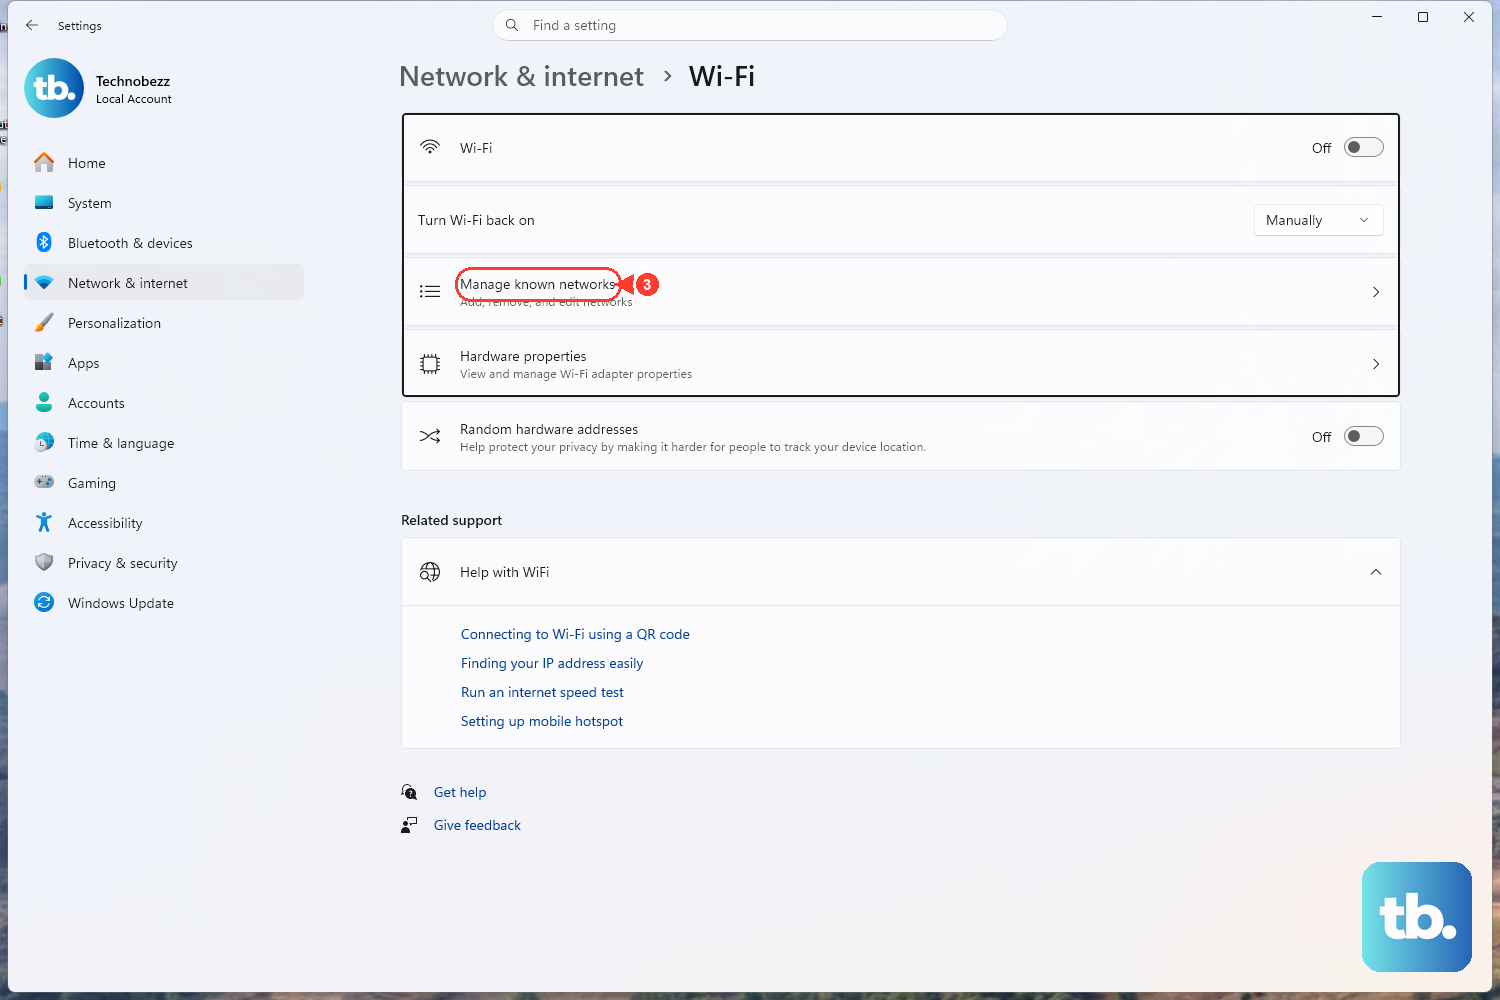
Go to Network & internet settings and select Wi-Fi > Manage known networks, then pick your network.
Next to IP assignment, select Edit.
Under Edit IP settings, choose Manual and toggle on IPv4.
Enter the appropriate network settings in the IP address, Subnet mask, and Gateway boxes. Enter your chosen DNS server addresses in the Preferred DNS and Alternate DNS boxes, then save.
If you are unsure which addresses to use, select Automatic (DHCP) under Edit IP settings to have your router or access point set the IP address and DNS server addresses automatically.
Forget the Network and Reconnect
If the Wi-Fi option returns but your specific network will not connect, the saved profile may be the problem. Forgetting the network clears the stored settings and password so you can reconnect with a clean entry.
In Settings, select Network & internet > Wi-Fi, then select Manage known networks.
Select your Wi-Fi network and click Forget.
Reconnect by selecting the network again and entering the password.
Use Network Reset Only as a Last Resort
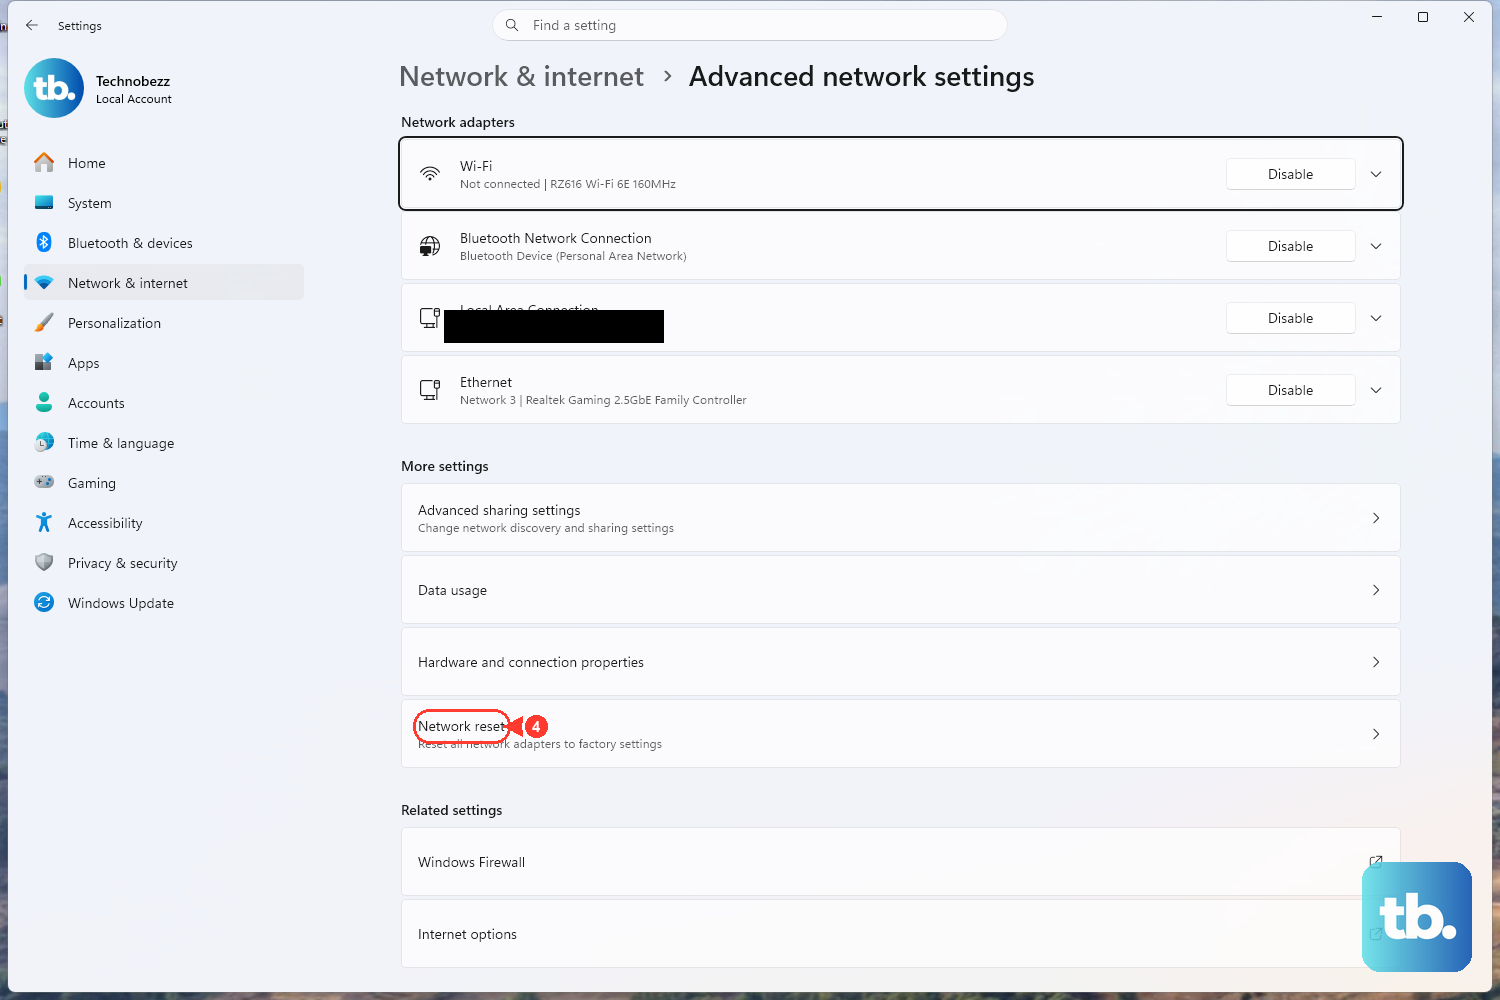
If nothing above brings the Wi-Fi option back, a full network reset is the final option. Be aware of what it does before you run it: network reset removes all network adapters and their settings, then reinstalls them and returns everything to defaults after a restart. You may need to reinstall other networking software afterward, such as VPN client software or virtual switches, so only use it when the earlier fixes have failed.
Open Settings > Network & internet.
On Windows 11, select Advanced network settings > Network reset. On Windows 10, select Status > Network reset.
Select Reset now > Yes to confirm.
Wait for the PC to restart.
After the restart, Windows reinstalls the adapters and sets them to defaults, which usually brings the Wi-Fi option back into the interface. Reconnect to your network and reinstall any VPN or virtualization networking tools you were using.
Frequently Asked Questions
Why does only Ethernet show up while Wi-Fi is missing?
The most common reasons are that Airplane mode is on, the wireless adapter has been disabled, or its driver is missing or corrupted. Airplane mode can turn off wireless communications while a wired Ethernet connection keeps working normally, but it remembers your previous Wi-Fi and Bluetooth settings and can leave those enabled.
Do these steps work on both Windows 10 and Windows 11?
Yes. Every fix here applies to both Windows 10 and Windows 11. The main differences are the menu paths: on Windows 11 the network troubleshooter opens through Get Help and network reset lives under Advanced network settings, while on Windows 10 the troubleshooter and network reset are reached through the Status page.
Is it safe to uninstall my network adapter driver?
On most PCs it is, and Windows attempts to reinstall the driver automatically after you restart. To be safe, download backup drivers from your PC manufacturer's website first in case the automatic reinstallation fails. The exception is Surface Pro X devices, where uninstalling the driver this way means a full system reset is the only way to restore it.
What does the network reset actually change?
Network reset removes all network adapters and their settings, then reinstalls them and restores default settings after a restart. Because it wipes your network configuration, you may need to reinstall other networking software such as VPN clients or virtual switches, which is why it should be your last resort.
Do I have to run Command Prompt as administrator for the reset commands?
Yes. The ipconfig and netsh commands require an elevated Command Prompt, and you must be signed in as an administrator. Type cmd on the Start screen, right-click Command Prompt, and select Run as administrator, then run each command one at a time and restart the PC afterward.