Viber is a popular messaging app that lets you make free calls, send messages, and share photos with friends and family. While it's commonly used on smartphones, you can also enjoy all its features on your computer with a bigger screen and more comfortable typing experience.
Here are the main ways to use Viber on your computer, from the official desktop app to alternative methods.
Method 1: Using the Official Viber Desktop App
The easiest way to use Viber on your computer is through the official desktop application. This method provides seamless synchronization between your phone and computer, so all your messages and calls stay in sync across devices.
Before you begin, make sure you have Viber installed on your mobile phone and are running the latest version of the app.
Step-by-Step Setup
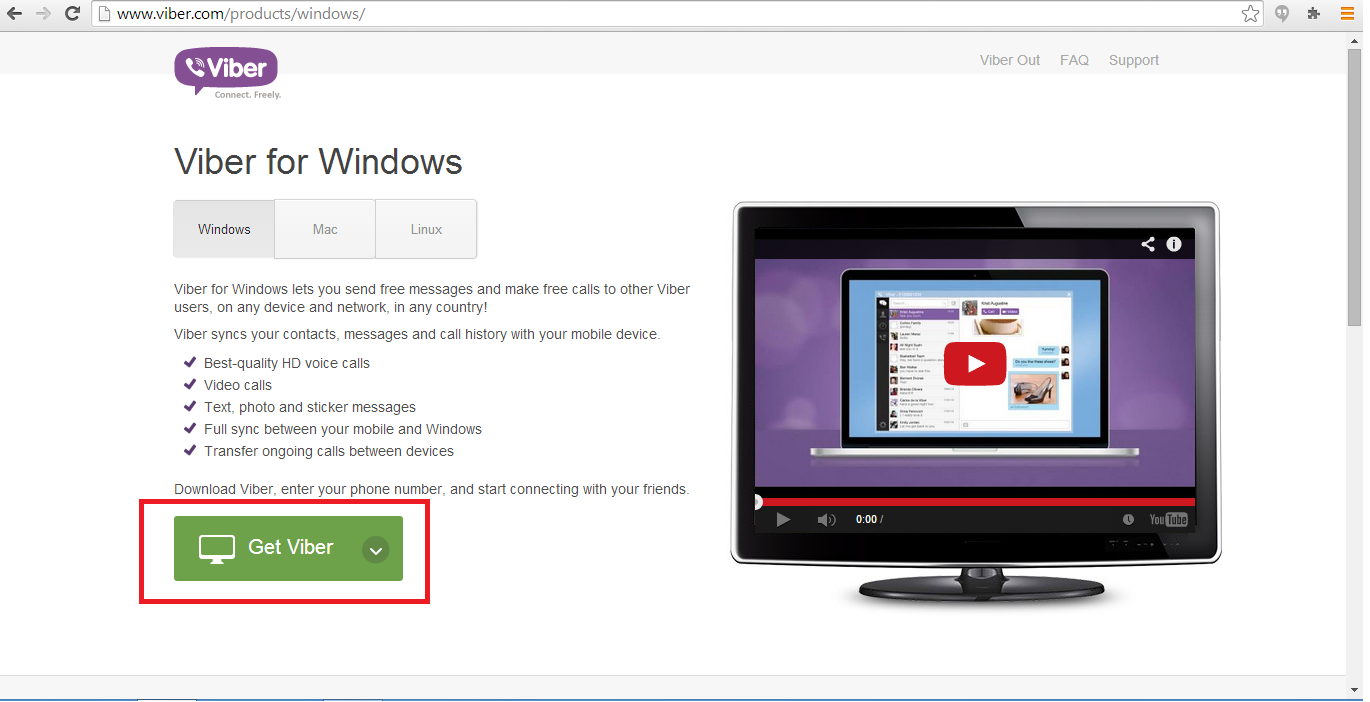
- 1.Download Viber for Desktop Visit the official Viber download page and download the Windows or Mac version of the app.
- 2.Install the Application Run the installation file and follow the on-screen instructions. Click "Accept and Install" when prompted to proceed with the installation.
- 3.Activate Your Account After installation, you'll see a welcome screen asking if you have Viber on your phone. Select "Yes" to continue.
- 4.Enter Your Phone Number Type in the same phone number you used to set up Viber on your mobile device.
- 5.Scan the QR Code Click "Scan with my phone" on your computer screen, then open Viber on your phone and point your camera at the QR code displayed on your computer.
- 6.Start Using Viber Once the QR code is scanned successfully, your Viber desktop app will be ready to use. All your conversations and contacts will sync automatically.
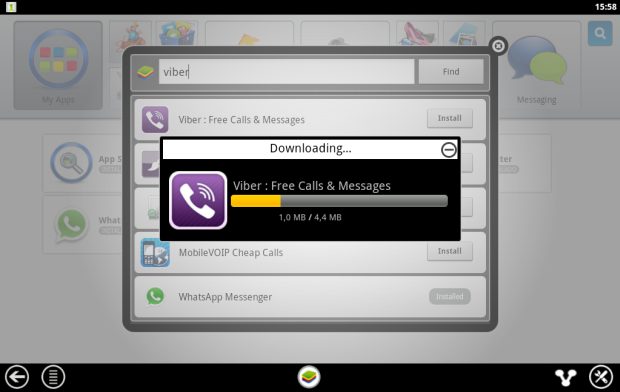
Method 2: Using BlueStacks Android Emulator
If you prefer using the mobile version of Viber on your computer, you can install it through BlueStacks, an Android emulator that lets you run mobile apps on your PC.
Setting Up Viber with BlueStacks
- 1.Download and Install BlueStacks Get BlueStacks from their official website and install it on your computer.
- 2.Launch BlueStacks Open the BlueStacks application from your desktop or start menu.
- 3.Install Viber Click on the "My Apps" button, use the search bar to find "Viber Messenger," and install it just like you would on an Android device.
- 4.Set Up Your Account Open Viber within BlueStacks and enter your phone number. You'll receive a verification code via SMS or phone call.
- 5.Complete Verification Enter the verification code when prompted, and your Viber account will be ready to use.
- 6.Manage Contacts Since Viber doesn't have a built-in contacts app in the emulator, you might want to install a separate contacts app like "GO Contacts EX" from within BlueStacks to manage your contacts more easily.
Benefits of Using Viber on Computer
- Larger Screen: Enjoy video calls and view photos on a bigger display
- Comfortable Typing: Type messages faster using your computer keyboard
- Multitasking: Easily switch between Viber and other computer applications
- File Sharing: Drag and drop files directly from your computer
- Synchronization: All your messages stay in sync across devices
Tips for Better Experience
- Keep both your mobile and desktop apps updated to the latest versions
- Use the desktop app for better performance and native integration
- BlueStacks is great if you prefer the mobile interface but want to use it on a larger screen
- Both methods allow you to make free Viber-to-Viber calls and send messages
Choose the method that works best for your needs. The official desktop app offers the most seamless experience, while BlueStacks gives you the familiar mobile interface on your computer.