Your Canon printer needs the right Windows 11 driver before it prints, scans, or appears correctly in apps. Start with Canon's model page, then use Windows Settings for USB, Wi-Fi, S mode, Arm, offline, and reinstall cases.
Download the driver from Canon first
Open the Canon U.S.A. software and drivers page.
Under Search for your Product to Get Started, choose Printers or search for your exact Canon printer model.
Open the support page for your model.
In the downloads or software area, select Windows 11 when Canon asks for an operating system.
Download the recommended driver or software package.
Open the downloaded installer and follow the on-screen prompts.
Use the exact model page, because Canon driver packages vary by printer.
Use ij.start.canon for supported inkjet printers
Supported Canon inkjet models use Canon's browser setup page.
- 1.Go to ij.start.canon/connect for your model.
- 2.Select Connecting to a Computer (Windows).
- 3.Choose Download and run the software to start setup on your computer.
- 4.Select Download.
- 5.Open the downloaded file from your browser's Downloads menu.
- 6.Follow Canon's setup instructions on screen.
Run Canon MP Drivers correctly
This method applies to Canon inkjet models that use Canon MP Drivers, including PIXMA TS-series printers. Use an administrator account for the Windows permission prompt.
Download the latest MP Drivers for your printer model from Canon's website.
Double-click the icon for the downloaded file.
At the Windows administrator confirmation or warning dialog, select Yes, Continue, or Allow.
Follow the installer screens until Canon finishes installing the driver.
Select Exit.
Restart the computer when Canon prompts you to restart.
Add a USB Canon printer in Windows 11
Connect the Canon printer to your Windows 11 PC with a USB cable.
Turn the printer on.
Wait while Windows installs the printer automatically.
For manual setup, open Start, then Settings, then Bluetooth & devices, then Printers & scanners.
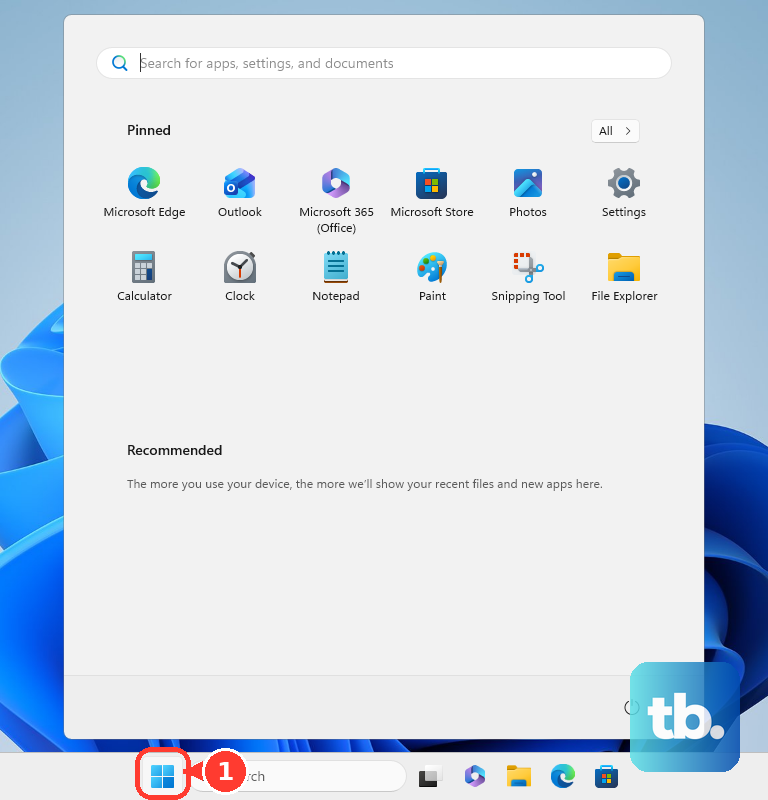
Under Add a printer & scanner, select Add device.
Select Add Device next to your Canon printer.
This path works for Canon USB printers supported by Windows built-in drivers, Windows Update, or installed Canon drivers.
Add a wireless Canon printer in Windows
Put the printer and PC on the same network before adding the printer in Windows.
- 1.Turn on the Canon printer and connect it to the same network as the PC.
- 2.Open Start, then Settings, then Bluetooth & devices, then Printers & scanners.
- 3.Under Add a printer & scanner, select Add device.
- 4.Wait for Windows to list nearby printers.
- 5.Select Add Device next to your Canon printer.
- 6.Beside The printer that I want isn't listed, select Add a new device manually and follow the Add Printer window.
Connect the printer to Wi-Fi before adding it
Open the setup guide for your exact Canon printer model.
For WPS setup, get the router's WPS button ready.
On supported Canon printers, press and hold the printer Wireless select button, then release it when the network status icon flashes.
Within 2 minutes, press and hold the router WPS button.
Confirm that the printer's network status and signal strength icons are lit.
Add the printer in Windows through Settings, then Bluetooth & devices, then Printers & scanners, then Add device.
Button names vary by Canon model, so use the controls named in your printer's setup guide.
Install on S mode, Arm, or offline PCs
This section covers three separate cases: Windows 11 in S mode, Windows on Arm, and Windows PCs without internet access. On supported Canon setup pages for Windows 11 in S mode, Windows 10 in S mode, and Windows on Arm, Canon says the printer driver installs automatically when connected, so use the connect-and-add steps below instead of a downloaded Canon installer. Windows 11 in S mode runs only Microsoft Store apps, so a downloaded Canon installer will not run until you permanently switch out of S mode from Settings, then System, then Activation. Microsoft also reports that some Arm PCs cannot add or install a printer with the manufacturer's installer, and tells those users to add the printer through Windows instead.
For network use, connect the printer to the network with Canon's setup guide, then add it in Windows settings.
For USB use, connect the printer and computer or tablet with a USB cable, then add the printer in the operating system settings.
The next three steps are for an offline Windows 11 PC that is not in S mode. On another computer with internet access, download the Canon printer driver for the exact model to a USB flash drive, SD card, or other removable media.
Move the removable media to the offline Windows PC.
Install the driver from the downloaded data and follow the installer instructions. On an Arm PC, use this route only when Canon publishes a driver for that device, and otherwise add the printer through Printers & scanners.
Update through Windows Update
Windows Update is Microsoft's preferred path for routine printer driver updates. Open Start, then Settings, then Windows Update, then Advanced options.
Turn Receive updates for other Microsoft products on.
Under Additional options, select Optional updates.
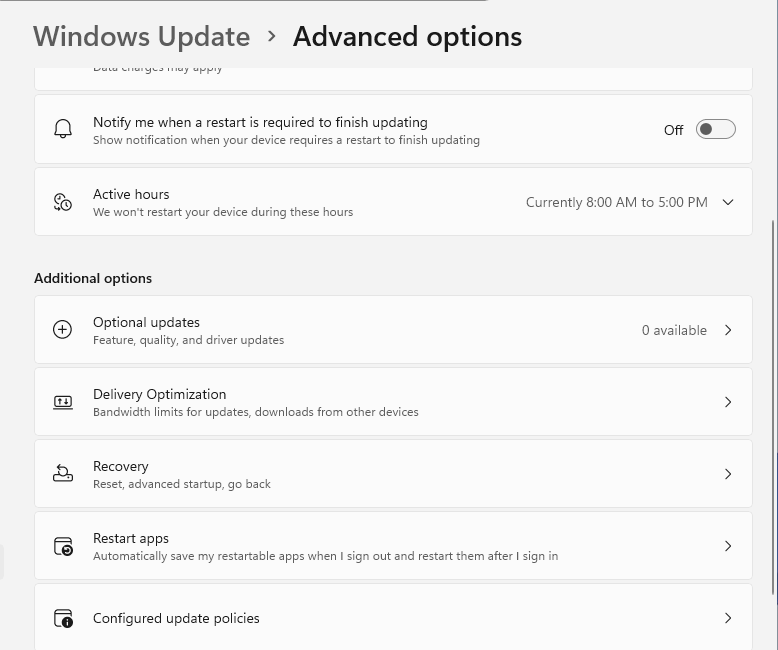
Select the Canon or printer driver update, then choose Download and install.
Restart from Start, then Shutdown or sign out, then Restart.
If Windows Update does not offer a Canon driver, use the Canon model download page or Canon installer.
Fix failed installs and protected print mode
The most common cause is a broken old Canon driver, a printer entry that needs re-detection, or Windows protected print mode blocking Canon's full driver.
Open Settings, then Apps, then Installed apps, and find Canon XXX series Driver or Canon XXX series Printer Driver, where XXX is your model name.
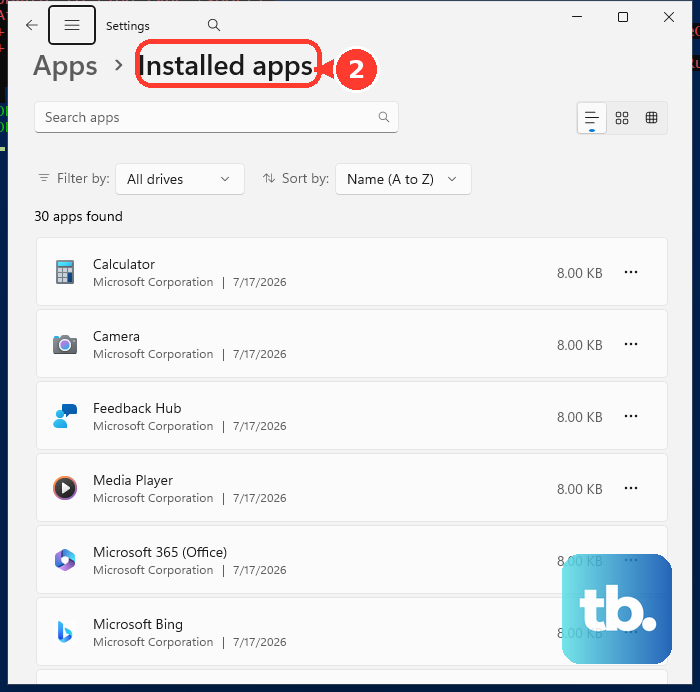
Uninstall the Canon driver.
Restart the computer using Restart instead of Shut down.
Install the latest MP Drivers or Printer Driver from Canon.
To force Windows to detect the printer again, open Start, then Settings, then Bluetooth & devices, then Printers & scanners.
Select the Canon printer, then choose Remove.
Add the printer again through Printers & scanners and use Windows Update or Canon's installer for the latest driver.
For Windows protected print mode, open Start, then Settings, then Bluetooth & devices, then Printers & scanners.
Under Printer preferences, find Windows protected print mode, select Turn Off, then select Yes. Administrator privileges are required, and a work or school PC controlled by policy blocks this change.
Skip the Canon Setup CD-ROM and the Add Printer Driver Wizard from printer server properties for normal setup. Current consumer paths are Canon's website, ij.start.canon, Windows Settings, and Windows Update.
Frequently Asked Questions
Do I need a Canon driver, or can Windows 11 install the printer by itself?
Windows 11 installs supported Canon USB and network printers through built-in drivers, Windows Update, or installed Canon drivers. Use Canon's support page or ij.start.canon for model-specific Canon software.
Why can't I install the Canon driver on a work or school PC?
A managed PC can enforce Windows protected print mode or administrator policy. The device administrator must change that policy before Canon third-party drivers install.
Can I install Canon printer drivers without internet on the Windows 11 PC?
Yes, as long as the offline PC is not in S mode. Download the exact Canon model driver on another internet-connected PC, save it to removable media, move it to the offline PC, and run the installer there. Windows 11 in S mode runs only Microsoft Store apps, so connect the printer and let Windows install it, or switch out of S mode first.
Should I use Device Manager to update a Canon printer driver?
Use Windows Update first. Device Manager remains supported for searching automatically or pointing Windows to a downloaded Canon driver folder.