You sign in to Windows 10, the password is accepted, and the desktop never appears. The screen may stay black, show only a cursor, or return only after a restart. Start with display and Explorer fixes that do not touch your files, then move through Safe Mode, drivers, updates, startup apps, and recovery tools.
Wake the display path first
This fixes the simplest Windows 10 black screen after login: Windows is running, but the screen, cable, monitor, or projection mode is not showing it.
Make sure the laptop is charged or plugged in.
If you use an external monitor, confirm that the monitor is connected, plugged in, and powered on.
Check the HDMI, DisplayPort, or VGA cable at both ends.
Try another monitor or another cable if one is available.
On a laptop, disconnect external displays and peripherals, then check whether the built-in screen returns.
Press Windows + Ctrl + Shift + B to reset the graphics driver.
Listen for a beep or watch for the display to flicker.
Press Windows + P.
Tap P again, then press Enter to cycle through display modes such as PC screen only, Duplicate, and Extend.
Restart Windows Explorer from the black screen
Use this when you can sign in, but the desktop, taskbar, and Start menu do not load. It is the right move when the black screen still has a cursor or Task Manager opens.
Press Ctrl + Shift + Esc to open Task Manager.
Find Windows Explorer, right-click it, and select Restart.
If Task Manager does not open that way, press Ctrl + Alt + Del.
Open Task Manager from the security screen.
When Windows Explorer is not listed, select File > Run new task.
Type explorer.exe, then press Enter.
Force Windows into recovery
If the keyboard shortcuts do nothing, use a forced restart. Press and hold the power button for 20 seconds, then turn the device back on.
When Windows starts but you still cannot reach a usable desktop, enter Windows Recovery Environment. Start the device, wait for the Windows logo or manufacturer logo, then press and hold the power button until the device shuts down.
Turn it on again and repeat the shutdown once. Turn it on a third time, and on the Automatic Repair screen, select Advanced options.
If you can still reach the sign-in screen or the Ctrl + Alt + Del screen, hold Shift while selecting Power > Restart to open the same recovery environment.
Repair the display driver in Safe Mode
Open Windows Recovery Environment.
Select Troubleshoot > Advanced options > Startup Settings > Restart.
After the restart, select 5 or press F5 for Safe Mode with Networking.
Sign in with your password, because PIN and biometric sign-in are unavailable in Safe Mode.
Open Device Manager.
Expand Display adapters.
Right-click the graphics adapter and select Update driver.
Select Search automatically for updated driver software or Search automatically for drivers, then follow the prompts.
If the black screen began after a display driver or Windows update, right-click the display adapter and select Properties > Driver > Roll Back Driver.
If updating or rolling back does not help, right-click the display adapter and select Uninstall device.
Choose Attempt to remove the driver for this device, then select Uninstall.
Restart if prompted.
Return to Device Manager, expand Display adapters, right-click the adapter, select Update driver, and choose Search automatically for updated driver software.
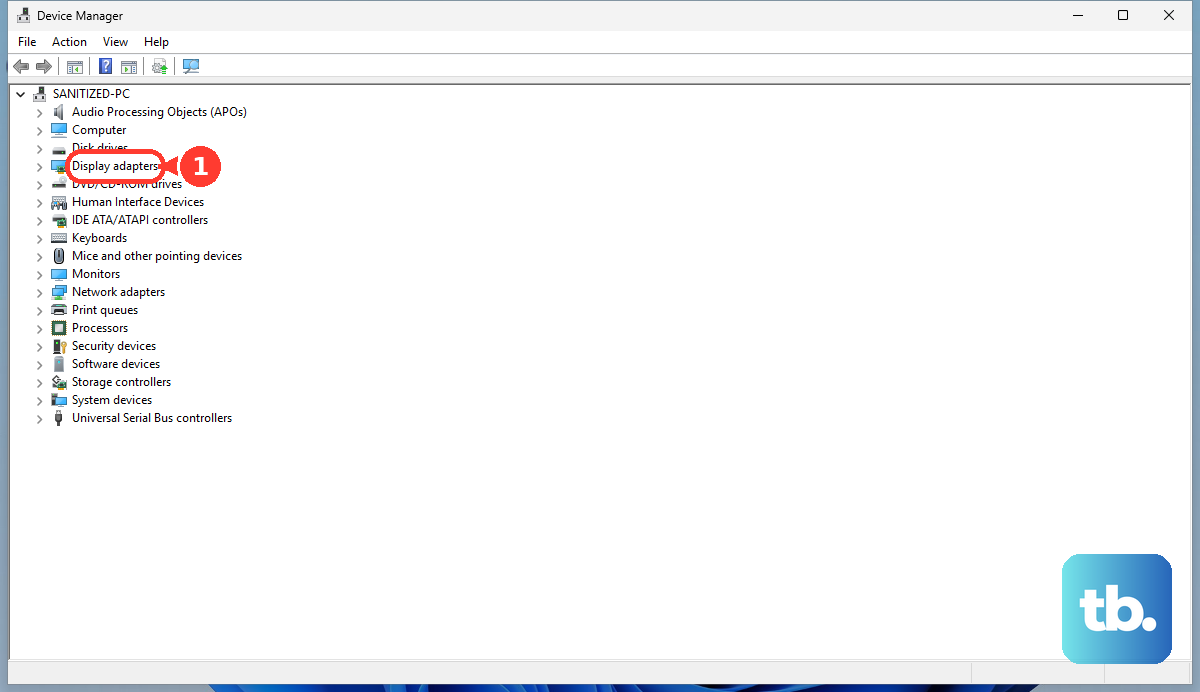
Use the official NVIDIA, AMD, or Intel driver page or driver assistant when Windows needs the current matching driver for that graphics hardware.
Use Safe Mode with Networking here so Windows starts with a minimal setup while still allowing network access for driver work.
Undo a recent update or system change
This fixes a black screen that started right after a Windows update, feature upgrade, driver update, app install, or settings change.
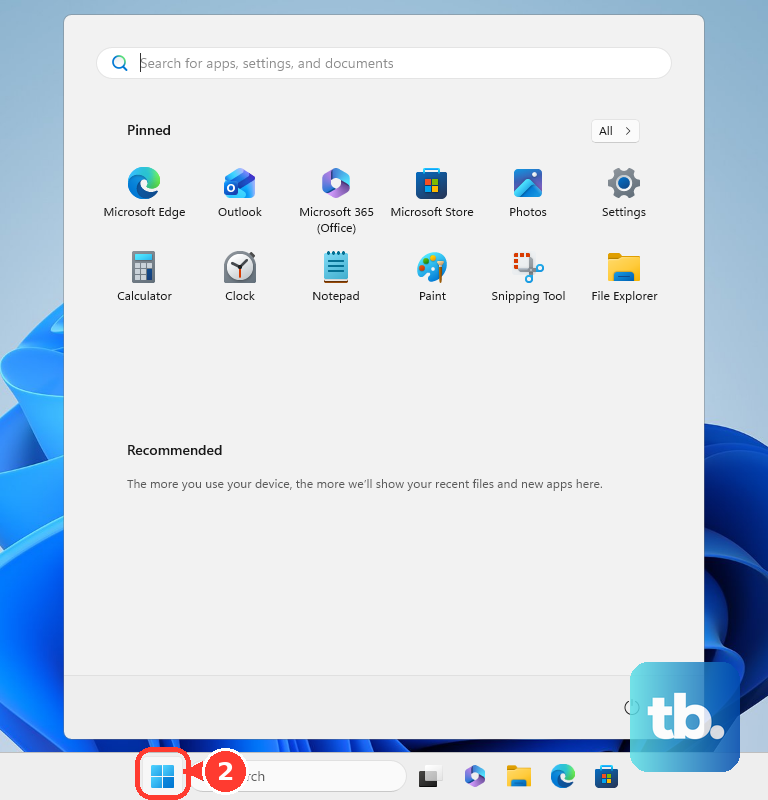
If Windows Settings still opens, select Start > Settings > Update & Security > Windows Update > View your update history > Uninstall updates.
Select the update you want to remove, then select Uninstall.
If Windows is not usable, open Windows Recovery Environment.
Select Troubleshoot > Advanced options > Uninstall Updates.
Choose Uninstall latest quality update or Uninstall latest feature update.
To use a restore point instead, open Windows Recovery Environment.
Select Troubleshoot > Advanced options > System Restore.
Select a restore point.
Choose Scan for affected programs if you want to see what may change.
Select Next > Finish, then restart.
If you recently upgraded to a new Windows version and the option is still available, open Settings > Update & Security > Recovery.
Select Go back, then follow the prompts.
Disable startup apps and services
The most common software cause is a third-party startup app or service loading after sign-in and stopping the desktop from appearing.
Sign in as an administrator, type msconfig in the taskbar search box, and select System Configuration.
Open Services, select Hide all Microsoft services, then select Disable all > Apply.
Open Startup and select Open Task Manager.
On the Startup tab in Task Manager, select each enabled item and choose Disable.
Close Task Manager, select OK in System Configuration, and restart the PC.
If the black screen disappears, return to System Configuration > Services with Hide all Microsoft services selected, re-enable half of the disabled services, select OK, and restart.
Repeat in batches until you isolate the service.
Use System Configuration > Startup > Open Task Manager to re-enable startup items in batches.
After you identify the problem item, contact the program manufacturer or leave that service unchecked or startup item disabled.
Managed work PCs can block clean boot changes through network policy settings. Contact your organization’s IT support when those controls appear.
Remove or repair problem apps
If Safe Mode or clean boot points to an app, use one of these app-level fixes.
- 1.Open Start > All apps, right-click or press and hold the app, then select Uninstall.
- 2.Open Start > Settings > Apps > Apps & features, select the app, then choose Uninstall. On Windows 11 and newer Settings layouts, the same area appears as Installed apps, where you select More next to the app and then choose Uninstall.
- 3.For older desktop programs, search for Control Panel, then open Control Panel > Programs > Programs and Features, right-click the program, and select Uninstall or Uninstall/Change.
- 4.To repair a supported app, open Start > Settings > Apps > Apps & features, select the app, choose Advanced options, then select Repair.
- 5.If repair does not work and the option exists, select Reset. For desktop programs, use Control Panel > Programs > Programs and Features, right-click the program, and select Repair or Change.
- 6.For Microsoft Edge web apps that launch at sign-in, open Edge, go to edge://apps, select Details on the app card, and turn off Auto-start on device login.
Repair Windows files and startup
Corrupted or missing Windows system files can keep the normal desktop from loading. Type cmd in Search, right-click Command Prompt, and select Run as administrator.
If prompted, enter the administrator password or select Allow. Run DISM.exe /Online /Cleanup-image /Restorehealth and wait for it to finish.
Then run sfc /scannow and wait until verification reaches 100 percent. If System File Checker says Windows Resource Protection could not perform the requested operation, run it from Safe Mode.
When Windows still cannot load correctly, open Windows Recovery Environment and select Troubleshoot > Advanced options > Startup Repair > Restart. Let Startup Repair scan and attempt repairs.
Reset or reinstall Windows last
This fixes stubborn cases after display checks, driver repair, update rollback, startup cleanup, and system-file repair have failed, but it can remove apps, settings, and files depending on your choices.
If Settings opens, select Start > Settings > Update & Security > Recovery.
Under Reset this PC, select Get started.
Choose Keep my files or Remove everything.
Choose Cloud download or Local reinstall, then follow the on-screen instructions.
If the desktop is unusable, open Windows Recovery Environment.
Select Troubleshoot > Reset this PC.
Choose the reset options and follow the prompts.
For a deeper repair, create official Windows 10 installation media from Microsoft’s Windows 10 download page.
Run the tool, accept the license terms, and choose Create installation media for another PC.
Select the language, edition, architecture, and USB or ISO option.
If Windows can still run setup, connect the installation media and open the drive in File Explorer.
Open setup.exe.
Select Change what to keep.
Choose Keep personal files and apps, Keep personal files only, or Keep nothing.
Select Next > Install.
Use a clean install only when recovery options fail or serious corruption is suspected.
Back up files first because a clean install removes personal files, apps, manufacturer customizations, and settings changes.
Frequently Asked Questions
Why does Windows 10 show a black screen after I log in?
The usual causes are a display or projection problem, Windows Explorer failing to load, a bad display driver, a recent update, a startup app or service, a problematic app, or corrupted Windows system files.
What should I try first if I only see a cursor?
Open Task Manager with Ctrl + Shift + Esc. Restart Windows Explorer, or use File > Run new task, type explorer.exe, and press Enter.
Can Safe Mode help with a black screen after login?
Yes. Safe Mode with Networking loads a minimal Windows environment so you can update, roll back, or reinstall the display driver and disable startup items.
Will Reset this PC delete my files?
It depends on the option you choose. Keep my files preserves personal files while reinstalling Windows, while Remove everything is more destructive. Apps and settings can still be removed depending on your choices.