Your Epson printer runs alignment, but the page still looks blurry, banded, slanted, or the alignment utility never finishes. Start with the alignment path built into your printer or Epson software, then fix the print conditions that make alignment fail. These steps use Epson-supported control panel, Windows, Mac, cleaning, update, and reinstall options.
1. Start from the Epson printer screen
Use the printer control panel first when your Epson model has an LCD or maintenance menu.
Load a few sheets of plain paper. Press Home if your model shows a home screen, then select Maintenance and Print Head Alignment.
Select Ruled Line Alignment for slanted or misaligned straight lines, when your model offers it. Select Vertical Alignment for blurry output or vertical gaps and lines, or select Horizontal Alignment for horizontal banding.
Follow the on-screen prompts. Choose the printed pattern with the least separation or overlap, then finish the prompts.
This keeps the fix close to the printer and avoids a missing computer utility. Exact menu labels differ by Epson model. If Print Head Alignment is not under Maintenance, use the model User's Guide for the matching control panel path.
2. Open alignment in Windows
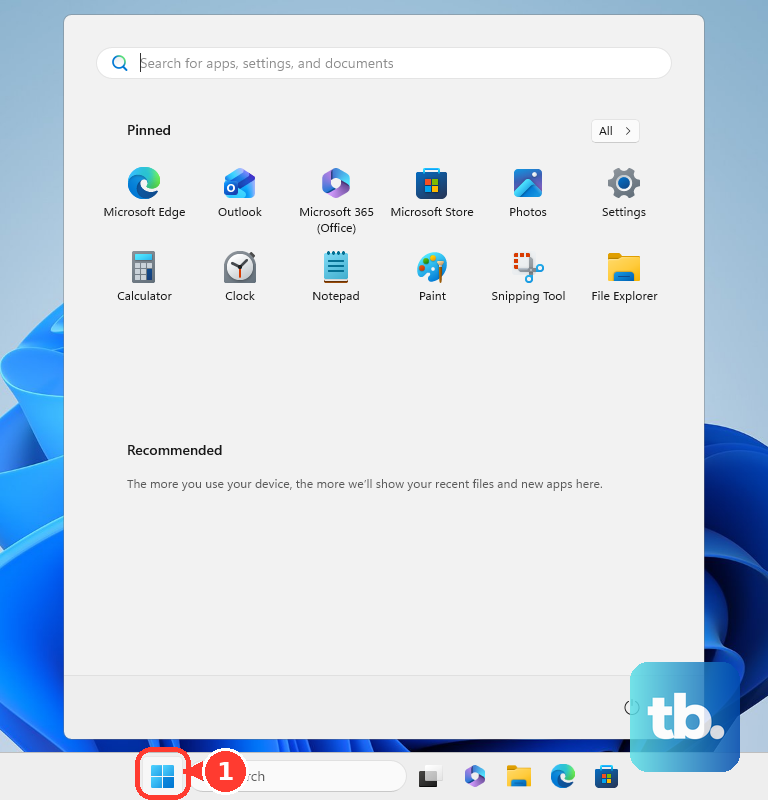
On Windows 11, click Start, search for the printer, open your installed Epson printer, then click Printer Properties.
On Windows 10, open Start, Settings, Devices, then Devices and Printers. Right-click the Epson printer and select Printing Preferences.
Click the Maintenance tab, then click Print Head Alignment. Click Next, click Print, and follow the alignment-sheet prompts until the vertical and horizontal alignment steps are complete.
On Windows, run alignment from Epson printer properties or the Epson taskbar utility. Use the path that appears on your computer. If the Epson icon is visible near the Windows clock, use the shorter route: right-click the Epson product icon, select Printer Settings, open Maintenance, select Print Head Alignment, click Next, then click Print.
3. Restore the missing Windows icon
A missing Epson taskbar icon blocks the shortcut, not alignment itself. Restart the computer first, then restore the shortcut from Epson monitoring settings.
Open Start, then open Settings. Open Bluetooth & devices, open Printers & scanners, and select your Epson product name.
Open Printing preferences and click Maintenance. Click Extended Settings, select Enable EPSON Status Monitor 3, then click OK.
Click Monitoring Preferences. Select the checkbox that adds the shortcut icon to the taskbar, then click OK.
After the shortcut returns, open Printer Settings, go to Maintenance, and run Print Head Alignment.
4. Run the Mac Epson utility
Mac alignment sits inside the printer utility, either through system printer settings or the standalone Epson Printer Utility.
Open the Apple menu or Dock. Open System Settings or System Preferences, then open Printers & Scanners, Print & Scan, or Print & Fax.
Select your Epson product and open Options & Supplies. Click Utility, click Open Printer Utility, and select Print Head Alignment.
Click Next, then click Print. Then follow the on-screen instructions.
You can also open Epson Printer Utility from Applications on Macintosh HD. Select the printer from Printer List, click OK, and select Print Head Alignment.
Then use Next and Print. Choose the best printed pattern from the drop-down menus and click Realignment when the selected pattern differs from the default.
5. Clean clogged nozzles first
Load plain paper. Open Maintenance on the printer panel, then select Nozzle Check or Print Head Nozzle Check.
Print the nozzle pattern and inspect the pattern for gaps or faint lines. If gaps or faint lines appear, return to Maintenance and select Print Head Cleaning.
Select Start and wait for cleaning to finish. Print another Nozzle Check, then run Print Head Alignment again after the nozzle pattern prints cleanly.
Alignment fails when the test pattern is faint, broken, or missing lines. Fix nozzle output before judging the alignment result.
On no-LCD Epson models with button-based cleaning, load plain paper, confirm that no product lights indicate errors, hold Stop for five seconds, and wait for the power light to stop flashing. Then run a nozzle check and retry Print Head Alignment from the Windows or Mac utility.
6. Use Power Cleaning after repeated cleaning fails
Use Power Cleaning only on Epson models that expose it and only after normal cleaning does not restore nozzle output. It consumes more ink than standard cleaning.
On models with a panel option, open Maintenance. Select Power Cleaning. On recent models this option is nested, so use the path your guide shows, commonly Print Head Cleaning or Head Cleaning and then Power Cleaning.
Follow the on-screen instructions. From a computer utility, open the Epson utility on Windows or Mac.
Select Print Head Cleaning and choose Power Cleaning. Click Next and follow the prompts, then print a Nozzle Check.
If quality does not improve, turn off the product and wait at least 12 hours before another nozzle check or cleaning cycle. After the nozzle check prints cleanly, run Print Head Alignment again.
7. Correct paper and quality settings
Slide the edge guides against the paper. Match the paper type setting to the paper loaded in the printer.
Select a higher print quality setting in the Epson printer software. Turn off high speed settings, then place the printer level, not tilted or angled.
Paper setup and print quality settings create symptoms that look like bad alignment. Fix the physical setup before running another alignment sheet. After those checks, run Print Head Alignment again.
Plain paper is the alignment paper Epson lists for many current consumer models.
8. Repair Epson software and drivers
If Print Head Alignment is missing, crashes, or never completes, update Epson software first.
On Windows, right-click the Epson product icon in the taskbar or open the Maintenance tab in printer settings. Select Software Update.
You can also open EPSON Software Updater from the EPSON or Epson Software program group. On Mac, open Applications, then Epson Software.
Open EPSON Software Updater. On macOS versions that show Epson updates in the App Store, open App Store, Updates, Epson Software, then Update.
Keep the product turned on and connected to a computer with Internet access. Then reinstall the model-specific driver and utilities from Epson support.
For a clean reinstall, download the current Drivers and Utilities Combo Package Installer, printer driver, utilities, or Uninstaller from Epson Support or the Epson Download Center for your exact model.
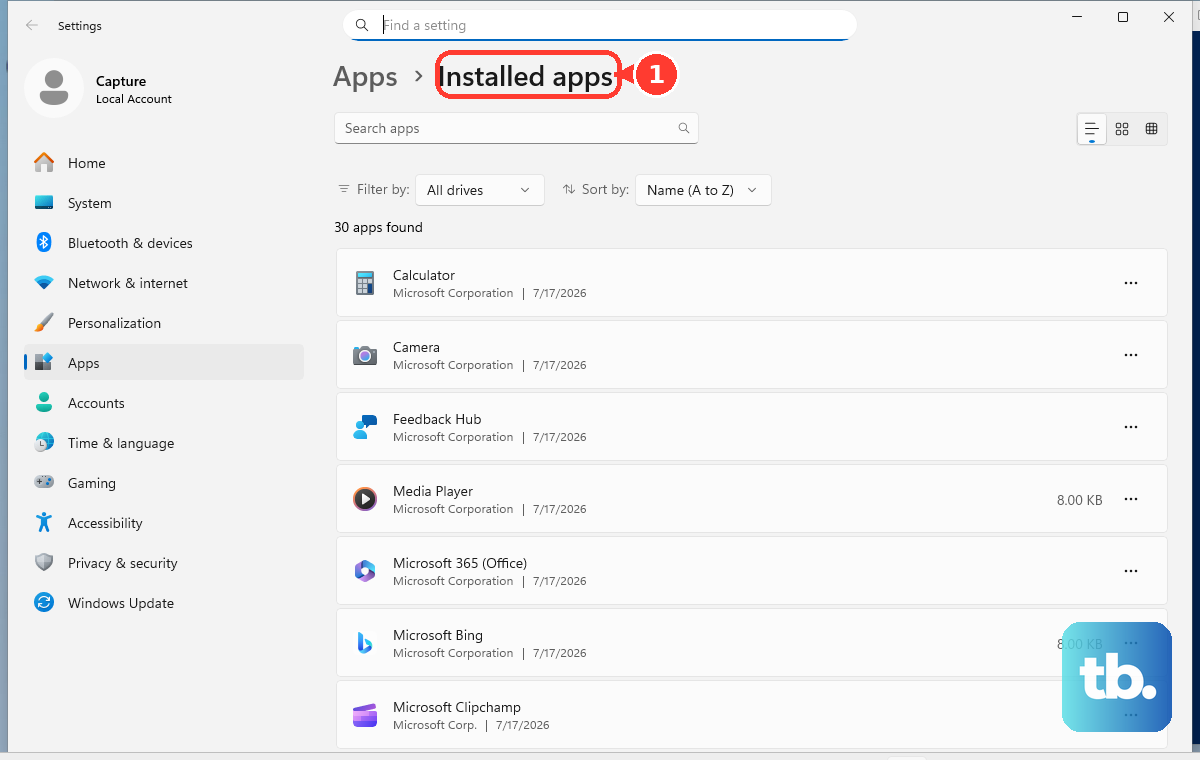
On Windows 11, turn off the product, disconnect interface cables, open Settings, Apps, Installed apps, find your model's Printer Uninstall entry, click its three-dot menu, and select Uninstall.
On Windows 10, cancel queued print jobs, turn off the product, disconnect interface cables, open Programs and Features, select your model's Printer Uninstall entry, and click Uninstall/Change.
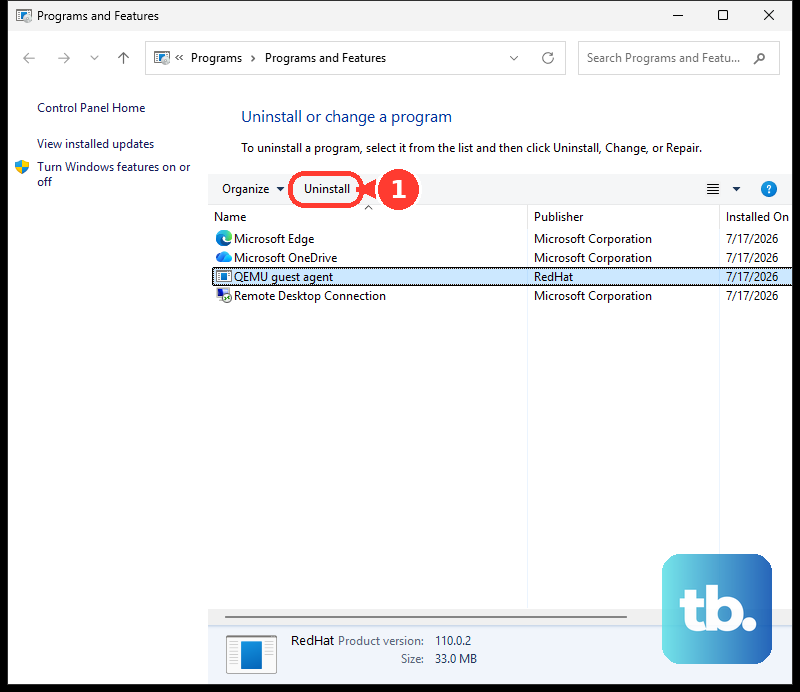
On Windows 8.x, use Control Panel, Programs, Programs and Features, select the Epson uninstall option, then click Uninstall/Change.
Click Yes or Continue if User Account Control asks, restart, then reinstall from Epson support. On Mac, use Epson's Uninstaller utility from the product support page.
9. Skip outdated alignment advice
Do not use classic Mac OS 8.6-9.x utility menus, local-port-only Stylus instructions, or LPT1 calibration programs for a current USB or Wi-Fi Epson consumer printer. Those instructions belong to older Stylus-era or parallel-port Epson documentation.
For current Epson consumer printers, use the printer control panel, Windows Epson utility, Mac Epson utility, nozzle check, head cleaning, Epson Software Updater, and model-specific downloads from Epson support.
For SureColor large-format and pro models, use the panel path Menu, Paper Setting, the loaded paper type, Print Adjustments, and Print Head Alignment. Select Uni-D Alignment or Bi-D Alignment, then choose Auto or Manual as supported for the loaded paper, and do not open the front cover or turn off the printer during sensor-based auto alignment.
Frequently Asked Questions
Why does Epson alignment keep printing sheets but not improving?
Choose the closest matching pattern in each set and click Realignment. If the printed pattern is faint or broken, run Nozzle Check, clean the print head, and retry alignment after the nozzle pattern is clean.
Can I align an Epson printer from Epson Smart Panel?
Epson does not document a current Smart Panel print-head alignment menu. Use the printer control panel, the Windows Epson utility, or the Mac Epson utility.
What should I do when Print Head Alignment is not listed?
Open the Epson utility from Windows printer preferences, restore the Epson taskbar icon, or reinstall the current driver and utilities for your exact model from Epson Support or the Epson Download Center.
Does Windows 10 S support the normal Epson alignment utility?
Epson says downloaded Epson product software cannot be installed on Windows 10 S, so the normal desktop utility path is limited. Use software supplied through the Windows Store for that mode.