Friday brings a fresh set of NYT Pips puzzles. Today's lineup serves up consistent zone layouts across all three difficulty levels, putting the focus squarely on placement strategy rather than puzzle variation. We've got hints, step-by-step walkthroughs, and full solutions for Easy, Medium, and Hard difficulty levels.
How to Play Pips
Pips is a domino placement puzzle where you fill a grid of color-coded zones. Each zone has a condition you must satisfy using the pip values on your dominoes. The twist: you must use every domino and meet every condition to win.
Zone Conditions:
- = All pips in this zone must equal the same number
- Not Equal All pips must be different numbers
- > Pips must be greater than the listed number
- < Pips must be less than the listed number
- Exact Number Pips must total that exact value
- No Color Free space, any domino value works
Click or tap dominoes to rotate them. Each puzzle has one or more valid solutions.
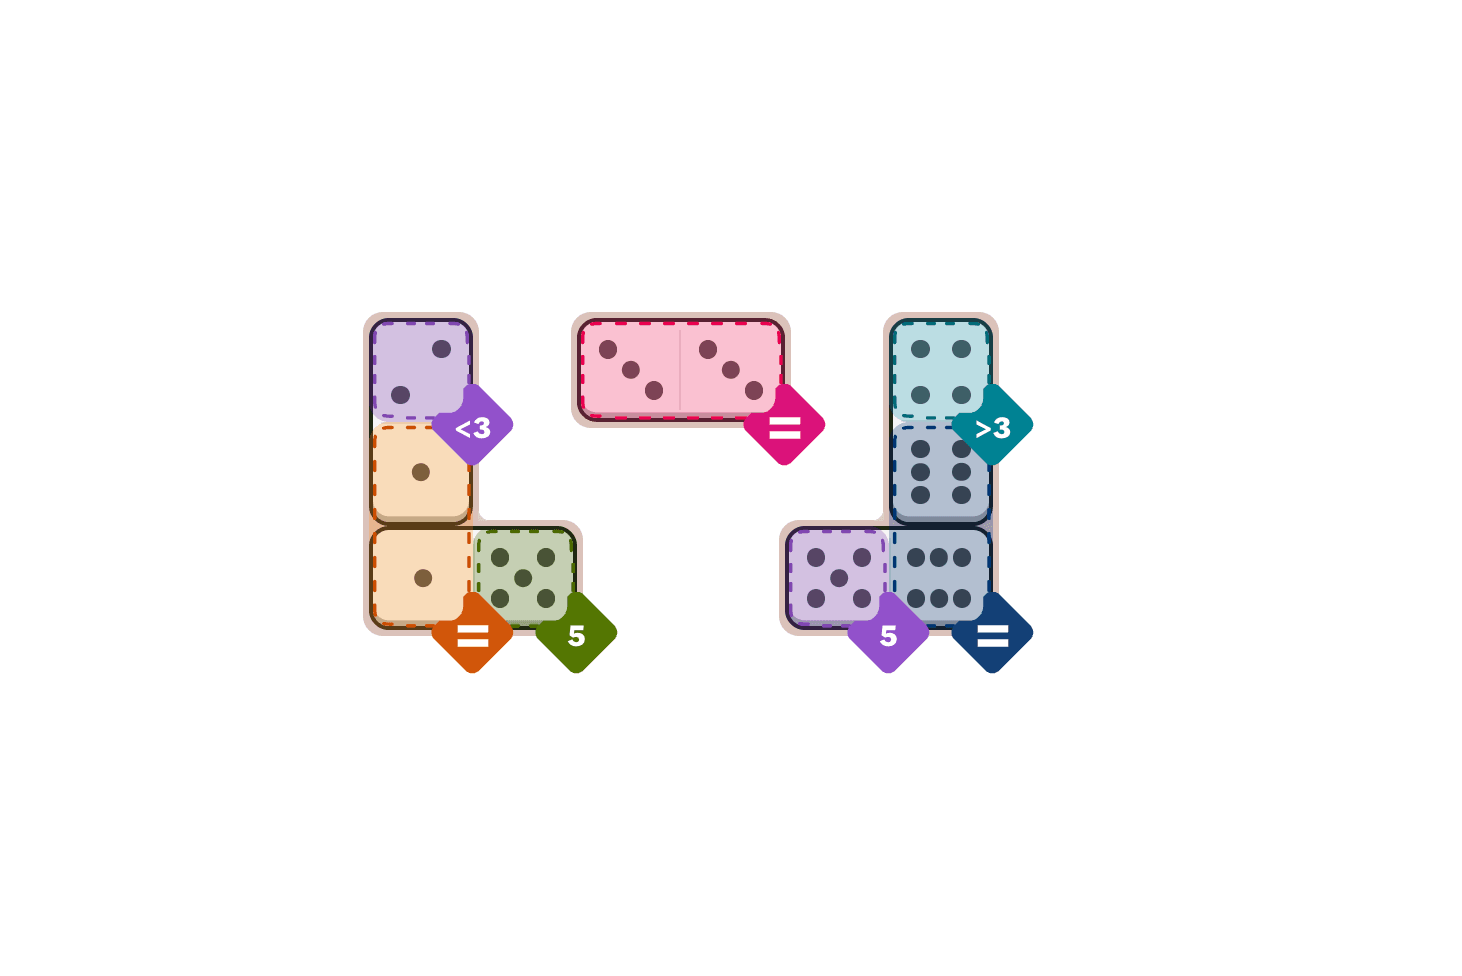
Today's Easy Pips
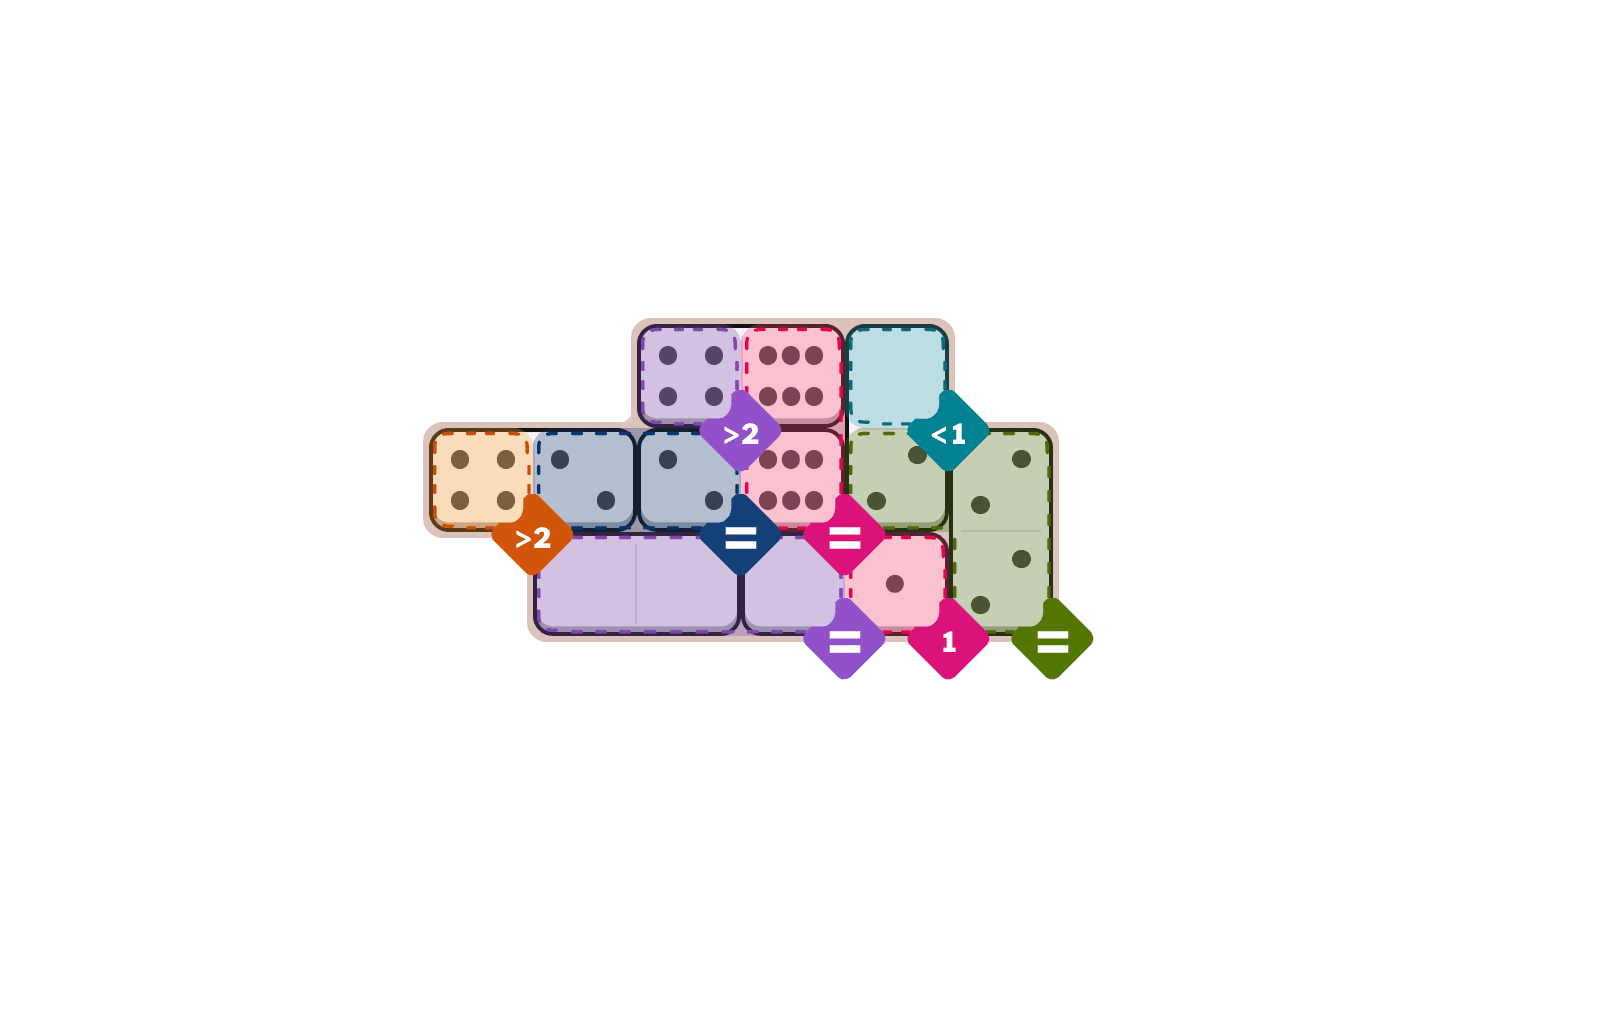
Today's Medium Pips
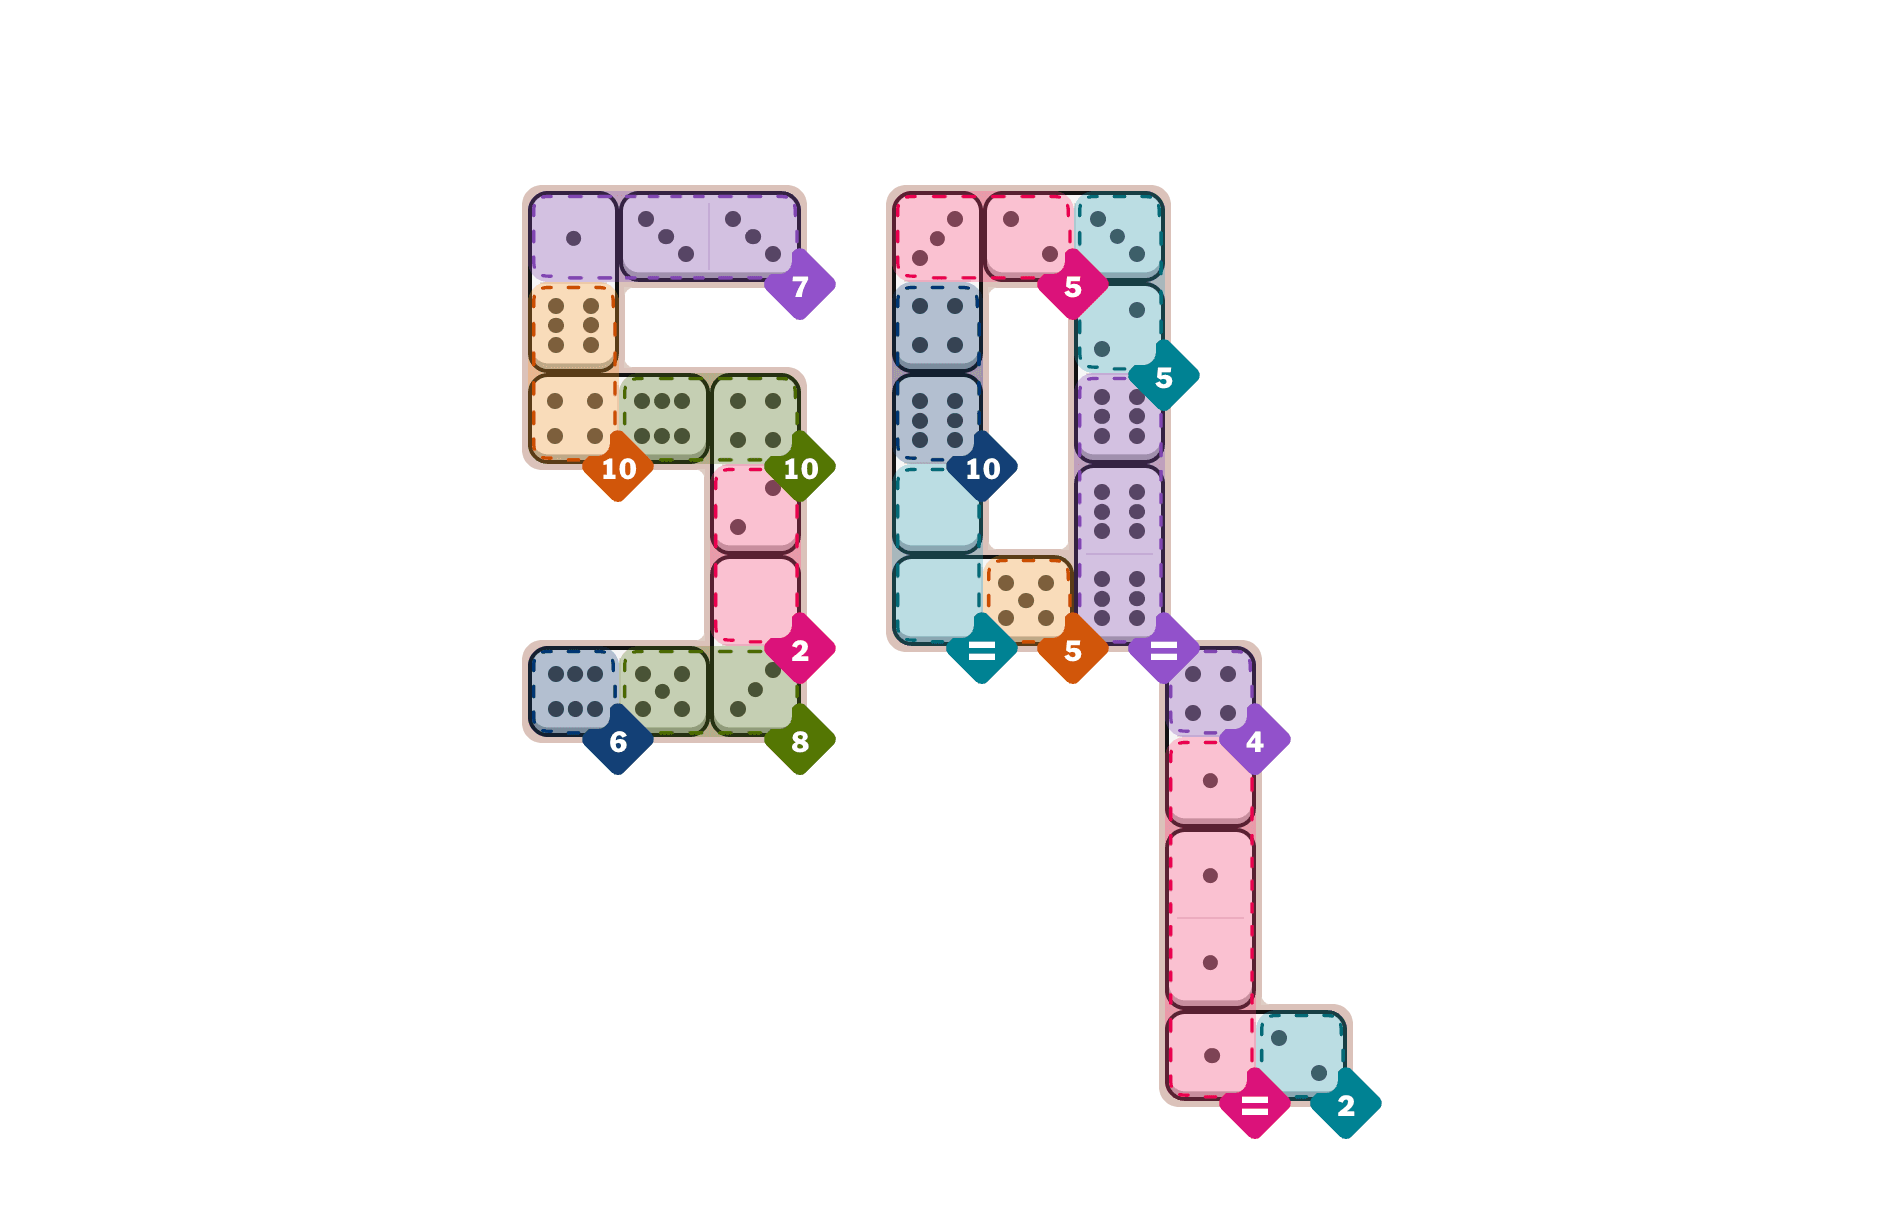
Today's Hard Pips
Quick Hints (No Spoilers)
Starting Point: Anchor yourself with the double dominoes first - 3/3 in purple (7) and 1/1 and 6/6 in the equal-value zones give you fixed reference points.
Key Insight: The teal (=) zone creates a ripple effect. Every domino touching it must carry the same value on the teal side, which cascades constraints into navy, orange, purple, and pink zones.
Watch Out For: The pink (=) zone is easy to overthink. Once you place the 1/1 vertically inside it, the 4/1 and 1/2 dominoes bridging out of it must carry a 1 on the pink side - keep that value consistent or the equal condition breaks.
Step-by-Step Walkthrough
- 1.Place the 3/3 horizontally in purple (7). This is your safest opening move - the double domino fills half the exact-7 requirement with no ambiguity.
- 2.Add the 1/6 vertically across purple (7) and orange (10). The 1 completes purple's total (3+3+1=7). The 6 enters orange, which still needs 4 more to reach 10.
- 3.Lay the 4/6 horizontally across orange (10) and green (10). The 4 pushes orange to 10, and the 6 enters green. Both exact-number zones are now locked.
- 4.Position the 4/2 vertically between green (10) and pink (2). The 2 satisfies pink's exact requirement immediately. Green now has 6 from the previous step plus 4 here - that's 10 total, done.
- 5.Drop the 0/3 vertically across pink (2) and green (8). The 0 preserves pink's total at 2. The 3 enters green (8), which needs 5 more.
- 6.Place the 6/5 horizontally across navy (6) and green (8). The 6 satisfies navy's exact requirement. The 5 enters green, bringing it to 3+5=8. Green is complete.
- 7.Position the 3/4 vertically across pink (5) and navy (10). Navy already has 6 from step 6, so adding 4 brings it to 10. Pink (5) gets 3, needing 2 more.
- 8.Lay the 2/3 horizontally across pink (5) and teal (5). The 2 completes pink (5) - it now has 3+2=5. The 3 enters teal (5), which needs 2 more.
- 9.Place the 6/0 vertically across navy (10) and teal (=). Navy is already at 10, so the 6 is fine. The 0 enters teal's equal-value zone - all teal pips must now match.
- 10.Drop the 0/5 horizontally across teal (=) and orange (5). The 0 keeps teal's equal condition intact. The 5 satisfies orange's exact requirement.
- 11.Position the 2/6 vertically across teal (5) and purple (=). Teal (5) gets 2, bringing it to 3+2= 5. Purple (=) gets 6, establishing the equal value for that zone.
- 12.Place the 6/6 vertically in purple (=). All purple pips are now 6, satisfying the equal condition.
- 13.Lay the 4/1 vertically across purple (4) and pink (=). Purple (4) gets 4 - exact match. Pink (=) gets 1, setting the equal value.
- 14.Drop the 1/1 vertically in pink (=). All pink pips are now 1, satisfying the equal condition.
- 15.Place the 1/2 horizontally across pink (=) and teal (2). The 1 keeps pink's equal condition intact. The 2 satisfies teal's exact requirement.
Hard Pips Solution
Last chance to solve independently
---
---
---
---
---
- 1.Place the 3/3 domino horizontally in the purple (7) zone
- 2.Place the 1/6 domino vertically in the purple (7) zone and orange (10) zone
- 3.Place the 4/6 domino horizontally in the orange (10) zone and green (10) zone
- 4.Place the 4/2 domino vertically in the green (10) zone and pink (2) zone
- 5.Place the 0/3 domino vertically in the pink (2) zone and green (8) zone
- 6.Place the 6/5 domino horizontally in the navy (6) zone and green (8) zone
- 7.Place the 3/4 domino vertically in the pink (5) zone and navy (10) zone
- 8.Place the 2/3 domino horizontally in the pink (5) zone and teal (5) zone
- 9.Place the 6/0 domino vertically in the navy (10) zone and teal (=) zone
- 10.Place the 0/5 domino horizontally in the teal (=) zone and orange (5) zone
- 11.Place the 2/6 domino vertically in the teal (5) zone and purple (=) zone
- 12.Place the 6/6 domino vertically in the purple (=) zone
- 13.Place the 4/1 domino vertically in the purple (4) zone and pink (=) zone
- 14.Place the 1/1 domino vertically in the pink (=) zone
- 15.Place the 1/2 domino horizontally in the pink (=) zone and teal (2) zone
Puzzle Debrief
Overall Difficulty: Moderate challenge - the zone layout is identical across all three difficulties, so the real differentiator is how quickly you can trace the constraint chains.
Trickiest Puzzle: Hard - the teal (=) zone creates a constraint cascade that forces you to think multiple moves ahead. One wrong domino orientation here breaks the entire equal-value chain, and recovering requires backtracking several steps.
Our Take: Today's set is a great study in how the same puzzle grid can feel completely different depending on whether you're learning the mechanics or racing the clock. The equal-value zones are the real brain-teasers here - they punish guesswork and reward systematic thinking. If you solved Hard without peeking, you earned it.
Tomorrow's Pips drops at midnight. See you then.