
Seeing an "Invalid SIM" error on your iPad Air M3 can feel like a dead end, especially when you depend on cellular data. Most of the time, this isn't a hardware failure.
Inspect the physical SIM card and tray
Start by ejecting the SIM tray using a paperclip or the SIM eject tool that came with the iPad. Check the gold contacts on the SIM card for any dirt, scratches, or corrosion.
Wipe the contacts gently with a dry, lint-free cloth and slide the tray back into the iPad. Make sure the card lies perfectly flat in the tray before pushing it in.
Do a quick force restart
A force restart clears out temporary system glitches that can mess with cellular detection. Press and quickly release Volume Up, then Volume Down, then press and hold the Top button.
Keep holding the Top button until you see the Apple logo on screen. Let the iPad boot up fully and check if the SIM error is gone.
Toggle Airplane Mode
Open Control Center and tap the Airplane Mode icon to turn it on. Wait about 15 seconds, then tap it again to turn it off.
This forces the iPad to re-register with your carrier network. It's a quick test that often refreshes a stuck connection.
Verify the SIM is activated in Settings
Go to Settings and tap Cellular. If you see your carrier name listed here, the iPad is reading the SIM card fine and the issue is likely on the software side.
If it says "No SIM" or "Invalid SIM," the iPad isn't detecting the card at all. You might need to try the physical inspection steps again or reseat the tray.
Update to the latest iPadOS
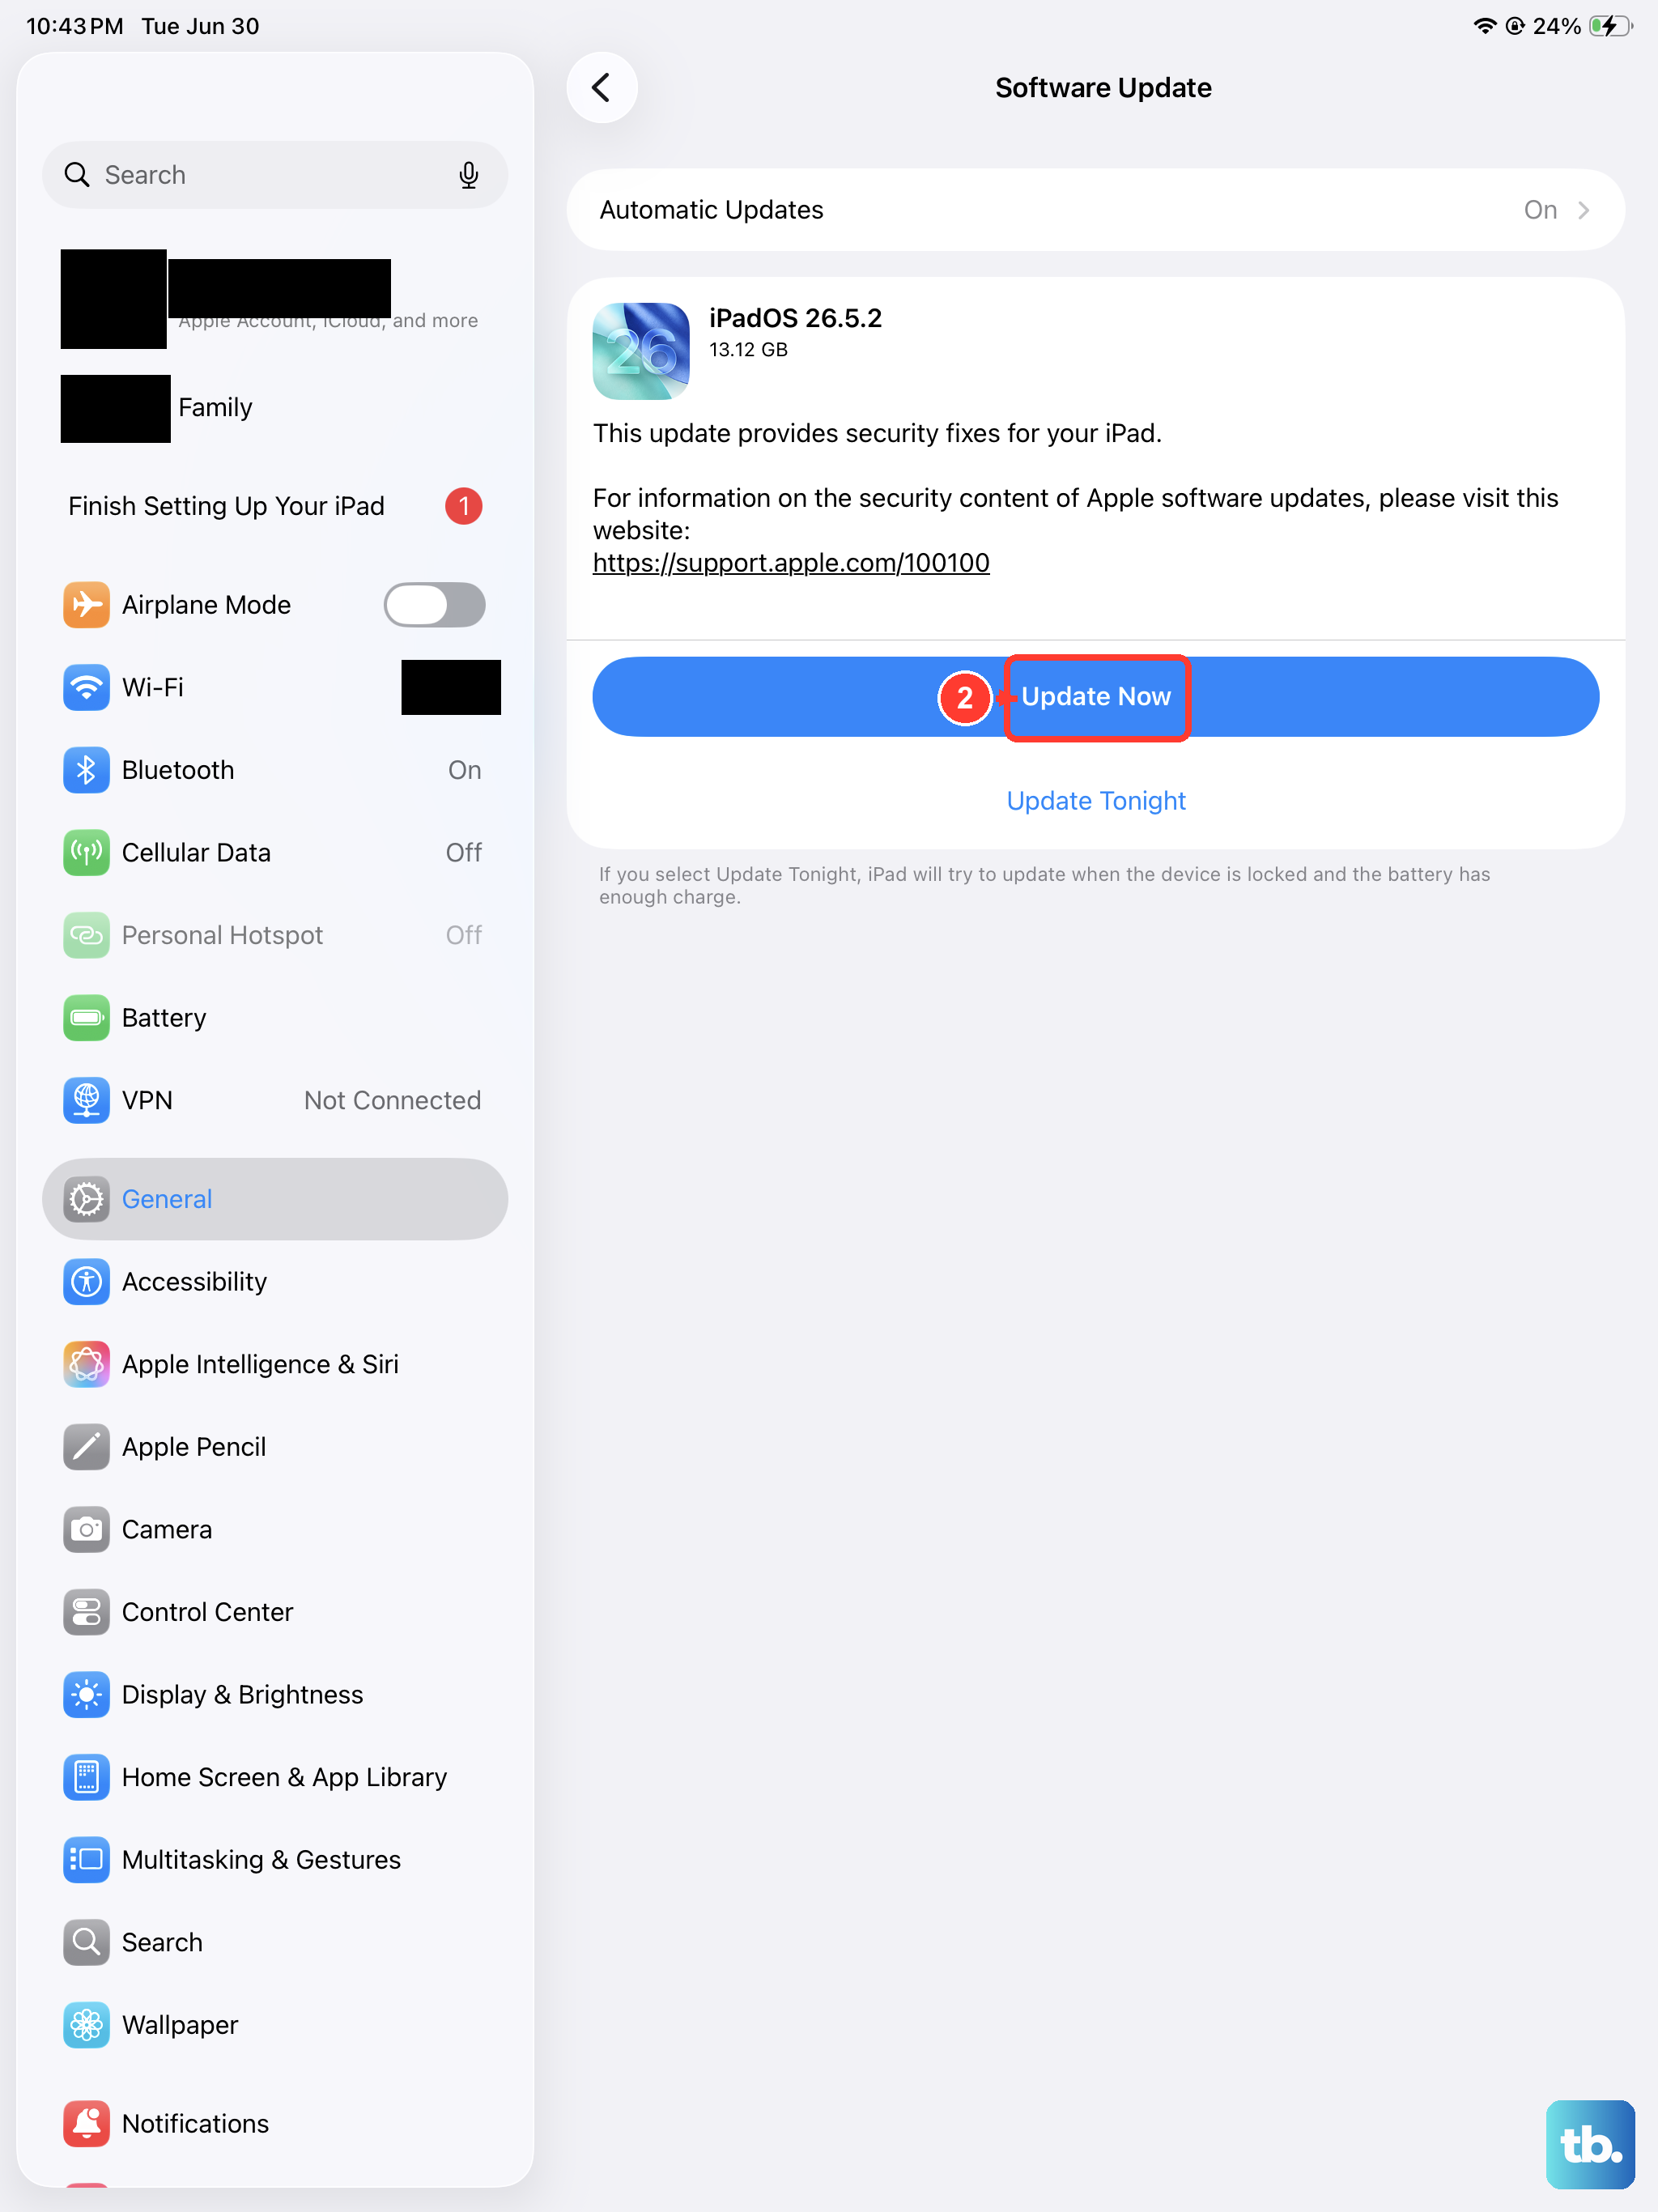
Apple regularly pushes out carrier settings updates and bug fixes through iPadOS updates. Go to Settings > General > Software Update and install any available version.
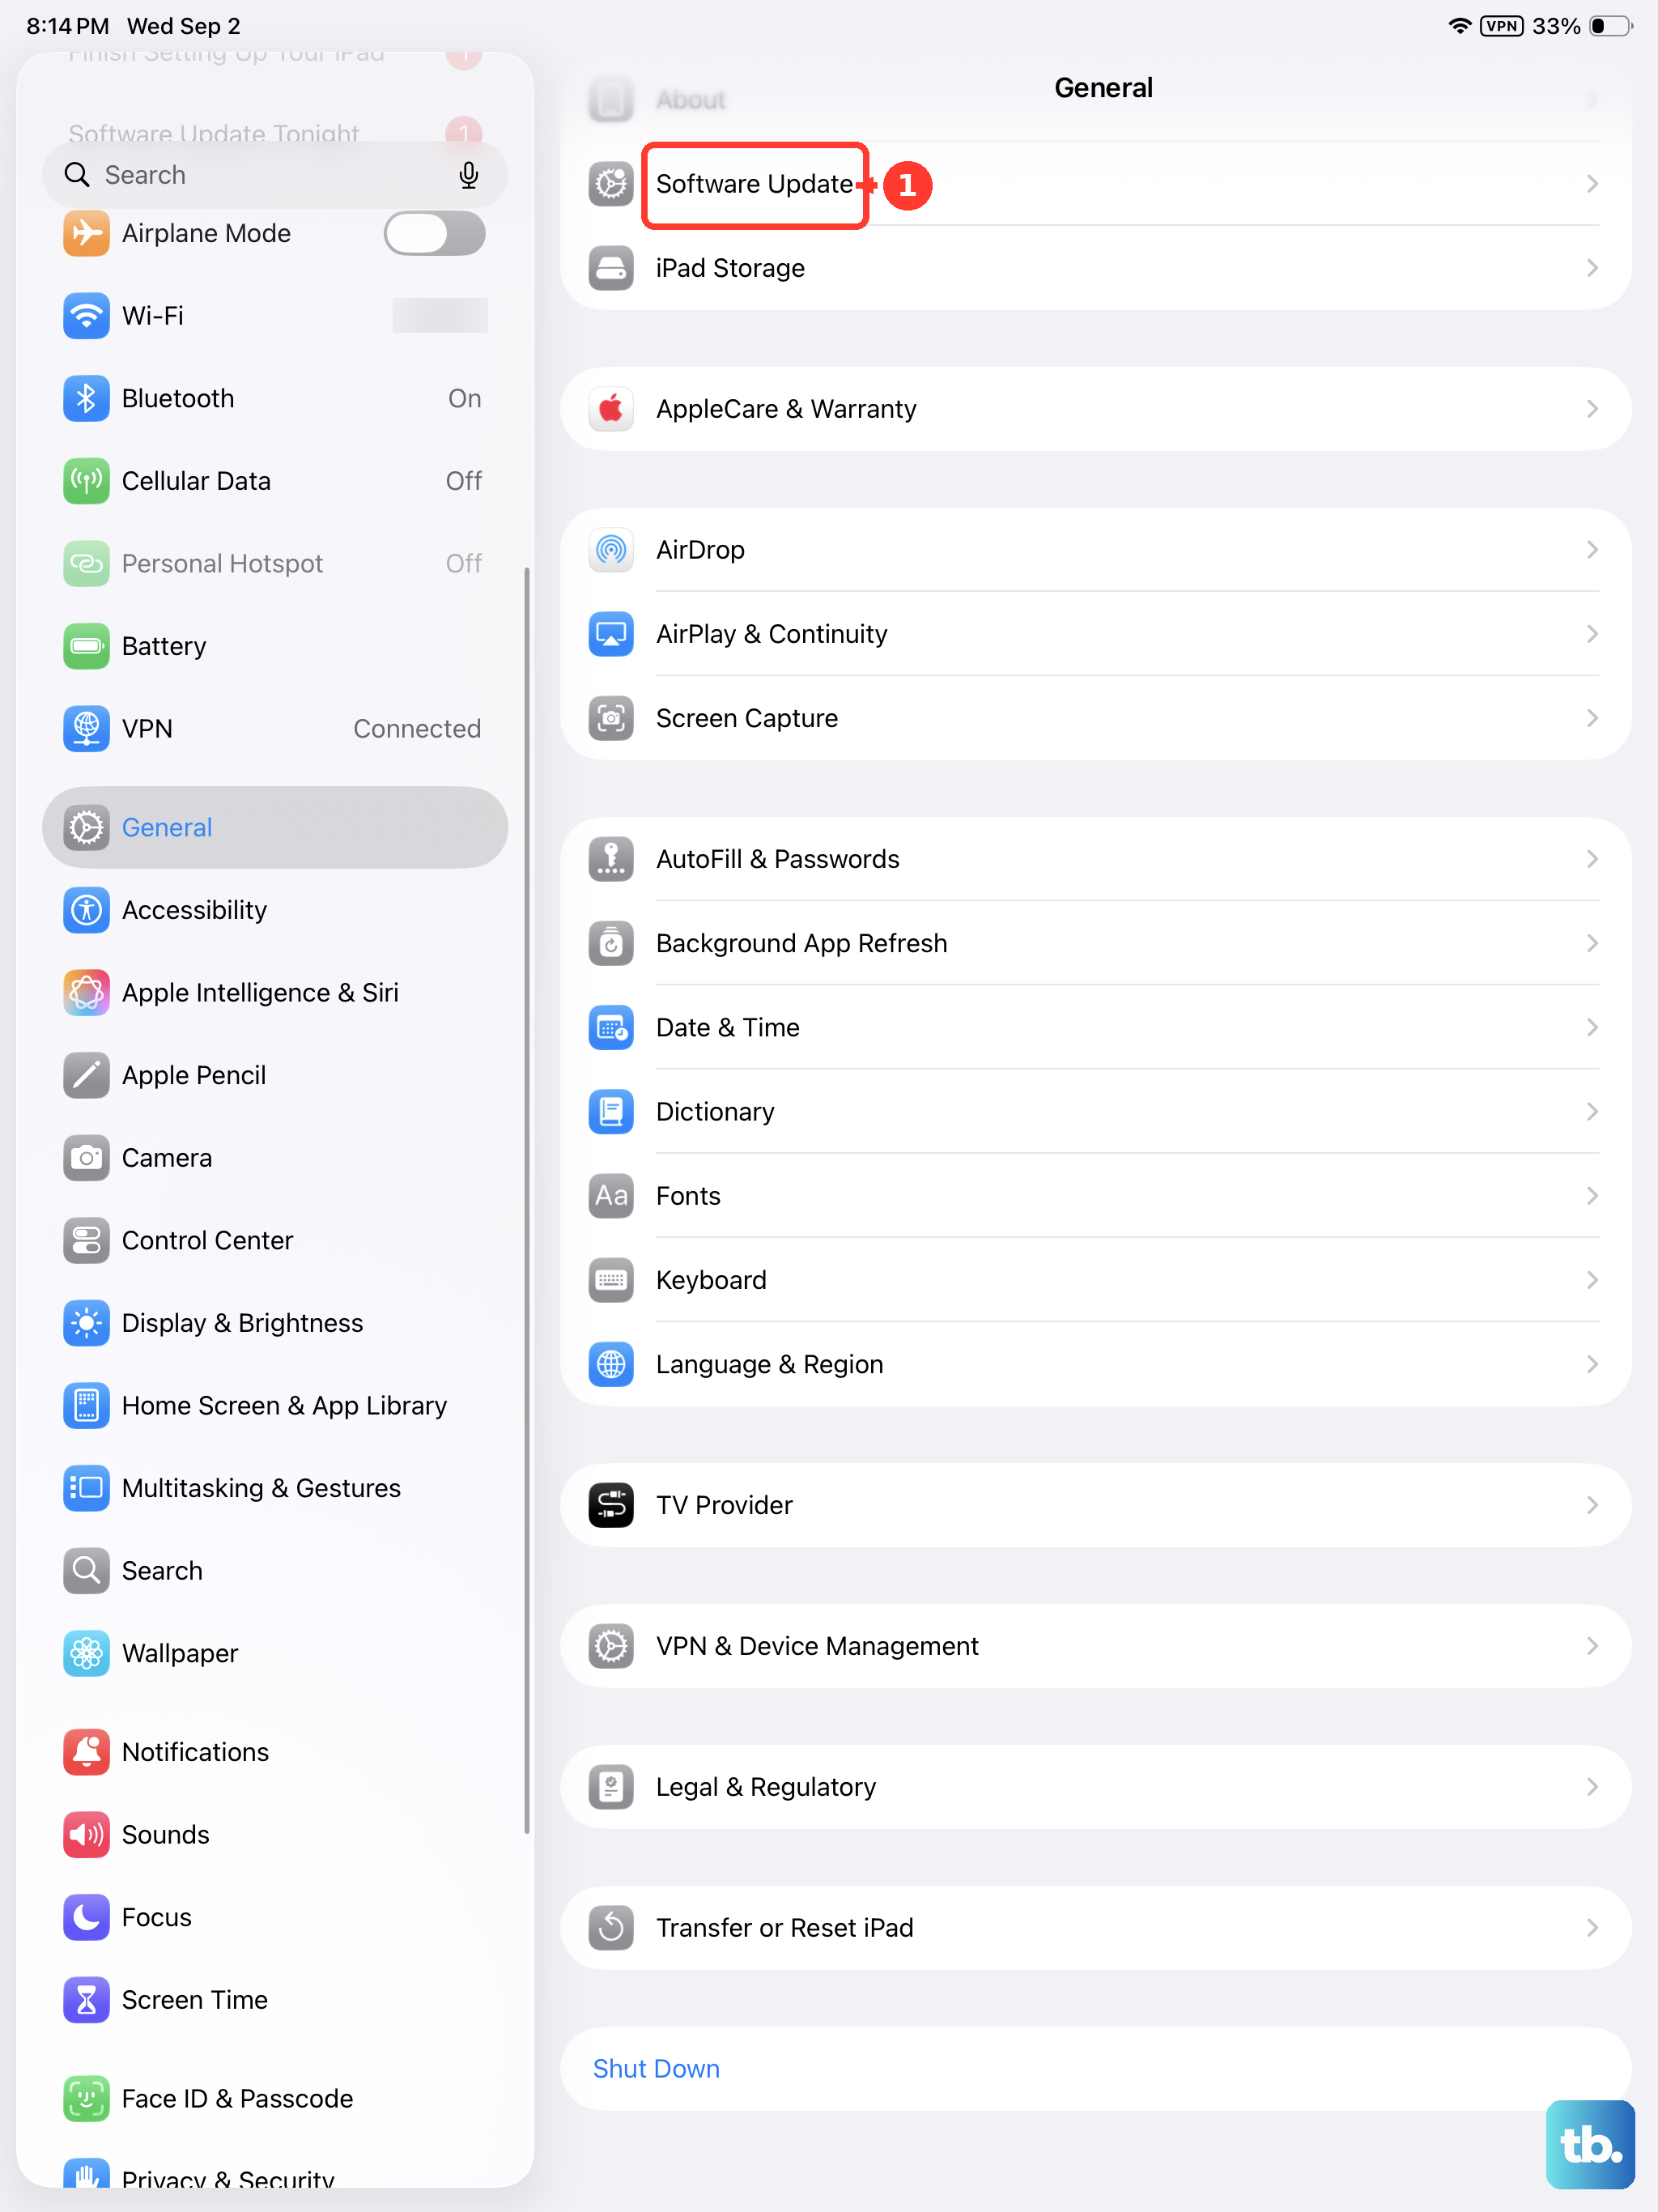
After the update finishes, the iPad restarts and resets its cellular connection automatically. This has solved "Invalid SIM" errors on a number of recent devices.
Reset Network Settings
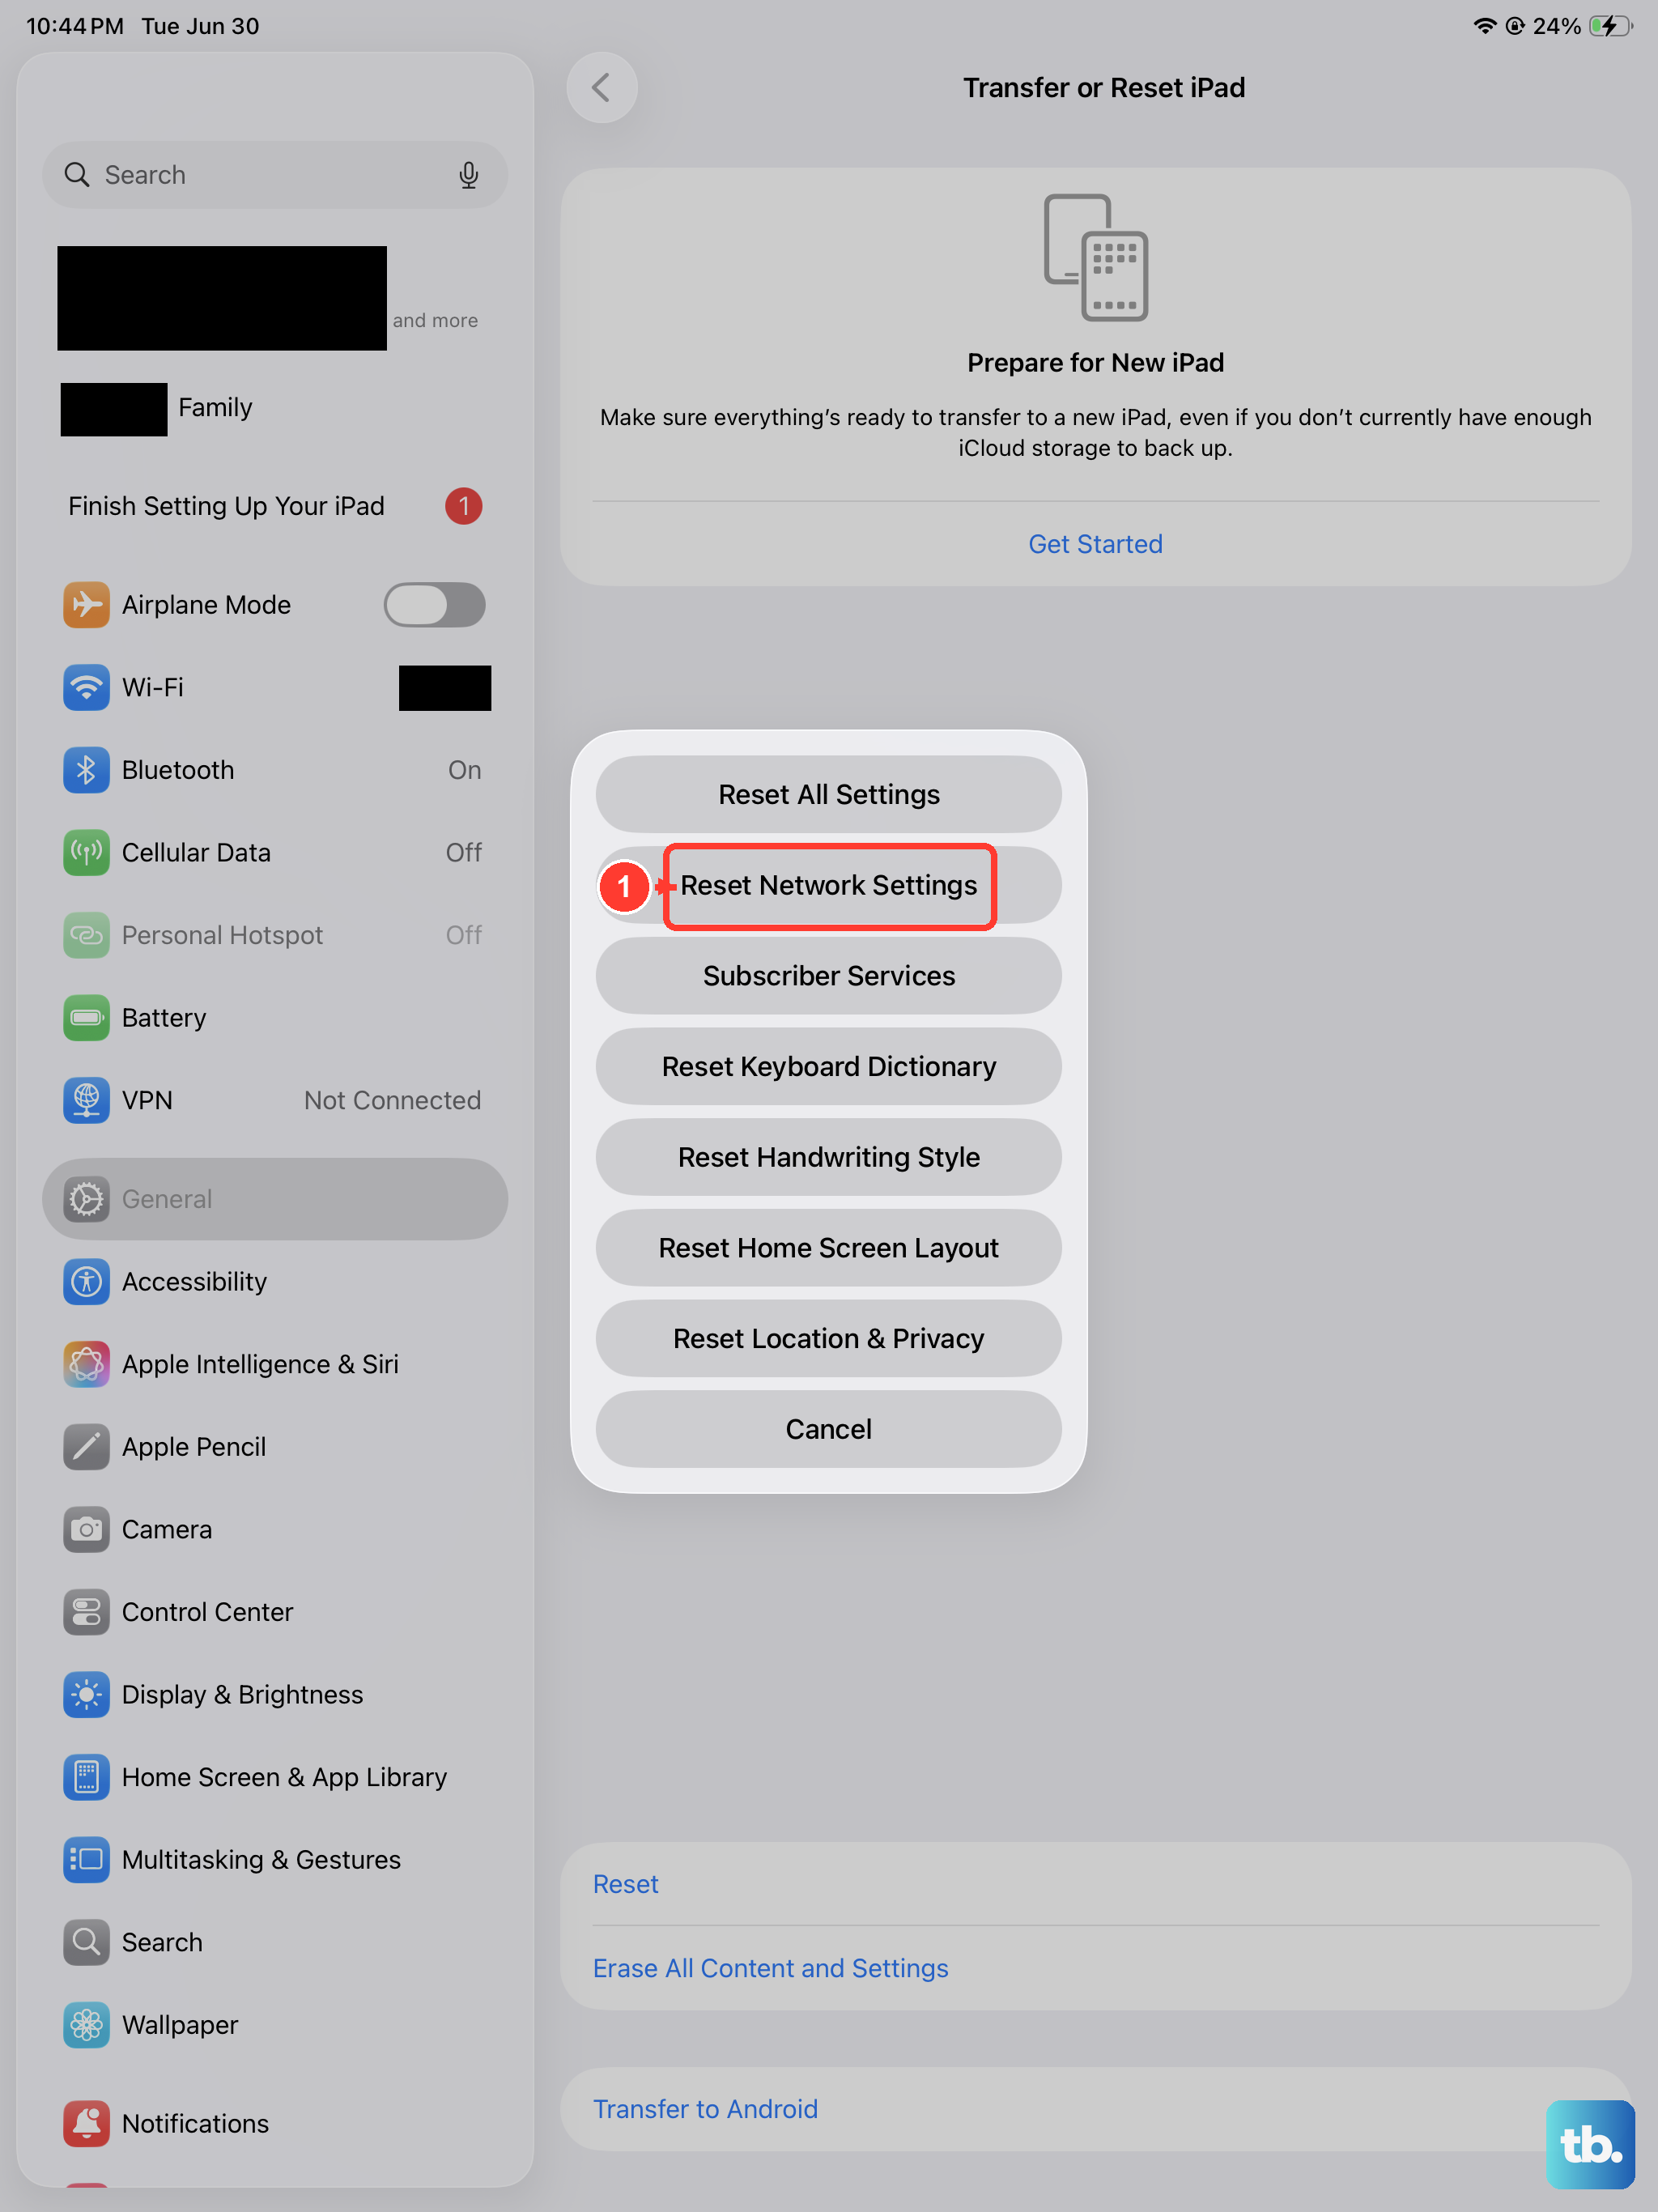
Resetting your network settings clears out saved Wi-Fi passwords, Bluetooth pairings, and VPN configurations. It also wipes any corrupted cellular data that might be causing the invalid SIM error.
Go to Settings > General > Transfer or Reset iPad > Reset > Reset Network Settings. The iPad will restart, and you'll need to reconnect to Wi-Fi networks afterward.
Manually select your network operator
Automatic network selection sometimes fails, especially after a carrier outage or a software update. In Settings > Cellular > Network Selection, turn off Automatic.
Wait for the iPad to search for available operators and tap your carrier from the list. If it connects, you've found the culprit.
Check your cellular data settings (APN)
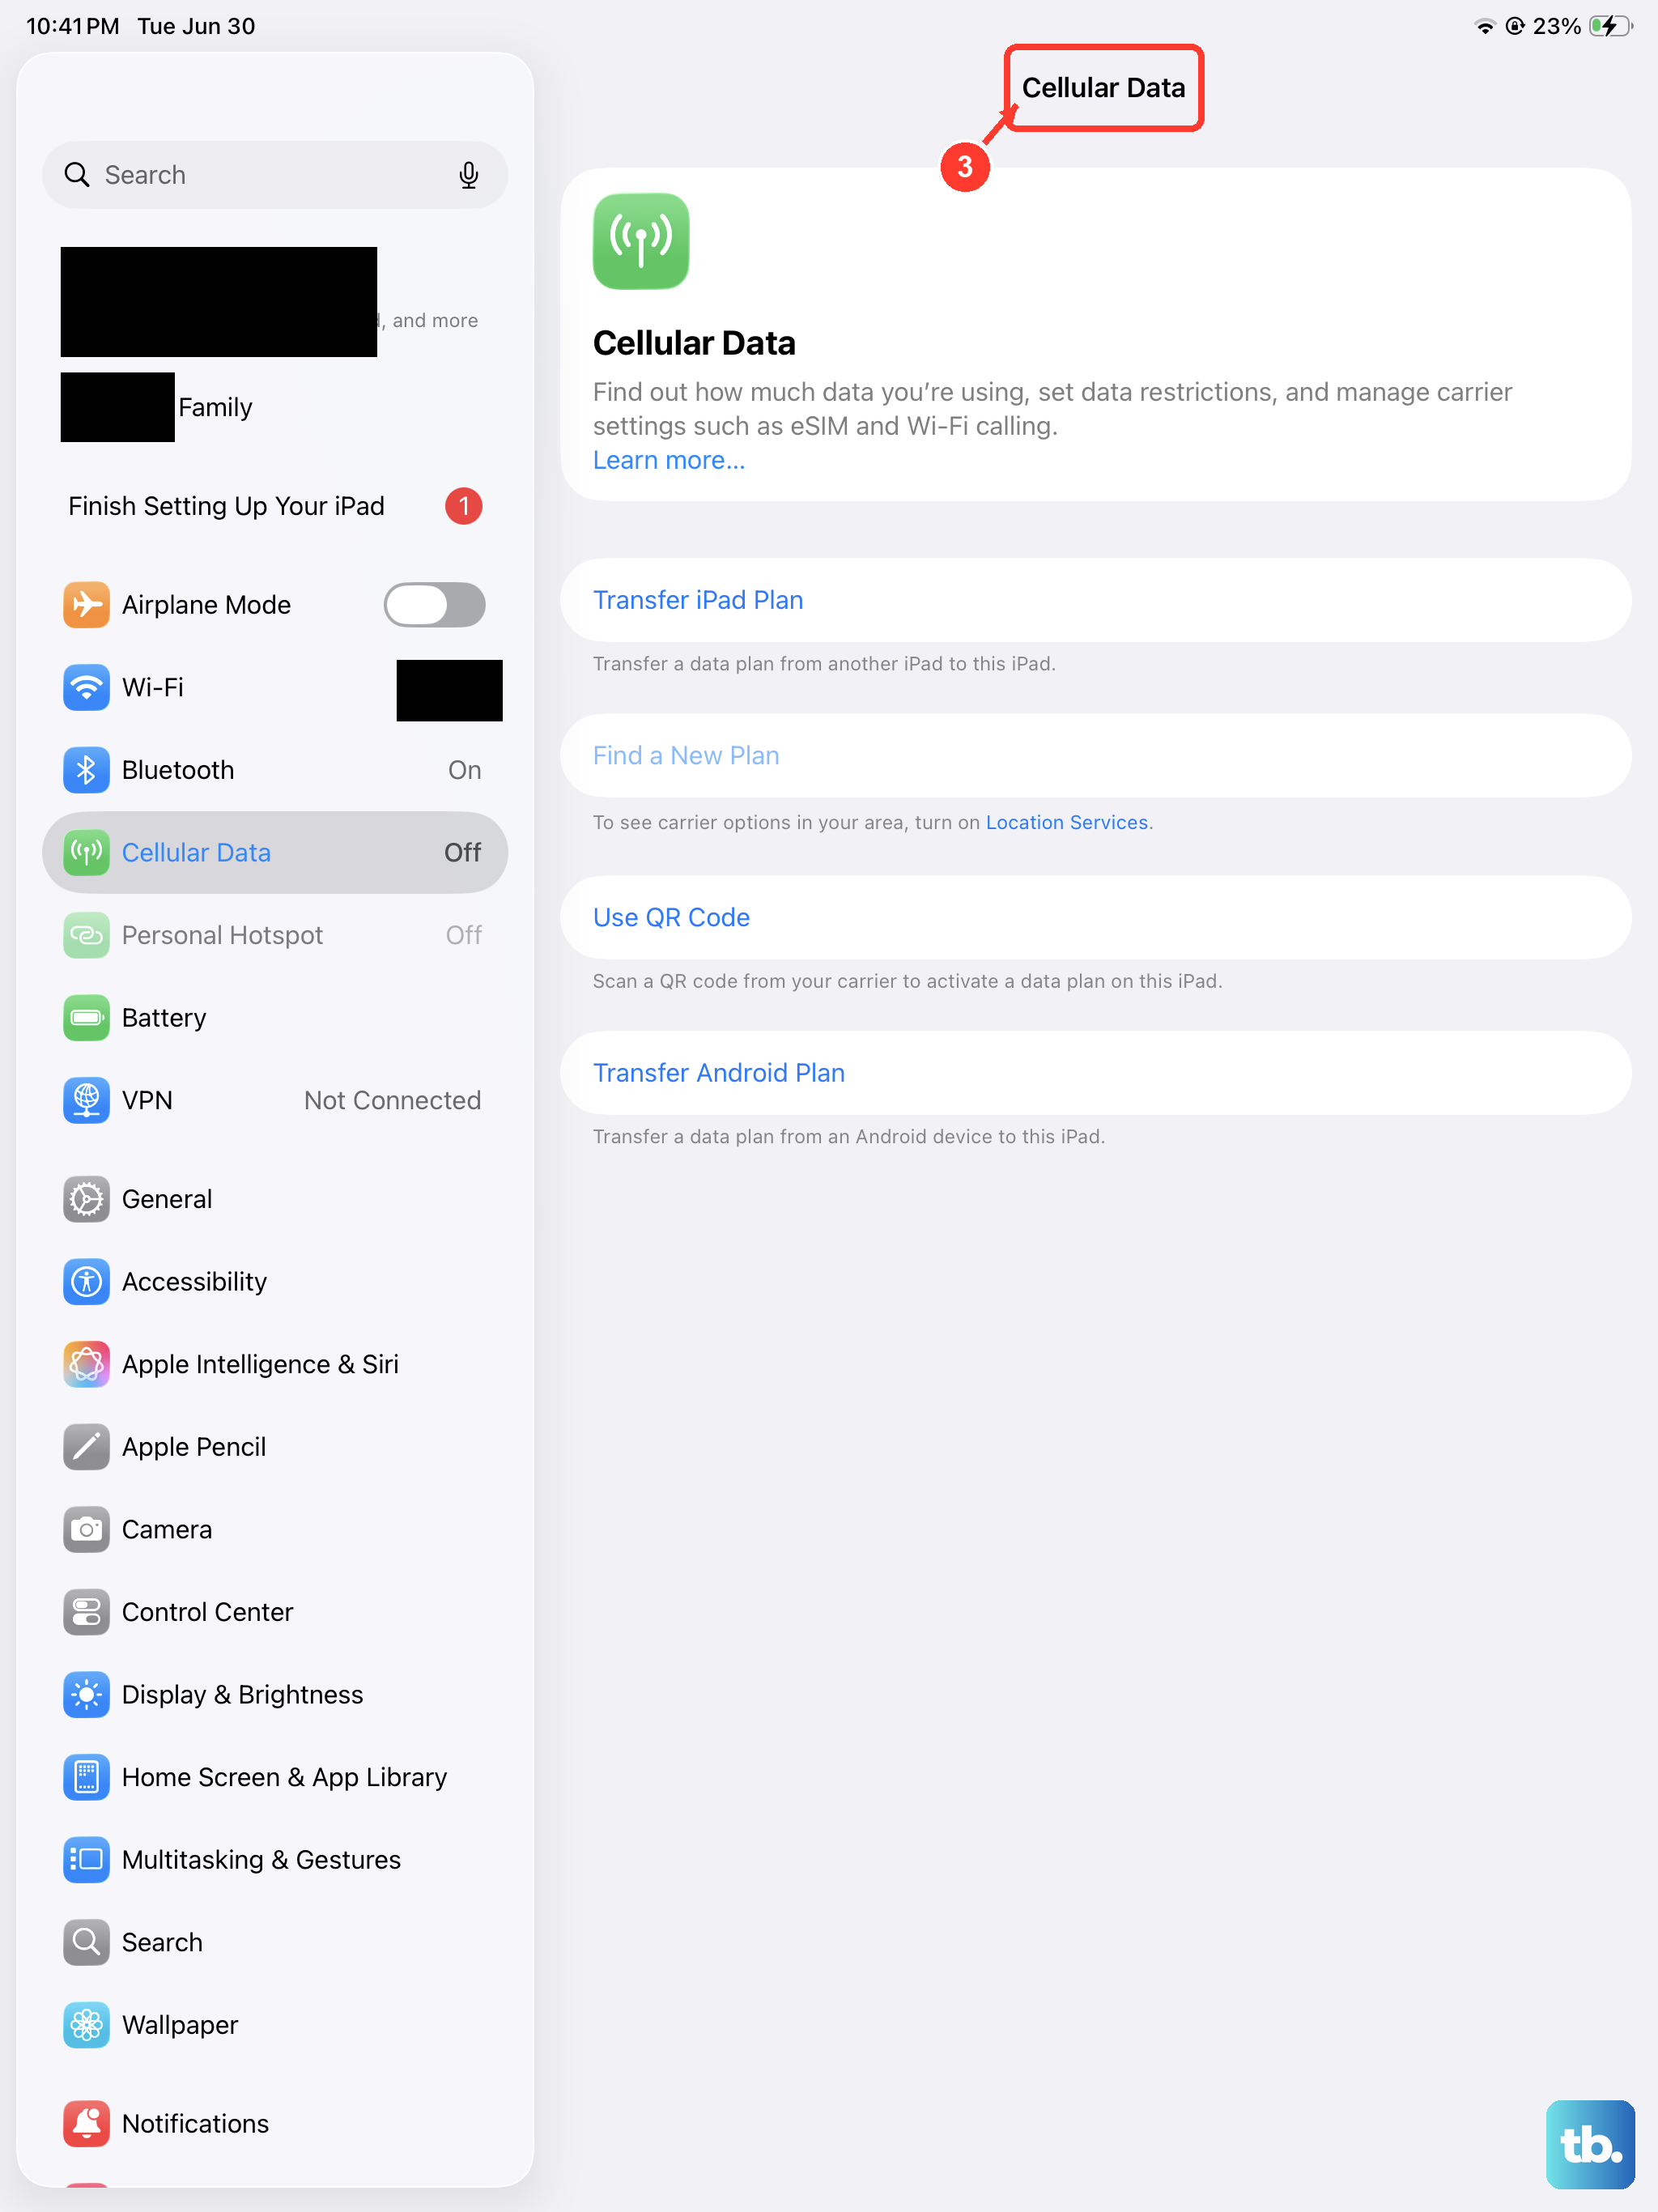
Wrong Access Point Name settings can trick the iPad into thinking the SIM is invalid. Go to Settings > Cellular > Cellular Data Network and verify the APN matches what your carrier provides.
If the fields are blank or look incorrect, contact your carrier for the right values. A simple APN correction can bring the SIM back to life immediately.
Switch to LTE if you're having 5G issues
Some SIM cards have trouble negotiating certain 5G frequency bands. Go to Settings > Cellular > Cellular Data Options > Voice & Data and try switching from "5G Auto" to "LTE."
If the error disappears, you can leave it on LTE or check with your carrier about a SIM card that's fully 5G compatible.
Try using an eSIM instead
If the physical SIM slot keeps throwing errors, convert your line to an eSIM. Contact your carrier and ask for an eSIM activation.
Once you scan the QR code or install the eSIM profile through your carrier's app, you can remove the physical SIM entirely. That often solves persistent invalid SIM problems.
Restore the iPad as a last resort
A full restore fixes deeper system-level problems that regular resets don't touch. Back up your iPad first, then connect it to a Mac or Windows PC and open Finder or iTunes.
Put your iPad into DFU mode: press Volume Up, then Volume Down, hold the Top button for 10 seconds, and while holding the Top button, connect it to the computer. Keep holding for another 10 seconds until the recovery screen appears. Erase and restore.