
Seeing a "SIM Not Provisioned" or "No Service" message on your iPad 10th Generation can stop you from getting online when you're away from Wi-Fi. This usually means your cellular iPad can't connect to your carrier's network, which could be due to a simple setting or an account issue that needs sorting out.
I'd start with the quickest fix first. Pull down from the top-right corner of the screen to open Control Center and tap the airplane icon to turn on Airplane Mode. Wait about 15 seconds, then tap it again to turn it off. This forces your iPad to drop its current network connection and search for a fresh one, which often clears up temporary glitches.
Restart Your iPad
A simple restart can work wonders for many iPadOS issues, including cellular problems. To restart your iPad 10th Generation, go to Settings > General > Shut Down and slide the power off slider. Wait a full minute, then press and hold the top button until you see the Apple logo.
If the screen is unresponsive, you can perform a force restart. Quickly press and release the Volume Up button, then quickly press and release the Volume Down button. Immediately press and hold the top button until the Apple logo appears, which can take about 10 seconds.
Check Your SIM Card Tray
The iPad 10th Generation uses a nano-SIM card, and sometimes it just isn't seated perfectly in the tray. You'll need the SIM eject tool that came in the box or a small paperclip.
Turn off your iPad first. Locate the SIM tray on the left side, insert the tool into the small hole, and gently push to eject the tray. Take out the SIM card, inspect the gold contacts for any dust or damage, and then carefully place it back in. Push the tray firmly back into the iPad until it clicks, then power it back on.
Verify Activation with Your Carrier
This is one of the most common reasons for this error, especially with a new line or a newly transferred number. Your SIM card needs to be fully activated on your carrier's network.
If you just got the SIM, it might take a little time for activation to complete. The best move is to contact your carrier's customer support directly. They can check your account status in real-time, confirm the SIM is provisioned correctly, and push any necessary updates to your line.
Check for a Carrier Settings Update
Apple and carriers occasionally release small updates that help your iPad communicate better with the cellular network. Checking for this is easy. Make sure your iPad is connected to Wi-Fi, then go to Settings > General > About.
If an update is available, a prompt will appear on this screen. Just tap "Update" and follow the instructions. Your iPad will restart to complete the process. This is different from a regular iPadOS software update.
Manually Select Your Network
Sometimes letting your iPad automatically choose a network can lead to it latching onto a weak or incorrect signal. You can try picking your carrier manually. Go to Settings > Cellular > Network Selection.
Turn off the "Automatic" toggle. Your iPad will search for available networks. After a moment, a list will appear. Select your specific carrier's name from the list. Wait a minute to see if service returns. If it doesn't, or if your carrier doesn't appear, go back and turn "Automatic" on again.
Reset Your Network Settings
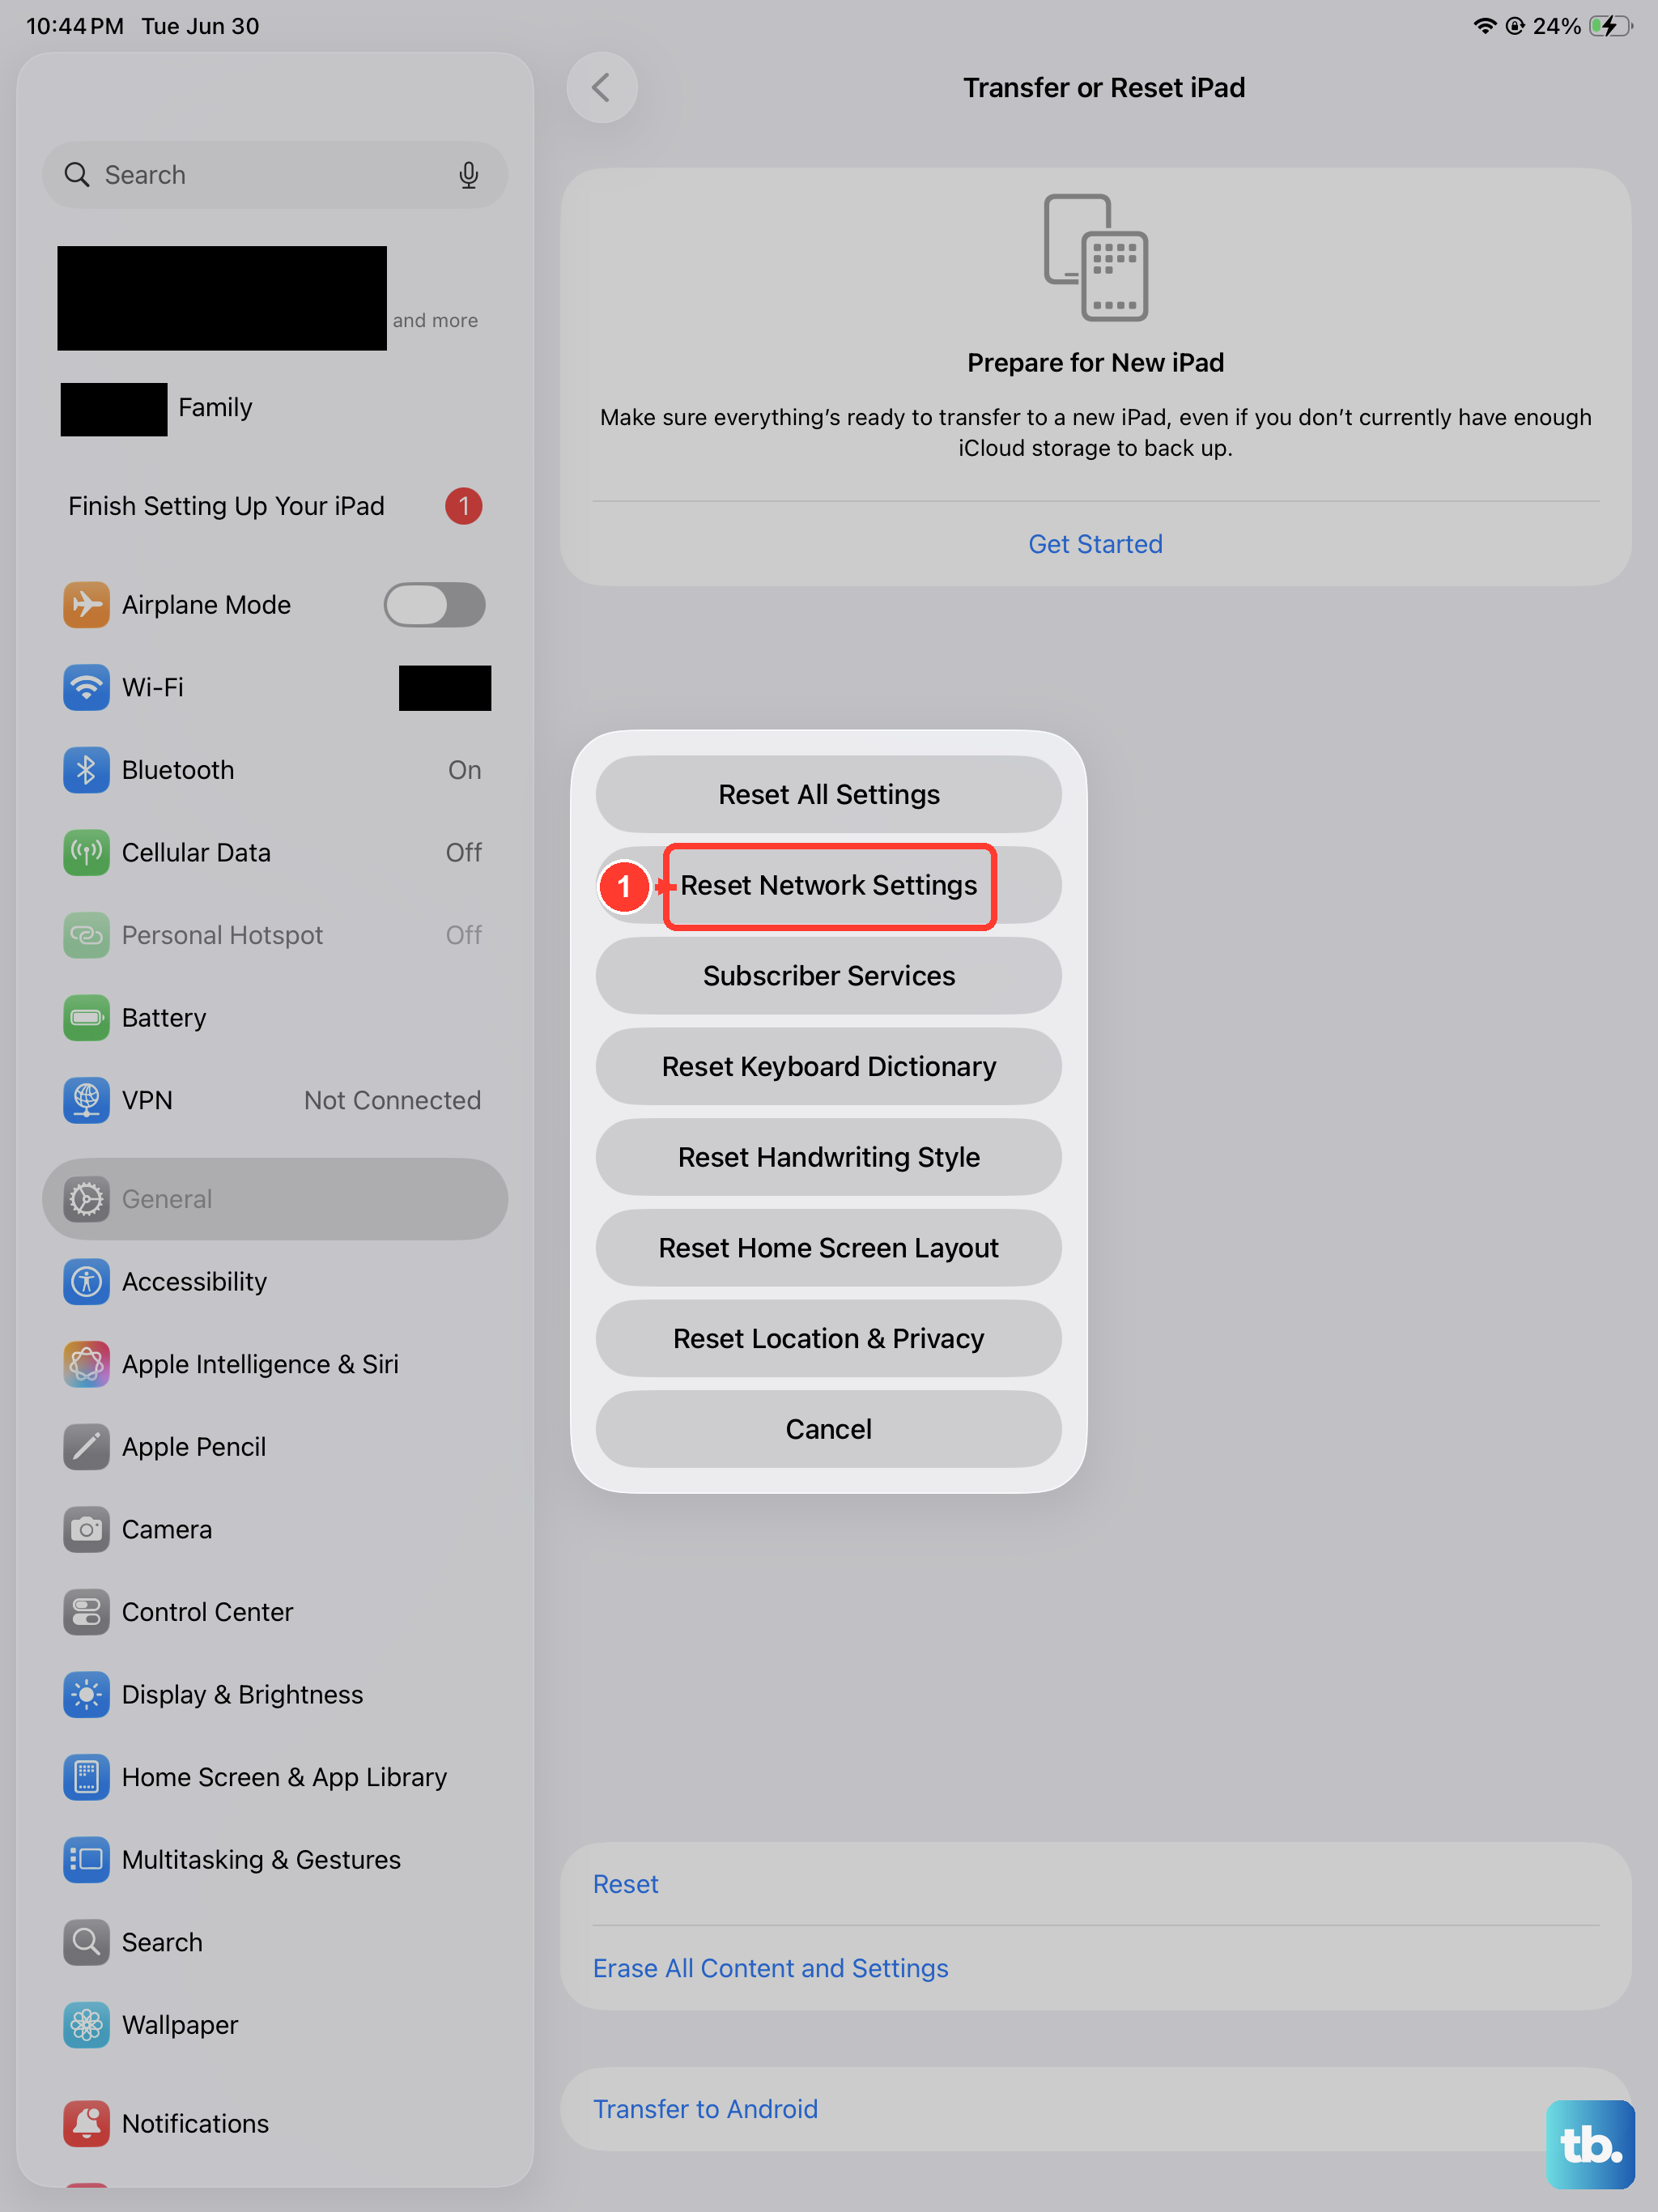
This step will clear all your saved Wi-Fi passwords, Bluetooth pairings, and cellular network preferences, but it can resolve deeper software conflicts. Before you do this, make sure you know your important Wi-Fi passwords.
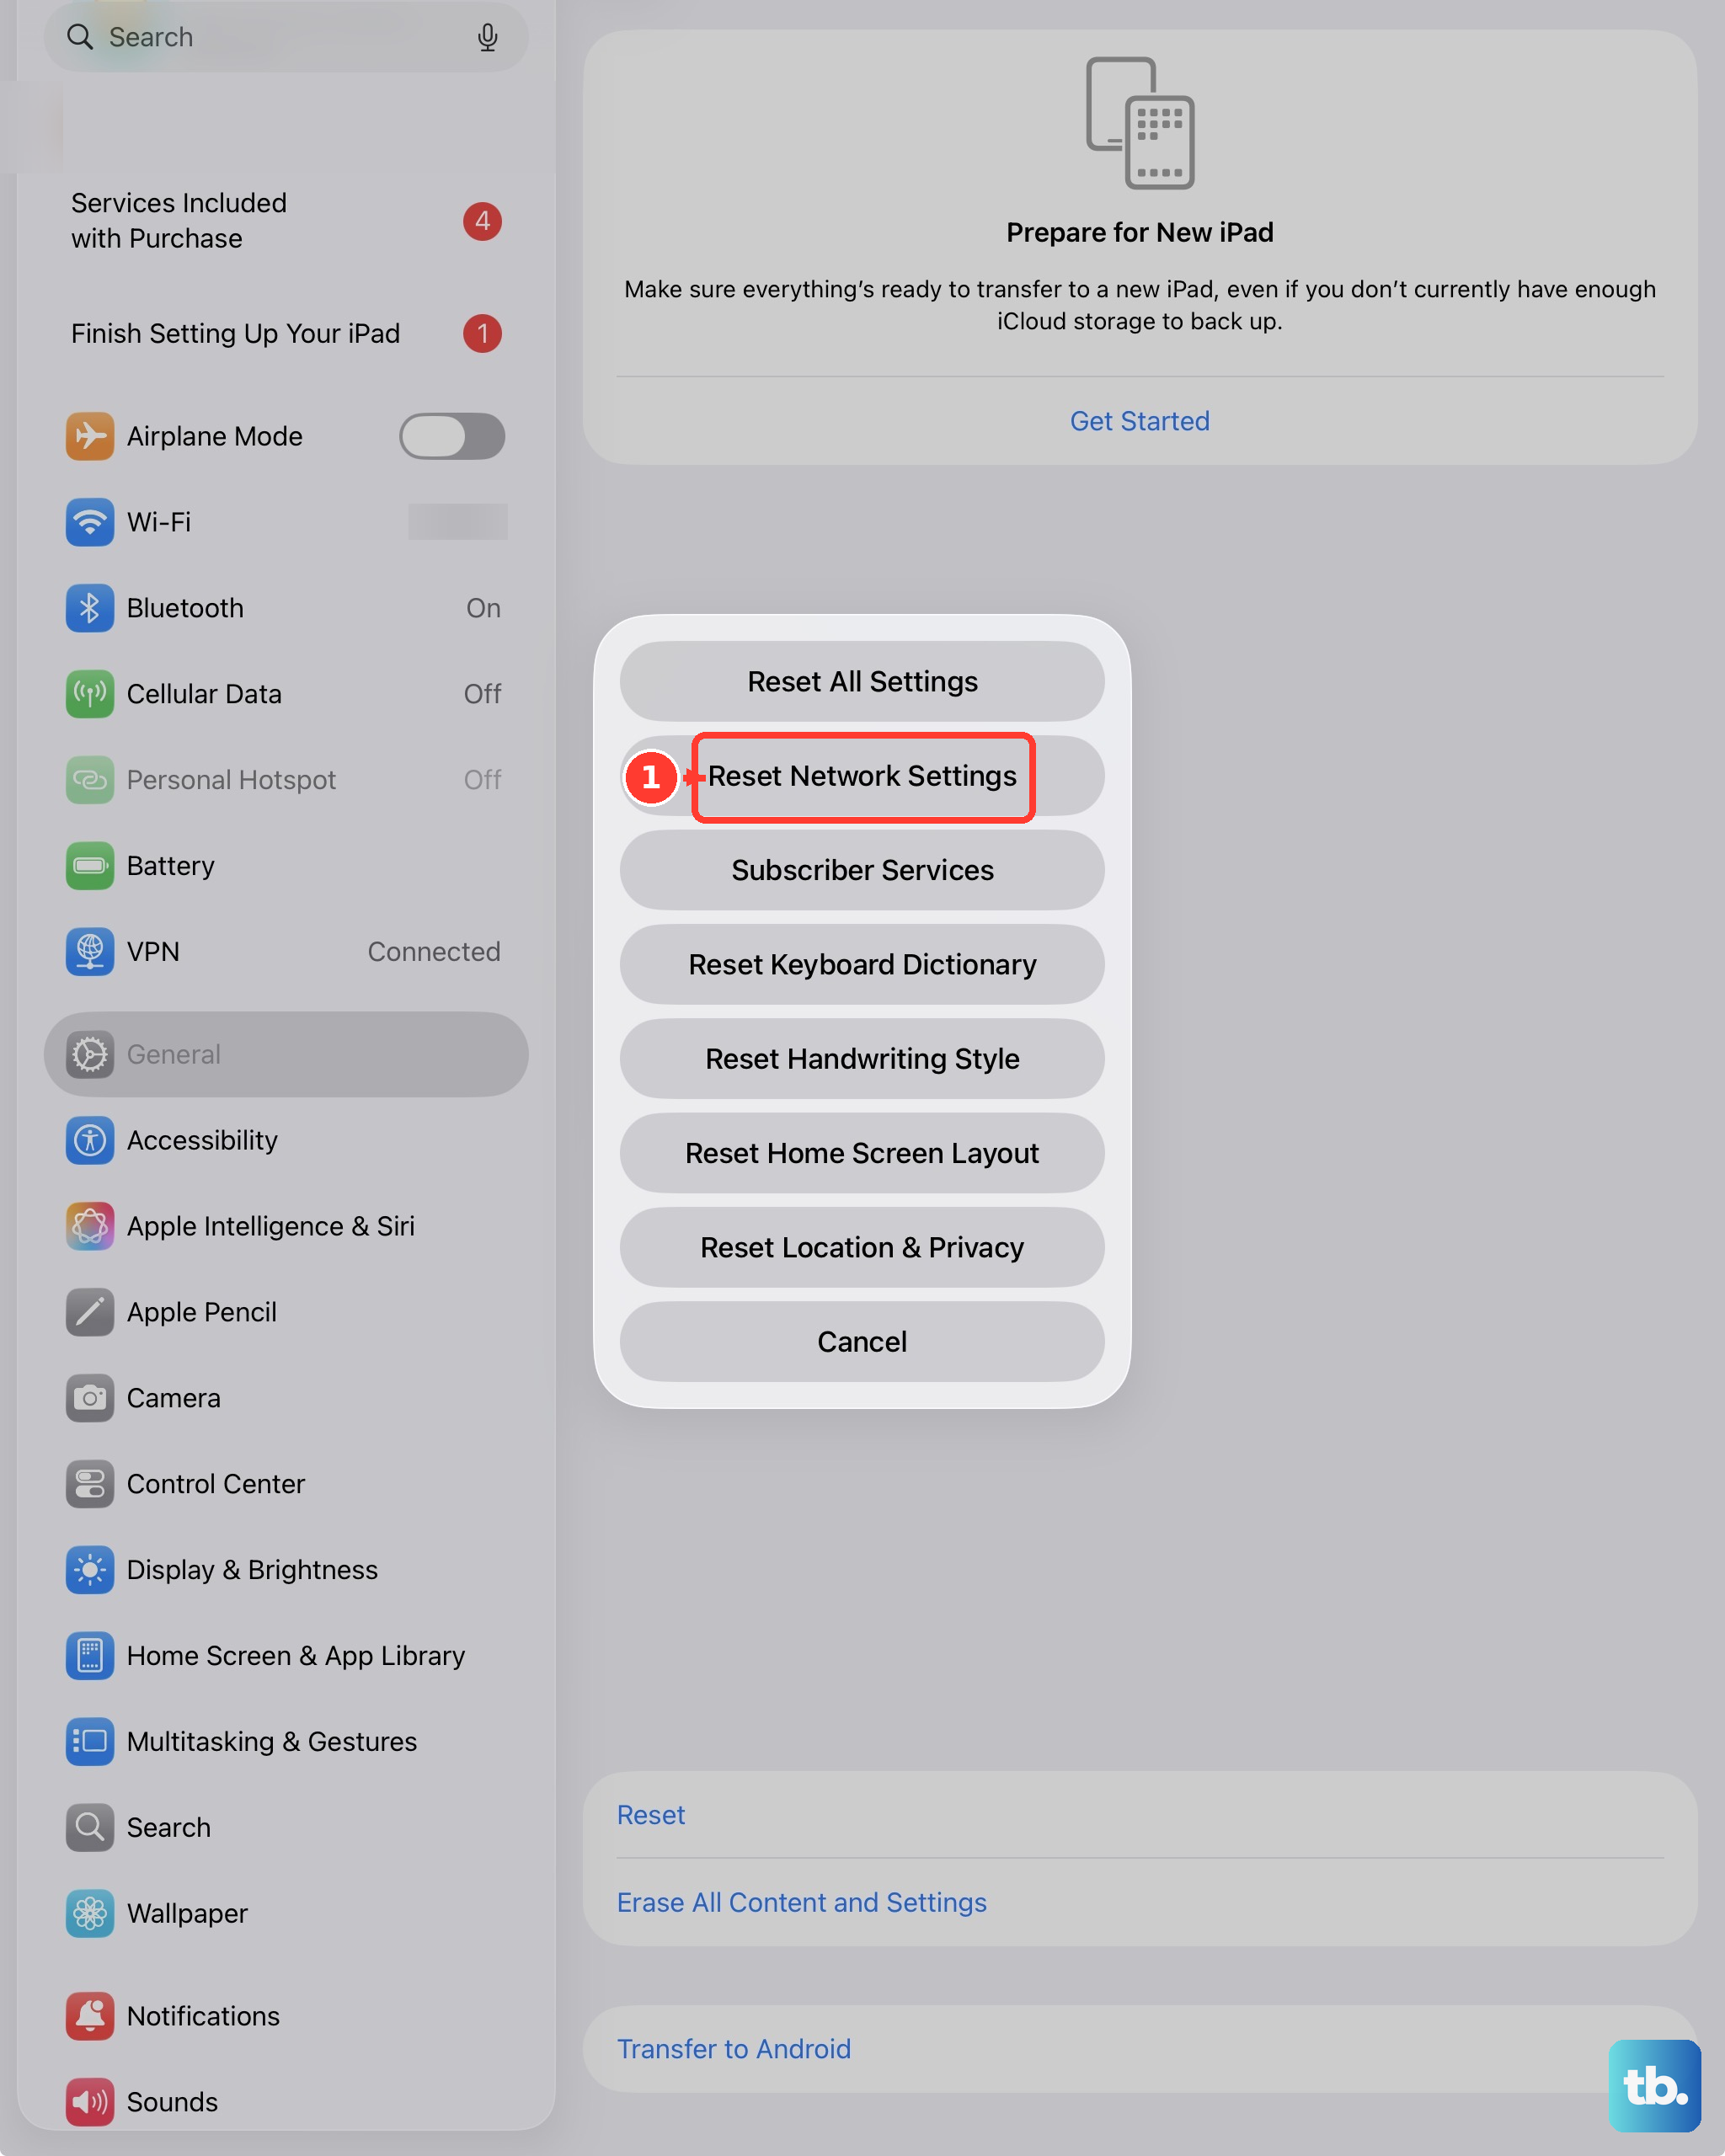
To reset, open Settings > General > Transfer or Reset iPad. Tap "Reset" at the bottom, then choose "Reset Network Settings." You'll need to enter your passcode and confirm the action. Your iPad will restart, and you'll need to reconnect to Wi-Fi and re-pair any Bluetooth devices like the Apple Pencil.
Ensure Your Cellular Plan is Active
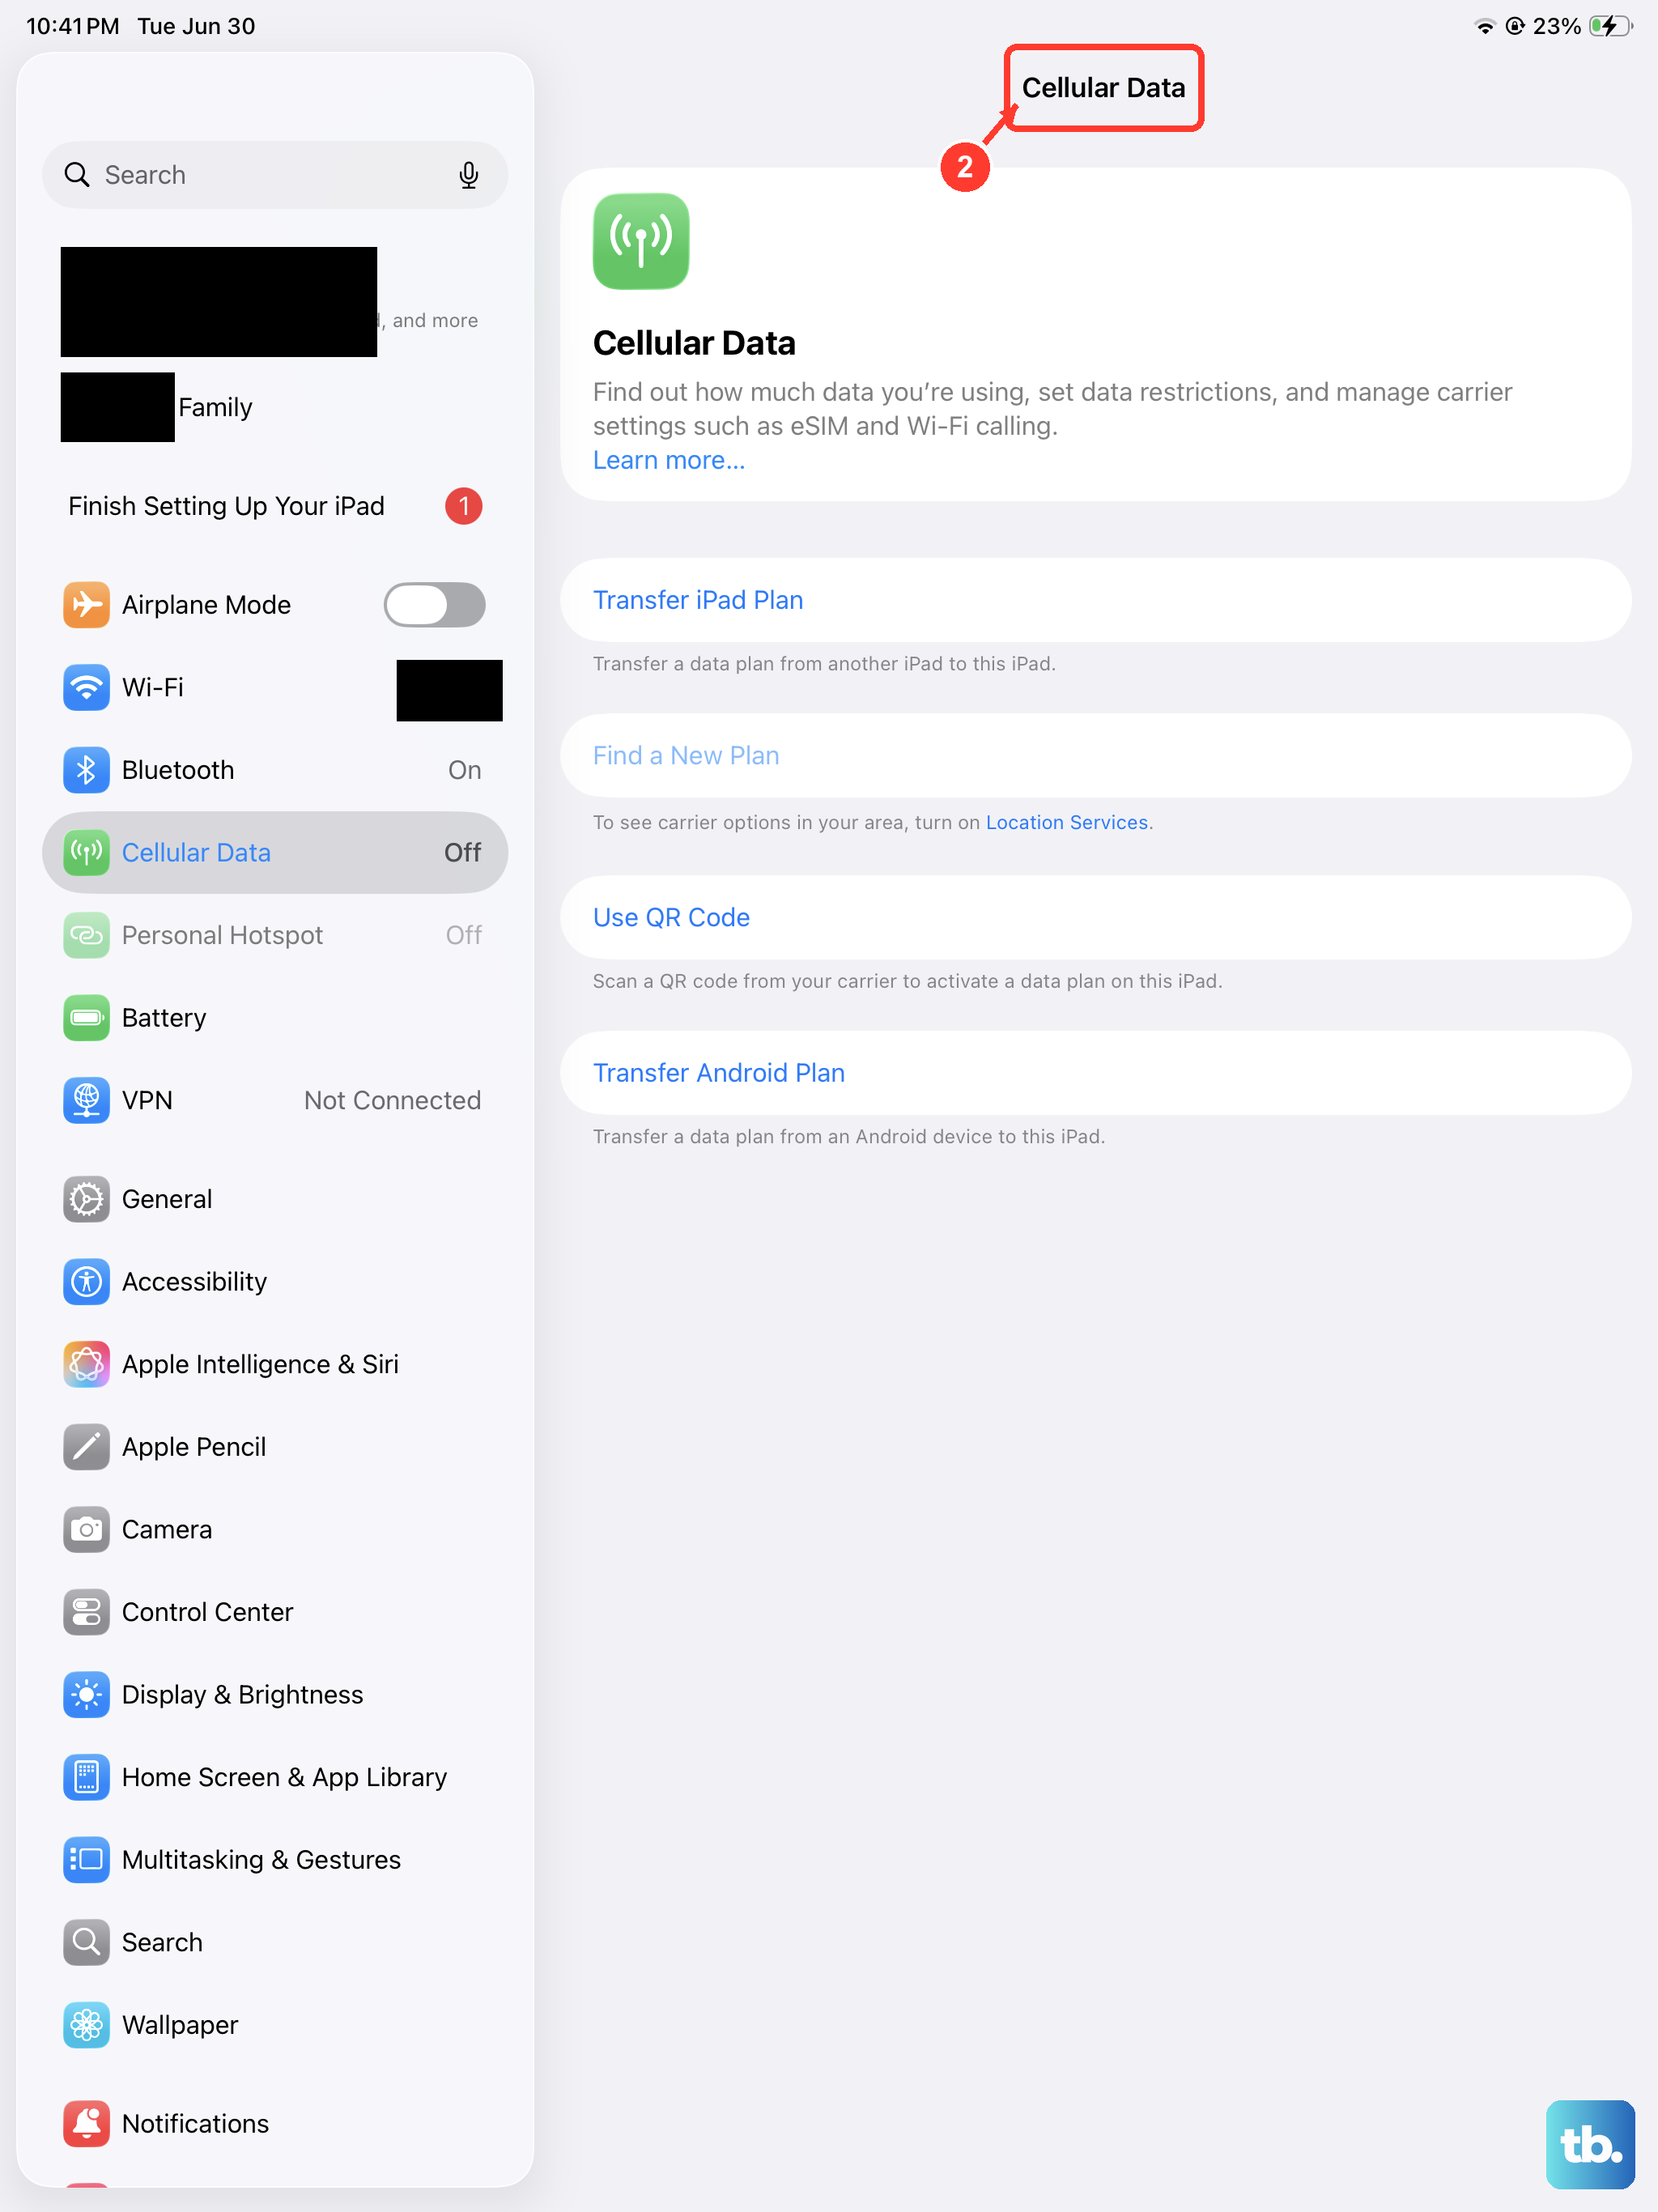
For prepaid plans, a lapsed payment will suspend service. Even for postpaid accounts, a billing issue could be the cause. Open your carrier's official app on your iPad or another device to check your account status and balance.
You can also dial your carrier's customer service number from another phone. They can tell you immediately if there's an outstanding balance or an account hold preventing your cellular data from working.
Update iPadOS
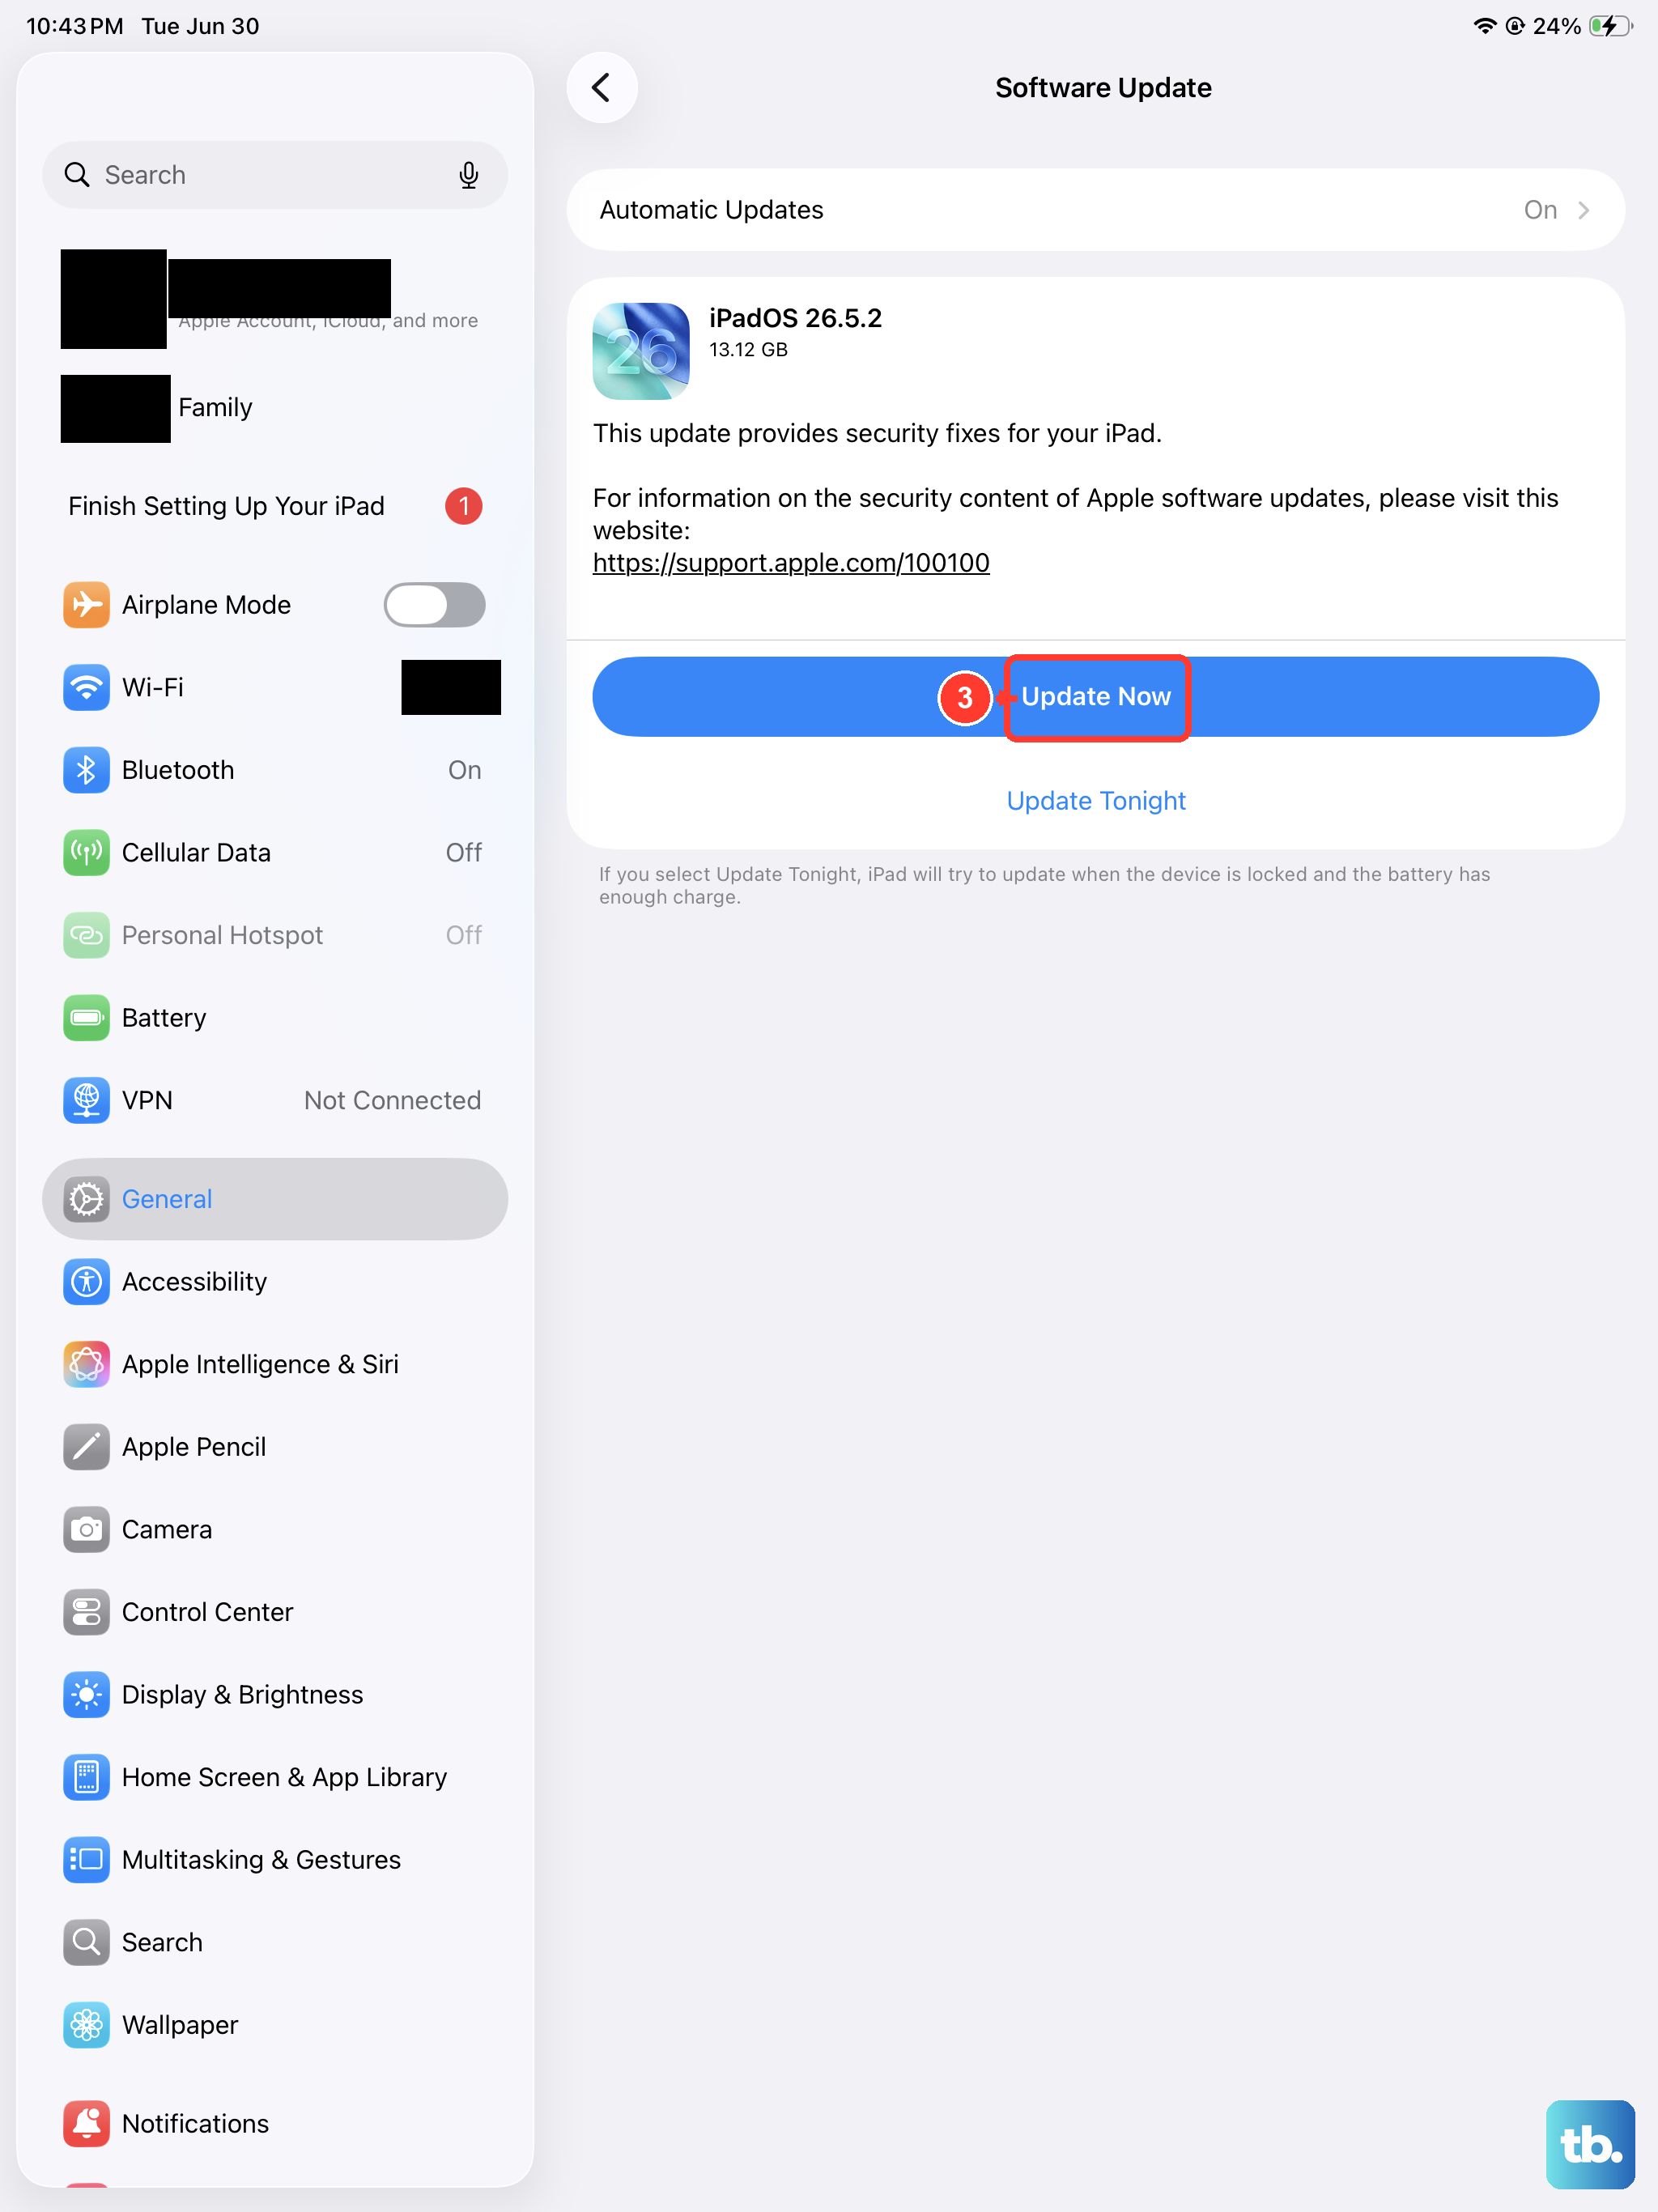
Running an outdated version of iPadOS can sometimes lead to connectivity bugs that are fixed in later updates. It's a good idea to make sure you're on the latest version. Connect to a Wi-Fi network and plug your iPad into power using a 20W or higher USB-C PD charger for a reliable update.
Then, go to Settings > General > Software Update. If an update is available, tap "Download and Install." Keeping your iPad 10th Generation updated to the latest iPadOS 18 version ensures you have all the latest stability improvements.
Test the SIM in Another Device
If you have access to another unlocked cellular tablet or phone, you can test to see where the problem lies. Power down the other device, insert your iPad's SIM card, and turn it back on.
If the SIM gets service in the other device, the issue is likely with your iPad's hardware or software. If the SIM still shows as "Not Provisioned" in the other device, the problem is almost certainly with the SIM card or your carrier account, and you'll need to contact them for a replacement SIM.