You double-click the Windows Media Creation Tool, but no window opens, or it disappears almost immediately. Start with a fresh Microsoft download and administrator access, especially when running the Windows 11 tool on Windows 10. Follow the fixes below to replace the executable affected by the silent-exit bug, address Windows launch restrictions, and get installation media ready if the tool still refuses to open.
Replace the downloaded tool first
A fresh copy fixes the confirmed silent-exit bug in an older Windows 11 Media Creation Tool. Open Microsoft’s Windows 11 download page.
Under Create Windows 11 Installation Media, select Download Now. Microsoft identifies version 26100.6584 as affected by a launch failure on Windows 10 version 22H2. The replacement released October 28, 2025 resolved that problem.
Locate the newly downloaded executable in File Explorer, using this fresh copy for the remaining steps. Right-click the file and select Run as administrator. The tool requires administrator privileges. Approve the elevation prompt, providing administrator credentials when requested.
If nothing happens, clear a stuck instance
Check for an unresponsive instance before opening the tool again. Press Ctrl+Shift+Esc to open Task Manager.
Under Processes, select the identifiable, unresponsive Media Creation Tool process. Leave any installation that is actively progressing alone. Select End task. Reopen the fresh executable.
If it still will not open, save your work. Select Start > Power > Restart.
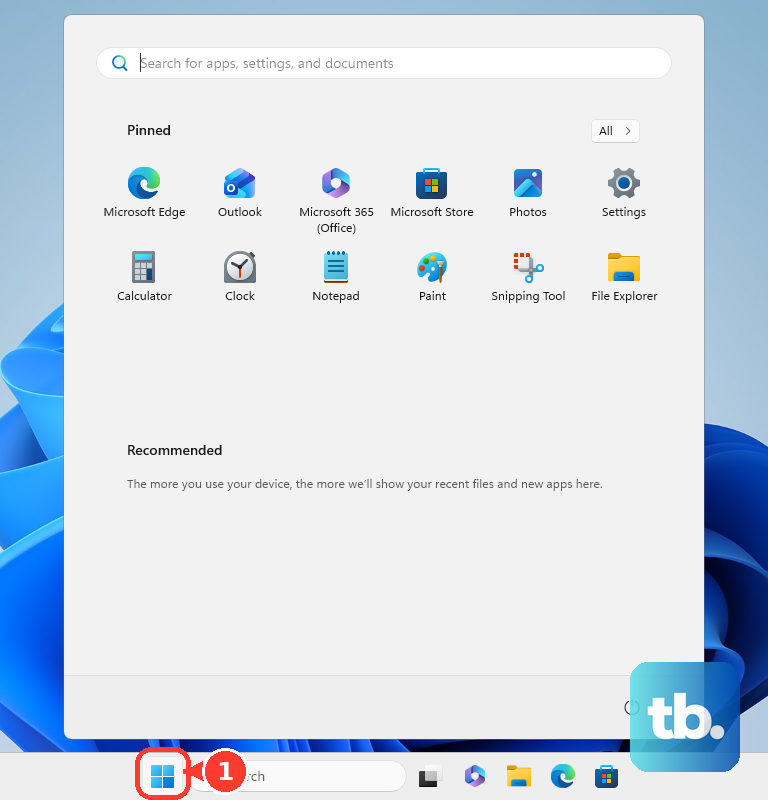
Retry the tool after signing in. If restarting makes no difference, install Windows updates next; ending a process and restarting are general application troubleshooting steps.
Windows updates and Arm compatibility
On Windows 11, select Start > Settings > Windows Update > Check for updates. On Windows 10, use Start > Settings > Update & Security > Windows Update > Check for updates.
Install available updates. Microsoft identifies KB5067036 together with the refreshed tool as resolving the documented Windows 11 25H2 Arm64-host failure when creating x64 media.
Restart Windows after the updates finish. The Media Creation Tool creates x64 installation media; it does not create Arm64 media, and Windows 10 Arm64 hosts are unsupported.
Retry the current tool. For an Arm-based destination PC, Microsoft provides a separate Windows 11 Arm64 ISO, covered in the alternative download routes below.
When Windows only allows Store apps
A Microsoft Store-only app restriction blocks the downloaded executable. On Windows 11 outside S mode, open Start > Settings > Apps > Advanced app settings > Choose where to get apps.
Select Anywhere, where that setting is available. On Windows 10, open Start > Settings > Apps > Apps & features > Choose where to get apps.
Select Allow apps from anywhere or Turn off app recommendations, whichever option is shown. Microsoft notes that the available options vary by Windows version. Retry the official executable.
Windows 11 Home in S mode requires a separate decision. Switching out of S mode is free and permanent. To keep S mode, use another compatible PC to create the installation media.
To switch out, open Settings > System > Activation. Select the S-mode switching link labeled Go to the Store. Microsoft’s instructions place it in a section labeled Switch to Windows 11 Pro; avoid the separate edition-upgrade purchase link.
On the Switch out of S mode page, select Get. If a work or school policy locks the setting or blocks the tool, give your administrator the official executable’s details and the block message for policy review.
Check for a file or security block
These steps address an Internet-origin file block or a recorded security detection. Confirm that the executable came from Microsoft’s official download page before changing a block.
Right-click the executable and select Properties. Select Unblock if it is present. If it is absent, continue to the security checks below. Select Apply.
Retry opening the executable. Unblocking a downloaded file does not override antivirus, Smart App Control, or organizational application-control decisions.
For a Defender warning or a file that disappeared after downloading, open Windows Security > Protection history. Expand the event matching the executable. Administrator privileges are required to inspect threat details.
Only for a confirmed false positive, select Actions > Allow on device. For a quarantined file confirmed to be a false positive, select Restore. Select Allow on device if Defender detects the restored file again.
For a download already removed or blocked, select Allow instead, again only for a confirmed false positive. Download the official executable again if the previous copy was removed.
For a reputation warning, inspect Windows Security > App & browser control > Reputation-based protection. Use the individual-file allowance in Protection history for a recorded false positive. Keep the broader protection enabled.
For an explicit Smart App Control block, open Windows Security > App & browser control > Smart App Control settings. Smart App Control has no individual-app exception, and selecting Off disables it system-wide. Obtain a fresh, correctly signed Microsoft download before considering a change to Smart App Control.
Repair damaged Windows components
Install available updates through Windows Update using the path above. Restart your PC through Start > Power > Restart.
Search for Command Prompt. Right-click Command Prompt and select Run as administrator. Select Yes at the elevation prompt.
Run DISM.exe /Online /Cleanup-image /Restorehealth by entering it and pressing Enter. After DISM completes successfully, run sfc /scannow. Let the system-file check finish.
Retry the Media Creation Tool. Use this sequence to address damaged Windows components; it is a general repair, not a confirmed fix for every Media Creation Tool launch failure.
A compatibility check for persistent failures
If the current executable still will not launch on Windows 11, try Microsoft’s Program Compatibility Troubleshooter. This is a general application check.
Open Start > Settings > System > Troubleshoot > Other troubleshooters. Select Run beside Program Compatibility Troubleshooter.
Follow its prompts using the fresh executable you downloaded earlier. If troubleshooting fails, use one of the alternatives below to create a USB installer, upgrade the current PC, or repair Windows.
Get installation media without fixing this PC first
Use an alternative route when you need installation media or a Windows repair before resolving the launch problem. Choose the route that matches your destination PC and what you need to do.
For a Windows 11 x64 installation USB, download Microsoft’s tool on another compatible Windows PC. Run the downloaded executable through Run as administrator. Follow the language and edition prompts.
Select USB flash drive when asked which media to use. Select the intended USB drive. Use a blank drive with at least 8 GB of capacity, because its contents will be erased. Move the completed installation media to the destination PC.
For an ISO on a compatible x64 PC, open Microsoft’s Windows 11 download page at Download Windows 11 Disk Image (ISO) for x64 devices. Select the offered edition. Confirm the edition selection.
Select your product language. Confirm the language selection. Download the generated ISO. Right-click the downloaded ISO and select Mount.
Run setup.exe from the mounted image to start setup. This starts an alternative installation route; it does not repair the Media Creation Tool.
For an Arm-based destination PC, open Microsoft’s Windows 11 Arm64 download page. Select the offered Windows 11 Arm64 image. Select Download Now.
Choose your product language. Select Confirm. Download the generated ISO. Check the destination device’s driver and installation requirements before using the image.
If your goal is upgrading the current PC, open Windows Update using the path earlier in the article. Follow an offered, eligible Windows 11 upgrade. Availability depends on hardware eligibility and rollout safeguards, and this route does not create installation media.
For a repair that preserves apps, files, and settings, open Start > Settings > System > Recovery. This option requires Windows 11 22H2 or later with the February 2024 optional update or later. Organization-managed update settings restrict its availability on managed devices.
Under Fix problems using Windows Update, select Reinstall now. Choose your restart preference. Select OK.
Keep the PC connected to power and the Internet throughout the repair. Restart when the repair completes.
Frequently Asked Questions
Can the Windows 11 Installation Assistant replace the Media Creation Tool?
Yes, for upgrading an eligible x64 PC running Windows 10 version 2004 or later. It requires 9 GB of free download space. It does not create a USB installer and is not an Arm app.
Should I use TLS or registry fixes from older tutorials?
The historical TLS hotfix applies to older Windows releases, not Windows 10 or Windows 11. There is no current official Media Creation Tool launch fix based on AllowOSUpgrade registry edits or forced Windows 7/8 compatibility mode.
Does the current Windows 11 download work as recovery media for every Windows 11 PC?
No. Microsoft’s public download offers Windows 11 25H2. Windows 11 26H1 comes preinstalled on selected new hardware and is not a general upgrade for existing PCs. Do not assume the public 25H2 ISO is suitable recovery media for a 26H1 device.
Can I turn Smart App Control back on after troubleshooting?
Microsoft says recent Windows updates allow Smart App Control to be re-enabled without a clean installation. Return to Smart App Control settings in Windows Security and enable it if that option is available. Microsoft does not specify a minimum build for this behavior.