Here’s how to add a New Task in Thunderbird.
Accessing the Tasks Feature
To start using tasks in Thunderbird, you first need to access the dedicated tasks interface:
- Open Thunderbird on your computer
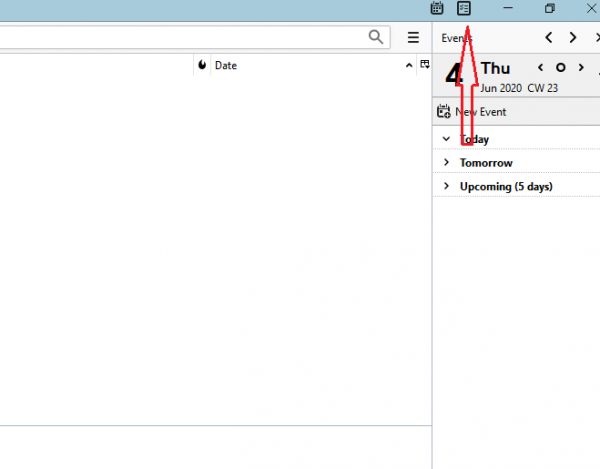
- Look for the tasks icon in the top-right corner of the application window
- Click the tasks icon to switch to the tasks tab
Creating Your First Task
Once you're in the tasks interface, adding a new task is straightforward:
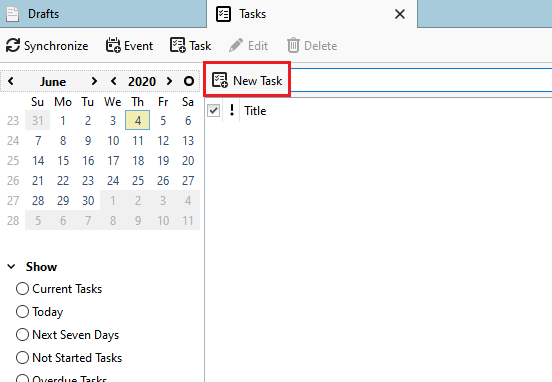
- 1.Click the "New task" button to open the task creation window
- 2.
 Click to expand
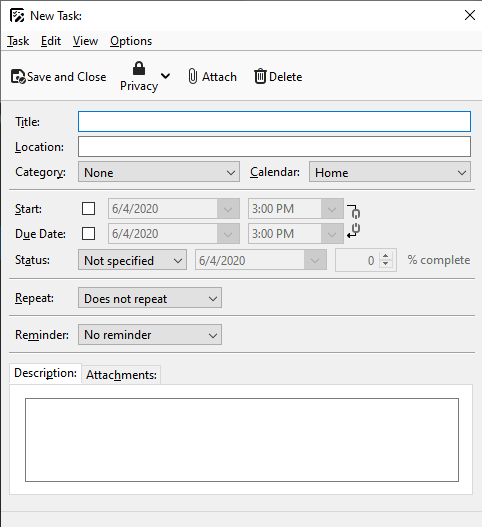
 - 3.Fill in the task details in the form that appears:
- 4.
 Click to expand
- Title: Give your task a clear, descriptive name
- Location: Add where the task needs to be completed (optional)
- Due Date: Set when the task should be finished
- Categories: Organize your task by assigning it to a category
- Priority: Set the importance level of your task
- Description: Add detailed notes or instructions
- When you've entered all the necessary information, click "Save and close" to create the task
Managing Your Tasks
After creating tasks, you can easily manage them:
Click to expand
Editing Tasks
- Find the task in your task list
- Double-click the task to open it for editing
- Make your changes and save
Deleting Tasks
- Locate the task you want to remove
- Select it and click the "Delete" button
- Confirm the deletion when prompted
Organizing Tasks
- Use categories to group related tasks together
- Sort tasks by priority, due date, or title
- Mark tasks as completed when you finish them
Task Management Tips
Thunderbird's task management works best when you:
- Use consistent naming conventions for similar tasks
- Set realistic due dates and update them as needed
- Take advantage of categories to organize by project or context
- Regularly review and update your task list
- Use priorities to focus on what matters most
With these simple steps, you can effectively use Thunderbird not just for email, but as a central hub for managing your daily tasks and staying productive.