Samsung Galaxy smartphones have many perks. Unfortunately, they also have a few downsides. One of the major issues that users experience with their Galaxy S7 is GPS problems. If you’re having issues finding your location, getting incorrect directions, or simply cannot find your current location, it’s probably due to an issue with your phone’s GPS.
This article will discuss how to fix Samsung Galaxy S7 GPS problems and what you can do to prevent them in the future. After reading this post, you should be able to address any GPS issues that appear on your Samsung Galaxy S7 and get back to using your phone as intended. If you use your phone for Google Maps, drive for work or have any other reason to frequently know where you are and how to get somewhere else, this blog post is for you.
Samsung Galaxy S7 GPS Not Working - How To Fix It
1. Toggle the GPS
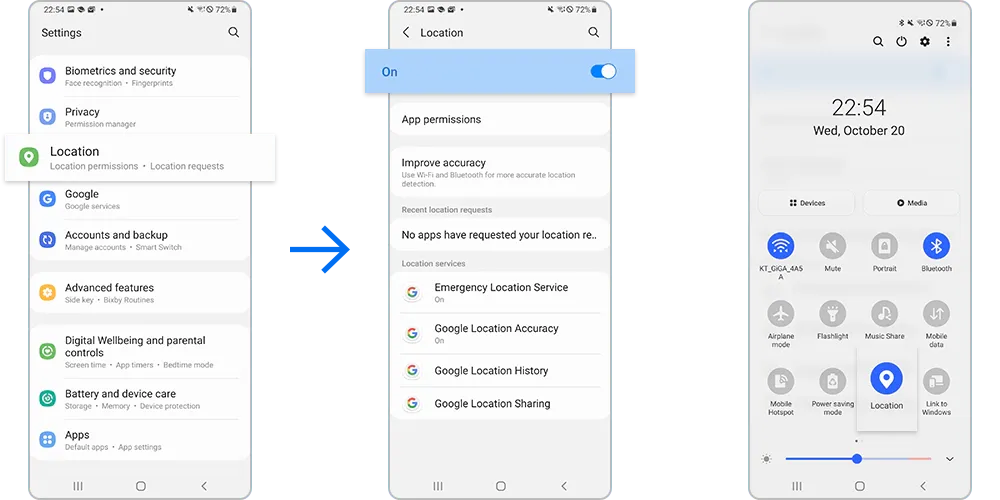
The easiest and quickest way to solve the problem is to toggle the GPS so that it gets a chance to refresh itself. You can turn the GPS On or Off from the notifications shade of your phone or settings:
- Navigate to Settings
- Search for location, then tap it. Or, Security & Location or Biometric and Location
- Tap Location.
- Toggle it off and on.
2. Toggle Airplane Mode
Many users have found that toggling the Airplane mode can help solve problems with the GPS.
3. Power Saving Mode
'Power Saving mode' reduces your Android phone performance and limits vibration, location services and most background data. It may be beneficial when saving battery, but you must disable Power Saving mode if you are trying to use your GPS on your Galaxy S7.
- From Settings
- Tap Battery and device care.
- Then, tap Power Savings
4. Restart your Galaxy S7
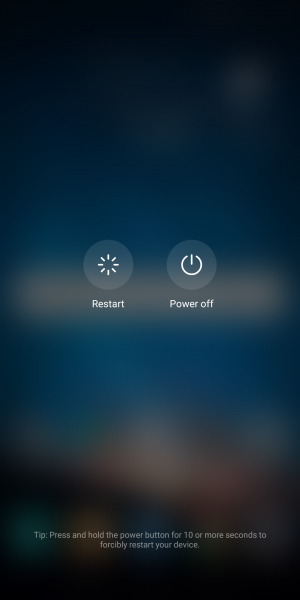
You can fix many problems with a restart. Press and hold the Power button or Power and Volume Down Button to restart your device. Once the menu appears, tap Restart or Power off and Restart.
5. Tweak the GPS Settings (Fixes searching for GPS problems in Google Maps on Galaxy S7)
The GPS settings of your Samsung Galaxy S7 can make a lot of difference in your location's calibration. Your GPS could be using some assistance from other technologies to help get a better location.
However, this will only happen when you have chosen the proper settings. To check the GPS settings on your Galaxy S7, follow these steps:
- Head to the settings menu of your device
- Scroll down to check for location Or Security & Location
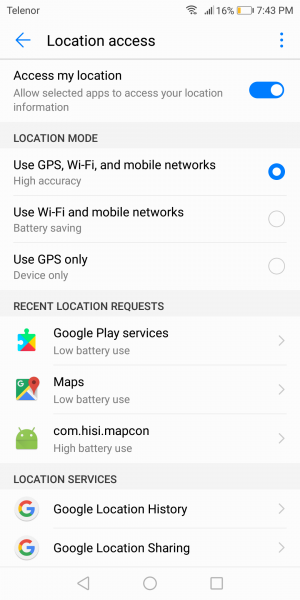
- Under location, tap on Mode
You will notice that there are three different settings available under Mode. Your GPS can provide the most accurate location depending on your chosen setting.
You must choose "High Accuracy" because the other two options will limit how your GPS checks the location.
- High accuracy (Battery usage: high): Uses GPS, Wi-Fi, and mobile networks to estimate location.
- Power saving / Battery saving (Battery usage: low): Uses Wi-Fi and mobile networks to estimate location.
- GPS only / Device only / Device sensors (Battery usage: moderate): Uses GPS to estimate location.
6. Update Google Maps on your Galaxy S7
Updating your Google maps can make a big difference.
- Open your Google Play Store app.
- At the top right, click your profile icon.
- Then, tap Manage apps & devices. Apps with an update available are labeled "Update available."
- Search for Google Maps
- Tap Update.
Once the update is complete, restart your Galaxy S7 and allow the GPS to check the location once again.
7. Clear Cache and Data on your Samsung Galaxy S7
Cache files store information that helps your device load the application quickly. These files are made over time once you keep using the application.
Here is what you need to do:
- Go to Settings
- Tap on Apps (App Manager, Manage apps, depending on the Android device)
- Find the Google Maps app and tap on it
- Tap Storage.
- Next, tap Clear Cache and Clear Data
- Go back to the Home screen and relaunch the app
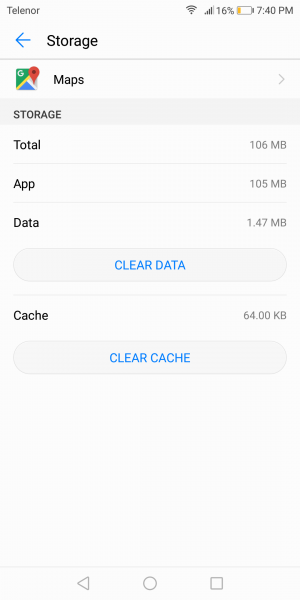
Once you have cleared all the data and cache files, restart your Galaxy S7 and use GPS again. Check if the issue you were facing has been resolved.
8. Use GPS Status and Toolbox App
The GPS Status and Toolbox App is a practical and user-friendly application that can give you a lot of information on your device's GPS settings.
It can also help install necessary updates for Assisted GPS Data, also known as A-GPS data. The A-GPS data enhances the GPS performance of your device.
Download the GPS Status and Toolbox App
9. Use Safe Mode
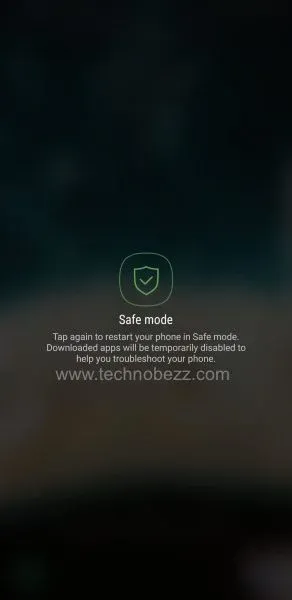
Some of your apps use GPS services on your Samsung Galaxy S7. If these apps end up with corrupt files, it may affect your device's GPS performance. To check if an app is causing the problem, use your phone in Safe Mode and check if it works fine.
- Press and hold the Power button on your device till you see the Power menu > Tap Power Off
- Press and hold the Power and Volume Down buttons at the same time to turn the device on.
- Once the Samsung logo appears on the screen, you can let go of the power button. Ensure you keep holding the Volume Down Button
- Safe Mode will now appear at the bottom left of the screen.
How to Exit Safe Mode (3 Ways):
- Press and hold the Power button for at least 6 seconds, then tap Restart.
- Press and hold the Power + Volume Down buttons for at least 5 seconds
- Swipe down from the top of the screen to access the Notification Panel, then tap on "Safe mode is on" To disable and restart.
10. Update the Software on your Galaxy S7
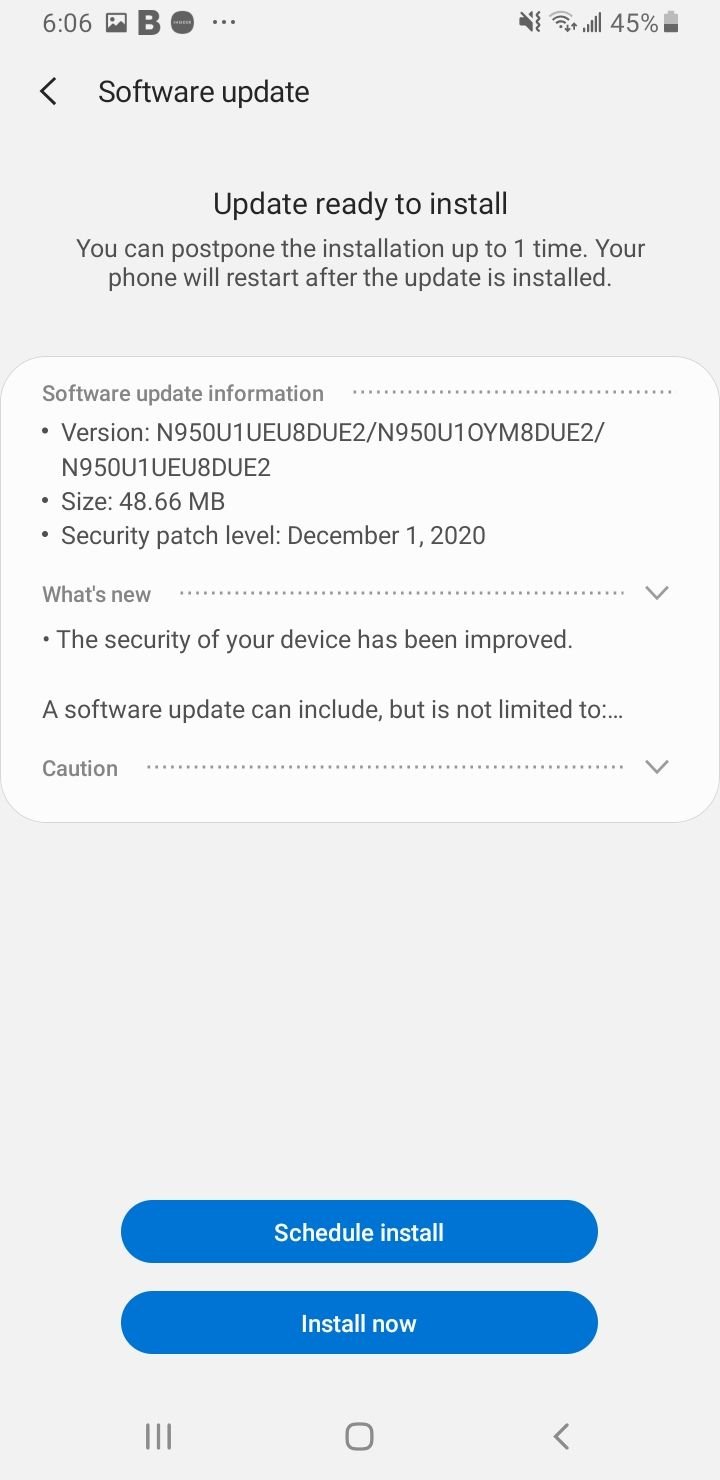
If there are delayed updates for your phone, it is about time you checked and updated your software.
- Go to the Settings menu of your device.
- Please scroll down to find About device and tap on it
- Tap on Check for Updates, and if a newer version is available, install the latest updates.
11. Wipe Cache Partition
If you are facing problems with your GPS on your Samsung Galaxy S7, then it is always recommended to wipe the cache partition of your device and allow your device to build new cache files. This will ensure that the cache partition is not causing the problem.
Older Models / Versions:
- To turn off your phone, press and hold the Power, Volume Up, and Home buttons until your phone vibrates.
- You will be in the Recovery menu of your device.
- Highlight the 'wipe cache partition' option by using the Volume Down key and pressing the Power key to select the option.
Updated:
- Press and hold the Power button on your device till you see the Power menu > Tap Power Off
- Connect your phone to a desktop/ laptop with the original Type-C cable
- Press and hold the Power + Volume Up Buttons
- When the Android logo appears, release all keys.
- Use the Volume down button to navigate, then select "Wipe cache partition."
- Use the Power button to make selections.
- Once the wipe cache partition process is complete, select Reboot System using the Power button.
- Press the Power key to restart the device.
12. Factory Reset your Galaxy S7
Resetting your phone to factory settings deletes all data, including your downloaded apps. This is why it is essential to create a backup of all crucial data.
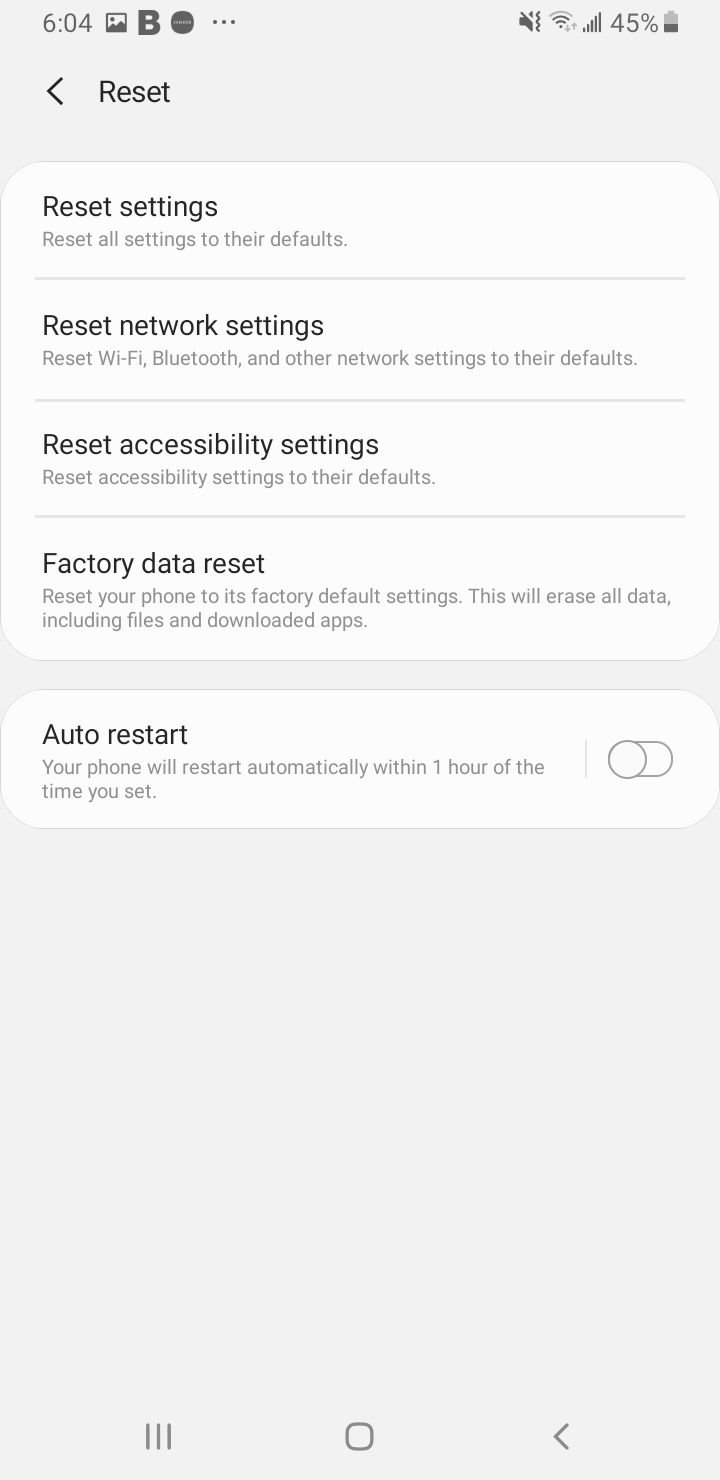
- Go to the Settings menu of your device
- Tap on General Management or Back up and Reset
- Tap Reset.
- Tap Factory Data Reset.
- Tap on it and confirm the Reset when you get a warning message letting you know that your data will be lost.
How can I determine if the GPS problem I face is hardware-related or software-related?
To find out where the problem lies, you can use an application like GPS Essentials, available on the Play Store. Download and install GPS Essentials on your phone. Now open the app and tap on Satellites.
You will notice on your screen that your phone will try to connect to the satellites around Earth.
If your Samsung Galaxy S7 cannot connect to a satellite, there is a chance that the device is facing a hardware problem.
On the other hand, if the screen shows that the satellites are connecting, but your GPS is still not working as expected, then the problem lies in your device's software.
If the software is the concern, the solutions mentioned in this article will work for you. If the problem lies in the hardware, you must consider taking your phone to a technician who can check the device.
What should I do if my Samsung Galaxy S7 GPS is not telling the location accurately?
If you have already updated Google maps and still find the GPS of your Galaxy S7 showing you the wrong locations, then there is a chance that the compass is not calibrated correctly.
If your device gets incorrect orientation information when you try to use a navigational app, then the compass of your Android device needs to be calibrated.
You will require an app to calibrate the compass of your device. GPS Essentials is a good app on the Play Store which can help you calibrate your device's compass. Download and install the app.
- Please open it and tap on 'compass.'
- You must use your phone to draw figure 8 in the air to calibrate the compass. Once you wave your phone in the air creating the pattern of the number 8 sideways, you will be able to calibrate the compass.
- Draw the pattern several times to properly calibrate the phone's compass.
How can I refresh my Samsung Galaxy S7 GPS data?
Sometimes, your Galaxy S7 may show the wrong location, or the GPS may not work because it is stuck on one of the GPS satellites even though that particular satellite is not within range.
This causes the GPS of your phone to show incorrect information. By refreshing the GPS data, you can correct this problem.
You can use an app like GPS Status and Toolbox to refresh the data. The app is available on the Google Play Store, where you can download and install it for free.
- Open the app and tap anywhere on the screen.
- Tap on the spanner icon to bring up the drop-down menu
- Tap on Manage A-GPS status.
- Now tap on Reset.
- Once that's done, go back to Manage A-GPS state and tap on download.
Once the download is complete, your GPS data will be refreshed.
If you continue to face problems with your GPS, then take it to a professional to check if the antennas are damaged.
