
Seeing a "No SIM" or "SIM card not detected" message on your Samsung Galaxy Tab S9 can stop you from getting online when you're away from Wi-Fi. This usually happens because of a simple software hiccup or a physical issue with the card itself, and you can often fix it in a few minutes.
Restart Your Tablet
Start with a simple restart. This clears out any temporary glitches that might be preventing the system from seeing your SIM card. Press and hold the Volume Down button and the Side button (power button) together for about 10 seconds until you see the Samsung logo appear. This forces a reboot and is a great first step.
Check the SIM Card Manager
Open your tablet's Settings and go to Connections. Tap on SIM card manager. Here, make sure the switch next to your SIM card is turned on. Sometimes, after an update or a random error, it can get switched off without you realizing it.
If you see multiple SIM slots listed (like SIM 1 and SIM 2), ensure you're looking at the correct slot where your physical card is inserted. Toggling the switch off, waiting a few seconds, and turning it back on can also refresh the connection.
Inspect and Clean the Physical SIM
If a restart didn't help, the next thing to check is the SIM card and tray. Power your Tab S9 off completely. Use the SIM ejector tool that came in the box (or a small paperclip) to gently press into the tiny hole on the SIM tray, usually on the top edge of the tablet.
Carefully pull the tray out and remove the SIM card. Look at the gold contacts on the card for any scratches, dirt, or corrosion. Gently wipe them with a clean, dry microfiber cloth. Blow any dust out of the SIM tray slot on the tablet as well. When reinserting, make sure the card is seated firmly and the tray is pushed all the way in until it clicks.
Toggle Airplane Mode
Swipe down from the top of your screen twice to open the full Quick Settings panel. Tap the Airplane mode icon to turn it on. Wait about 10-15 seconds, then tap it again to turn it off. This resets all the tablet's radio connections, including the cellular modem, and can often kick-start the SIM detection process.
Update Your Software
Outdated system software can sometimes cause conflicts with network components. Go to Settings > Software update and tap Download and install. If an update is available, install it and let your tablet restart. I've seen minor One UI updates resolve persistent SIM issues on several Samsung devices.
Reset the Network Settings
This is a more thorough step that clears all your saved network configurations without touching your personal files. Go to Settings > General management > Reset. Tap on Reset network settings and confirm.
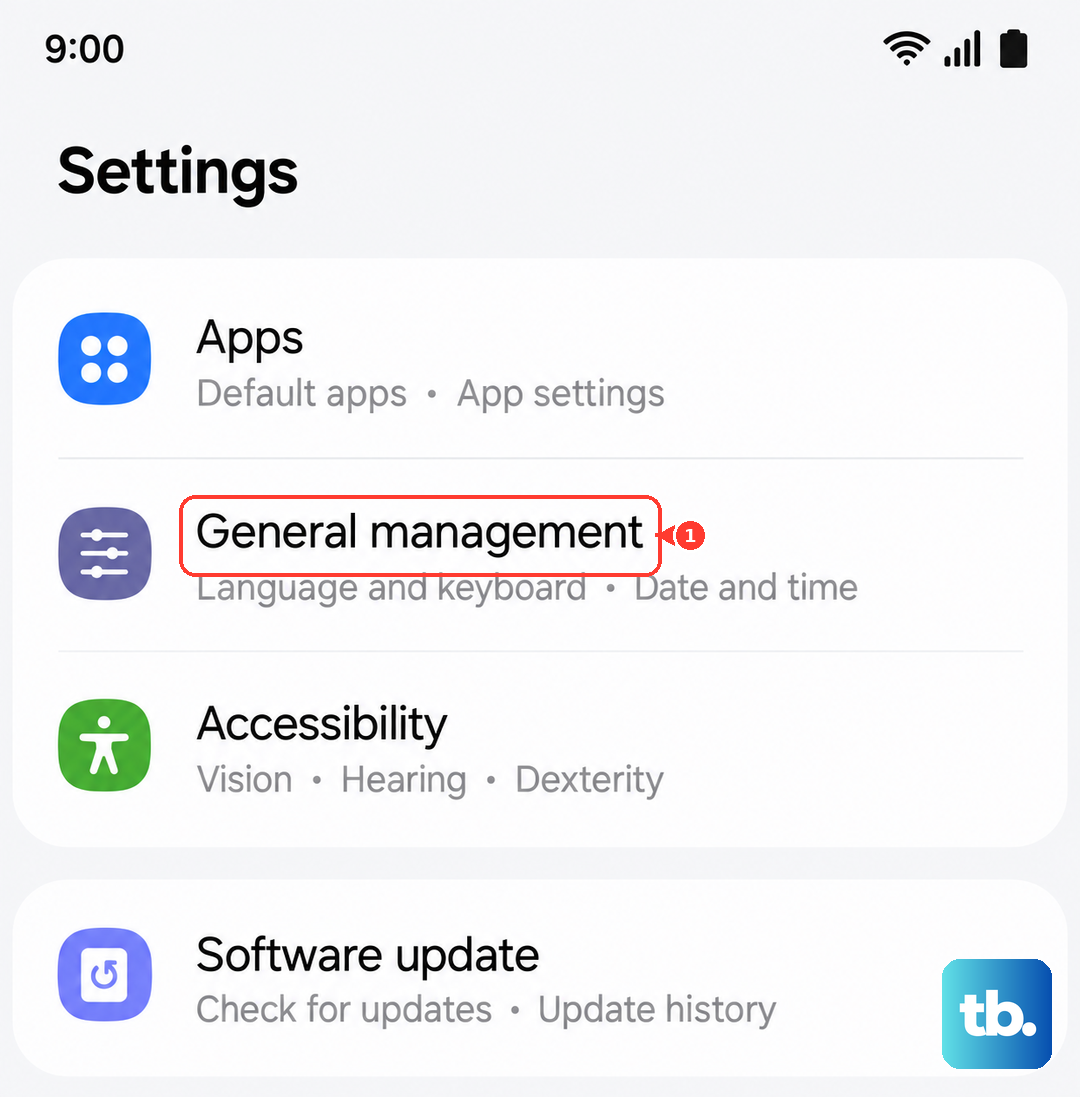
This will erase all Wi-Fi passwords, paired Bluetooth devices, and cellular network preferences. After the reset, you'll need to reconnect to Wi-Fi and re-pair Bluetooth accessories, but it often fixes stubborn SIM and network problems.
Check for Carrier Updates or APN Settings
Sometimes the issue is with the configuration data from your mobile carrier. First, go to the Google Play Store, search for your carrier's official app (like "My Verizon" or "T-Mobile"), and make sure it's updated. These apps can sometimes push critical carrier settings.
Next, check the Access Point Name (APN) settings. Go to Settings > Connections > Mobile networks > Access Point Names. If the list is empty or the settings look wrong, you may need to enter them manually.
Tap the three-dot menu and select Reset to default. If that doesn't populate the correct settings, you'll need to get the exact APN details from your carrier's website or customer support and enter them here.
Try Manual Network Selection
Your tablet might be having trouble automatically connecting to your carrier's network. You can force it to search. Go to Settings > Connections > Mobile networks > Network operators.
Tap Search now and wait for the list to populate. Select your specific carrier from the list (e.g., "T-Mobile" or "Verizon Wireless") instead of leaving it on "Automatic select." This can bypass an automatic selection error.
Clear the SIM Toolkit Cache
Background system services related to the SIM can get bogged down with cached data. Go to Settings > Apps. Tap the three-dot menu in the top right and select Show system apps.
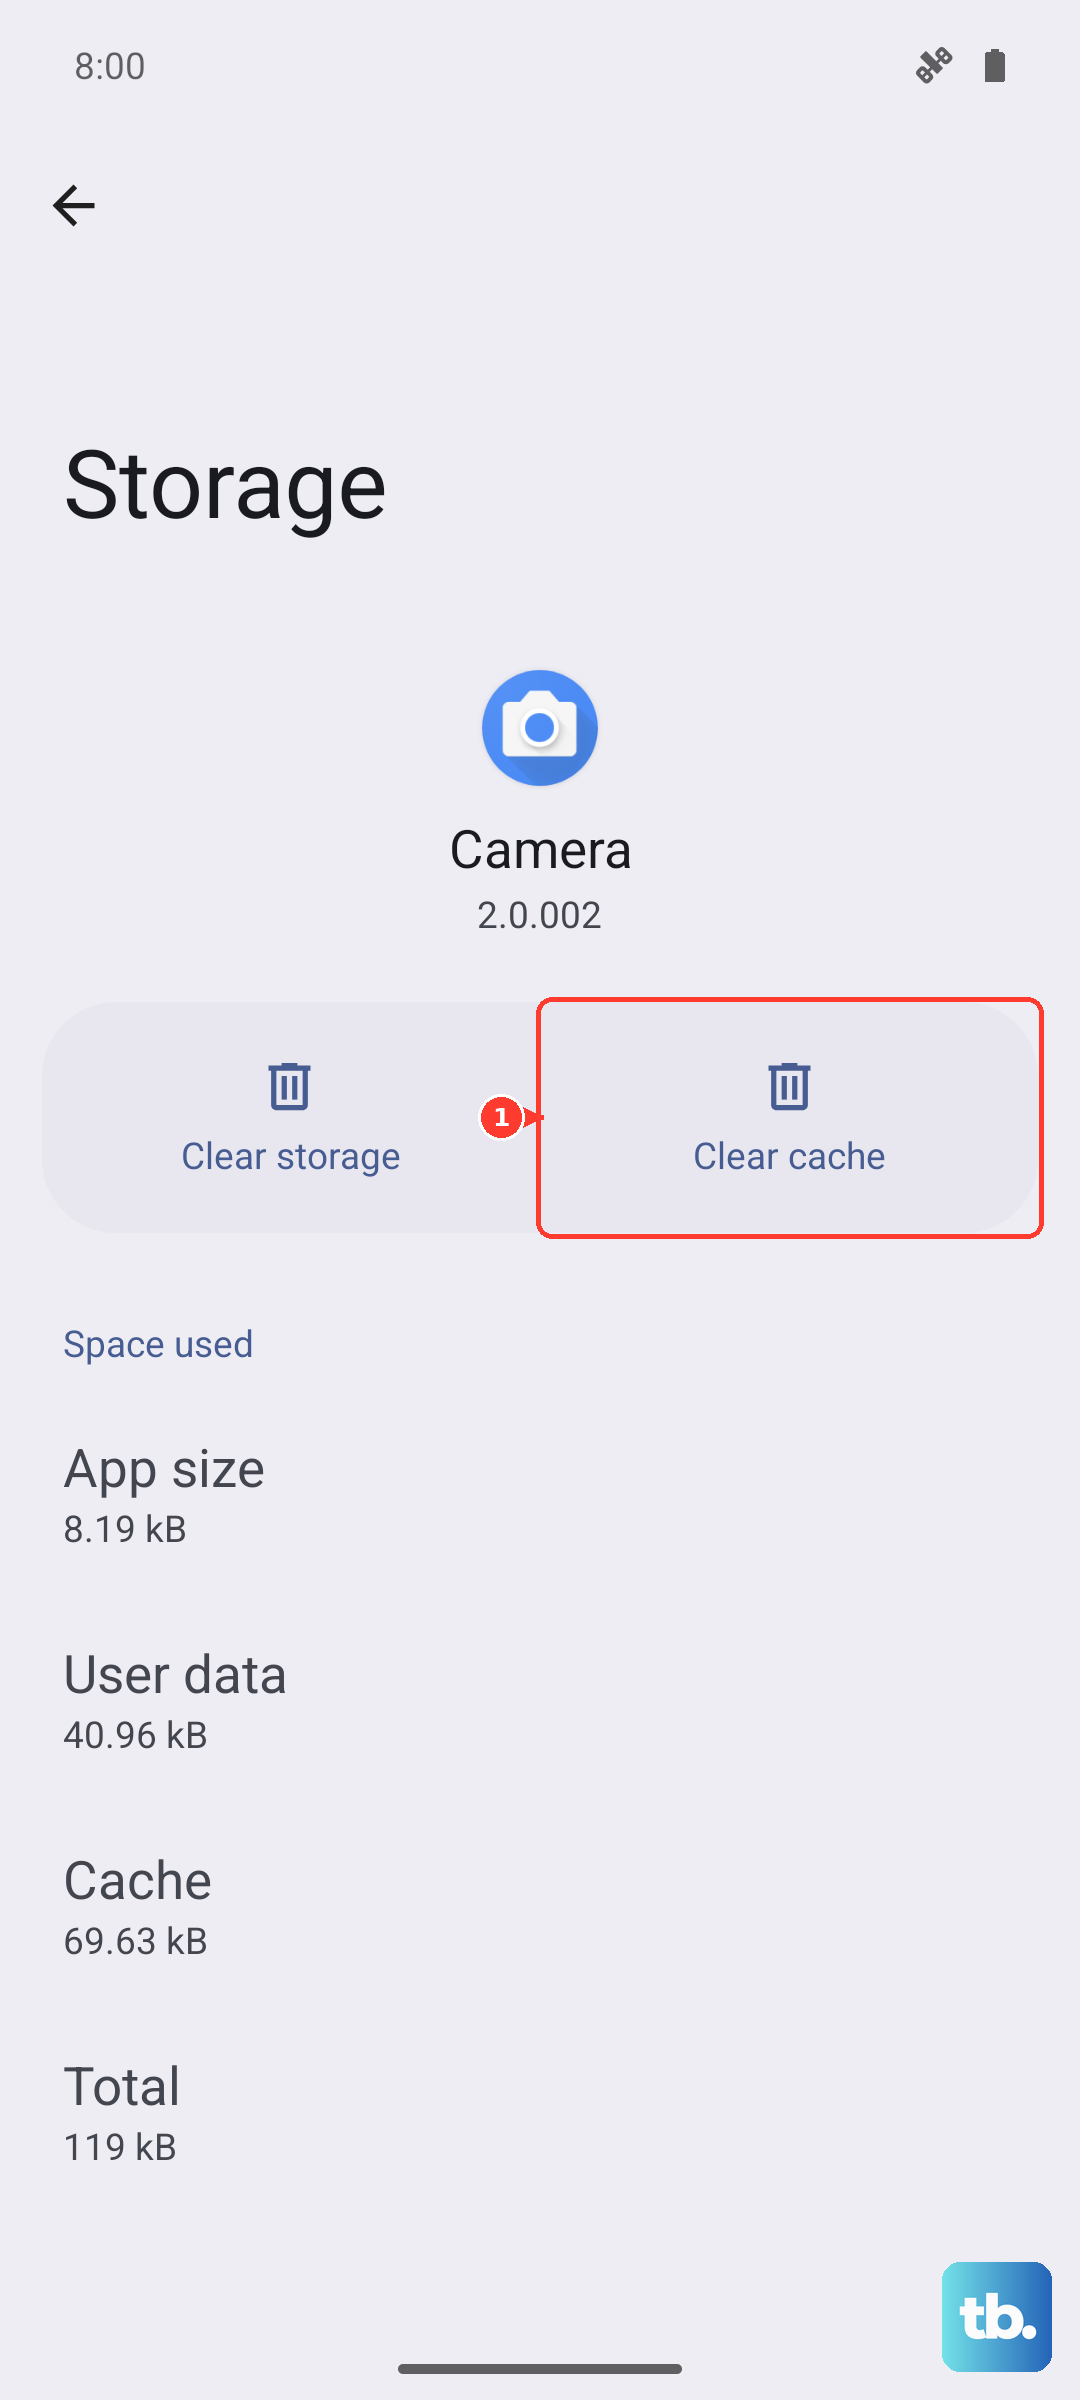
Scroll down and find SIM Toolkit or SIM Application Toolkit. Tap on it, then go to Storage. Tap Clear cache. This doesn't delete any personal data, it just clears temporary files that might be causing a conflict.
Test the SIM in Another Device
This is the best way to figure out if the problem is with your Tab S9 or with the SIM card itself. If you have another phone or tablet that accepts the same size SIM, power that device off, insert your SIM, and turn it back on.
If the other device also says "No SIM," then the SIM card is likely faulty or deactivated, and you need to contact your carrier for a replacement. If the SIM works perfectly in another device, then the issue is isolated to your tablet, pointing to a software or hardware problem with the Tab S9 itself.