
Getting a "Call Failed" error on your Samsung Galaxy Tab A9+ can stop you right in the middle of an important conversation. This usually means your tablet is having trouble connecting to the cellular network properly. It's often due to a weak signal, a minor software hiccup, or a setting that needs adjusting.
Let's go through the most effective fixes, starting with the quickest ones you can try right now.
Toggle Airplane Mode On and Off
The fastest way to reset your cellular connection is with Airplane Mode. This clears out temporary network glitches that can block calls. Swipe down from the top of your screen to open the Quick Settings panel. Tap the Airplane Mode icon to turn it on, wait about 10 seconds, then tap it again to turn it off.
Your tablet will reconnect to the network, which often resolves the call failed error immediately.
Check Your Signal Strength
A weak cellular signal is the most common culprit. Look at the signal bars in the top-right corner of your screen. If you only have one or two bars, try moving to a different location.
Being near a window or stepping outside can make a big difference. Thick walls and buildings can seriously interfere with your connection.
Restart Your Galaxy Tab A9+
A simple restart can clear up many software-related issues. Press and hold the Volume Down button and the Power button at the same time. Keep holding them for about 10 seconds until you feel a vibration and see the Samsung logo appear.
This force restart is a bit more thorough than a normal shutdown and is a great first step for any persistent problem.
Verify Your SIM Card
A loose, dirty, or faulty SIM card is a frequent cause of call failures. You'll need the SIM eject tool that came with your tablet. Insert it into the small hole on the SIM tray, usually on the side of the device, to pop the tray out.
Carefully remove the SIM card, gently wipe the gold contacts with a soft, dry cloth, and then reinsert it. Make sure it's seated firmly in the tray before sliding it back into the tablet.
Update Your Software
Software updates from Samsung include bug fixes that can resolve calling and network issues. First, connect your Tab A9+ to a Wi-Fi network. Then, open Settings and scroll down to Software update.
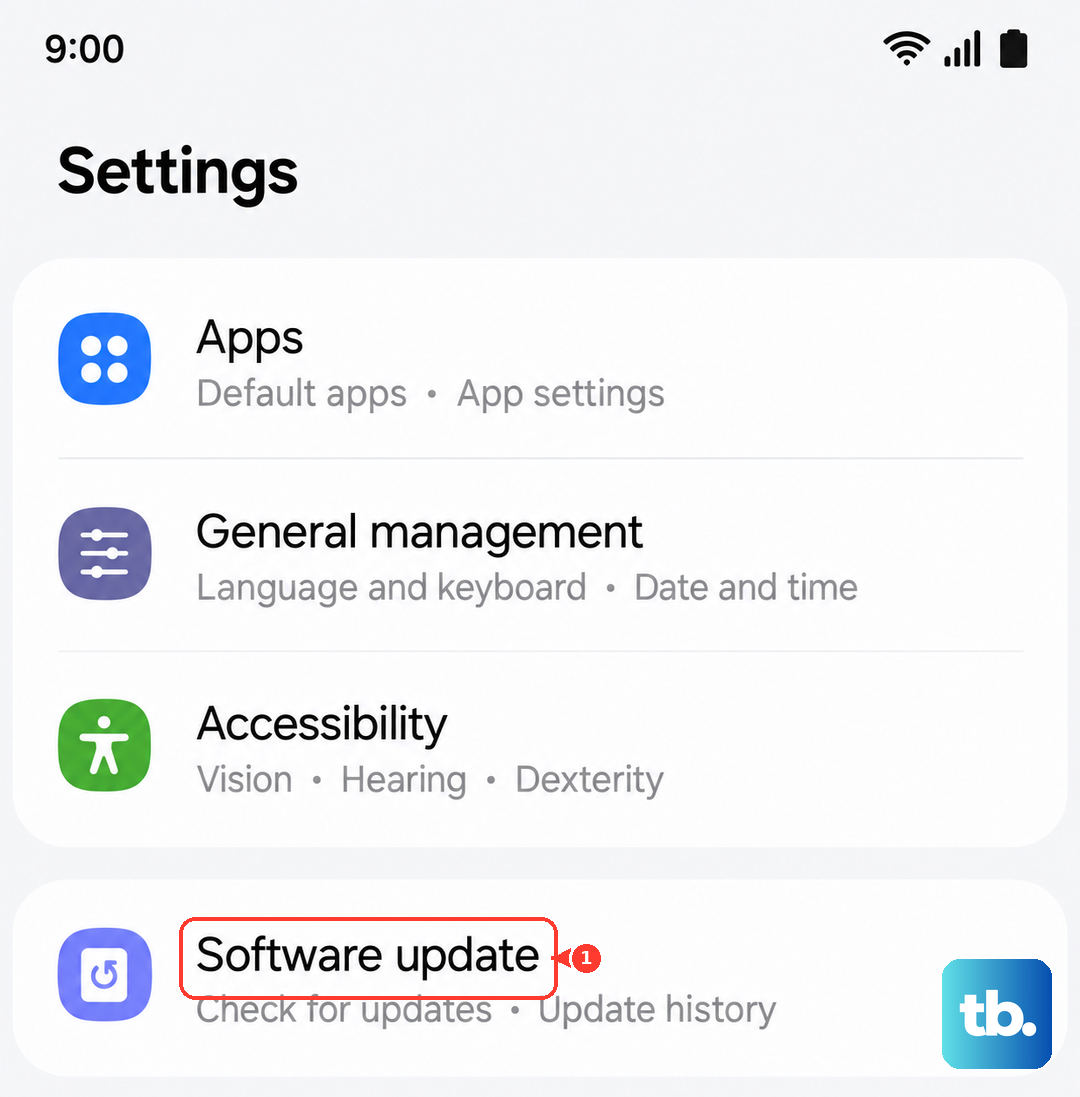
Tap Download and install. If an update is available, follow the prompts. I'd recommend doing this with your tablet plugged into its charger, as the process can take a few minutes.
Check for Carrier Updates
Sometimes, your mobile carrier pushes specific updates to improve network connectivity. These happen separately from regular Android updates. Go to Settings > Software update and tap Download and install.
If a carrier settings update is available, you'll usually see a notification here. Installing it can iron out compatibility issues between your tablet and the network.
Review Your Do Not Disturb and Focus Settings
Check if you have any modes enabled that might be blocking calls. Swipe down twice from the top of the screen to see your full Quick Settings. Look for icons like "Do Not Disturb" or "Focus" mode.
If either is active, tap it to turn it off. Also, go into Settings > Sounds and vibration > Do Not Disturb to check your schedules and allowed exceptions.
Ensure Mobile Data is Enabled
Even for voice calls, having your mobile data turned on can help with network registration. Open Settings and tap Connections. Then, select Data usage.
Make sure the switch at the top for "Mobile data" is turned on. If you're traveling, you might also need to enable data roaming from within the same menu, but be aware of potential charges from your carrier.
Switch Between Network Modes
Sometimes, the 4G/LTE network can have issues in your area. You can try forcing your tablet to use an older, but often more stable, 3G network for calls. Go to Settings > Connections > Mobile networks.
Tap Network mode. Instead of "LTE/3G/2G (auto connect)", select "3G/2G (auto connect)". Try making a call. If it works, you know it's an LTE issue. You can switch the setting back later.
Reset Your Network Settings
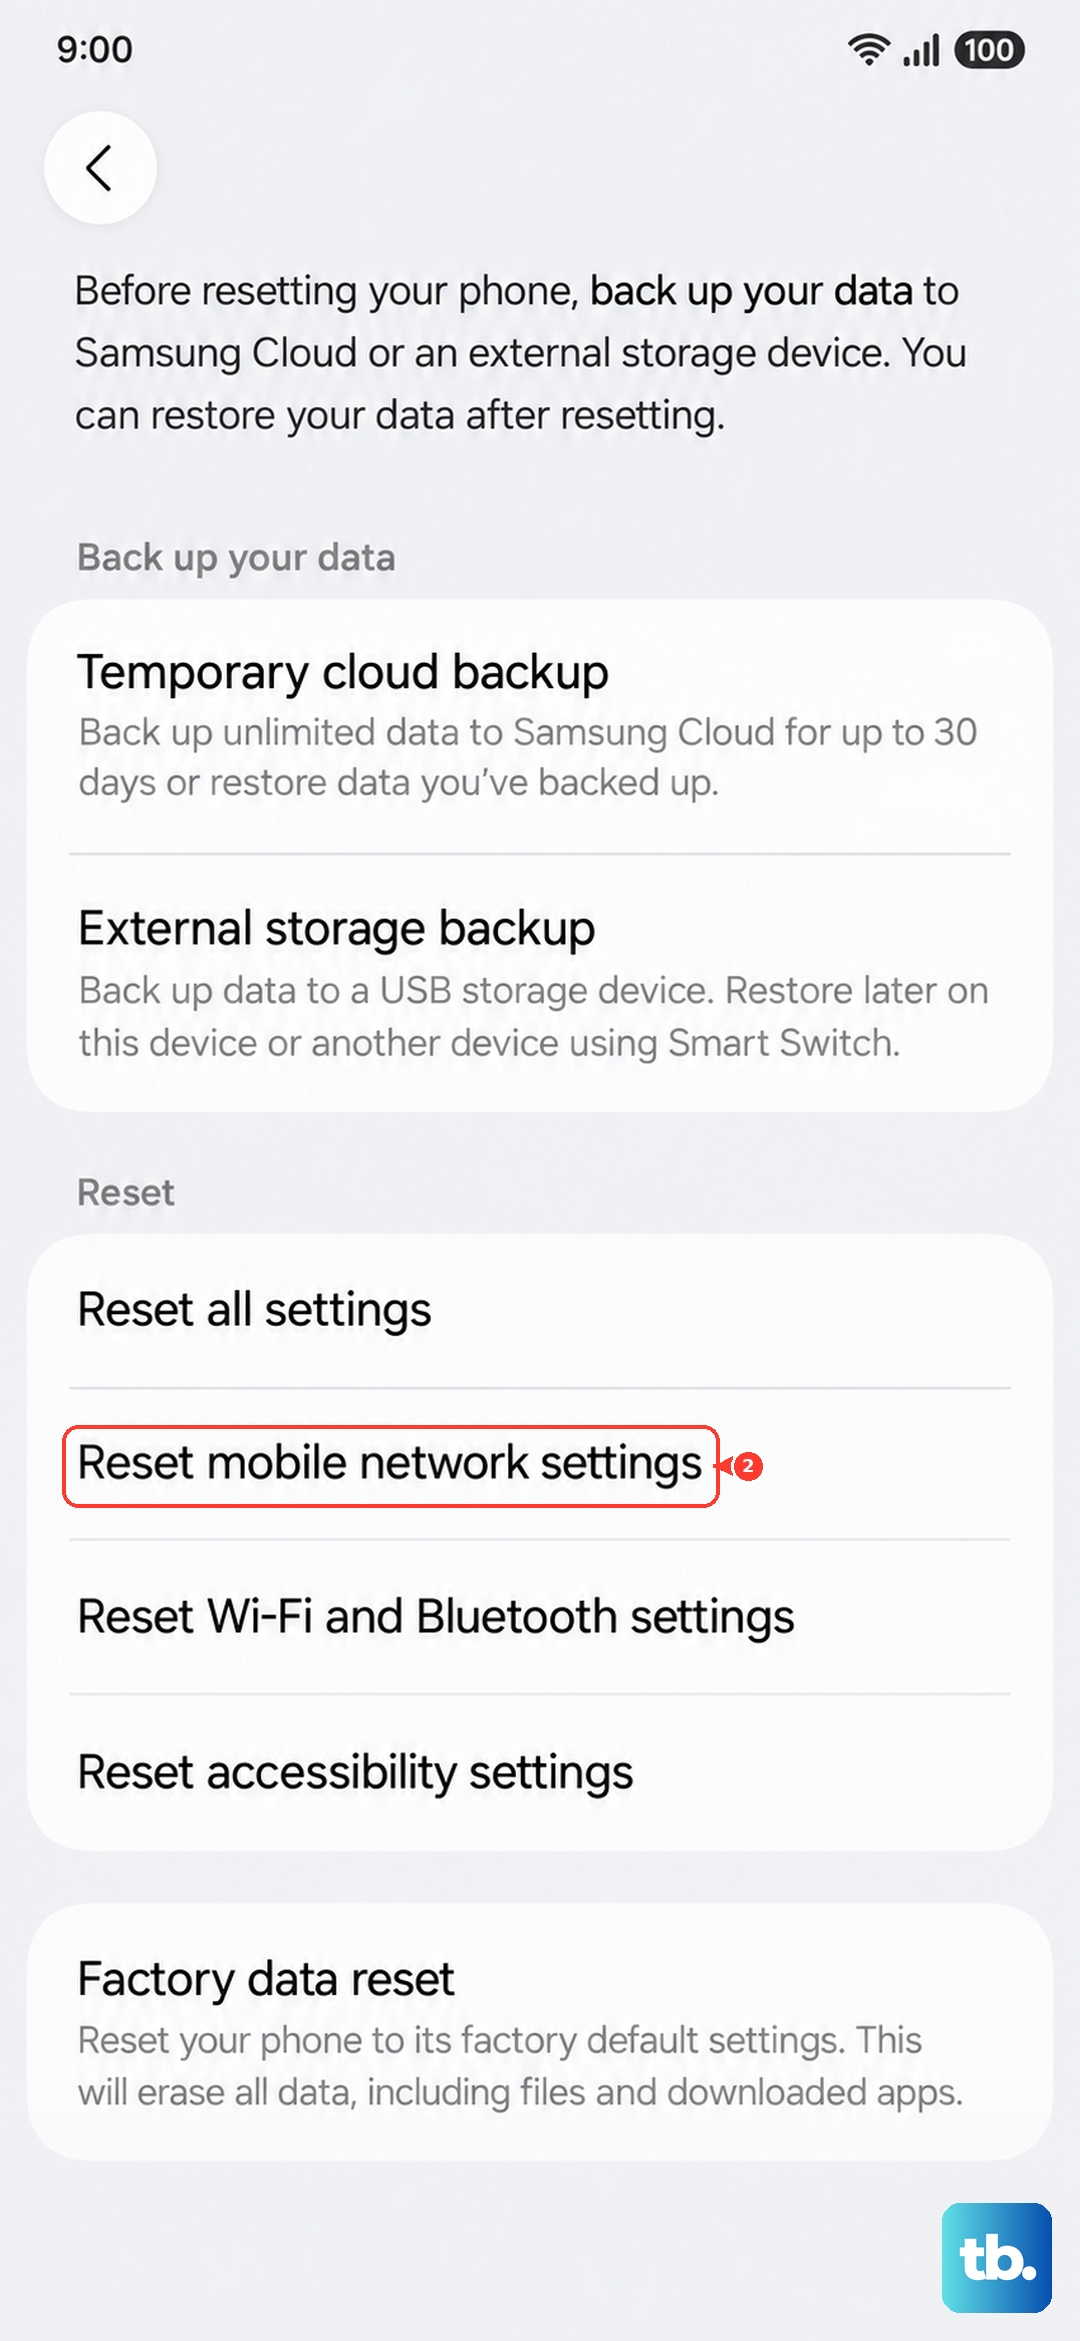
This is a more thorough step that clears all your saved Wi-Fi networks, Bluetooth pairings, and cellular settings. It won't delete your personal files or apps. Go to Settings > General management > Reset.
Tap Reset network settings. You'll need to enter your PIN or password to confirm. After the reset, you'll have to reconnect to Wi-Fi and re-pair Bluetooth devices, but it can solve persistent network problems.
Check for Blocked Numbers
Make sure you haven't accidentally blocked the number you're trying to reach. Open your Phone app and tap the three-dot menu in the top-right corner. Select Settings and then Block numbers.
Review the list. If the number is there, you can tap the minus (-) icon next to it to remove it from the block list.
Update Date and Time Settings
Incorrect date and time settings can sometimes cause issues with network authentication. This is an easy one to check. Go to Settings > General management > Date and time.
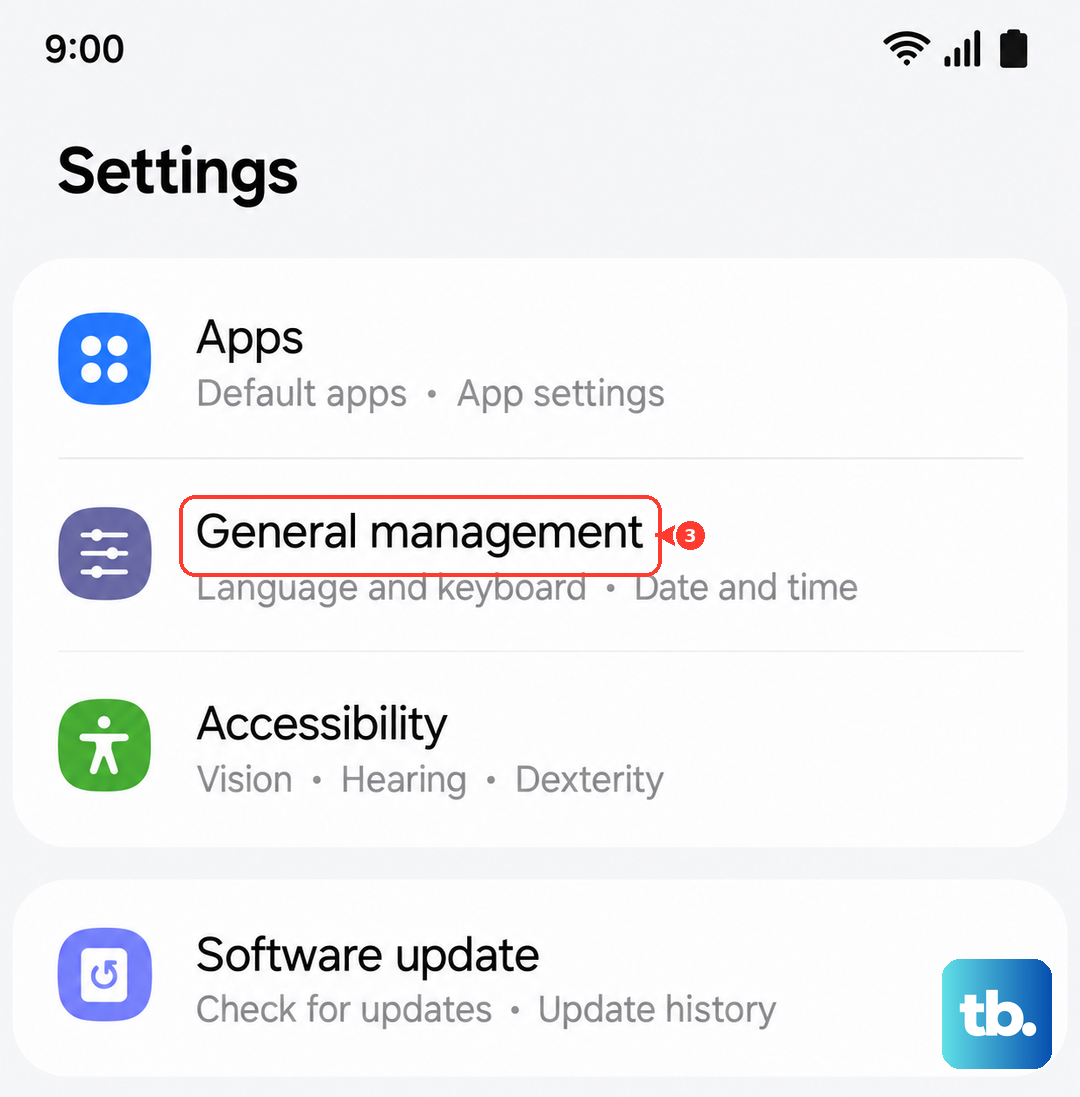
Make sure the option for "Automatic date and time" is turned on. This lets your tablet set the time based on your network signal.
Contact Your Mobile Carrier
If you've tried everything and calls are still failing, the problem might be on your carrier's end. There could be a network outage in your area, a problem with your account, or your SIM card might be damaged.
Call your carrier's customer service from another phone. They can check for outages, reprovision your line on their network, or send you a replacement SIM card if needed.