
When your Samsung Galaxy S25+ stops sending or receiving emails, it can leave you feeling disconnected. Whether you're missing a critical work message or can't reply to a friend, the silence is frustrating. The good news is that email problems on Android are usually caused by a few common things that you can fix yourself.
Before we get into the specific steps, let's quickly rule out the obvious. Make sure your phone has a solid internet connection, either through Wi-Fi or your mobile data. It's also worth checking if your email provider, like Gmail or Outlook, is having a widespread outage by visiting their status page online.
Check Your Sync and Background Data Settings
Android manages how apps sync data in the background to save battery. If these settings are too restrictive, your email app might not check for new messages. Start by opening Settings and going to Accounts and backup > Manage accounts.
Select your email account and make sure the sync toggle for "Email" or "Mail" is turned on. Next, go back to Settings > Apps, find your email app (like Gmail or Samsung Email), and tap Battery. Set the battery usage to "Unrestricted" to ensure it can sync properly at all times.
Toggle Airplane Mode to Reset Connections
A quick network reset can clear up temporary glitches that block email traffic. Swipe down twice from the top of your screen to open the Quick Settings panel, then tap the Airplane mode icon to turn it on.
Wait about 15-20 seconds, then tap the icon again to turn Airplane mode off. Your phone will reconnect to Wi-Fi and cellular networks, which often resolves the hiccup preventing email from working.
Force Close and Reopen Your Email App
Sometimes the app itself just gets stuck. To force close it, swipe up from the bottom of the screen and hold to enter the recent apps view. Find your email app and swipe it all the way up or off the screen to close it completely.
Wait a moment, then tap the app icon on your home screen to relaunch it. This clears the app from your phone's memory and starts it fresh, which can fix minor software bugs.
Verify Your Network Connection
Email issues are often network-related. If you're on Wi-Fi, try switching to your mobile data to see if emails come through. You can do this by swiping down to the Quick Settings and turning off Wi-Fi.
Conversely, if you're using mobile data, try connecting to a known good Wi-Fi network. I've seen cases where an email server might be temporarily blocked by a cellular carrier's firewall, so switching networks is a great test.
Review Your Email Account Password and Security
Services like Gmail or Microsoft 365 sometimes require you to re-authenticate, especially if you've recently changed your password or enabled two-factor authentication. Try logging into your email account through a web browser on a computer.
If you can't log in there, you'll need to reset your password. If you can log in, your phone's stored credentials might be outdated. You'll likely need to remove and re-add the account on your S25+, which we'll cover in a moment.
Check for App and System Updates
Outdated software can cause compatibility issues with email servers. First, open the Google Play Store, tap your profile icon, and go to Manage apps & device. Check if there's an update available for your email app.
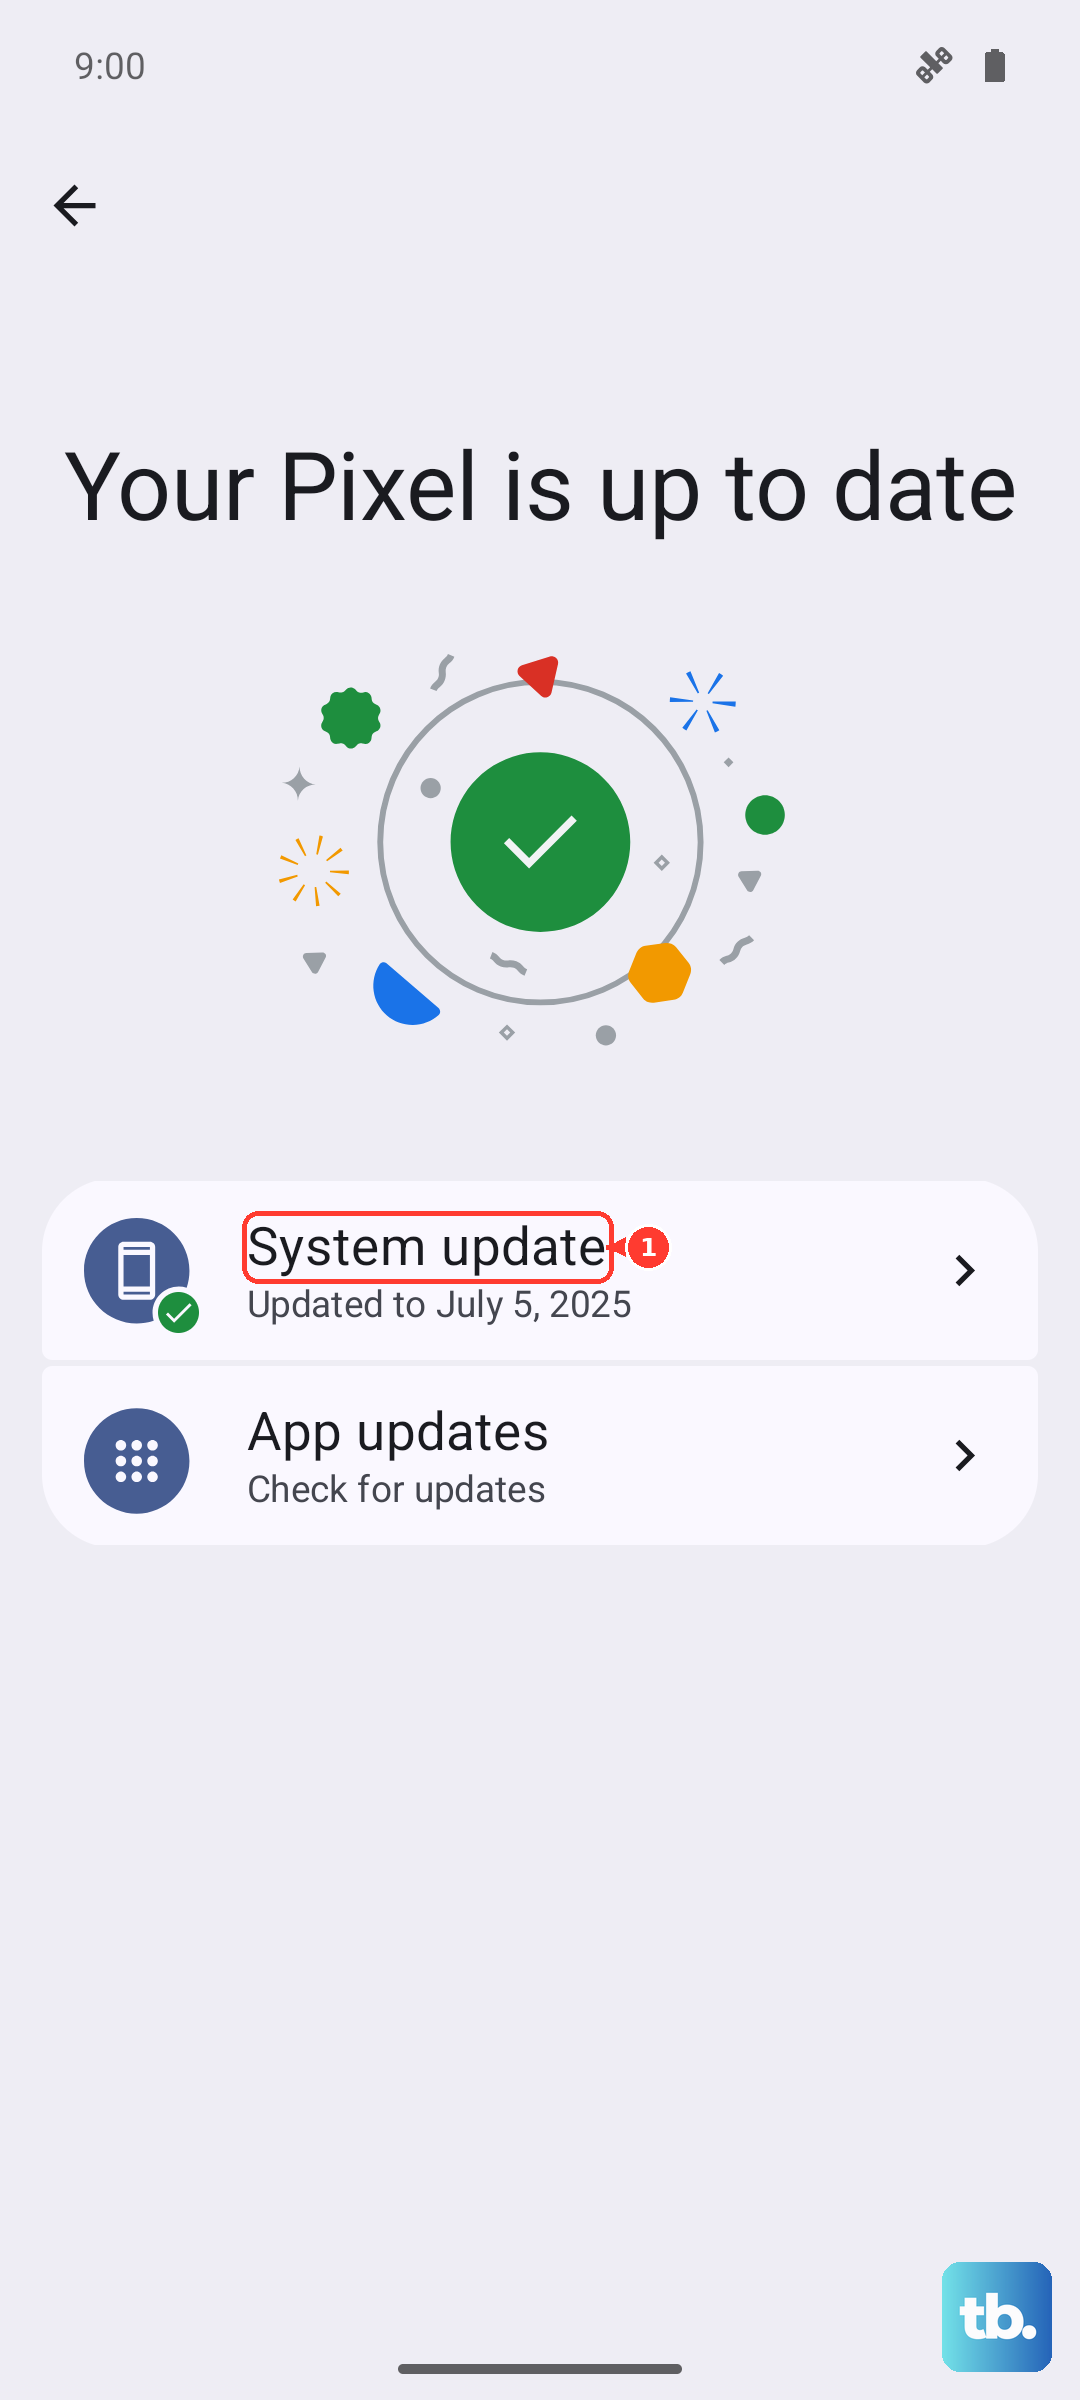
Next, check for a system update. Go to Settings > Software update > Download and install. Installing the latest version of Android 15 and One UI 7 can include important bug fixes for connectivity and app performance.
Disable Any Active VPN or Ad Blockers
VPNs and DNS-based ad blockers are great for privacy, but they can sometimes interfere with the specific ports and connections your email app uses. Open your VPN app and disconnect from it, or go to Settings > Connections > More connection settings to manage VPNs.
Try sending and receiving an email with the VPN turned off. If that works, you may need to adjust your VPN's settings or switch to a different server location that doesn't block email traffic.
Clear the Email App's Cache and Data
Corrupted temporary files can cause all sorts of strange app behavior. Go to Settings > Apps, select your email app, and then tap Storage. First, tap Clear cache. This deletes temporary files without affecting your account.
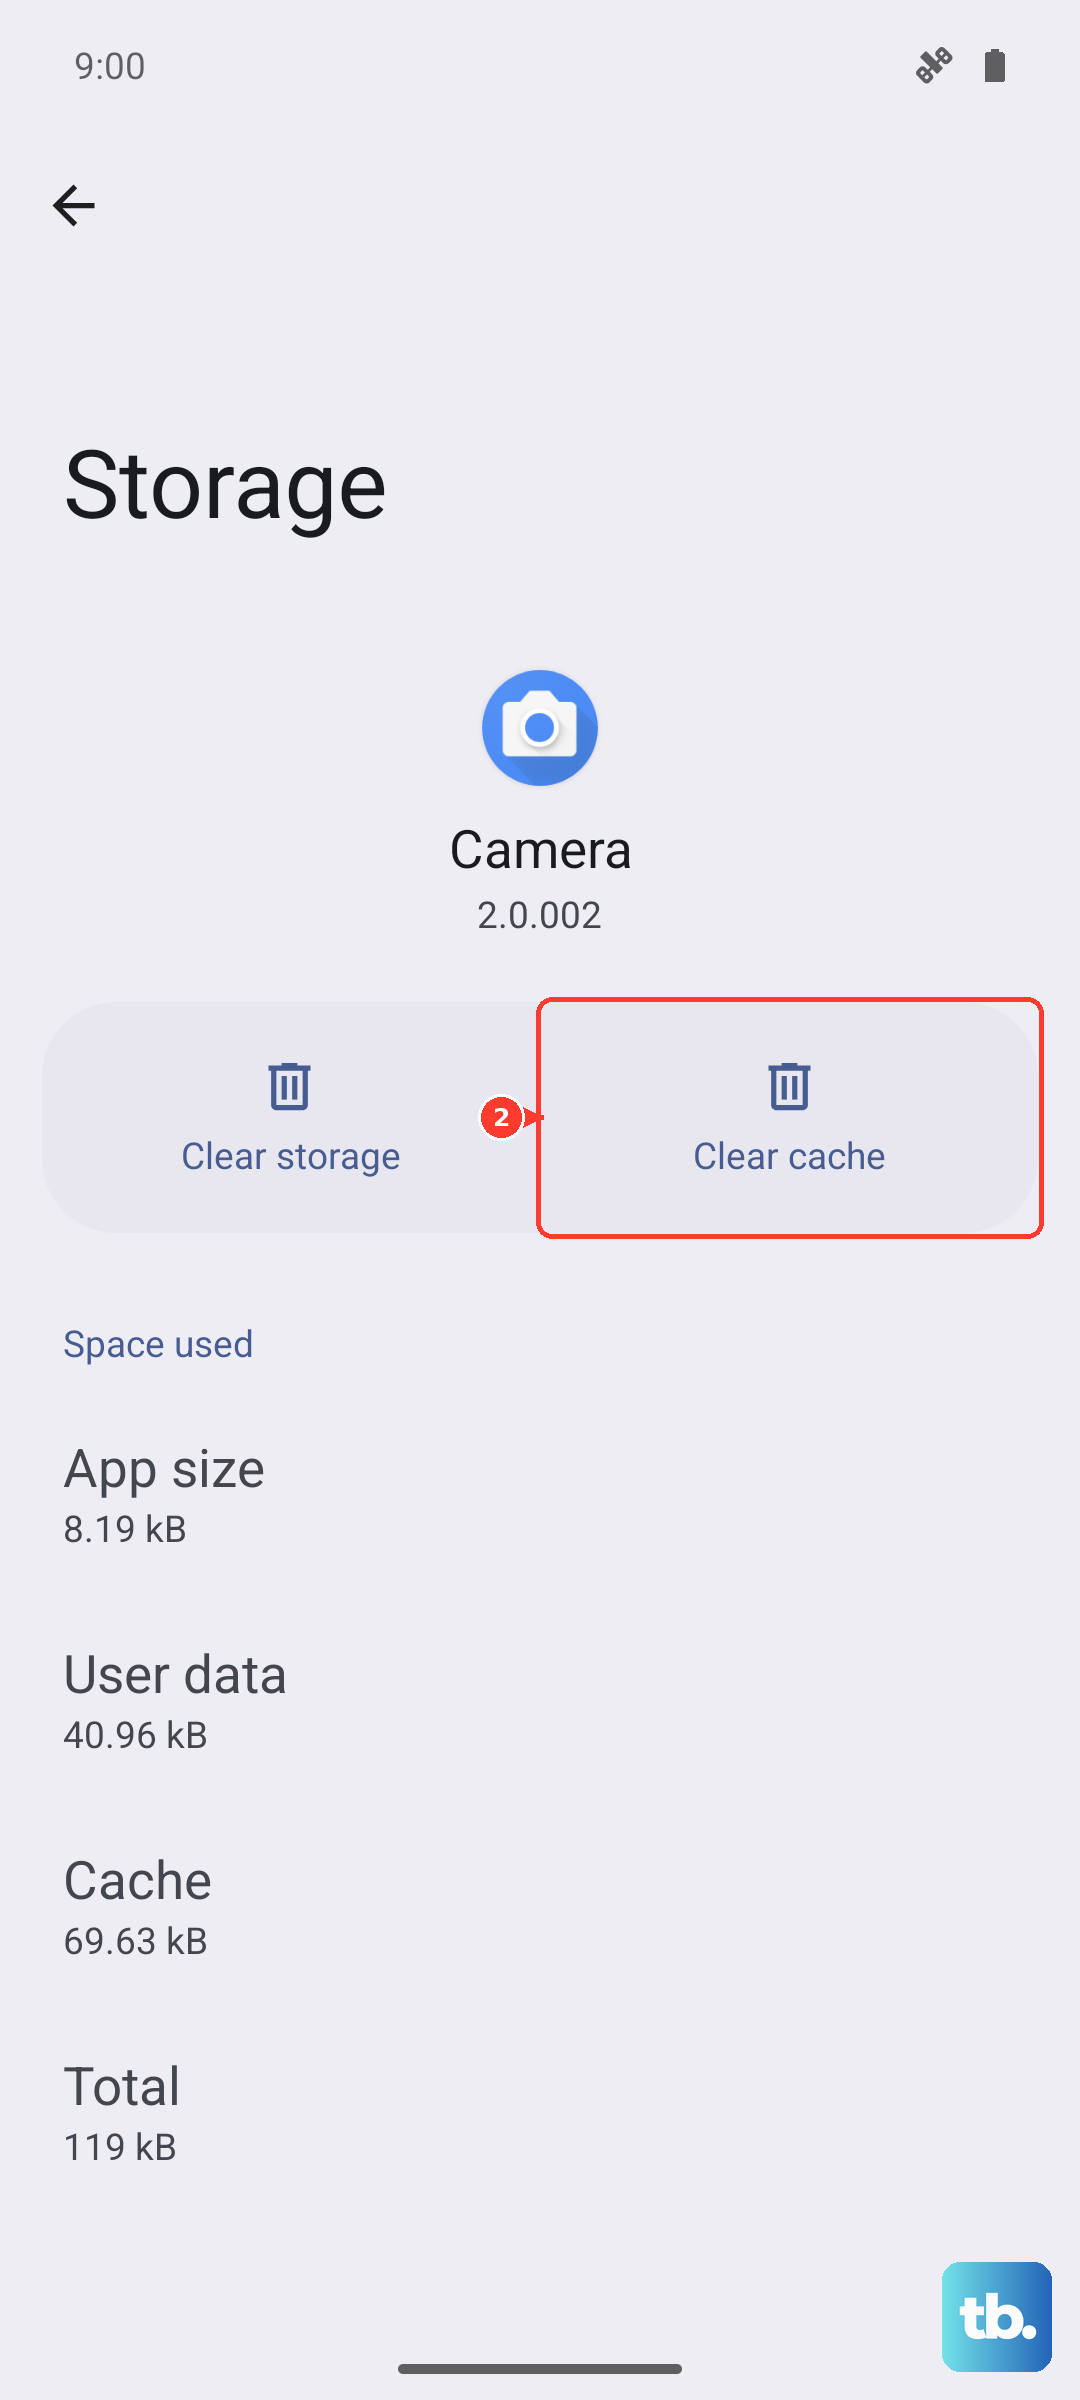
If the problem persists, you can tap Clear data. Be warned, this will remove the app's settings and log you out, so you'll need to set up your email account again afterward. It's a more thorough reset for stubborn issues.
Remove and Re-add Your Email Account
This is often the most effective fix for persistent sync problems. It gives your phone a clean slate for that account. Open your email app's settings, or go to Settings > Accounts and backup > Manage accounts.
Select the problematic email account and tap Remove account. Confirm, then go through the process of adding it back. Use the automatic setup if possible, as it will pull the correct server settings directly from your provider.
Ensure Automatic Date and Time is Enabled
Email security certificates rely on your phone having the correct time. If your clock is off, servers may reject the connection. Go to Settings > General management > Date and time.
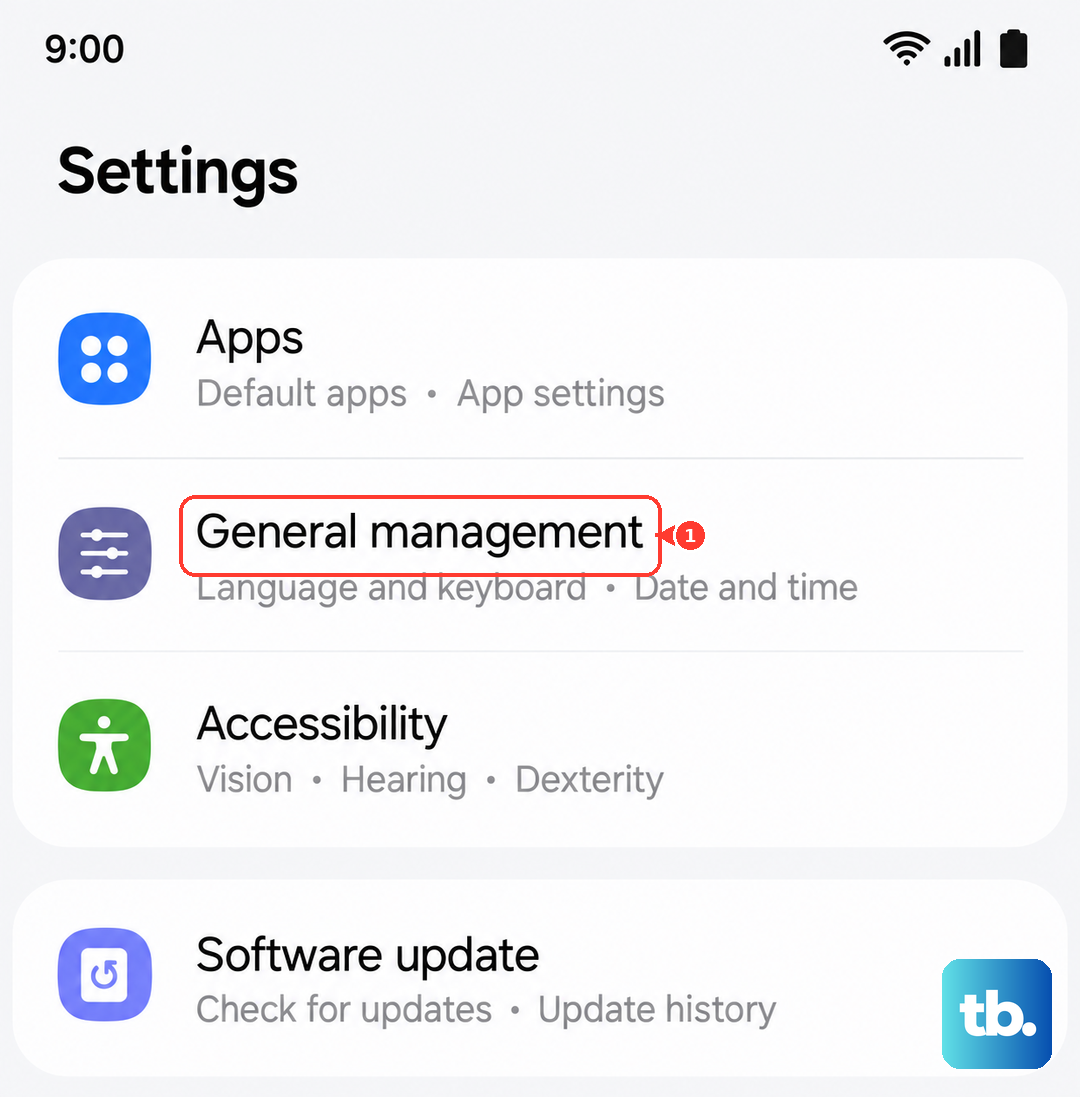
Make sure the switch for Automatic date and time is turned on. This allows your phone to sync its clock with network time servers, ensuring perfect timekeeping for all your secure connections.
Check Your Notification Settings
If emails are arriving but you're not getting alerts, the issue is with notifications, not syncing. Long-press on your email app's icon and tap App info, then go to Notifications.
Make sure notifications are turned on for the app overall. Then, tap on "Mail" or "New messages" to dive into the specific notification channels and ensure they aren't muted or set to "Silent."
Perform a Force Restart on Your S25+
A soft reset can clear out system-level glitches affecting all apps. Press and hold the Volume Down button and the Side (power) button simultaneously for about 10 seconds.
Keep holding until you see the Samsung logo appear on the screen, then release. Your phone will reboot. This is different from just turning it off and on, as it clears the device's active memory more thoroughly.
Review Your Sync Account Settings
Android has a master sync toggle that controls all accounts. If this is off, nothing will sync in the background. Swipe down with two fingers from the top of the screen to open the full Settings menu, then tap the three-dot menu in the top right and select Sync now.
You can also check the master sync setting by going to Settings > Accounts and backup > Manage accounts and tapping the three-dot menu to see if "Auto sync data" is enabled.
Reset Your Network Settings
This is a last resort before a factory reset, but it can fix deep-seated connection problems. It will erase all your saved Wi-Fi networks, Bluetooth pairings, and mobile data settings. Go to Settings > General management > Reset > Reset network settings.
Tap to confirm, and your phone will restart. Afterward, you'll need to reconnect to your Wi-Fi and re-pair Bluetooth devices, but any network-related software corruption will be cleared.