
When your MacBook Pro 16-inch M5 Pro won't connect to WiFi, drops the connection frequently, or shows "No Internet Connection" despite being connected, it can be incredibly disruptive. The fixes below are tailored for macOS 26 Tahoe on this specific model.
Toggle WiFi Off and On
Click the WiFi icon in your menu bar and select "Turn Wi-Fi Off." Wait a solid ten seconds, then click the icon again and turn it back on. This simple refresh of the wireless adapter clears out most temporary glitches and is the fastest thing to try.
Restart Your MacBook Pro
Click the Apple menu in the top-left corner and choose "Restart." A full reboot reloads the WiFi driver and clears any cached network states that might be causing trouble. I'd start with this one if toggling WiFi didn't help.
Forget and Rejoin the Network
Head to System Settings > Wi-Fi. Click the i (info) button next to the network giving you trouble. Click "Forget This Network" and confirm. Then, select the network from the list again and re-enter the password. This creates a brand new, clean connection profile.
Renew Your DHCP Lease
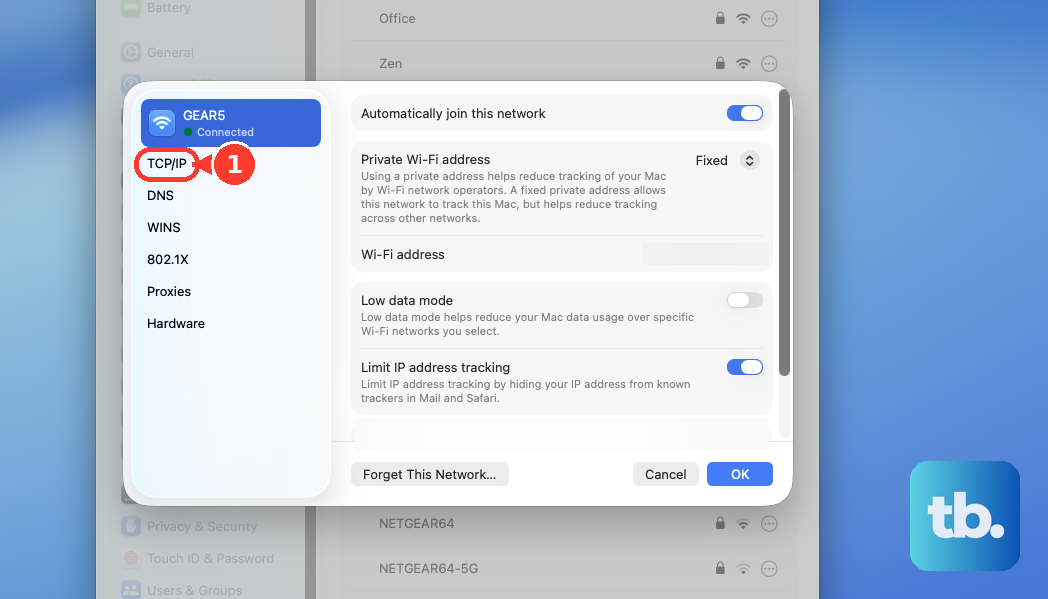
This is a great fix for when you're connected to WiFi but have no internet. Go to System Settings > Wi-Fi and click the i button for your connected network. Click "TCP/IP" on the left, then click the "Renew DHCP Lease" button. This requests a fresh IP address from your router.
Change Your DNS Servers
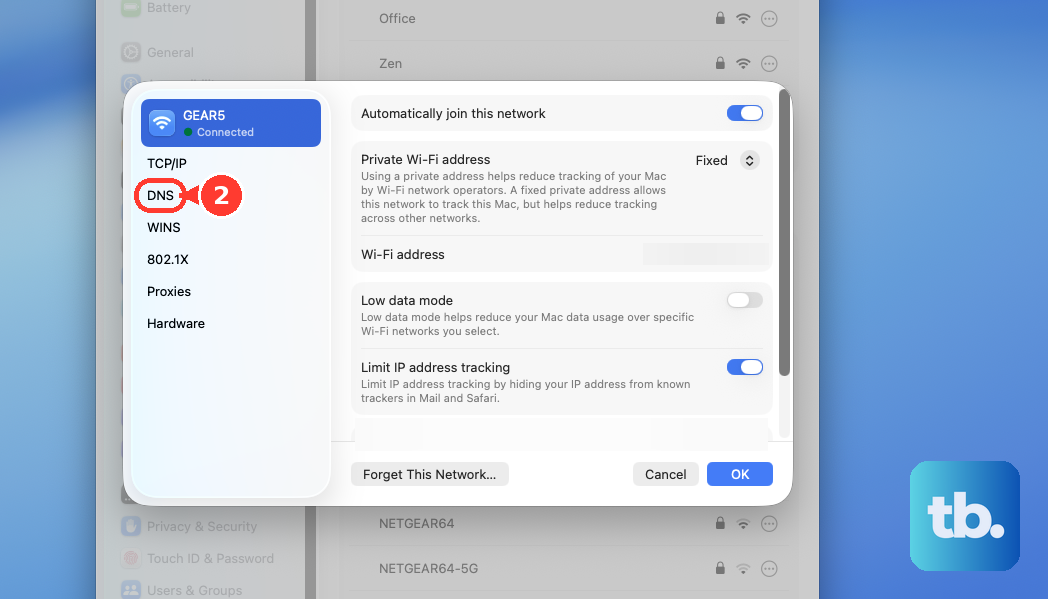
Sometimes the problem isn't the connection itself, but the servers that translate website names into addresses. In the same network details window, go to the DNS tab. Remove any existing servers listed, then add new ones. I've seen good results with Google's DNS: 8.8.8.8 and 8.8.4.4.
Delete Network Configuration Files
If the issue persists, corrupted system files might be the culprit. Open a new Finder window, press Command + Shift + G, and paste this path: /Library/Preferences/SystemConfiguration/. Look for and move these three files to the Trash: NetworkInterfaces.plist, com.apple.wifi.message-tracer.plist, and preferences.plist. You'll need to restart your MacBook Pro afterward, and macOS will generate fresh, default versions of these files.
Check for a macOS Update
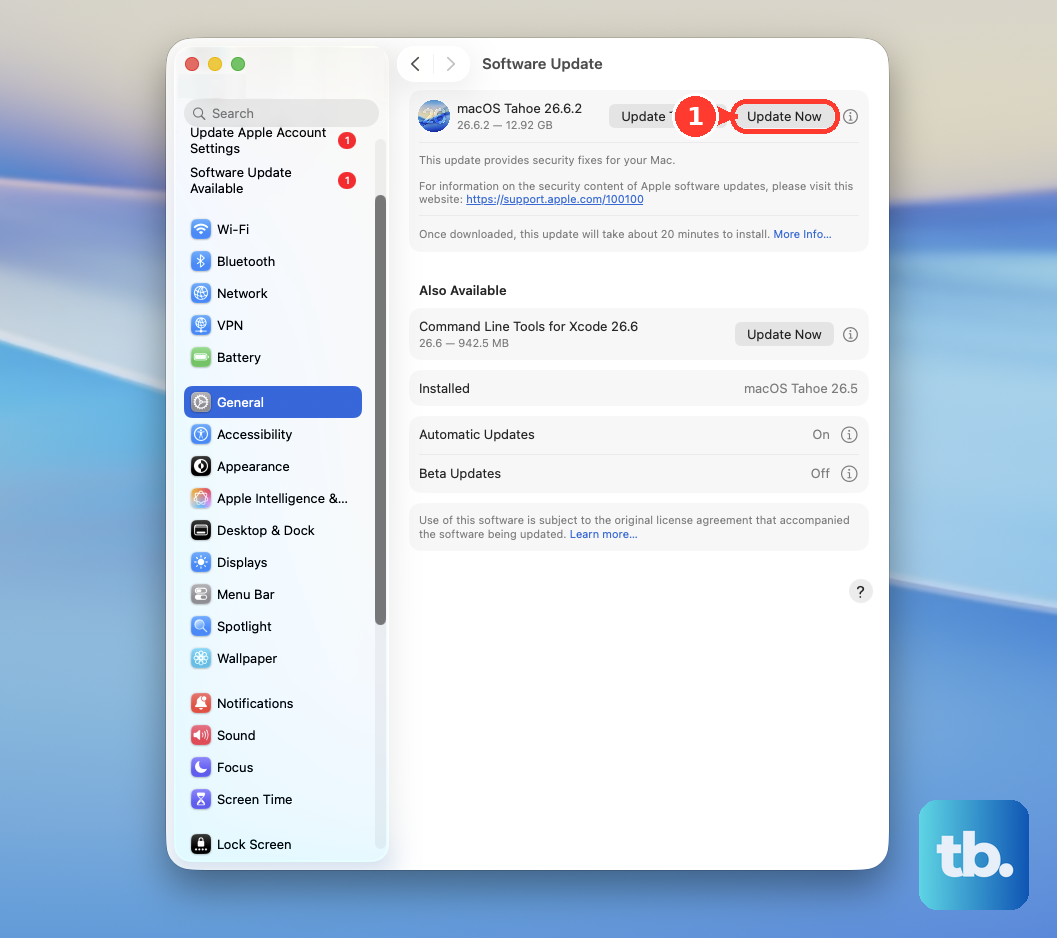
Apple frequently includes fixes for wireless connectivity in system updates. Go to System Settings > General > Software Update to check. Ensuring you're on the latest version of macOS 26 Tahoe can resolve underlying bugs causing your WiFi woes.
Inspect Your WiFi Signal
Hold down the Option key on your keyboard and click the WiFi icon in the menu bar. You'll see a detailed dropdown. Look for the RSSI value, which indicates signal strength. If it's -70 dBm or lower (more negative), the signal is weak. The M5 Pro's robust performance needs a good signal, so try moving closer to your router.
Create a New Network Location
This is a nuclear option for network settings that often works. Go to System Settings > Network. Click the three-dot menu button next to your network services and select Locations > Edit Locations. Click the plus (+) icon to add a new location, give it a name like "Fresh Start," and click Done. Finally, switch to this new location from the same menu. This gives you a completely blank slate for all network configurations.