
When your Lenovo Yoga 9i 14 shows a "USB Device Not Recognized" error or simply doesn't react to a connected flash drive, external hard drive, or phone, it's a common but fixable hiccup. The problem usually sits with the port, the cable, a driver, or a Windows power setting.
Start With a Different Port
Unplug your device and try it in another USB port on your laptop. The Yoga 9i 14 typically has both USB-C and USB-A ports, so test both types if you can. If the device works in a different port, the original one might have a physical issue or a temporary fault.
This is the quickest check and often points you in the right direction. I'd start here before digging into software settings.
Restart Your Laptop
A full restart reloads all the USB drivers and resets the controller. Many recognition errors are just temporary glitches that a reboot clears up. Make sure you select "Restart" from the Start menu, not just putting the laptop to sleep and waking it.
This simple step fixes the issue more often than you'd think. It's worth doing even if it feels too basic.
Test the USB Device Elsewhere
Plug the problematic device into another computer. If it isn't recognized there either, the fault lies with the device itself or its cable. If it works perfectly on another machine, then the issue is isolated to your Yoga 9i's configuration.
This test definitively rules out a problem with the peripheral. It saves you time troubleshooting the laptop for no reason.
Swap Out the Cable
If you're connecting something like an external SSD or a phone, try a different cable. USB cables, especially ones that get bent near the connectors, can fail in a way that still allows charging but breaks the data connection.
Use a cable you know works for data transfer. This is a very common culprit, so it's a good early step.
Update or Reinstall USB Drivers
Press the Windows key, type "Device Manager," and open it. Look for the section called Universal Serial Bus controllers and expand it. Right-click on any entry with a yellow warning icon and choose Update driver.
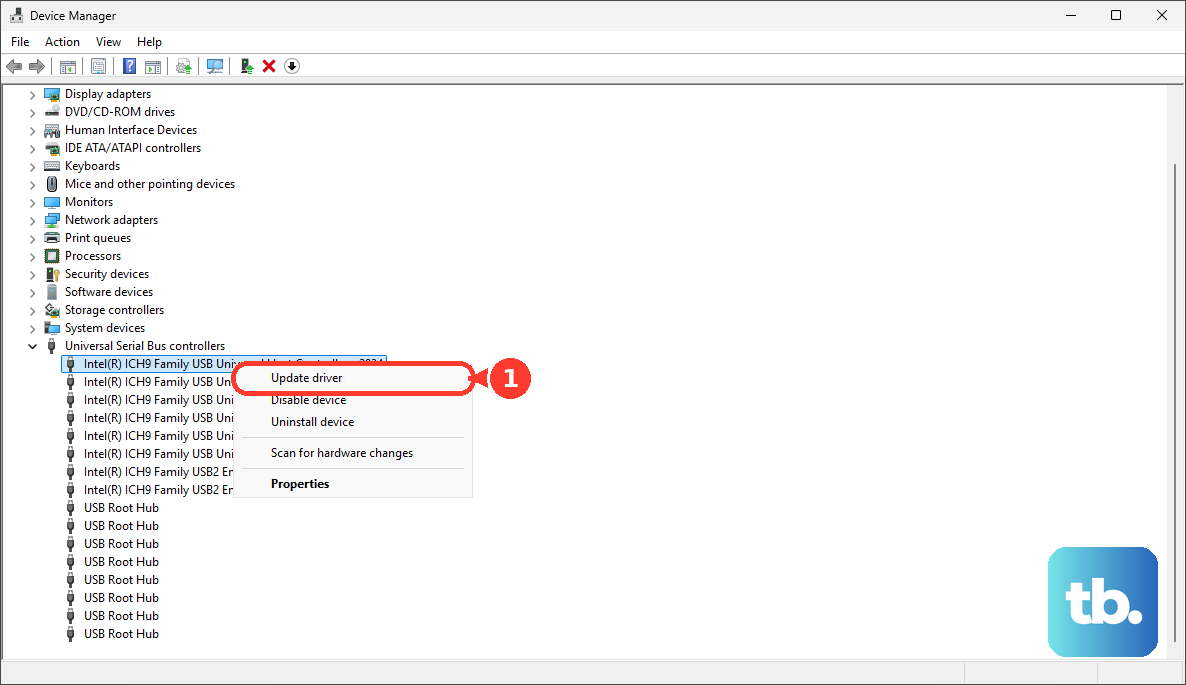
You can also try right-clicking on the generic USB controllers (like "USB Root Hub") and selecting Uninstall device. Restart your laptop, and Windows will automatically reinstall fresh drivers. For Yoga-specific drivers, check the Lenovo Vantage app.
Disable USB Selective Suspend
This power-saving feature can sometimes turn off ports prematurely. Go to Control Panel > Power Options. Click Change plan settings next to your selected plan, then Change advanced power settings.
In the new window, scroll down and expand USB settings, then expand USB selective suspend setting. Set both "On battery" and "Plugged in" to Disabled. Click Apply and OK.
Run the Hardware Troubleshooter
Windows has a built-in tool for this. Right-click the Start button and select Terminal (Admin) or Command Prompt (Admin). Type the following command and press Enter: msdt.exe -id DeviceDiagnostic.
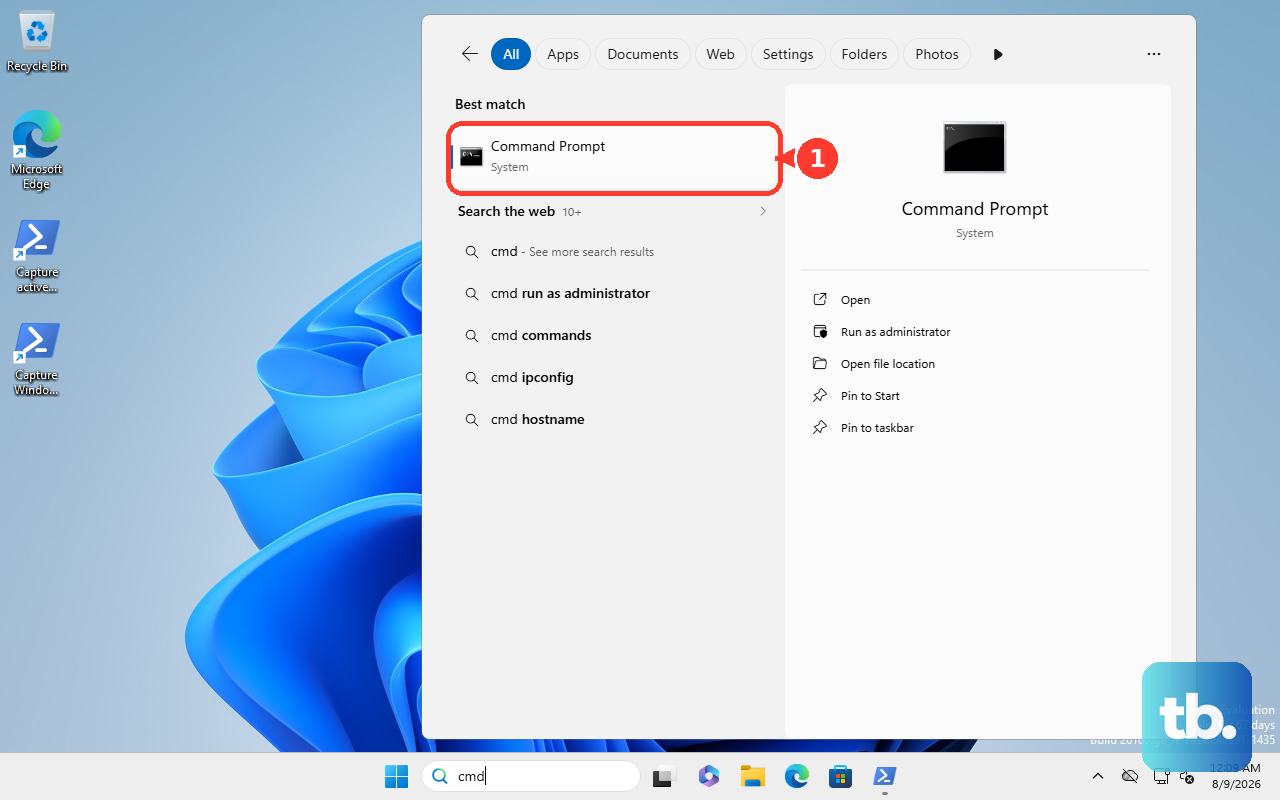
This launches the Hardware and Devices troubleshooter. Follow the prompts to let it scan for and attempt to fix problems with USB controllers and connected devices.
Check for System Updates
Go to Settings > Windows Update and click Check for updates. Install all available updates, especially any optional driver updates you might see. Microsoft and Lenovo frequently release patches that improve hardware compatibility.
For Yoga-specific updates, open the Lenovo Vantage app. It handles driver and BIOS updates that the Windows updater might miss, which can be crucial for port functionality.
Force a Hardware Detection Scan
Back in Device Manager, click the Action menu at the top and select Scan for hardware changes. This tells Windows to immediately re-check all buses, including USB, for any connected devices it might have missed.
It's a manual refresh that can jolt the system into seeing your device. Do this with the problematic USB device plugged in.
Check the BIOS Settings
On your Yoga 9i 14, you can access the BIOS by restarting and repeatedly pressing the F2 key as it boots up. Once in the BIOS setup, look for a section related to USB configuration.
Ensure that USB support is enabled. Sometimes there's an option for "USB Legacy Support" or "XHCI Hand-off" that can affect detection. If you're unsure, you can exit without saving changes.