
When your ThinkPad X1 Carbon doesn't recognize an external monitor, it's usually a quick settings or driver issue. The most common fix is just a key press away.
Press the Windows + P keys together. This opens the projection menu right on your screen. Select Extend or Duplicate. If it was set to "PC screen only," your external display will be disabled. Cycling through these options often wakes the connection right up.
Inspect Your Physical Connections
Unplug the video cable from both your ThinkPad and the monitor, then firmly reconnect it. A loose connection is a frequent culprit. I'd also recommend trying a different cable if you have one handy, as they can fail internally without any visible damage.
Make sure your monitor is powered on and set to the correct input source, like HDMI 1 or DisplayPort 2. It sounds simple, but it's an easy step to overlook when you're focused on the laptop.
Run a Hardware Diagnostic
Lenovo builds a great diagnostic tool right into your ThinkPad. Restart your laptop and press the F10 key repeatedly as it boots up. This will launch Lenovo Diagnostics.
From there, you can run tests on your video ports and display adapters. It's a reliable way to check if there's a hardware fault with the physical HDMI or USB-C port on your machine.
Update Your Display and Thunderbolt Drivers
Outdated or corrupted drivers are a leading cause of display detection problems. For the X1 Carbon, you have two excellent paths for updates. The easiest is to open the Lenovo Vantage app, which is pre-installed on your system.
Check for updates in Vantage; it will find the latest, certified drivers for your specific model. Alternatively, you can use Windows Update or visit the official Lenovo support site with your serial number. Pay special attention to Intel Graphics and Thunderbolt controller drivers, as they manage your video outputs.
Check Windows Display Settings
Navigate to Settings > System > Display. Click the Detect button. Windows will actively search for any connected displays. If your monitor appears here but is grayed out, it might be set to an unsupported resolution or refresh rate.
Select the external display in the settings pane and scroll down to choose a standard resolution like 1920x1080. This often resolves detection issues with older monitors or certain docking stations.
Disable and Re-enable Your Display Adapter
This trick forces Windows to completely reload your graphics driver. Press Windows + X and select Device Manager. Expand the "Display adapters" section, right-click on your Intel Iris Xe or UHD Graphics device, and choose Disable device.
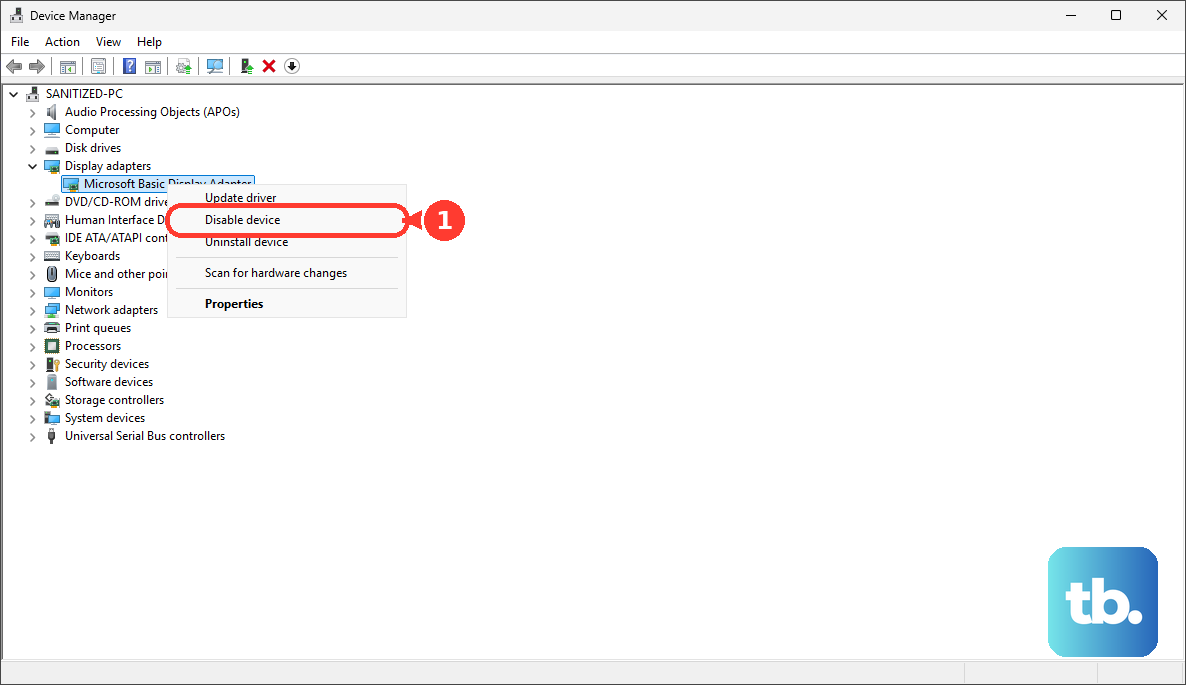
Wait about ten seconds, then right-click it again and select Enable device. Your screen will flicker as the driver reloads, which frequently reinitializes the external video ports and can establish the connection.
Try a Different Port or Dock
The X1 Carbon typically has both an HDMI port and USB-C/Thunderbolt ports that support video. If your monitor isn't being detected via HDMI, try connecting it through a USB-C to HDMI or DisplayPort adapter instead.
This test is crucial. If the display works through USB-C but not the dedicated HDMI port, it points to a potential issue with the HDMI port itself. Also, if you're using a Thunderbolt dock, unplug it and reconnect after a moment, as these docks can sometimes lose sync after the laptop wakes from sleep.
Check Your BIOS Settings
On rare occasions, a setting in the BIOS can affect external display output. To enter the BIOS on your ThinkPad, restart the computer and press the F1 key repeatedly as it starts up. If your function keys are swapped, you may need to press Fn + F1 instead.
Once in the ThinkPad Setup utility, look for display or video-related settings. Ensure nothing related to external video is disabled. Be careful not to change other settings unless you know what they do. Exit saving changes if you made any.
Perform a Power Drain Reset
This is a deeper reset that clears temporary power states which can interfere with port functionality. Shut down your ThinkPad completely. Unplug the AC adapter and disconnect any peripherals, including the external monitor.
Hold down the power button for a full 60 seconds. After that, release the button, reconnect your AC adapter, and power the laptop on normally. Then, try connecting your monitor again. This process can resolve stubborn hardware detection issues.