
When your Lenovo Legion Pro 16 won't connect to WiFi, it can feel like you're locked out of everything. Whether you see no networks at all, get stuck on "Connecting...", or have a connection that drops constantly, these steps will get you back online.
Run the Windows Network Troubleshooter
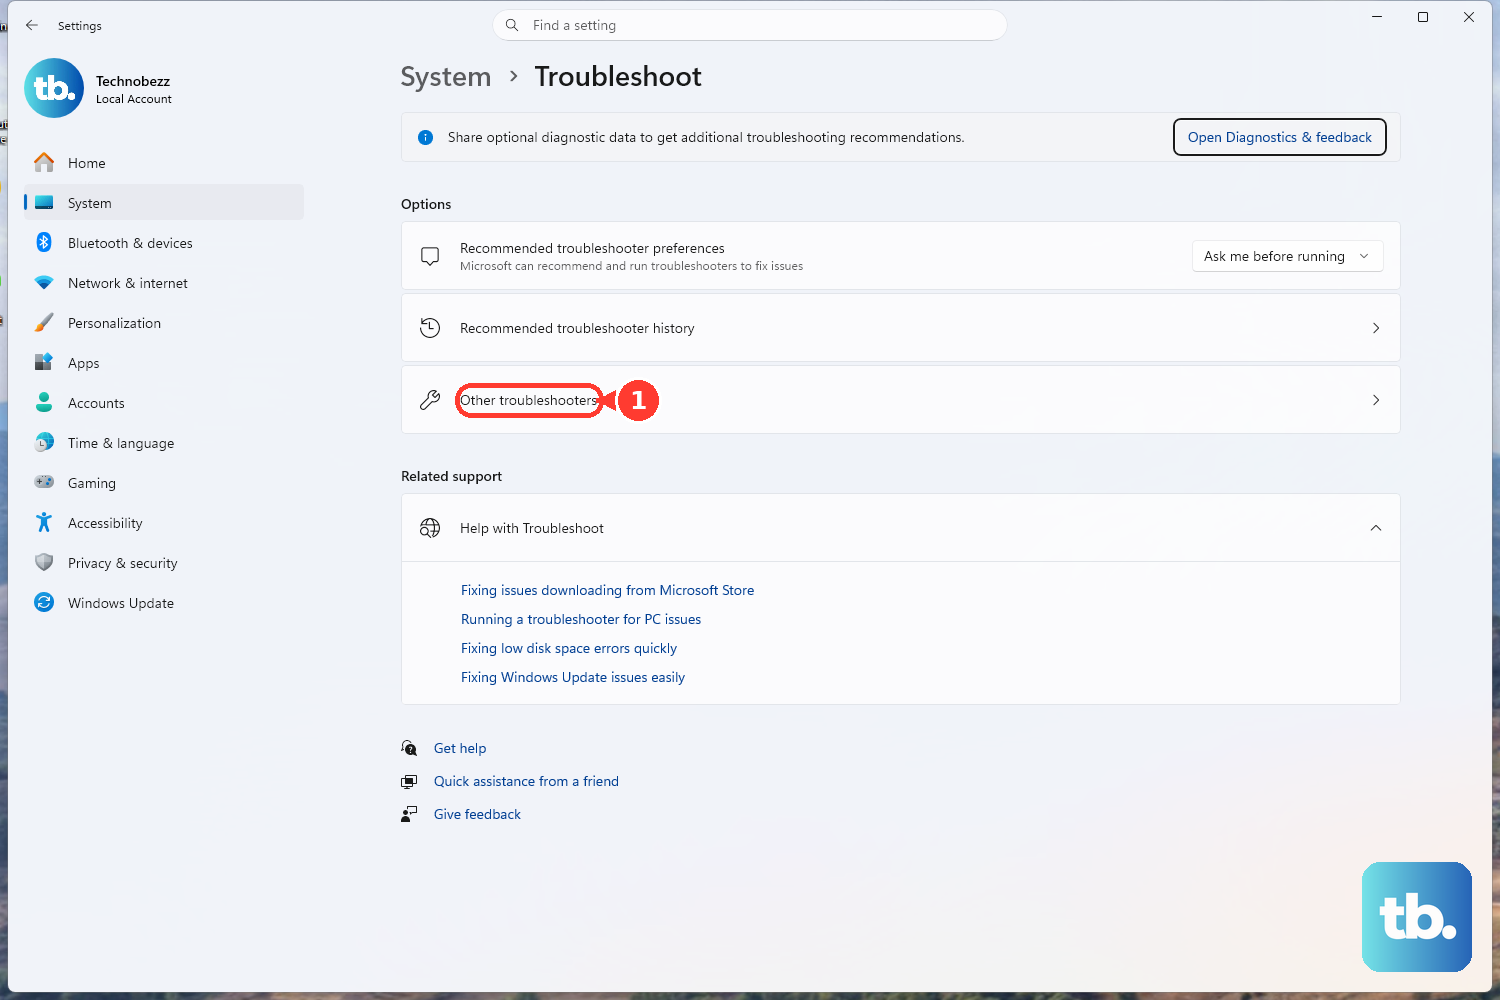
This is the quickest place to start. Right-click the WiFi icon in your taskbar and select Troubleshoot network problems. Windows will automatically scan for common issues and try to apply fixes. If you're on Windows 11, you can also navigate to Settings > System > Troubleshoot > Other troubleshooters and run the Network and Internet troubleshooter from there.
Toggle WiFi Off and On
Click the network icon in your taskbar and simply turn the WiFi toggle off. Wait about ten seconds, then flip it back on. This forces your Legion's wireless adapter to restart and can clear up temporary glitches. You can also toggle Airplane mode on and off for a more comprehensive reset of all radios.
Forget and Reconnect to Your Network
Go to Settings > Network & internet > Wi-Fi > Manage known networks. Find your home or office network in the list and click the Forget button. After that, scan for networks again, select yours, and re-enter the password. This solves a lot of problems caused by a corrupted connection profile.
Restart Your Legion Pro
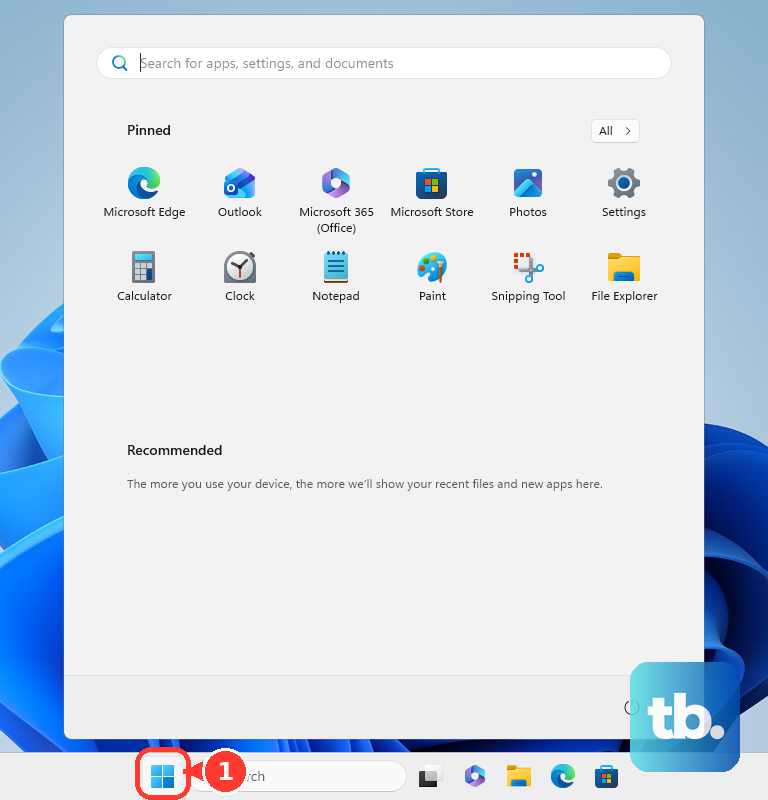
A full restart is more powerful than putting the laptop to sleep. Click the Start menu, select the power icon, and choose Restart. This clears out the network stack and reloads all drivers from scratch. I've seen this fix connection issues that nothing else would touch.
Update Your WiFi Driver
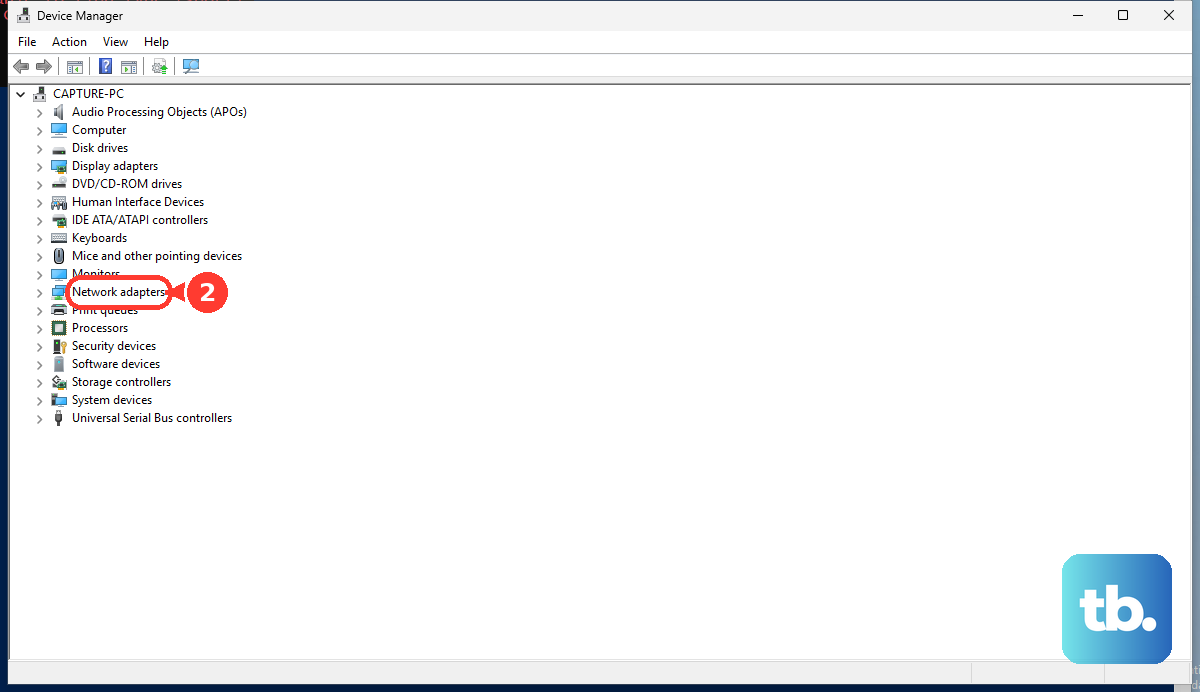
Outdated or corrupted drivers are a frequent culprit. Press Windows Key + X and select Device Manager. Expand the Network adapters section, right-click your wireless adapter (it might be listed as Intel Wi-Fi 6E or a similar name), and choose Update driver > Search automatically for drivers. If that doesn't find anything, visit the official Lenovo support site, enter your Legion Pro 16's model number, and download the latest network driver directly.
Disable and Re-enable the WiFi Adapter
This is like a targeted restart for just your network hardware. In Device Manager under Network adapters, right-click your WiFi adapter and select Disable device. Wait a moment, then right-click it again and choose Enable device. Your laptop will reinitialize the adapter, which can resolve driver state issues without a full reboot.
Reset Your Network Settings
If you're still stuck, a network reset can be very effective. Go to Settings > Network & internet > Advanced network settings. At the bottom, click on Network reset. This will remove and reinstall all network adapters and set every networking component back to its default state. Be aware you'll need to re-enter all your WiFi passwords after this completes.
Flush DNS and Reset TCP/IP via Command Prompt
Open the Start menu, type "cmd", right-click on Command Prompt, and select Run as administrator. Type or paste the following commands one at a time, pressing Enter after each: netsh winsock reset netsh int ip reset ipconfig /flushdns ipconfig /release ipconfig /renew
After running all commands, restart your laptop for the changes to take full effect.
Check for Windows and Lenovo Updates
Head to Settings > Windows Update and click Check for updates. Install any available feature or quality updates. It's also worth checking the Lenovo Vantage or Legion Space app for any system-specific driver or firmware updates from Lenovo that might include networking improvements.
Check Your Router and Network Environment
If other devices in your home also can't connect, the issue is likely with your router or internet service. Try restarting your router by unplugging it for 30 seconds. You can also test your Legion's WiFi by trying to connect to a different network, like a mobile phone hotspot. This confirms whether the problem is with your laptop or your home network.