
When your iPhone SE 4 suddenly goes silent, it can throw you off. Whether you're missing calls, can't hear videos, or your alarm doesn't make a peep, the fix is often simpler than you'd think. I'd start with the quick checks first, as they resolve most sound issues on the SE 4.
Start with a free online speaker test that plays left and right channels one at a time. Hearing both sides confirms the hardware, which makes the remaining steps much easier to pin down.
Check the Ring/Silent Switch and Volume
First, look at the left side of your iPhone SE 4. If you see a small orange stripe next to the switch, your phone is in Silent mode. Flip the switch towards the screen to turn silent mode off. Next, press the volume up button on the left side a few times while you're on the Home Screen or in an app.
You should see the volume indicator appear on screen. If you're in a call, use the volume buttons on the side to adjust the call volume separately. Sometimes a case can accidentally hold the silent switch in the wrong position, so it's worth checking that too.
Disconnect Bluetooth and Other Audio Outputs
Your iPhone might be trying to play sound through a connected device instead of its own speaker. Swipe down from the top-right corner to open Control Center. Look at the audio card in the top-right corner.
If it shows anything other than your iPhone's name (like "AirPods" or "Car Stereo"), tap it and select your iPhone SE 4 from the list. You can also go to Settings > Bluetooth and toggle it off temporarily to force all audio back to the phone's speaker.
Clean the Speaker Grilles
The iPhone SE 4 has a speaker grille at the bottom next to the USB-C port and the earpiece at the top of the screen. Lint, dust, or pocket debris can easily clog these tiny holes. Grab a soft, clean, dry toothbrush or a soft-bristled brush.
Gently brush across the grilles to dislodge any buildup. You can also use a can of compressed air, but hold it upright and use very short bursts from a few inches away. Never poke anything sharp like a pin or paperclip into the grilles, as this can permanently damage the speaker.
Force Restart Your iPhone SE 4
A simple force restart can clear out temporary software glitches that affect audio. On the iPhone SE 4, press and quickly release the Volume Up button. Then press and quickly release the Volume Down button.
Finally, press and hold the Side button. Keep holding it until you see the Apple logo appear, then let go. This process doesn't erase any data, it just gives the system a fresh start. I've seen this fix weird audio issues more times than I can count.
Check Do Not Disturb and Focus Modes
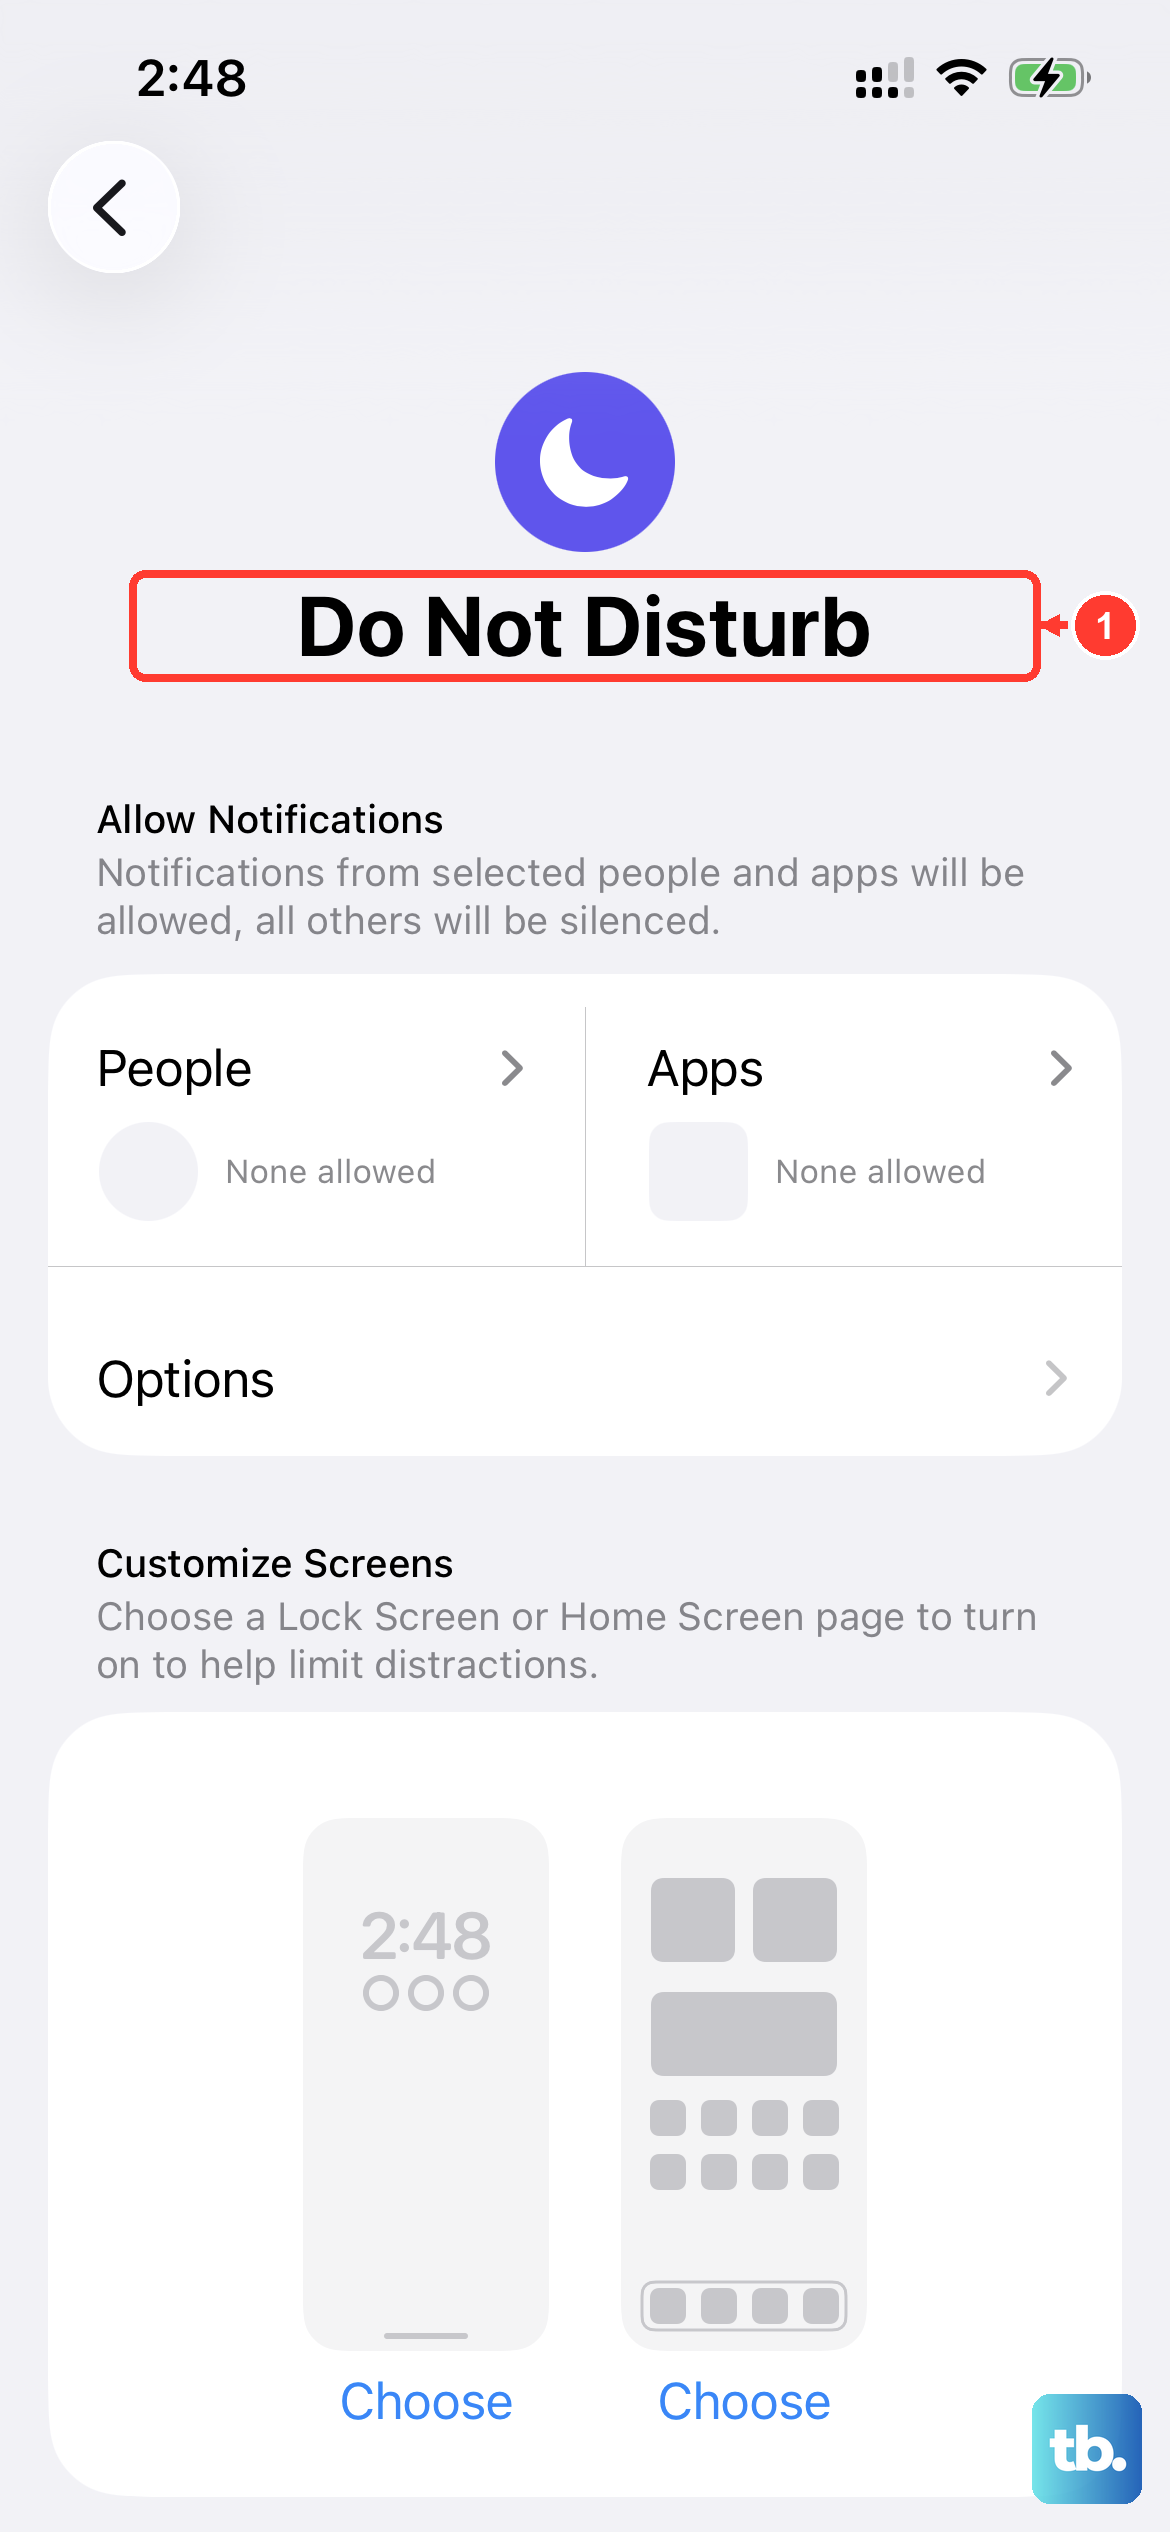
Focus modes in iOS 18, like Do Not Disturb, can silence calls and notifications. Open Control Center by swiping down from the top-right. If the Focus icon (it looks like a crescent moon or another symbol) is highlighted, tap it to turn the active Focus off.
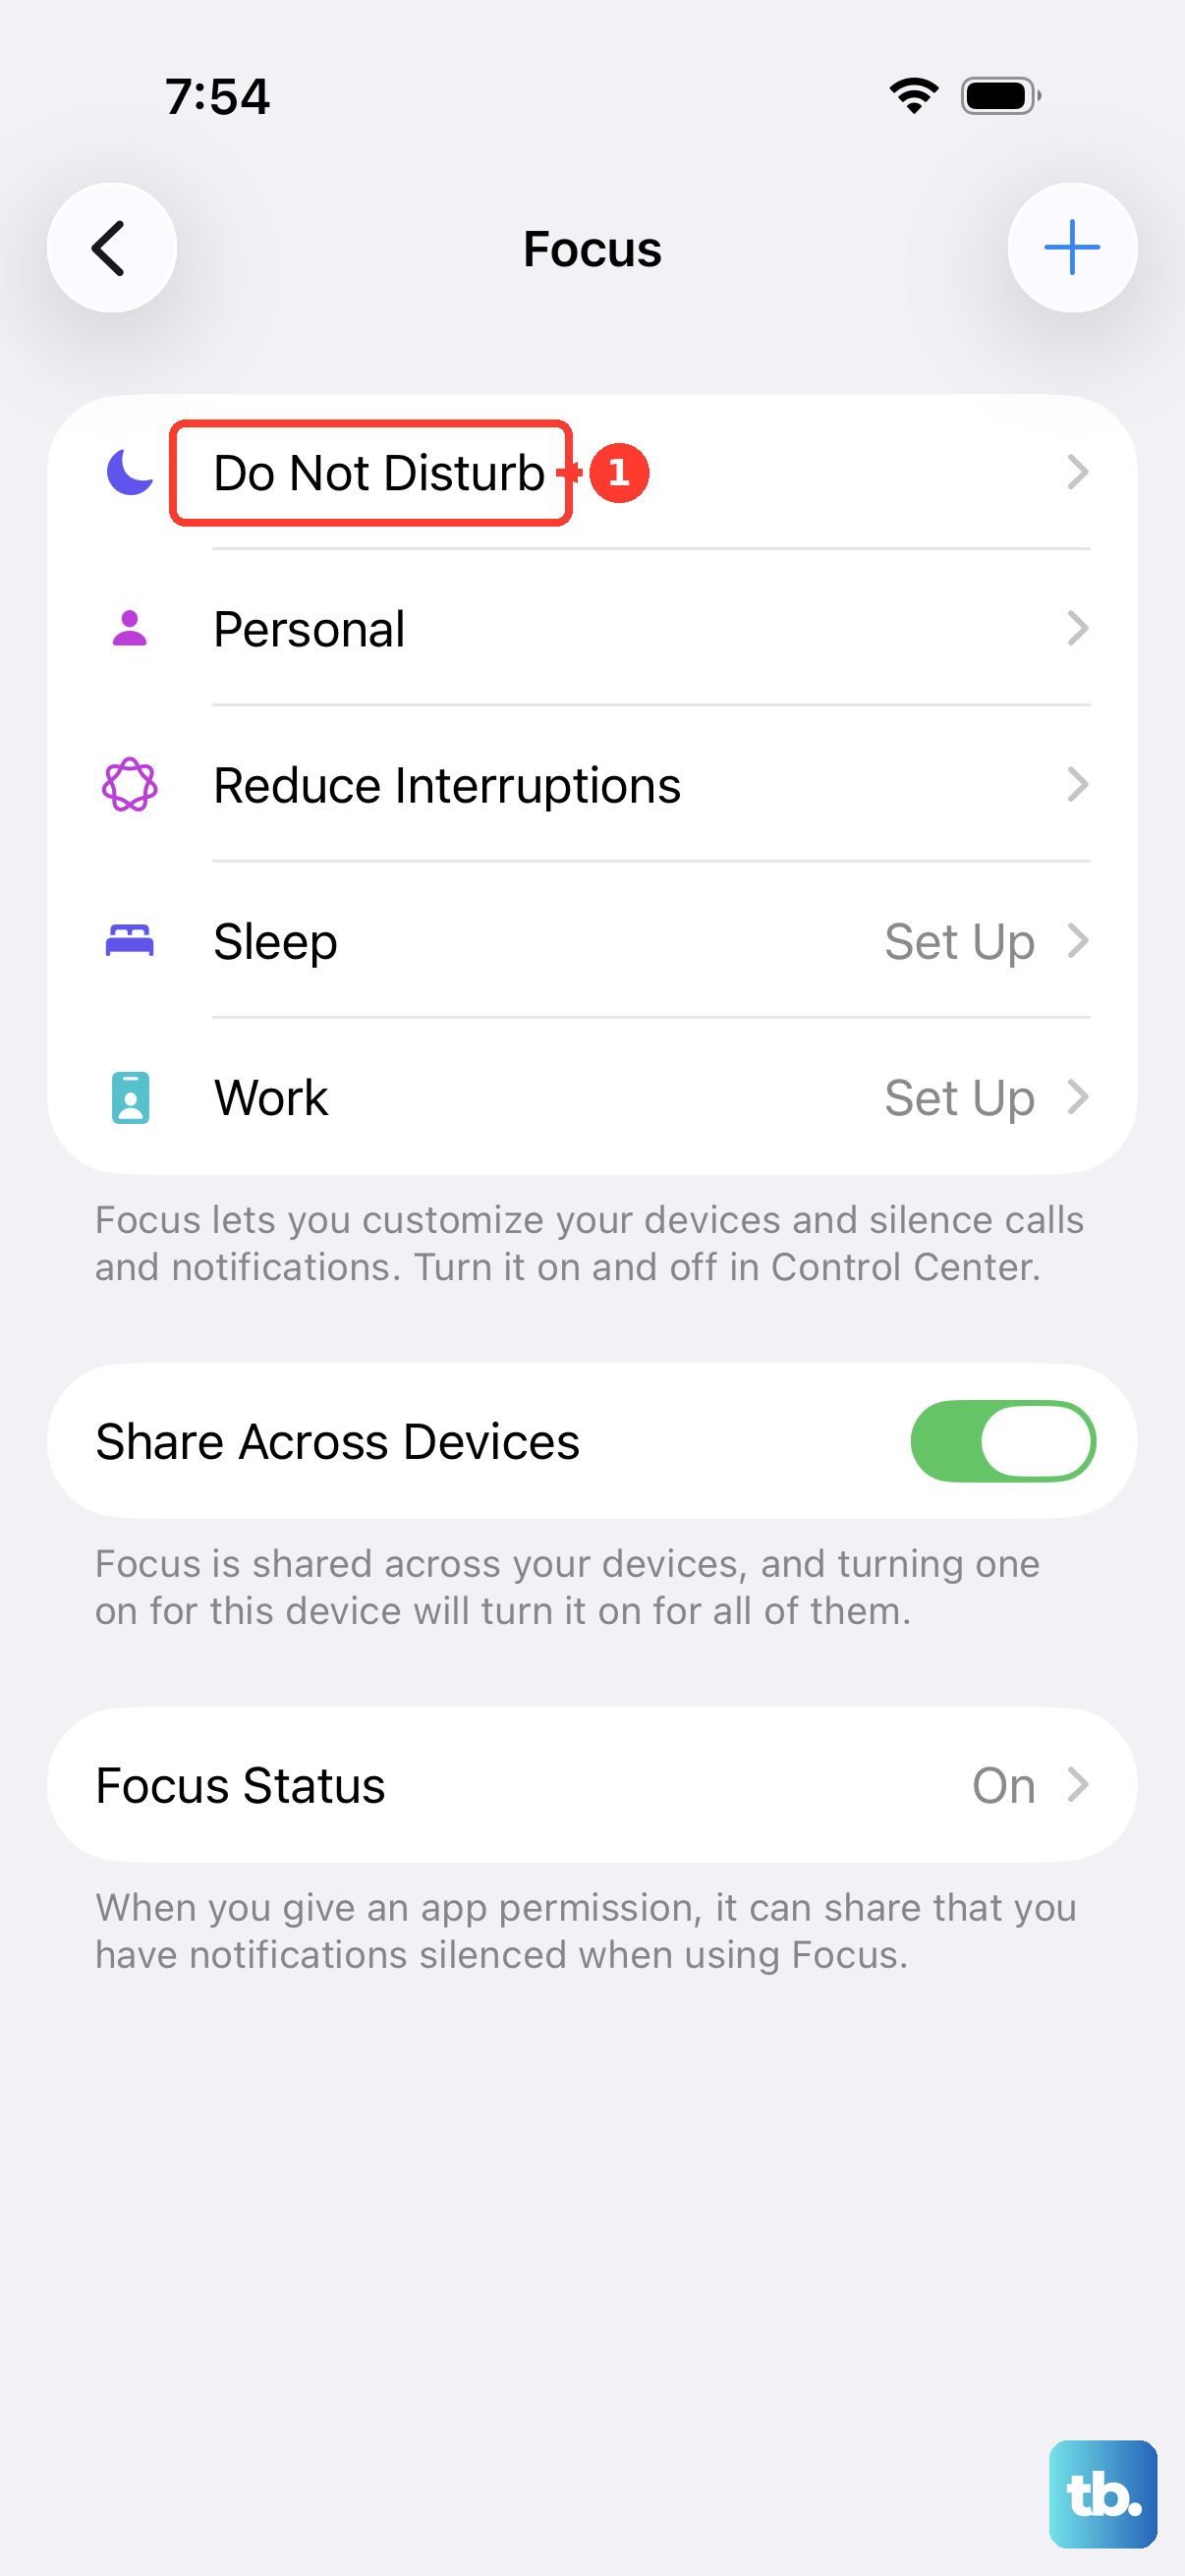
You can also go to Settings > Focus to see which modes are enabled and adjust their settings. Make sure the mode you're using isn't set to silence all calls or alerts from the people and apps you need to hear from.
Review Sound Settings in Accessibility
Some accessibility features are designed to alter audio output. Go to Settings > Accessibility > Audio/Visual. Check that the balance slider in the "Balance" section is centered.
Also, make sure "Phone Noise Cancellation" is turned on. While you're in Accessibility, scroll down to "Touch" and ensure "Call Audio Routing" is set to "Automatic" and not forced to a specific output like Bluetooth.
Update iOS to the Latest Version
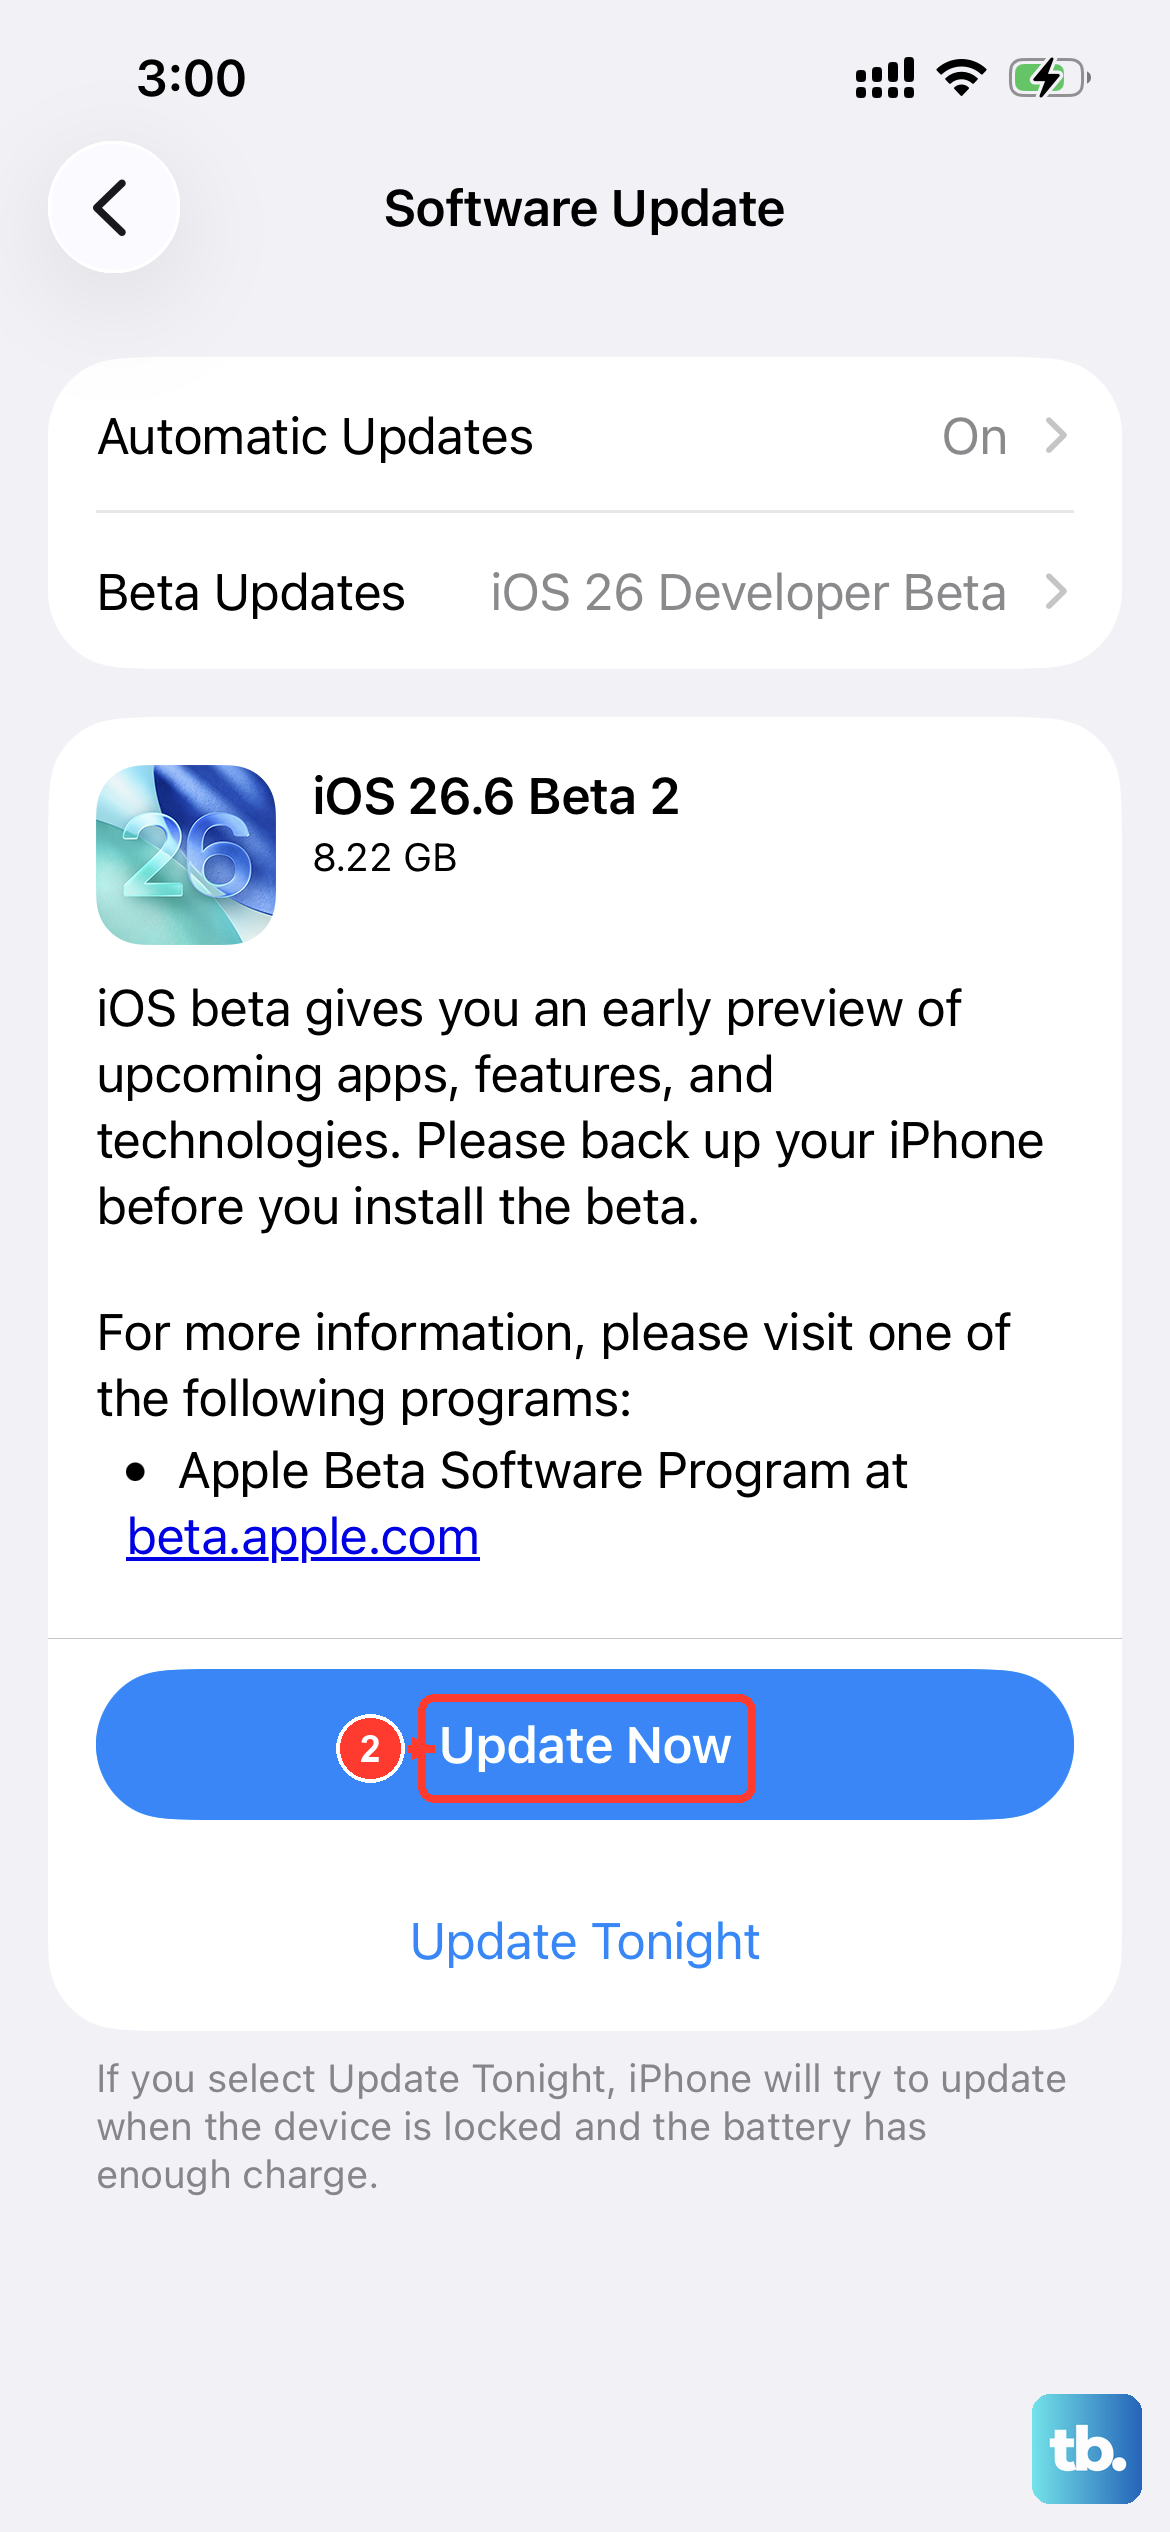
Software bugs can sometimes cause audio problems, and Apple releases fixes in updates. Connect your iPhone SE 4 to Wi-Fi and plug it into power. Go to Settings > General > Software Update.
If an update for iOS 18 is available, tap "Download and Install." Keeping your phone updated is a good habit, as it not only fixes bugs but can also help preserve your battery health over time, which is useful for the SE 4's compact battery.
Reset All Settings
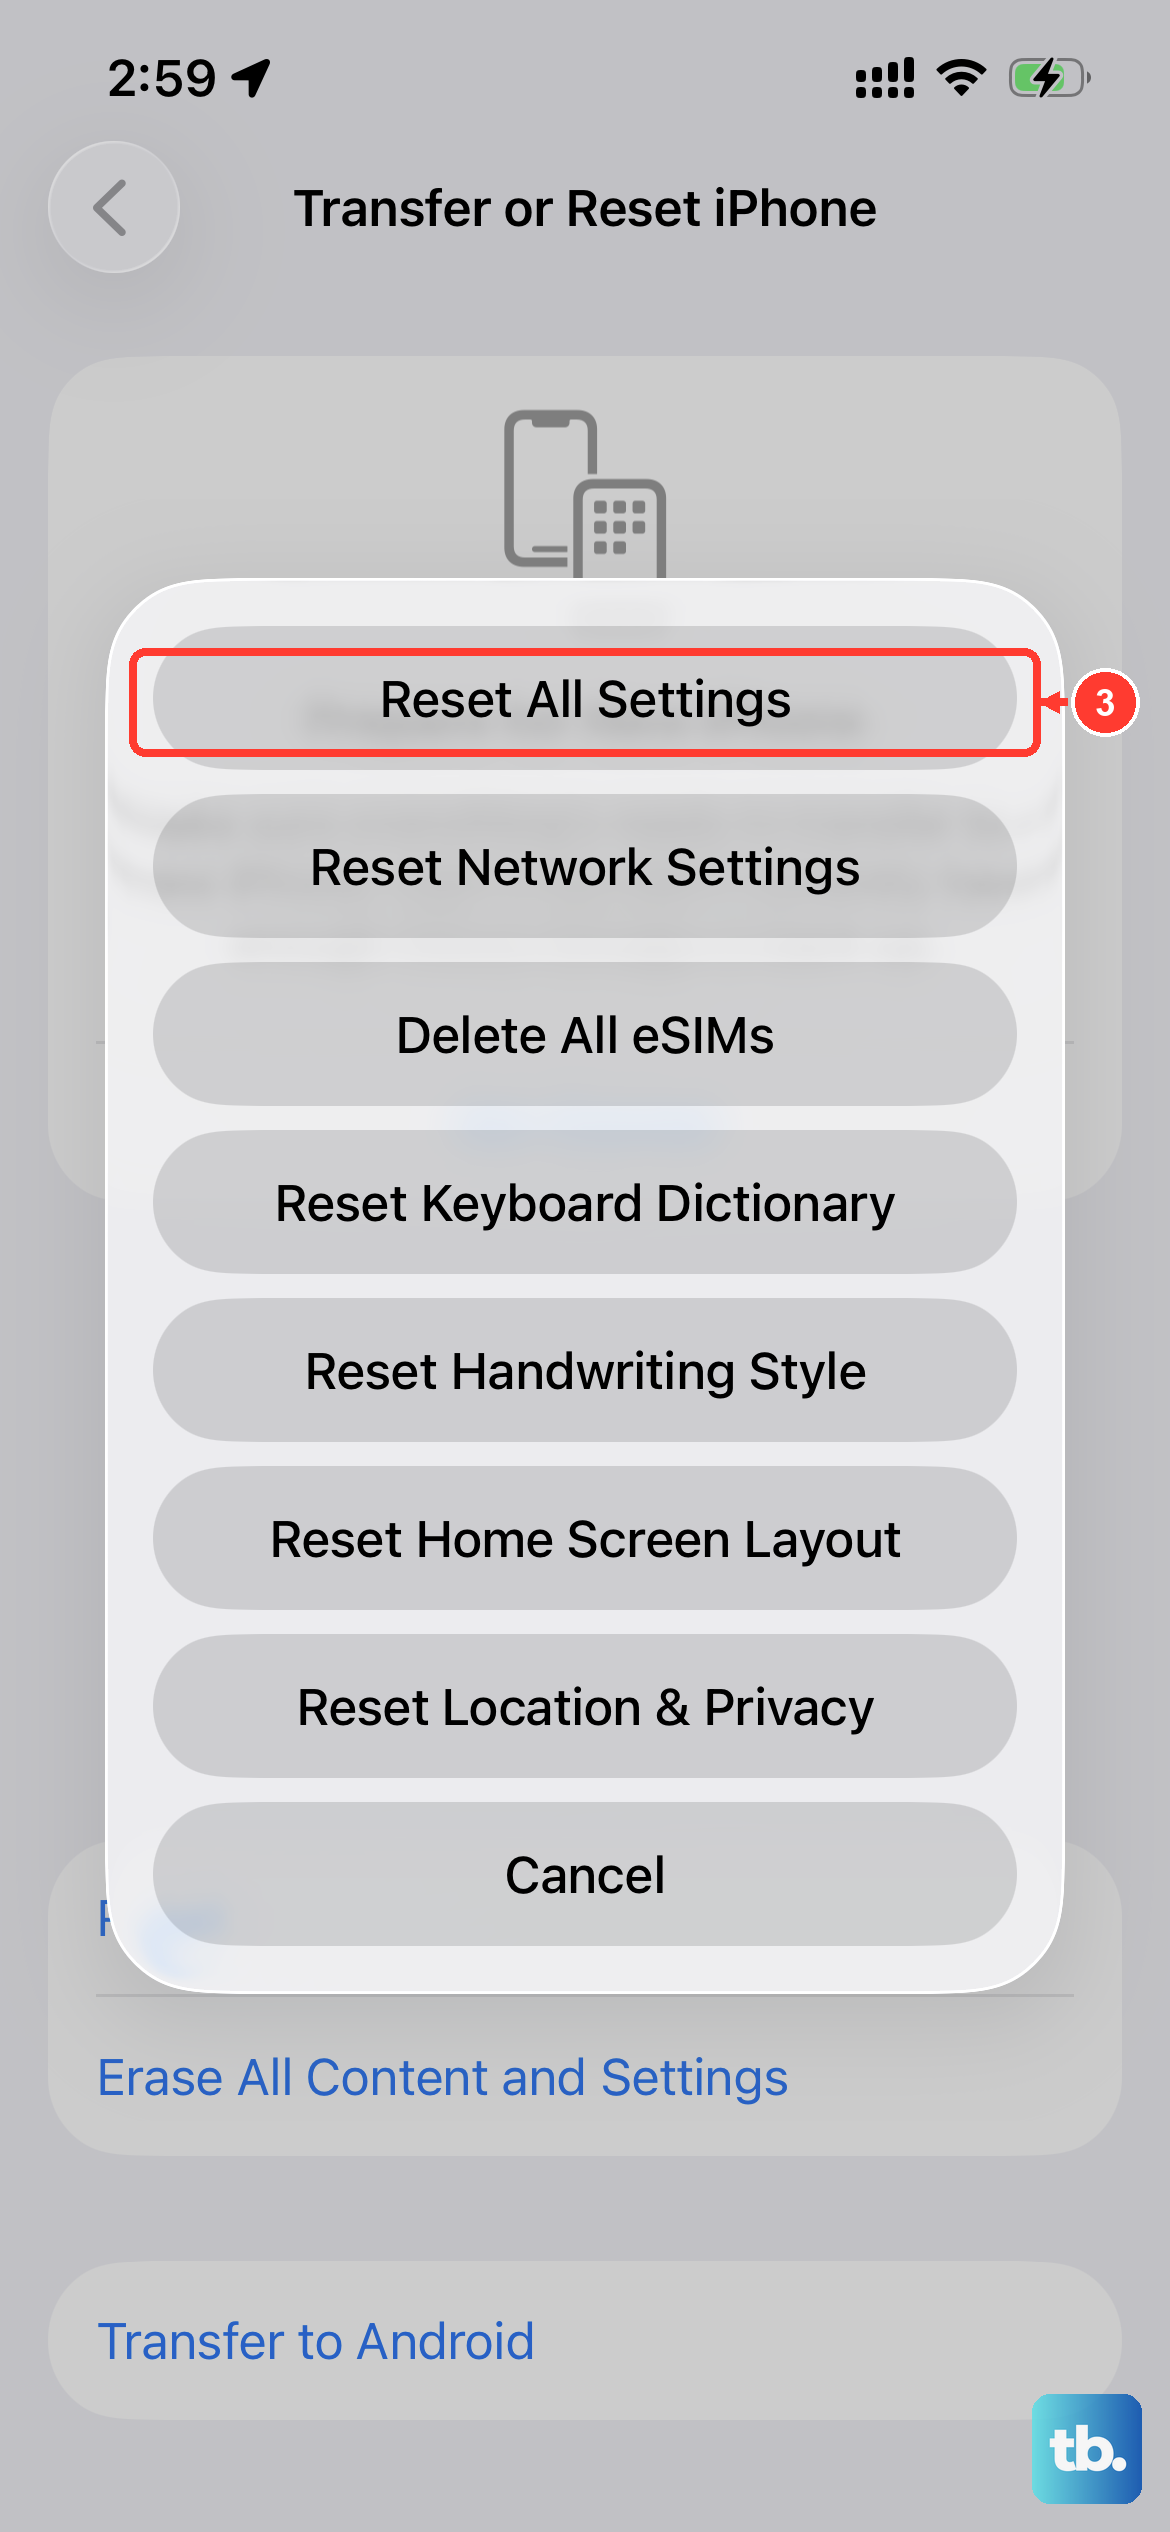
If a specific setting got changed accidentally, this will revert everything back to defaults without deleting your photos, messages, or apps. Go to Settings > General > Transfer or Reset iPhone.
Tap "Reset" and then choose "Reset All Settings." You'll need to enter your passcode. After the phone restarts, you'll have to reconfigure things like Wi-Fi passwords, wallpaper, and privacy settings, but it often clears up persistent sound issues.
Test Sound in Different Apps
Finally, figure out if the problem is with everything or just one app. Try playing a song from Apple Music, a video on YouTube, and making a test call. If sound works in one app but not another, the issue is likely with that specific app.
In that case, try force-closing the app and reopening it. You can also go to the App Store and see if there's an update available for the problematic app. If all else fails, deleting and reinstalling the app can sometimes clear its corrupted data.