
One of the options AutoCAD provides you besides scaling, calculating the area, and working on your object drawings is the option to trim. This option allows you to correct the object line in the area where they intersect.
There are a couple of options for trimming the objects. Assuming that you are a professional and know how to use AutoCAD very well, here are some solutions and tips on how to trim in AutoCAD for beginners and people who don’t know use this program daily.
![]()
The easiest way to trim objects in AutoCAD
The first way we are going to mention is the easiest one. This way, you can trim the objects, but start by finding the Trim option in the Modify section, next to the many other options under this section.
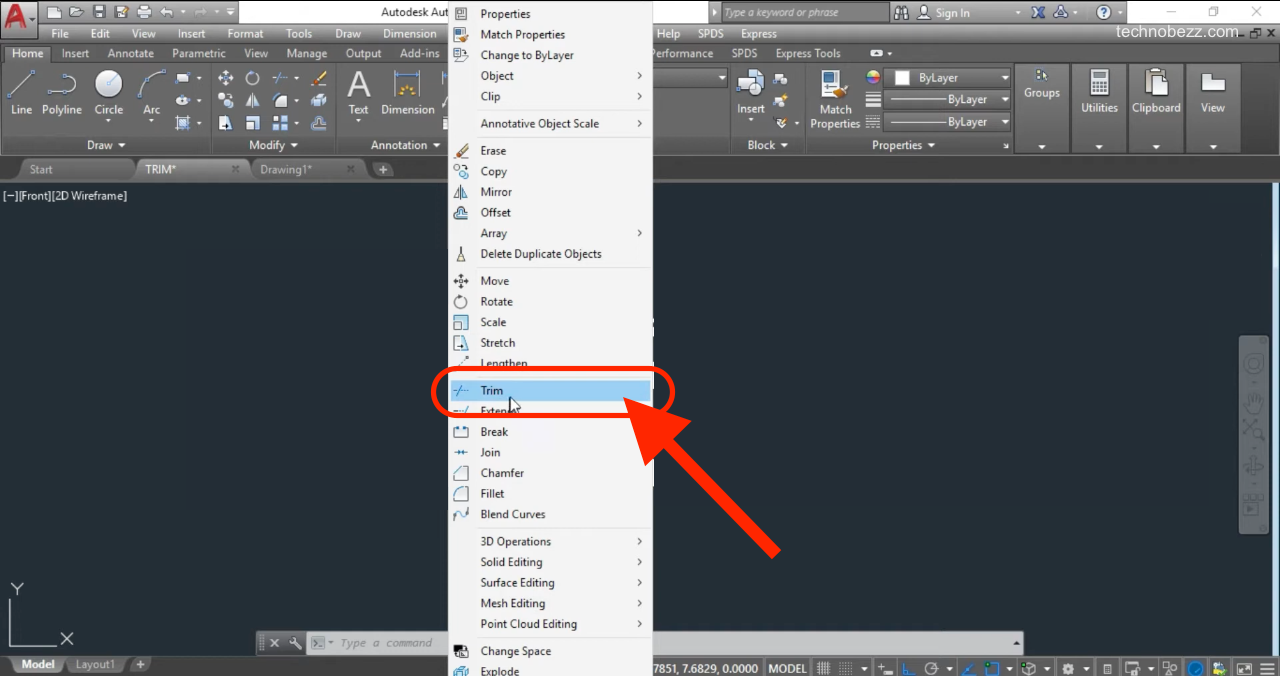
So, to start, you must select objects you are about to trim. Click on each object individually, or click by the left button on your mouse and drag the objects to set them into the group. Next, click the right mouse button at the blank space so the selection can be finalized.
Now, choose the lines you want to trim on the objects and click on the left mouse button. Then press the enter key on your keyboard, or right-click with your mouse to get the trimming done. That is the whole procedure. Just remember that you can only trim the lines that you are crossing.
To delete lines that you don’t need to be on your drawing, you can use the Erase option. This option is located in the same place as the Trim option. Then check the Modify section to head to the Erase command.
Shortcuts to trim
Here is a shorter way to trim the line at your objects. You will be asked if you want to cut the edges as you trim. You can press enter key or right mouse click to mark certain objects that need to have edges cut. Then, you should just choose the part of the object you will trim, and the program will automatically trim it. The trim will be done to the closest edge that cutting is possible.
So, to make it short, this is what you need to do. Head to the Modify panel and choose the Trim command to start it. Then, at that option, Select cutting edges, and squeeze the Enter key. It could be written as Select objects or Select all, so just right-click on your mouse or press Enter on the keyboard, and you are going to the last step, which is to choose and select the objects you are about to trim.
EXTRIM command – another shortcut to trim
The EXTRIM command is another shorter way for objects to trim. This option will allow you to choose any object you want to trim. It also allows you to trim just one side of the object if you need to do so. To start, use the command line to write extrim in.
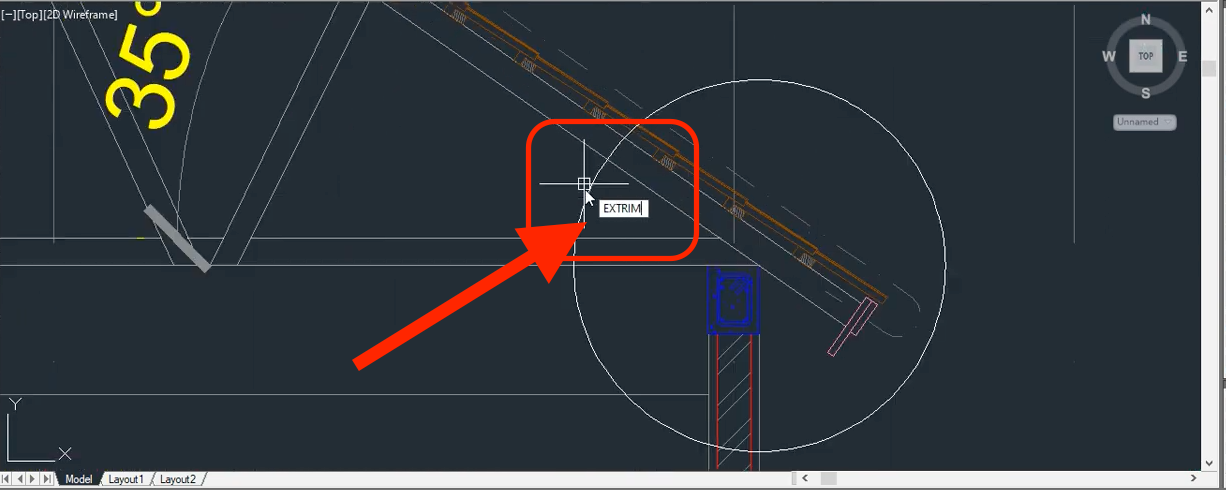
The window will open, showing the list of objects. Ellipse, Polyline, Line, Circle, Arc, Image, or Text is on the list for a cutting edge. You are supposed to choose one item from the list you see.
As this command allows you to trim only one side of the object, you will be led to the new window. You will be asked about the side you want to trim, and it should be written like this: Specify the side to trim on. So this means that you are about to choose which side of the object will be trimmed.
