Installed OneDrive on your Mac, but your files still aren’t syncing? Getting the app is only the first step: you also need to connect your account and put files where OneDrive can sync them. Here’s how to finish setup, keep files available offline, and include your Desktop and Documents.
Install OneDrive and connect your account
Start with compatibility. Microsoft’s current OneDrive requirements specify macOS 15.8 or newer, an Apple silicon or Intel processor, and case-insensitive APFS storage.
Open Microsoft’s OneDrive download page and select macOS. Select Download under Mac standalone for Desktop and Documents backup support. The Mac App Store edition supports ordinary syncing but does not include that backup feature. Use one edition; do not run both side by side.
Install OneDrive using the downloaded installer. Press Command+Space to open Spotlight. Type OneDrive and press Return to launch it.
Enter your Microsoft personal or work/school email address. Select Sign in. Complete the authentication prompts for your account.
At This is your OneDrive folder, select Next to accept the location. For a different destination, select Change Location instead.
If changing the destination, choose a folder that meets OneDrive’s storage requirements. Confirm it with Choose this location. Select Next to continue.
Complete any folder-selection screen shown during setup. Select Open my OneDrive folder. This opens the location you’ll use in Finder.
If setup stalls, restart the app using Quit OneDrive and the Spotlight launch steps above, then retry sign-in. For an account that still won’t sync, follow the reconnect steps below.
Put the files you want to sync in OneDrive
Files outside your OneDrive folder stay outside its sync, even after you install the app. Open your OneDrive location in Finder. Drag a file or folder into it. Changes to the OneDrive copy now sync automatically.
Want to keep a separate original? Select the original item in Finder. Press Command+C to copy it.
Open the destination inside OneDrive. Press Command+V to paste. The original and the OneDrive copy are separate: later changes to the original outside OneDrive will not sync.
For new files, choose your OneDrive folder as the save destination in your app. Uploading through the OneDrive website also adds files to cloud storage, but it does not continuously sync the original local folder.
Choose which folders appear on this Mac
Folder selection controls which existing OneDrive folders appear on your Mac; it does not add folders from elsewhere on the computer. From the OneDrive cloud icon in the menu bar, open three-dot menu > Preferences > Account > Choose Folders.
Clear the checkboxes beside folders you do not want on this Mac. Select OK to save your choices. These choices apply separately to each account and computer, and including a folder does not download all its files for offline use. To include a folder later, repeat this process in Choose Folders with that folder’s checkbox selected.
Keep important files available offline
A file appearing in Finder isn’t the same as having it downloaded. Files On-Demand lets you access OneDrive content without storing everything locally; opening an online-only file downloads it.
In Finder, right-click the OneDrive file or folder you need offline. Select Always keep on this device. Let the download finish before going offline.
To release downloaded content later, right-click the item in Finder. Select Free up space. The file stays in OneDrive.
Skip older instructions that tell you to turn off Files On-Demand. Microsoft does not support that switch from macOS 12.1 onward; use Always keep on this device for offline access.
If selecting individual items still leaves files you need online-only, use OneDrive menu-bar icon > OneDrive Preferences > Preferences > Download all OneDrive files now. Allow enough disk space and time for the full download.
Include Desktop and Documents in backup
Ordinary OneDrive syncing leaves Desktop and Documents out until you configure folder backup. Use the standalone OneDrive edition for this feature. It requires Full Disk Access and supports personal and eligible work/school accounts. An organization’s policy can disable backup.
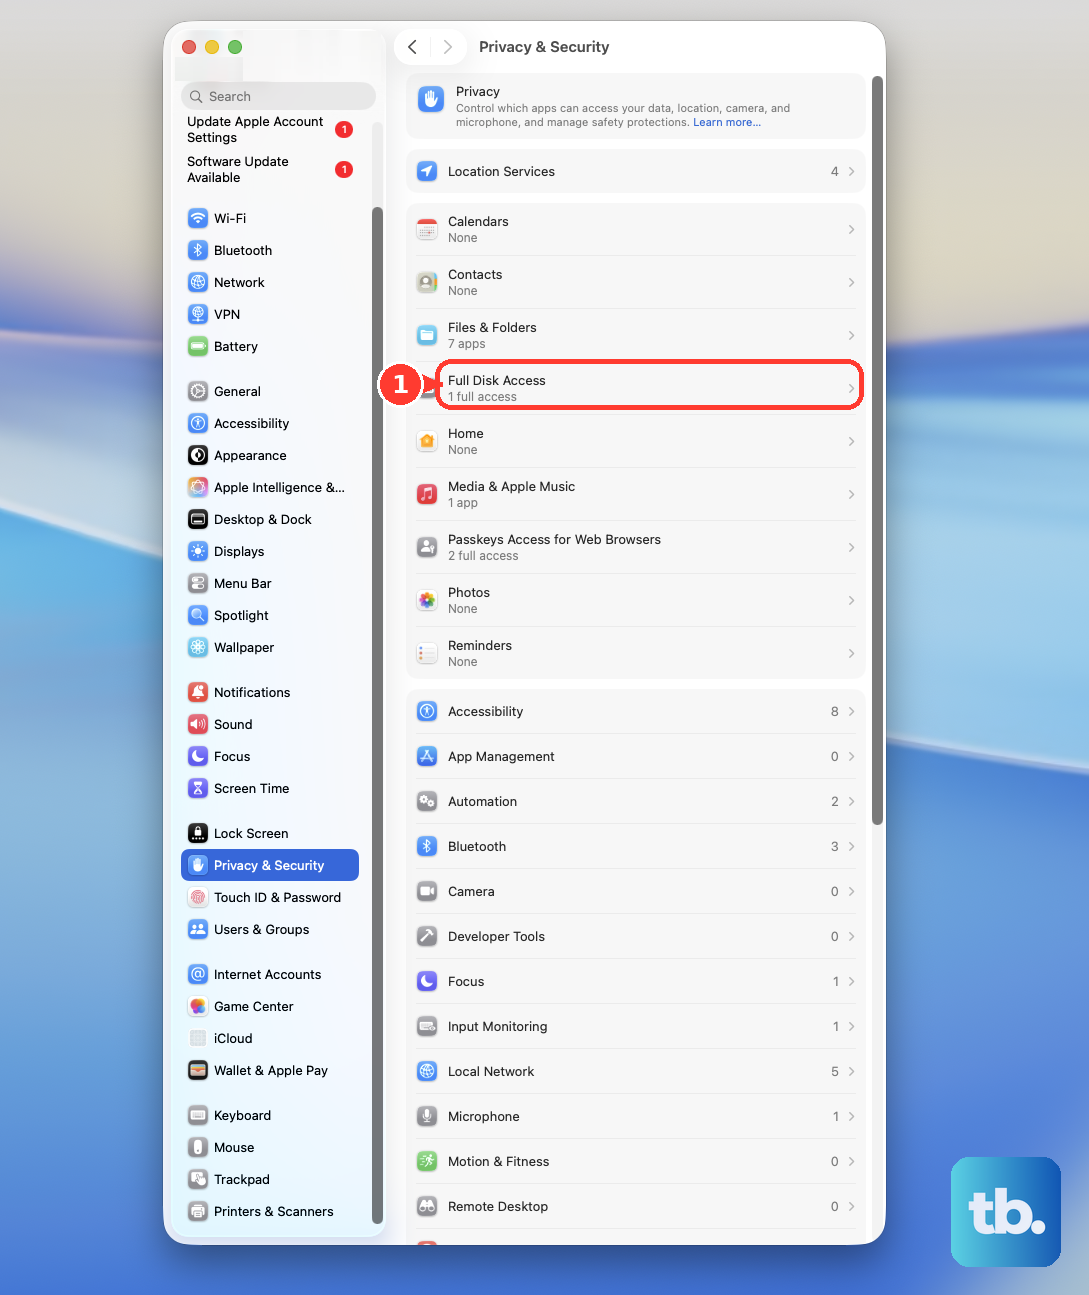
Open Apple menu > System Settings > Privacy & Security > Full Disk Access. Enable OneDrive.
If OneDrive is missing, click the add button. Select OneDrive. Click Open.
From the OneDrive cloud icon, open three-dot menu > Preferences > Backup > Manage backup. Select Desktop, Documents, or both, leaving out folders already marked Files backed up. Select Start backup.
To stop later, open Preferences > Backup > Manage backup. Select Stop backup. Confirm the change. Already-backed-up files remain in OneDrive.
Use Where are my files to locate those files. Move them back to your Mac’s Desktop or Documents folder if you want them stored there again.
Have OneDrive start when you log in
Add OneDrive to your Mac’s login items to launch it automatically when you sign in to your Mac. Open Apple menu > System Settings > General > Login Items & Extensions.
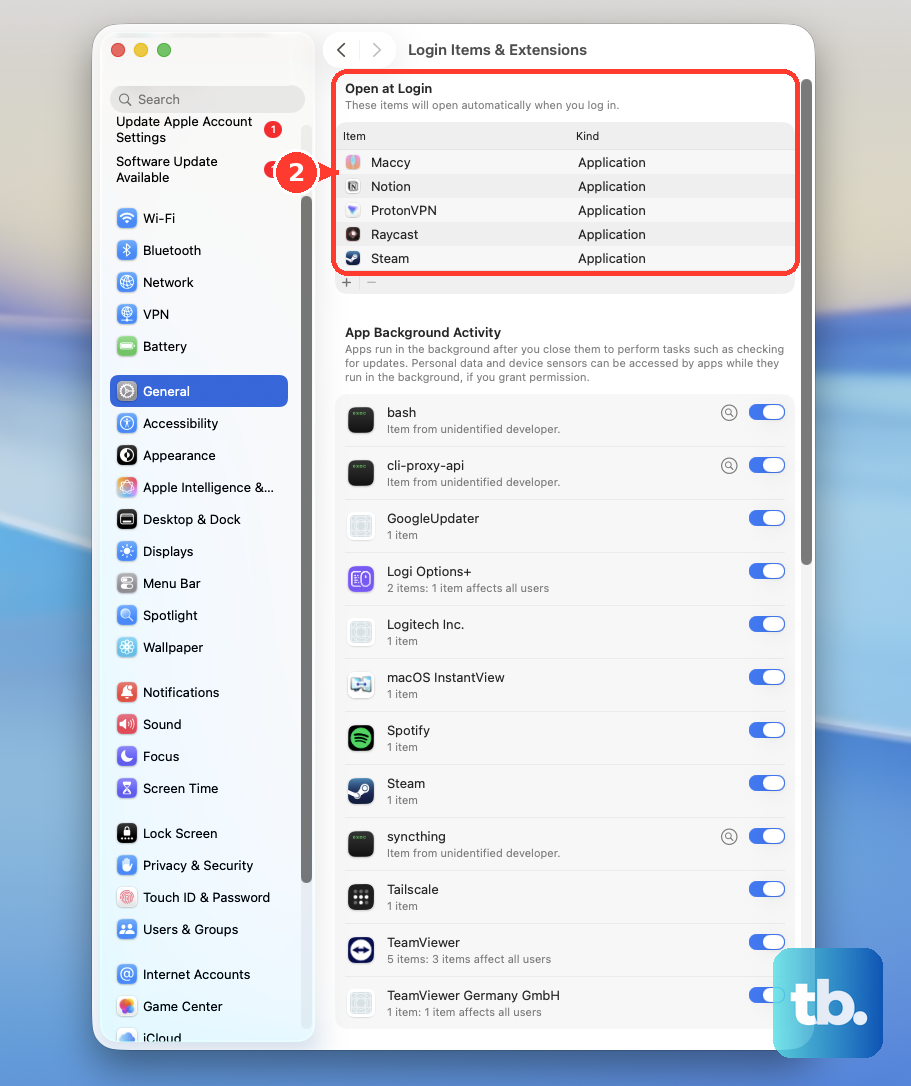
Click the add button under Open at Login. Select OneDrive to add it.
If syncing still does not start after login, launch OneDrive through Spotlight using the steps above. Then check for paused syncing and resume it using the next section.
Get syncing moving again
Open the OneDrive cloud icon for the account that is not syncing. Select Resume syncing if that account is paused. If syncing remains stuck, select Quit OneDrive from its menu.
Press Command+Space to open Spotlight. Type OneDrive and press Return to reopen it.
For a persistent problem, reconnect through OneDrive cloud icon > Help & Settings > Preferences > Account > Unlink this Mac. Sign in again to begin setup.
Select Use this folder to reconnect to the existing folder. Complete setup using the prompts described above. Tip: With multiple accounts connected, check that you’re troubleshooting the account containing the affected files.
Frequently Asked Questions
Can I sync more than one OneDrive account on my Mac?
Yes. OneDrive supports one personal account plus multiple work or school accounts. Open the OneDrive menu-bar cloud, then three-dot menu > Preferences > Account > Add an account. Sign in and complete setup for the additional account.
Can I change my OneDrive folder location after setup?
Yes. Open OneDrive cloud icon > Help & Settings > Preferences > Account > Unlink this Mac. Sign in again. Select Choose new folder to choose a destination that meets OneDrive’s storage requirements. Do not manually relocate the active sync folder.
Can a shared personal OneDrive folder appear in Finder?
Yes, with edit permission and the same account connected in the Mac app. Sign in to OneDrive on the web. Open Shared. Select the shared folder. Choose Add shortcut to My files. Microsoft warns that some shortcuts temporarily appear as .url links that open the website instead of folders in Finder.
Does deleting a synced file on my Mac also affect OneDrive?
Yes. Sync propagates deletions as well as edits, so it is not an independent archival backup. To remove only the downloaded content, right-click the file in Finder. Select Free up space to retain the file in OneDrive.