


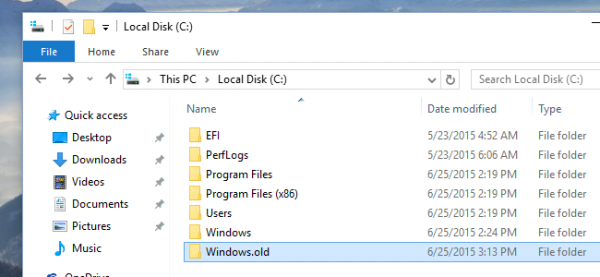
Active computer users can detect Windows.old on the system partition, which is often in “Drive C» and is a huge volume folder. Many are wondering what it is and if it is possible to remove it. Some even try to remove it immediately in the usual way through File Explorer, but they fail. This guide will show you how to remove the Windows.old folder in Windows 10.
How To Remove The Windows.old Folder In Windows 10
What and where is the Windows.old folder?
This directory will appear on the system partition after you upgrade your PC to a new version of the operating system or after Windows reinstall without formatting of drive C. This folder, as you might guess from its name, contains the files from the previous system. Navigating to the directory, you will see a folder structure on disk C: Program Files, Users, Windows, etc. The folder is designed in case any errors appear in the new system; the user can revert to a previous version. That is why, during the upgrade of Windows, Windows.old saved all essential files of the old system.
Since Windows.old takes up too much space on your hard drive, Windows included a mechanism to auto-delete this. If the new system works properly, the directory will be deleted automatically after 28 days. Most often, users try to remove Windows.old immediately. Since Microsoft has transitioned to a new version of the OS, which is free, easy, and convenient, many use the auto-update mechanism, which is why they will find the directory on the C drive with the old files.
Removing the Windows.old folder
The following method is versatile and can be used to remove the Windows.old folder, not only for Windows 10 versions of the OS but also for older versions.
Using a combination of «Win + R» Open the “Run” and type “cleanmgr” and in disk selection dialog, you will need to select the system partition, “Drive C», and press «OK.»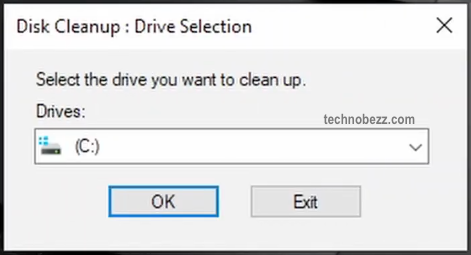
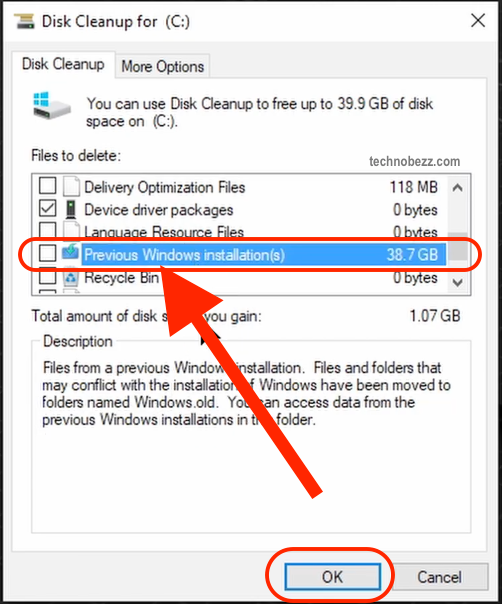
After the scan is finished, “Disk Cleanup” window appears. Select “Clean up system files” and “Disk Cleanup” again. Select “Disk C» and click «OK,» and after a brief scan, open “Disk Cleanup,” check folder “Previous Windows installation(s).” Click «OK» and wait until it is cleaned up.
After that, you can re-open File Explorer and ensure that the directory isn’t there.
