In the digital age, when you have lots of great things on your computer screen, you might want to record it and share it with a friend or a partner. Many people wish to know how to record a computer screen for different purposes.
If you don’t know it yet, there are many software programs available on your PC that you can use to record. There is also an option to download free or get paid software to do the same with more customization features that professionals would adore.
When you want to record a computer screen, be clear about your purpose. If you are recording a video stream for educational purposes, it’s entirely different from how gamers want to capture great moments while playing. Some requirements, such as online tutorials and casting gameplay footage, would require live streaming as you are capturing them, which also comes under this category.
Let’s start with a popular, free computer screen recording software.
How to record a computer screen
OBS Studio (Free to download)
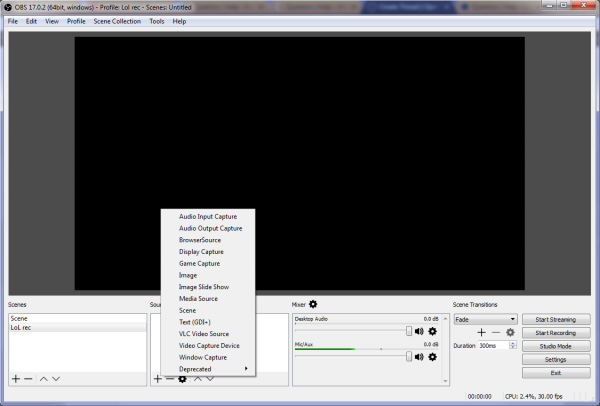
OBS Studio is free to download and will allow you to record your screen. The best part is that it won’t force you to buy it with watermarks. You can record your entire screen, and there is no limit on the total timeline allowing you to capture hours of footage if required. Another surprising factor is that you can even live stream your content, such as live tutorial videos, online classes, or anything similar at 60 FPS, making it the best you can get without spending a dime.
OBS Studios is fully compatible with Twitch, Xbox Mixer, and YouTube, allowing you to become a streamer without making any huge investment. Users also have the freedom to edit the audio using a built-in mixer, record multiple screens and edit them on the fly with a complex set of features available in this open-source app.
How to Record Using OBS Studio?
- Download OBS Studio from the official website
- During installation, you can choose to optimize settings only for recording if you don’t plan to stream your content.
- Use the default settings to set it up quickly.
- Locate the source panel inside OBS and choose which screen you would like to record
- You can record a single browser window as your source, a YouTube video, or a live game.
- Choose between Display Capture to capture the entire screen or Game Capture.
Click on “Start Recording,” and everything you do on your display will be fully recorded if you haven’t specified a particular window as the source. Game Capture begins recording when you launch a full-screen app which is supposed to be the game you will play.
FlashBack Express (Free)
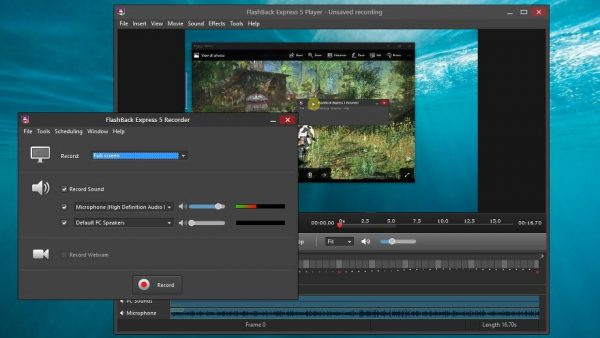
FlashBack Express is an excellent software for screen recording. The main difference between OBS Studio and Express is that the latter is user-friendly, easy to understand, and has fewer customization features that most users will be happy with. The software allows you to record the entire desktop or specific areas on your computer.
You can use this feature to add footage being captured by your webcam and use a microphone to add audio commentary while creating a tutorial video. It doesn’t end there because everything you capture can be saved as a video file without annoying watermarks. It is necessary for budding YouTubers and gamers to be able to upload their footage online without copyright issues.
The level of privacy provided by the software is reliable as it lets you hide passwords automatically, capture keystrokes, and even schedule your PC to start recording automatically even when you are not there. The software is developed by Blueberry software and is free to download. There is also a Pro version of FlashBack that you can purchase to get even more options.
How to record a computer screen with FlashBack Express?
- Download the free version of FlashBack Express from the official link
- Find the option that reads Record your screen
- Choose to record the entire display or drag your mouse pointer over a specific area.
- Select if you want to record a microphone or not
- Start recording by clicking on the Red Record button
Snagit (Paid)
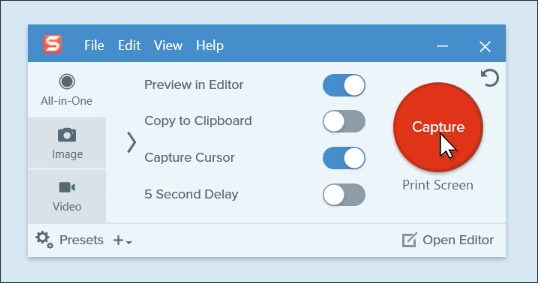
Snagit is a paid software, but if you are a professional running a startup or a marketing executive working in a branded firm, you might want to pay the $50, as this software is very useful for most purposes. The tool mainly captures your display and records everything you do on your screen.
Users can select a specific area on their screen, record the entire computer screen or record from Webcam inputs. The idea behind Snagit is that it even allows you to easily create your own screenshots to be used in PowerPoint presentations or your slides, maybe to explain an error to the IT department.
The same software tool can be used to create images and slides or capture something to explain it better over email. With multiple purposes, it’s not surprising that this has become a popular choice among professionals in most companies, and different people in your team can use your investment. If you are a startup, you need to get it to make quick videos to add to your presentations or showcase your product in a better way to clients.
How do you record your computer screen using Snagit?
- Purchase Snagit and install it on your PC
- Click on the Capture window
- Choose the entire screen, capture the cursor area or specify a region that will be recorded.
- Click on the Red Record button, and your recording will begin
- You can also click on the Microphone icon to record the audio along with the visual or the system audio
QuickTime Player for macOS Users (Free)
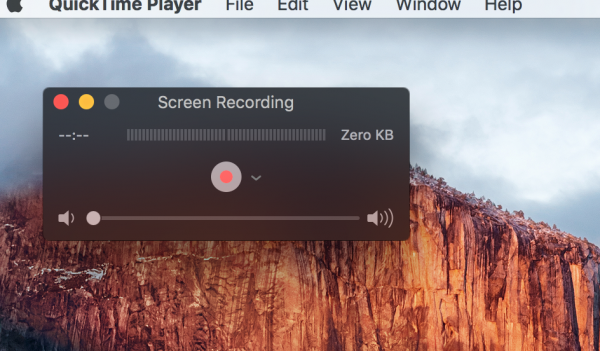
If you are using a macOS older than Mojave, you can always use QuickTime Player to instantly record your display and audio and share it with others. Compared to many powerful video recording tools available in free and paid versions, QuickTime is not one of the best, but it gets the job done without hassles.
How to record a computer screen on Mac with QuickTime?
- QuickTime is installed by default on Mac
- Open the app.
- Click on File and select the option “New Screen Recording.”
- Select if you need your Mac sound to appear in the video or not
- Click the Red Start Recording button
Once the recording is over, tap to stop the recording. You can now click on File and Save it to your desired location.
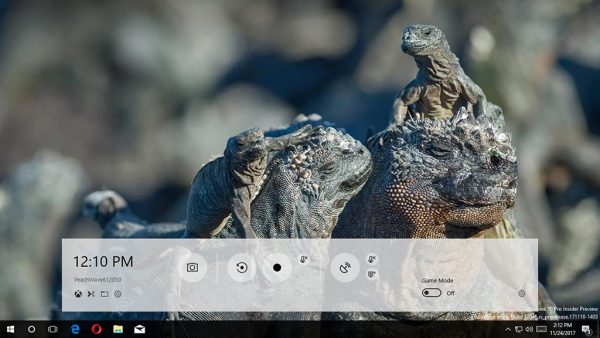
Xbox App with Game DVR for Windows 10 PCs
With the latest update, Microsoft has introduced an option called Game DVR. Using this option, you can record your game and display it through the Xbox App. It is compatible with the latest Windows 10 updates and is easy to use as it is already embedded in your operating system.
There are some caveats, though, as it may not have complex features like other dedicated apps; it can only record for 2 hours at a stretch and will not record the entire display but a specific app or a window. The feature is made for game recording, which you can later stream on Twitch, but it also works on all apps, including Microsoft PowerPoint, Word, Browser windows, and other programs.
How to record a computer screen on Windows 10 with the Xbox app?
- Open the Xbox app
- Select the box that says yes, it’s a game (It’s not entirely the truth, but never mind!)
- Keep your app or any window open.
- Hold the Windows Key and press G to open the game bar
- Click the record button to start recording, and you can toggle the microphone button on or off to record audio.
The Xbox app will only record the particular window on your display and excludes everything else. This will also avoid tracking your mouse movements. Now, open the Xbox Game DVR app, find your latest clip and trim it until it suits your requirements. It is minimal but is a great way to get the work done in a matter of minutes without downloading or installing another software on Windows 10 computers.
Final Thoughts
The most popular software programs, free and paid, are covered here. This guide has got you covered if you want to know how to record a computer screen with minimal fuss or have an extensive list of customization options. You can learn more about its features on its official website and through YouTube tutorials, but recording your screen has never been this easy as all of them work seamlessly as soon as you finish the installation. Create a presentation, tutorial guide, or gameplay video to bring your ideas to life.
Also Read


Recent
Ottocast Car TV Mate Max Review – A Versatile In-Car Entertainment Adapter
iPhone Battery Dying In Minutes? 23 Real Fixes That Work
Ottocast Play2Video Pro Ups the Game in Affordable Car Entertainment
Ottocast OttoAibox P3 Powers a Smarter Driving Experience
How to Disable WebRTC in Your Browser Settings
Guides

Lenovo Debuts Solar-Charging Laptop That Turns 20 Minutes of Sunlight Into Hour of Video

Why Do Smartphones Get Slower Over Time?

Decoding Tech Jargon: The A to Z Cheat Sheet (Free Downloadable PDF)

How to Clear an App's Cache on Your Samsung Device

Why Are My iPhone Messages Green Instead of Blue?

Everything Google Knows About You (And How to Stop It)
