Tech Insights in Your InboxSubscribe to our free newsletter and never miss out on what's happening in the tech world. Learn Tech Today, Lead Tomorrow.
Switching from Windows to Mac is not as complicated as you may think. Yes, you will need some time to get used to some changes, but you will pick it all up fast and after a while, you will feel like you have been using a Mac your whole life. We are here to help you a bit until you figure it out. This article will share a quick guide on how to print screens on Mac.
You can take a screenshot of the entire screen or go for the option to capture just part of it.
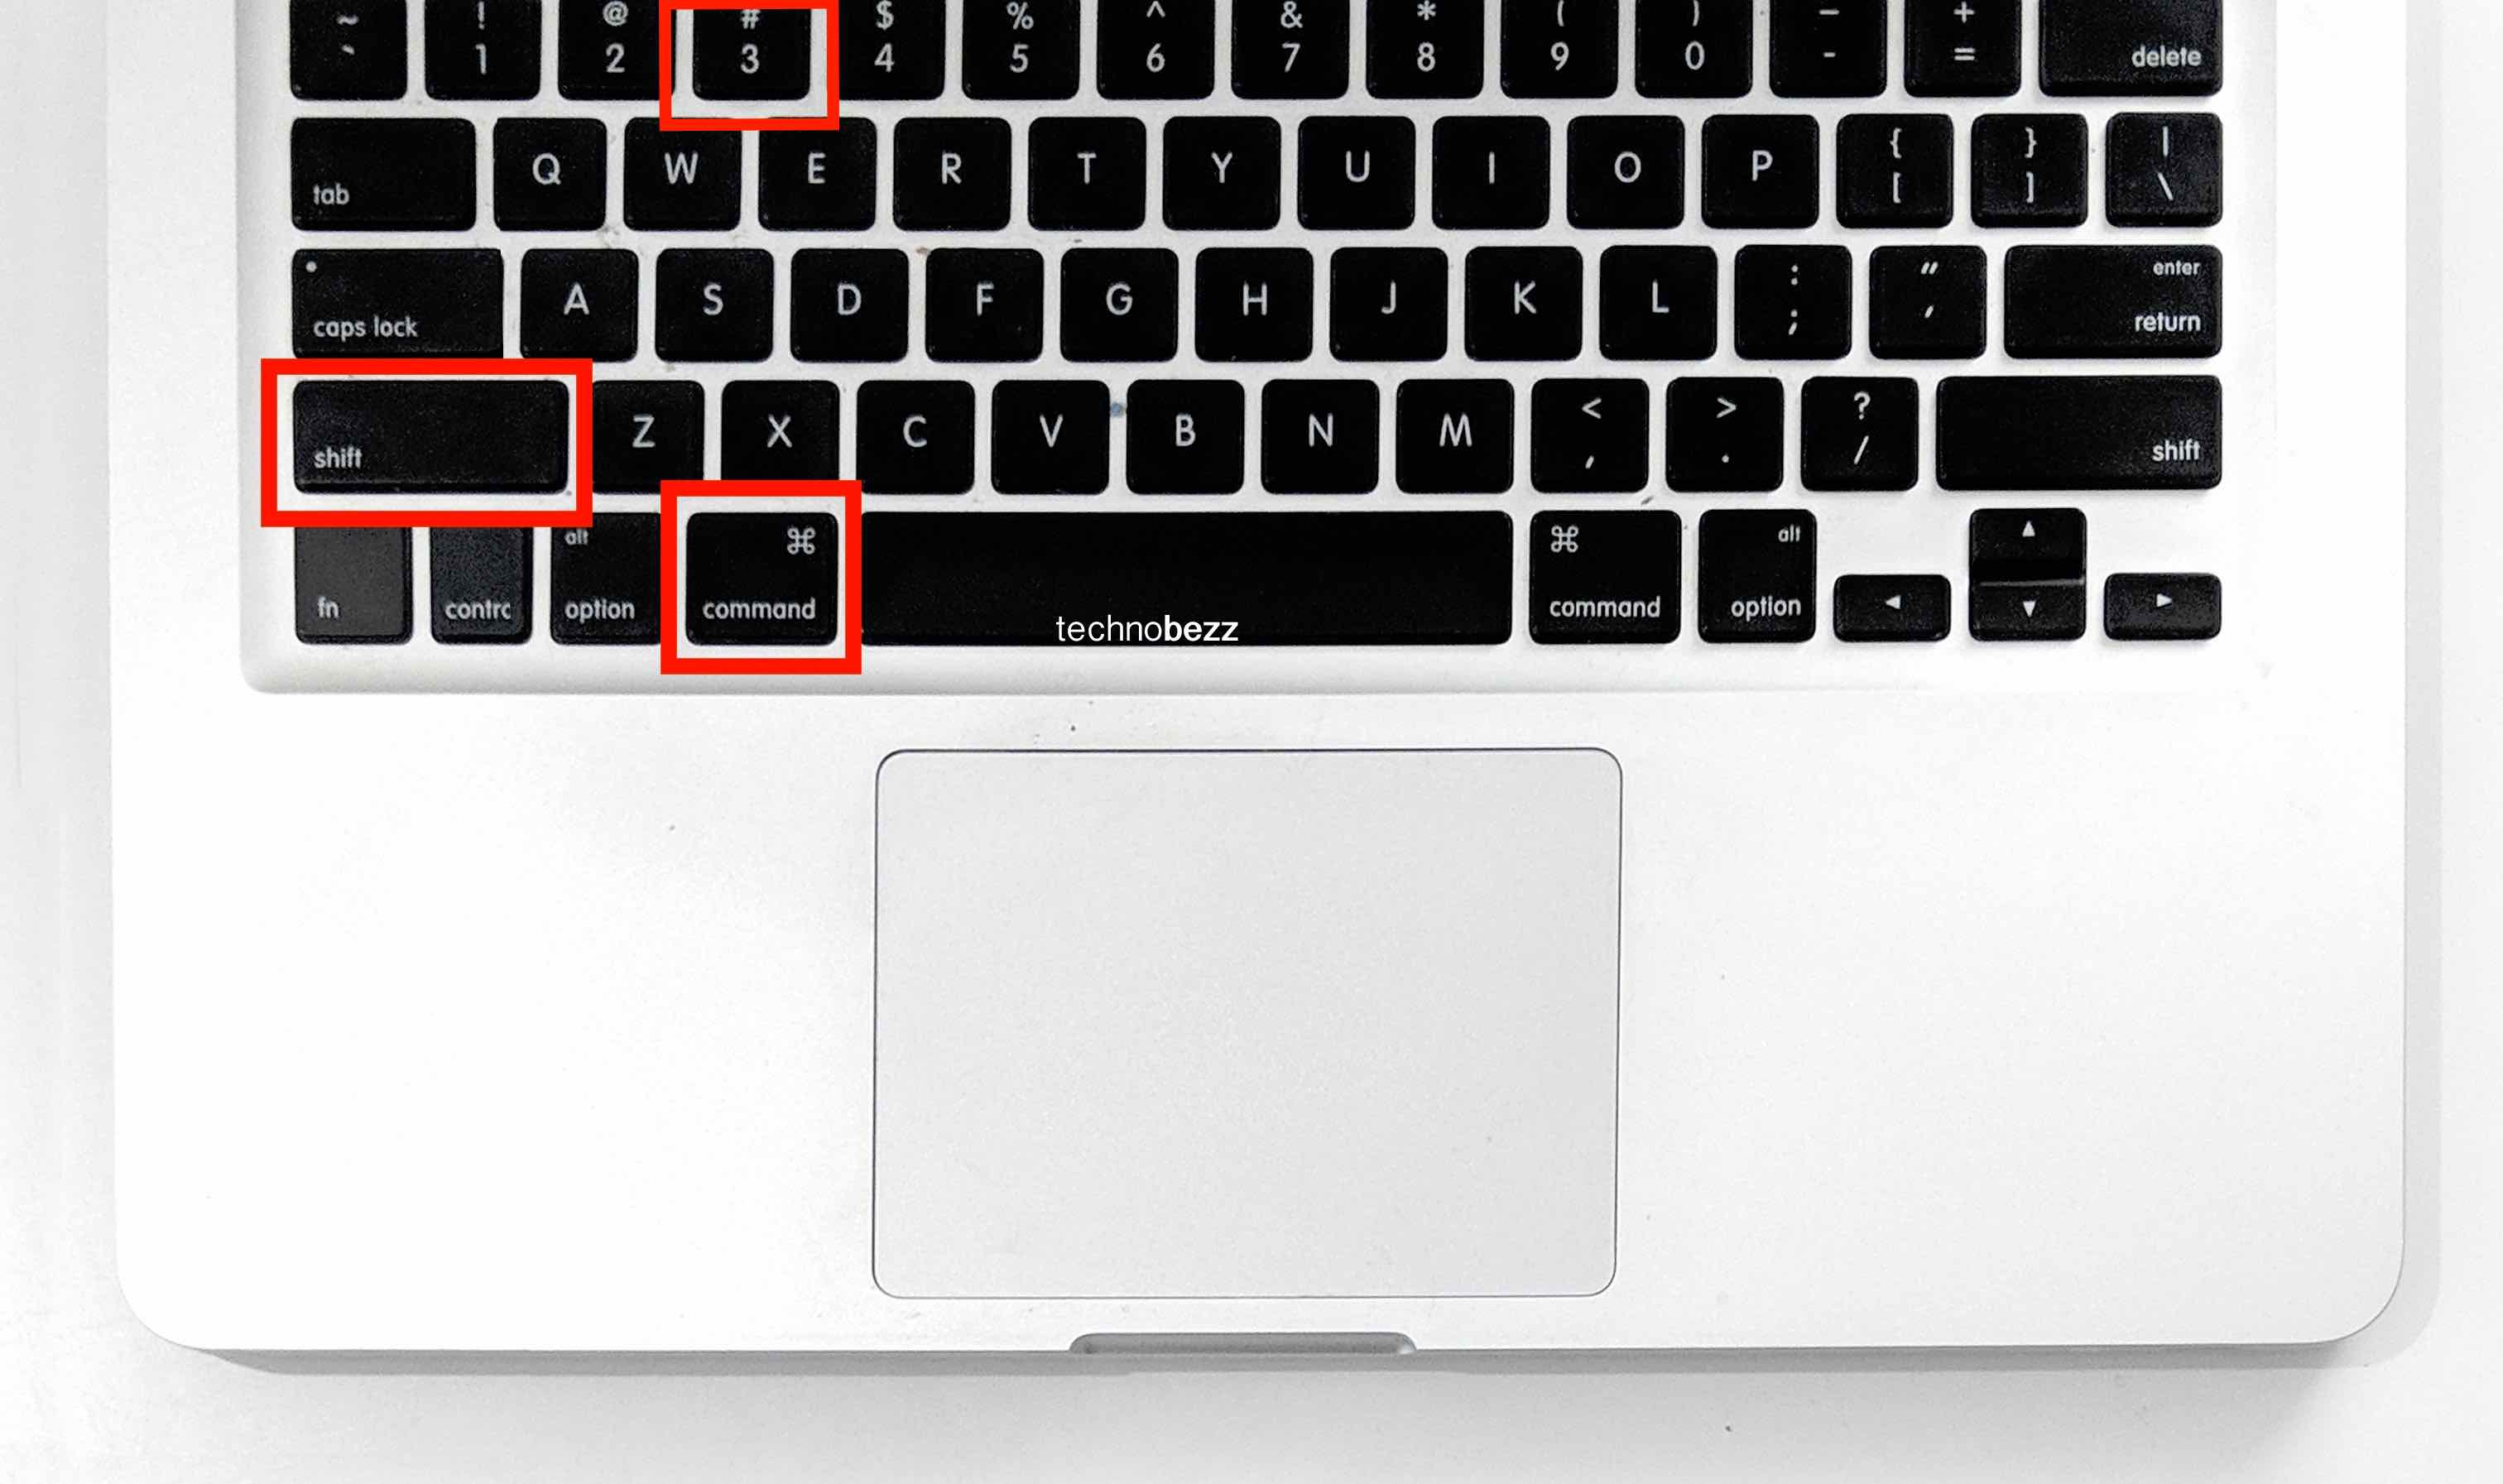
How to print screen on Mac – capture all
If you want to capture it all, here is what you need to do:
- Make sure that you are on the screen you want to capture
- On your keyboard, press Shift, Command and number 3 at the same time
- The screenshot is taken and will be saved on your desktop in PNG format.

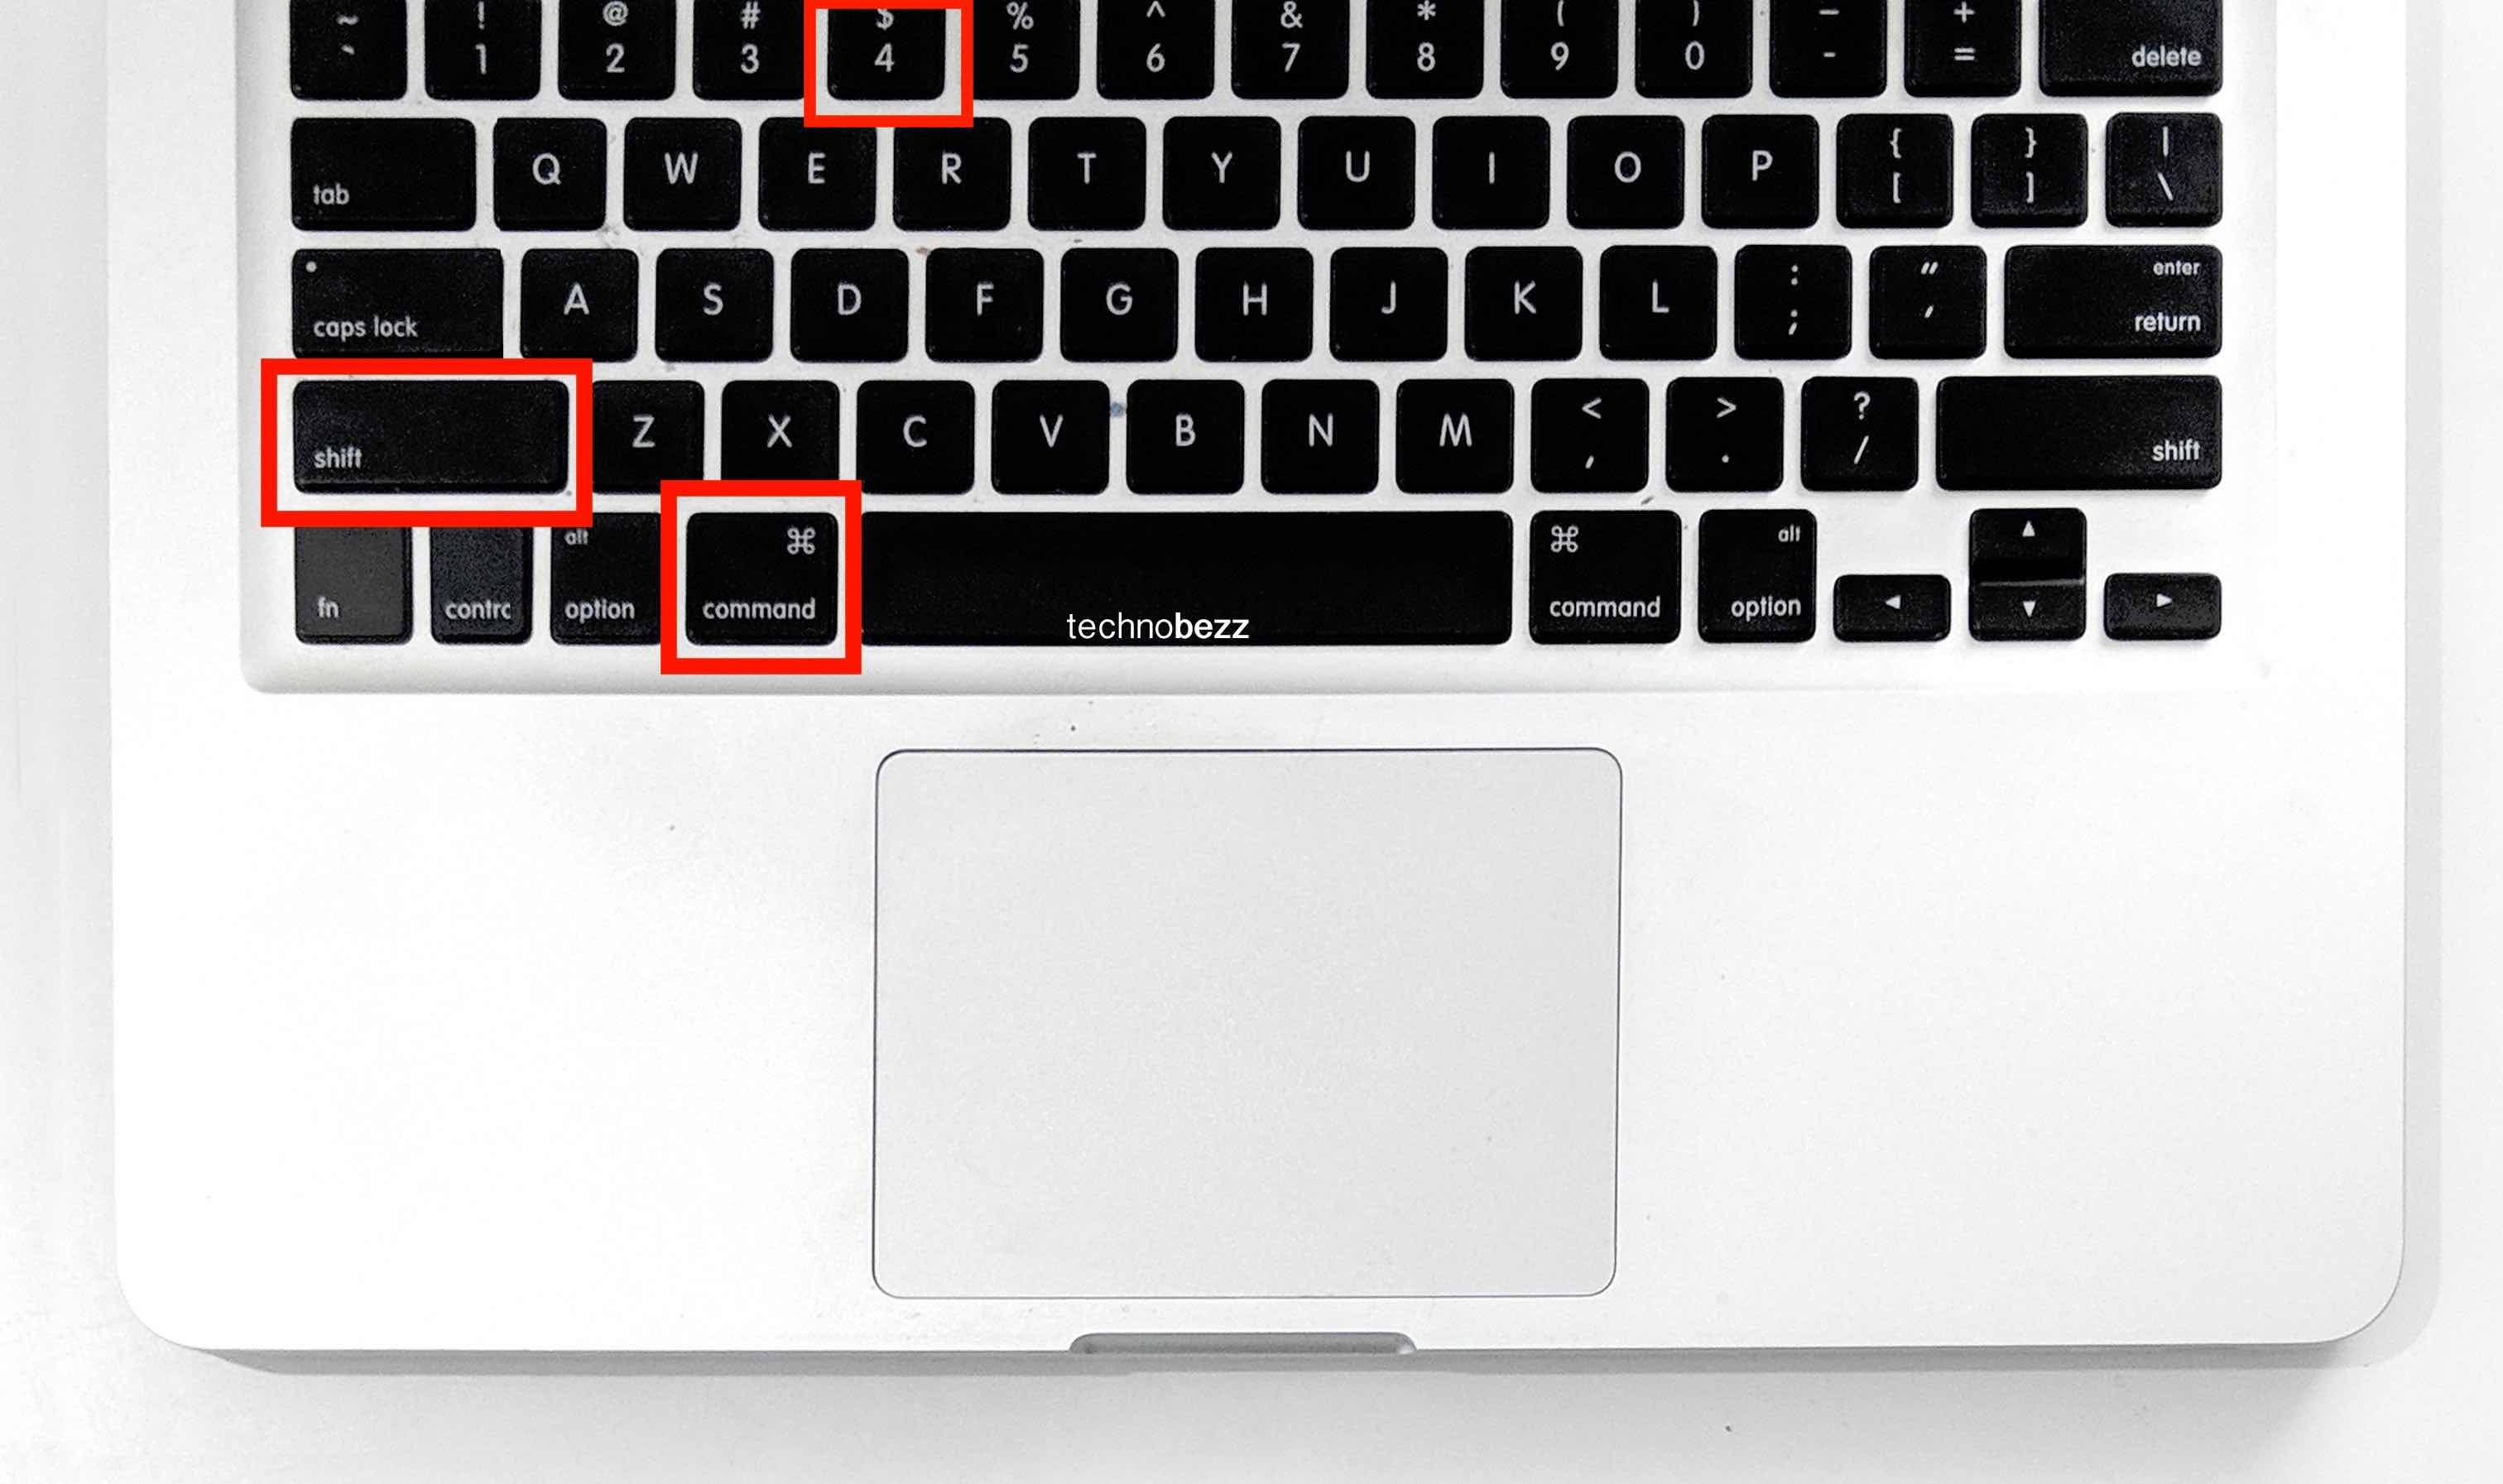
How to print a screen on Mac – part of the screen
If you want to take a screenshot but you don’t want to capture the entire screen but just part of it, here is what you need to do:
- Make sure that you are on the screen you want to capture
- On your keyboard, press Shift and Command and 4

- Select the area you want to capture by dragging the crosshairs
- Press and hold the Space bar while dragging to move the selection
- To capture part of the screen, just release your trackpad button or your mouse button
- The screenshot is now taken and will be saved on your desktop in PNG format.
You can take screenshots in a matter of seconds and now you know how to do it. Simple, right?


