Windows 10 works great, but sometimes you may stumble upon an issue. One of the issues that you may be facing is network-related. If your PC is unable to connect to a Wi-Fi network or when you are experiencing issues with Ethernet connectivity problems, you can perform a network reset.
By resetting the network adapter of your device, things can go back to normal, and everything may start working as usual. Keep reading if you are wondering how to perform a network reset on Windows 10. We are going to share an easy guide with all the steps.
How to perform a network reset on Windows 10
In most cases, network-related issues may appear after you install an update. So, perform a network reset if you have Wi-Fi or Ethernet connectivity issues. Here's how to do that:
- Click on the Start button in the bottom-left corner of the screen
- Click on the Settings icon (gear icon) on the left side to access the Settings
- From there, click on Network & Internet
- Another way to access these settings is by right-clicking on the little monitor icon in the bottom-right corner of the screen and choosing "Open Network & Internet Settings."
- At the bottom of the page, choose Network reset
- You will be notified of what a network reset does
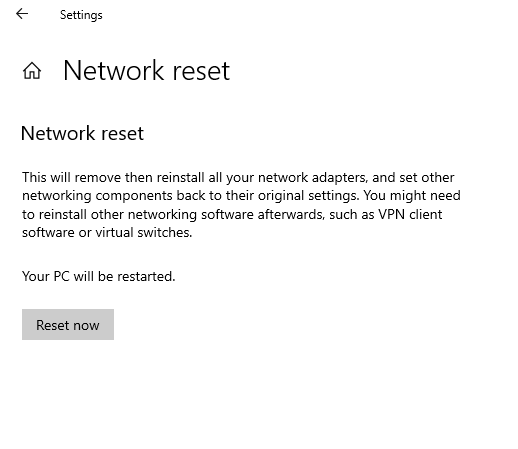
- To confirm the action, click on Reset now
Your PC will restart after this. As you can see, your network adapters will be removed and then reinstalled, and networking components will be restored to their original settings.
Also Read


Recent
Ottocast Car TV Mate Max Review – A Versatile In-Car Entertainment Adapter
iPhone Battery Dying In Minutes? 23 Real Fixes That Work
Ottocast Play2Video Pro Ups the Game in Affordable Car Entertainment
Ottocast OttoAibox P3 Powers a Smarter Driving Experience
How to Disable WebRTC in Your Browser Settings
Guides

Lenovo Debuts Solar-Charging Laptop That Turns 20 Minutes of Sunlight Into Hour of Video

Why Do Smartphones Get Slower Over Time?

Decoding Tech Jargon: The A to Z Cheat Sheet (Free Downloadable PDF)

How to Clear an App's Cache on Your Samsung Device

Why Are My iPhone Messages Green Instead of Blue?

Everything Google Knows About You (And How to Stop It)
