Project64 installs on Windows through the official installer, the official ZIP package, or WinGet. The cleanest home setup is the current public stable Project64 3.0.1 release from the official Project64 public releases page. Start with the official download, then set your ROM folder, controls, plugins, and uninstall path.
1. Choose the official Project64 download
This gets you the current stable Project64 build without a third-party download portal.
Open the official Project64 public releases page.
Select Project64 3.0.1 Installer for a normal Windows install.
Select Project64 3.0.1 Zip for a portable setup that runs from a folder.
Select Download Now for the package you chose.
2. Run the Windows installer
Open the downloaded Project64 installer.
Turn on Create a desktop icon if you want a desktop shortcut.
Leave Portable Mode off for a normal installed app.
Finish setup.
After installation, select Launch Project64, or open Project64 from Start or the desktop shortcut.
3. Use the ZIP version as a portable app
Download Project64 3.0.1 Zip from the official Project64 public releases page.
In File Explorer, right-click the ZIP file and select Extract All....
Choose a folder for the extracted files.
Open the extracted folder.
Run Project64.exe.
To remove this portable setup later, close Project64 and delete the extracted folder.
4. Install Project64 with WinGet
Open Windows Terminal, PowerShell, or Command Prompt.
Run winget install -e --id Project64.Project64 --source winget.
Accept source or package agreements when prompted.
Let WinGet launch the installer and complete the Project64 installation.
5. Clear the first launch prompt
If the Support Project64 prompt appears, select Continue after the wait to keep going. If you supported Project64 and have a code, select Enter/Request Notification Code. The prompt also uses Request Code, OK, and Cancel.
6. Add your ROM folder to the browser
This organizes your files in Project64 so the ROM browser can list them from one folder.
Open Project64.
Choose File > Choose ROM Directory....
Use Select current ROM directory to pick the folder that contains your legally obtained ROM or homebrew files.
Later, to adjust the browser, go to Options > Configuration > ROM browser.
Use Use ROM browser, Use directory recursion, Automatically refresh browser, and Show file extensions to control how Project64 lists files.
7. Open a game and map controls
To open a file directly, choose File > Open ROM.
If a game is loaded but stopped, choose File > Start Emulation.
To change controller settings, go to Options > Input Settings.
To choose the controller plugin, go to Options > Configuration > Plugins > Input (controller) plugin:.
Choose Project64 input or N-Rage input plugin based on your controller needs.
8. Tune graphics, audio, fullscreen, and hotkeys
This is where you finish the setup after Project64 opens your games correctly.
Go to Options > Graphics Settings for video settings.
Go to Options > Audio Settings for sound settings.
Go to Options > RSP Settings for RSP settings.
To pick plugins, open Options > Configuration > Plugins, then use Video (graphics) plugin:, Audio (sound) plugin:, and RSP (Reality Signal Processor) plugin:.
Use Options > Fullscreen to switch to full-screen mode.
For automatic fullscreen, go to Options > Configuration > General settings > Enter fullscreen mode when loading a ROM.
To edit keyboard shortcuts, go to Options > Configuration > Hotkeys, then use Detect Key, Assign, Remove, or Reset All.
9. Remove Project64 from Windows
For a normal installer setup, select Start > Settings > Apps > Installed apps.
Find Project64, select More, then choose Uninstall.
If Settings does not show it, search for Control Panel, then open Programs > Programs and Features, right-click Project64, and choose Uninstall or Uninstall/Change.
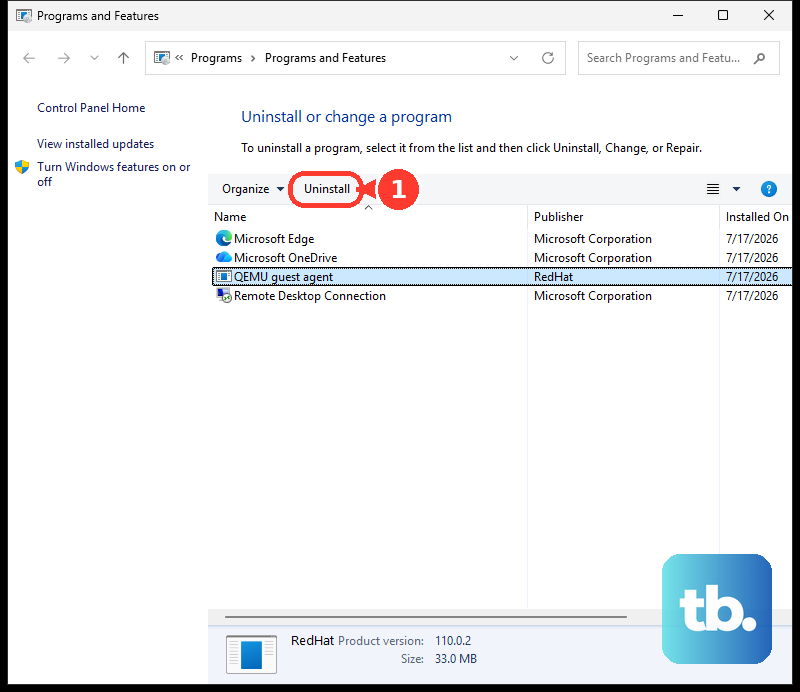
If you installed with WinGet, open Windows Terminal, PowerShell, or Command Prompt and run winget uninstall -e --id Project64.Project64 --source winget.
If you used the ZIP version, close Project64, delete the extracted Project64 folder, and delete any desktop shortcut you created manually.
Older official Project64 2.3.x builds remain on the public releases page as legacy downloads for compatibility or testing, not as the normal setup path. For a regular Windows setup, use Project64 3.0.1.
Frequently Asked Questions
Does Project64 include games?
No. Project64 does not include games. Add your own legally obtained ROM or homebrew files through Choose ROM Directory or Open ROM.
Should I use the installer or the ZIP version?
Use the installer for a normal Windows app with Start menu and uninstall support. Use the ZIP version for a portable folder you can remove by deleting it.
Can I use older Project64 2.3.x downloads?
Use older official 2.3.x builds only for compatibility or testing. For the normal current setup, use Project64 3.0.1.
Can an admin install Project64 silently with WinGet?
Yes. Open elevated PowerShell or Command Prompt and run winget install -e --id Project64.Project64 --source winget --silent --accept-source-agreements --accept-package-agreements.