The NVIDIA installer fails when the package is wrong, old NVIDIA files are still active, Windows is holding a driver state open, or another app blocks setup. Start with the fastest fixes, then move to a clean reinstall and Windows repair tools. Every path below uses current NVIDIA or Microsoft guidance.
Restart before changing anything else
Use this when the NVIDIA installer shows a generic failure, freezes, or refuses to continue after a previous attempt. A restart clears pending driver work and closes background components holding NVIDIA files open.
Open Start, choose Power, then select Restart.
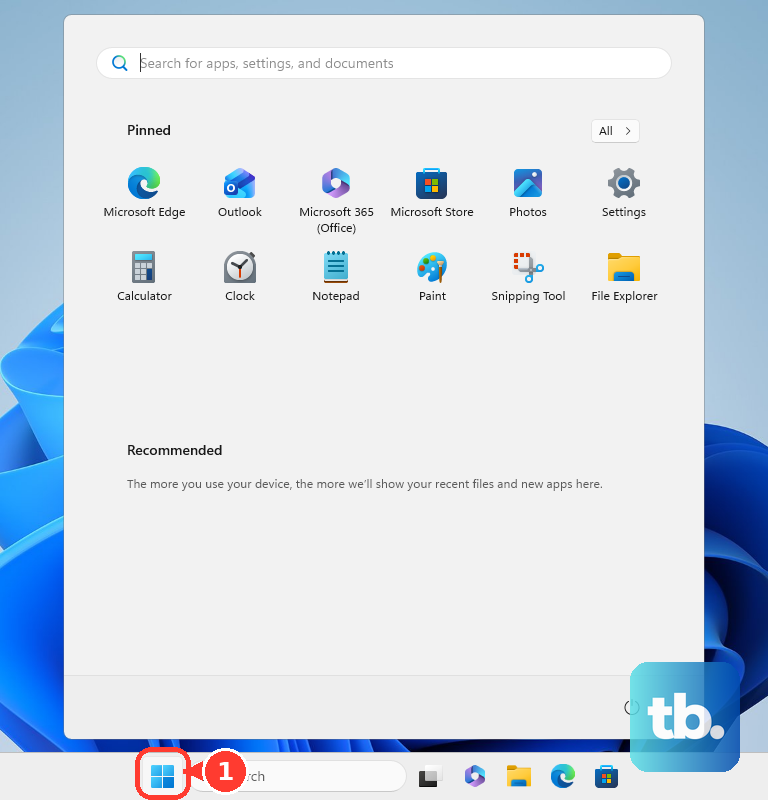
After Windows loads again, run the NVIDIA installer one more time.
If the same error returns, use a fresh NVIDIA package instead of retrying the same failed file.
Get a fresh NVIDIA driver package
This fixes failed installs caused by a mismatched, outdated, or damaged driver download.
Open NVIDIA’s official driver page at nvidia.com/en-us/drivers.
Select the correct Product Category, Product Series, Product, Operating System, and Download Type.
For a GeForce PC, choose Game Ready Drivers, Studio Drivers, or All.
Download the matching Windows installer.
Run the new installer file instead of the copy that failed.
Use NVIDIA App when the installer path is the problem
NVIDIA App is NVIDIA’s preferred consumer driver download surface for supported GeForce PCs on Windows 10 and Windows 11.
- 1.Install or open NVIDIA App.
- 2.Open the Drivers tab.
- 3.Choose the offered GeForce Game Ready Driver or NVIDIA Studio Driver.
- 4.Select Download, then use the app’s install option.
Run a clean install from the standalone installer
When NVIDIA App driver installation fails, use the standalone driver installer from NVIDIA’s driver page. Close open apps first, including GPU tuning tools, monitoring utilities, video players, browsers, and 3D apps.
Right-click the downloaded installer and choose Run as administrator. Approve User Account Control with Yes, keep the default temporary extraction path, and select OK.
In the installer, choose NVIDIA Graphics Driver and NVIDIA App, then select AGREE AND CONTINUE. Pick Custom (Advanced), select NEXT, turn on Perform a clean installation, then select Next.
Restart the PC when the installer finishes. This replaces existing NVIDIA settings and driver components with a clean copy.
Remove the old NVIDIA package and reinstall
Use this when the installer fails over and over, or when NVIDIA App itself is broken. Removing the previous package gives the new installer a cleaner starting point.
Open Start, go to Settings, choose Apps, then open Installed apps.
Find NVIDIA App or another NVIDIA entry, open the More menu, and choose Uninstall.
Restart Windows after the uninstall completes.
Download the current driver from NVIDIA again and install it fresh.
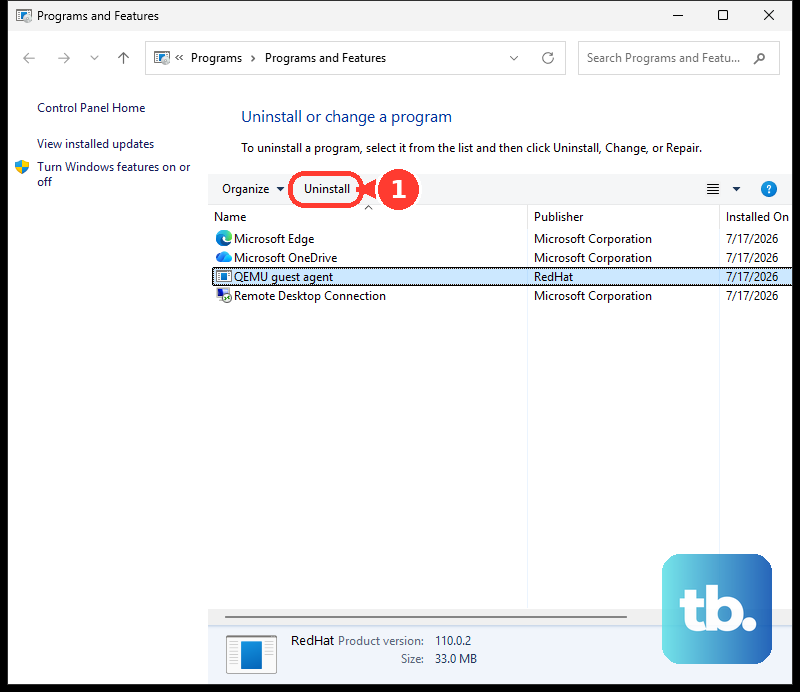
If the NVIDIA entry does not appear in Settings, search for Control Panel, open Programs, choose Programs and Features, select the NVIDIA program, then choose Uninstall or Uninstall/Change.
Stop NVIDIA background items that block setup
Some NVIDIA installer failures happen because NVIDIA services or app processes are still running. Close any visible NVIDIA windows first, then open Task Manager.
In Task Manager, end processes that start with nv or NVIDIA. Run the installer again after those tasks close.
If the error remains, press Windows key + R, type services.msc, and select OK. Stop services whose service names start with NVIDIA, then rerun the NVIDIA installer.
When a third-party antivirus or anti-malware tool uses aggressive real-time monitoring, turn off that app’s real-time monitoring during installation and turn it back on afterward. NVIDIA says Microsoft Defender is safe to leave running.
Try Windows Update or Device Manager
On Windows 11, open Start, then go to Settings, Windows Update, and Advanced options. Turn on Receive updates for other Microsoft products, then under Additional options select Optional updates.
On Windows 10, open Settings, Update & Security, Windows Update, then Advanced options, and turn on Receive updates for other Microsoft products when you update Windows. Return to Windows Update, choose Check for updates, then select View optional updates.
Select the listed NVIDIA or display driver update.
Choose Download and install, then restart when Windows finishes. Optional drivers are not installed automatically, so select the driver yourself.
Right-click Start, open Device Manager, expand Display adapters, and select your NVIDIA GPU.
Choose Update driver, then select Search automatically for updated driver software.
To use local NVIDIA driver files, choose Browse my computer for drivers, select the extracted NVIDIA driver folder with Browse, choose OK, then select Next.
Use Device Manager as a repair route when the main installer will not run, because it uses Windows-ranked drivers instead of NVIDIA’s full newest package.
Use deeper cleanup only after normal reinstall fails
Use these only after the restart, fresh download, clean install, and uninstall paths still fail.
- 1.Reinstall the display adapter from Device Manager by opening Display adapters, selecting the NVIDIA GPU, choosing Uninstall device, selecting Uninstall, and restarting.
- 2.Use a Windows clean boot by opening msconfig, choosing System Configuration, opening Services, selecting Hide all Microsoft services, choosing Disable all, selecting Apply, opening Startup, choosing Open Task Manager, disabling enabled startup items, selecting OK, restarting, and trying the install again.
- 3.Repair Windows system files from an elevated Command Prompt by selecting Run as administrator, approving Yes, running DISM.exe /Online /Cleanup-image /Restorehealth, then sfc /scannow, then restarting.
- 4.Leave C:\Program Files\NVIDIA Corporation\Installer2 in place. NVIDIA uses it for reinstalls, uninstalls, rollbacks, and its documented uninstall process. If disk space is the concern, use NVIDIA’s supported removal route before installing a new package.
- 5.Use Display Driver Uninstaller only as a third-party cleanup option for broken NVIDIA driver removal, then reinstall the latest driver from NVIDIA.
When it is a work or managed PC
This applies when your computer is owned or managed by a school, employer, or IT department. Driver installs are controlled by Windows Update policy, Microsoft Intune driver update policies, or administrator deployment rules.
Ask your administrator whether NVIDIA or display driver updates are blocked, manually approved, or deployed through management.
On managed devices, use the approved driver route instead of forcing the consumer installer. NVIDIA App is the current NVIDIA path for supported GeForce PCs; skip older GeForce Experience advice.
Frequently Asked Questions
Why does the NVIDIA installer keep failing after I download the right driver?
The remaining causes are active NVIDIA background processes, an older NVIDIA package that did not uninstall cleanly, third-party security software blocking registration, or Windows driver-state problems.
Should I use NVIDIA App or the standalone NVIDIA installer?
Use NVIDIA App first on supported GeForce PCs. If NVIDIA App driver installation fails, use NVIDIA’s standalone driver installer with Custom (Advanced) and Perform a clean installation.
Is Display Driver Uninstaller required to fix the NVIDIA installer?
No. It is a third-party cleanup option for stubborn driver removal problems, not a first-line fix. Try NVIDIA’s clean install, Windows uninstall, Windows Update, and Device Manager paths first.
Can Windows Update install an NVIDIA driver when the NVIDIA installer will not work?
Yes, when an NVIDIA or display driver appears under Windows Update optional updates. Optional drivers are not installed automatically, so select the driver and choose Download and install.