NVIDIA App can get stuck connecting when Windows is offline, the app install is damaged, a firewall or VPN blocks traffic, a driver update fails, or the browser sign-in never finishes. Start with the quick reset, then move into the deeper Windows and installer fixes only if the same error comes back.
Start with the quickest reset
Begin with the fixes that refresh Windows and replace the app without touching deeper system settings.
- 1.Save your work, open Start, select Power, and choose Restart.
- 2.After Windows loads again, reopen NVIDIA App and try the same action once more.
- 3.If the error returns, open NVIDIA's official app download page and select Download Now.
- 4.Run the installer and follow the prompts to install or update NVIDIA App.
- 5.Open NVIDIA App again and check whether it connects normally.
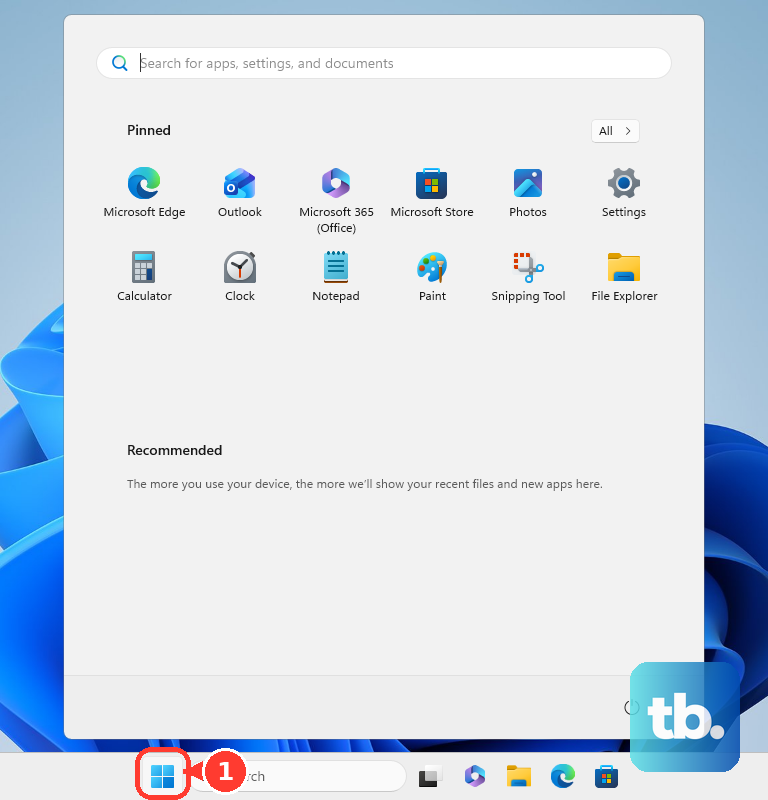
Reinstall NVIDIA App cleanly
Use this when the app keeps stopping at the same connection screen after a restart or normal update. A clean reinstall replaces the local NVIDIA App files and resets the broken install state.
Open Windows Settings, go to Apps, then open Installed apps.
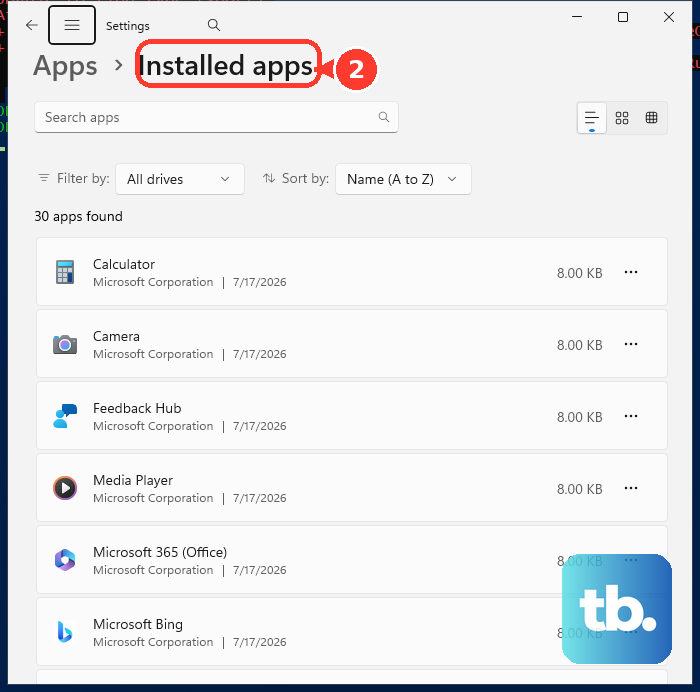
Find NVIDIA App, select the three-dot menu, and choose Uninstall.
Restart the PC after the uninstall finishes.
Download NVIDIA App again from NVIDIA's app page, select Download Now, run the installer, and follow the on-screen instructions.
Finish the browser login window
Open NVIDIA App and select Log In.
When your default browser opens, enter your NVIDIA account email address and password.
If the app shows Login in Progress, check every open tab in your default browser for the NVIDIA sign-in page.
Complete the Sign in with NVIDIA tab, including any duplicate sign-in tab that opened separately.
NVIDIA App login is optional for core use, but it is required for bundle and reward redemption.
Check the connection Windows is using
The most common network cause is a PC that is offline, on weak Wi-Fi, or using a connection that cannot complete the NVIDIA download.
If your laptop has a physical Wi-Fi switch, turn it on.
In Windows, select the network area on the taskbar, open the Wi-Fi controls, choose your network, select Connect, enter the password, and select Next.
Make sure Airplane mode is off.
If the download fails again or the installer shows a corruption-style error, retry on a stable connection.
On Wi-Fi, connect directly to the router or switch with Ethernet. If you are already wired, try another cable.
When the file still fails to download cleanly, download the NVIDIA installer on another computer and copy it to the problem PC with a USB drive.
Allow NVIDIA App through Windows Firewall
This fixes cases where Windows Firewall blocks NVIDIA App from reaching the network.
Open Windows Security.
Go to Firewall & network protection.
Select Allow an app through firewall.
Select Change settings.
Check the NVIDIA App entry for the network type you use.
If the entry is missing, select Allow another app, add the NVIDIA App path, and confirm the change.
Remove VPN or proxy blocks
The most common configuration cause is a VPN, corporate proxy, filtering proxy, or download manager interrupting the NVIDIA App connection or installer download.
To disconnect a VPN, select the network icon on the taskbar, choose the VPN connection, and select Disconnect.
You can also open Settings, go to Network & internet, then VPN, and disconnect or edit the VPN there.
For proxy settings, open Settings, go to Network & internet, then Proxy.
Remove proxy settings that are not required for the network you are currently using, then try NVIDIA App again.
Run Windows network repair
Use Windows' repair tools when NVIDIA App is not the only thing acting unstable online. On Windows 11, Microsoft now runs this fix from the Get Help app. Open Get Help, type connect to network and internet in the search bar, select Run network diagnostics, and work through the steps it offers. You can also start from Settings, then System, then Troubleshoot, then Other troubleshooters, which hands the network entries off to Get Help.
Keep Network reset as the last step you try. Microsoft says it removes every network adapter you have installed along with its settings, reinstalls those adapters at their defaults after the restart, and can switch your known networks to the public profile, so VPN clients and virtual switches such as Hyper-V may need to be reinstalled or reconfigured afterward. If the connection still behaves badly, open Start, then Settings, then Network & internet, then Advanced network settings, then Network reset. Select Reset now, choose Yes, and wait for the PC to restart.
On Windows 10, the network reset path is Settings, then Network & internet, then Status, then Network reset. Reopen NVIDIA App after Windows comes back up.
Install the driver manually instead of through NVIDIA App
This fixes NVIDIA App connection failures that are stopping driver updates. You pull the driver from NVIDIA's site instead of letting the app fetch it, and NVIDIA's current installer package bundles NVIDIA App with the graphics driver.
Open NVIDIA's drivers page and use Latest Driver Downloads or Manual Driver Search.
Choose the correct product, operating system, language, and download type.
Download the driver installer.
Close open apps, including GPU monitoring tools, tuning utilities, video players, browsers, game launchers, and 3D-accelerated apps.
Right-click the downloaded NVIDIA display driver installer and choose Run as administrator.
When prompted, select Yes, then select OK at the extraction path prompt.
Choose NVIDIA Graphics Driver and NVIDIA App.
Select AGREE AND CONTINUE, choose Custom (Advanced), and select NEXT.
Enable Perform a clean installation and select Next.
Restart the PC when the installer finishes.
Reset stuck NVIDIA installer components
Use this deeper repair after reinstalling the app and trying the driver installer.
- 1.Press Windows key + R, type services.msc, and stop every service whose name starts with NVIDIA.
- 2.Open Task Manager and end processes that start with nv or NVIDIA.
- 3.Run Regedit and delete HKEY_LOCAL_MACHINE\SOFTWARE\NVIDIA Corporation\Logging if it is present.
- 4.Delete HKEY_LOCAL_MACHINE\SOFTWARE\Wow6432Node\NVIDIA Corporation\Logging if it is present.
- 5.Run the NVIDIA App or driver installer again.
- 6.If the repair still fails, uninstall NVIDIA programs from Settings, then Apps, then Installed apps, restart the PC, and repeat these reset steps before installing again.
Skip old GeForce Experience fixes
Older fixes for Unable to connect to NVIDIA often mention deleting NSManagedTasks.xml or restarting NVIDIA Network Service. Those steps belong to the GeForce Experience era.
NVIDIA says GeForce Experience is no longer supported. Install NVIDIA App instead, then use the reinstall, firewall, network, clean driver install, and installer reset paths above.
Contact NVIDIA when it still fails
Escalate when NVIDIA App still cannot connect after reinstalling it, fixing the network path, allowing firewall access, removing VPN or proxy interference, and clean installing the driver.
Open the NVIDIA App home page.
Select the [!] icon in the upper-right corner to send in-app feedback.
Include what you were doing when the connection failed.
For direct help, use NVIDIA Support live chat or Ask a Question from NVIDIA's support page.
Frequently Asked Questions
Does NVIDIA App require a login to work?
No. NVIDIA says login is optional for core NVIDIA App use. You do need to sign in for bundle and reward redemption.
Can I still download NVIDIA drivers without NVIDIA App?
Yes. NVIDIA still supports direct driver downloads from its drivers page, including manual driver search and Game Ready Driver downloads.
What Windows versions does NVIDIA App support?
NVIDIA lists NVIDIA App for Windows 10 and Windows 11 PCs with supported NVIDIA GPUs and GeForce 551.52 Driver or later.
Should I go back to GeForce Experience instead?
No. NVIDIA says GeForce Experience is no longer supported, so the current path is to use NVIDIA App.