Minecraft Launcher won't connect to the internet, and you're stuck before the game even starts. The fix depends on whether your computer has lost its connection or the launcher is struggling with sign-in. Start with the quick checks below, then move through updates, account checks, and app repairs.
Start with the connection and a fresh launch
Start here, using the checks for your computer. On Windows, select the launcher's Close (X) button. Then reopen Minecraft Launcher.
If your Windows PC has lost Wi-Fi, open Settings > Network & internet. Turn on Wi-Fi and turn off Airplane mode. Enable the physical wireless switch if your computer has one.
On a Mac, open the Wi-Fi status menu and enable Wi-Fi. Choose your network, enter its password, and select Join.
On Ubuntu's GNOME desktop, open the system menu at the right of the top bar and select Wi-Fi. Choose your network, enter its password, and select Connect.
If your home connection is still down, unplug the modem and router. Wait 30 seconds, then reconnect the modem. Wait until it is ready, then reconnect the router.
For continuing connection trouble on Windows 11, open Get Help and search for “connect to network and internet.” Select Run network diagnostics and follow its prompts.
On a Mac, hold Option while clicking the Wi-Fi menu. Select Open Wireless Diagnostics and follow its recommendations.
Bring the launcher and Windows apps up to date
Open Minecraft Launcher to trigger its automatic update. If it doesn't update on Windows, open Microsoft Store and select Check for Updates. In the alternative Store layout, use Library > Get updates.
Install available updates, including Minecraft Launcher and Xbox components. On Windows 11, check system updates through Start > Settings > Windows Update > Check for updates. Select Install now when offered.
On Windows 10, check through Start > Settings > Update & Security > Windows Update > Check for Updates. Update availability depends on your PC's servicing eligibility. Restart when Windows requests it.
If updating doesn't restore access, check the purchasing account next. If Microsoft Store won't open or update apps, try the Store cache reset in the repair section below.
Make sure you're using the purchasing account
This addresses sign-in and ownership-verification failures. Compare your Microsoft account email with the email on your Minecraft purchase confirmation. Sign in to the Microsoft account website and check Order History for the purchase.
Retry Minecraft with the account that owns the game. On Windows, open the Xbox app. These Xbox app steps apply only to Windows. Sign in with the Microsoft account that owns Minecraft.
Check the displayed email and gamertag. Select Sign in with a different account if those details are incorrect. Launch Minecraft again and retry sign-in.
Repair the Windows launcher before resetting it
If updates and account checks haven't helped, try Windows' app repair controls. On Windows 11, open Start > Settings > Apps > Installed apps. Find Minecraft Launcher, select More, then select Advanced options.
On Windows 10, use Settings > Apps > Apps & features > Minecraft Launcher > Advanced options. Select Repair, then retry the launcher. If your package doesn't offer this control, use the reinstall route below.
If repair fails, back up important local Minecraft data. Then select Reset on the same page if available. Reset can remove app data and settings.
If the Xbox or Microsoft Store app also fails, open that app's Advanced options. Select Repair if available. Use Reset only after repair fails and you've preserved important app data.
If Microsoft Store won't open or complete an update, press Windows+R and enter wsreset.exe. Select OK. Wait for the blank command window to close and Microsoft Store to open. Then retry the launcher installation or update. This clears the Store cache, not Minecraft worlds.
When Windows settings interfere with access
Open Start > Settings > Time & language > Date & time, especially if Microsoft Store or account authentication also fails. Turn on Set time automatically. Enable Set time zone automatically, or choose the correct Time zone manually.
If an unintended proxy is configured, open Settings > Network & internet > Proxy. Turn off Use a proxy server for that unintended proxy. Required work or school proxy settings must come from your administrator.
If firewall rules are blocking Minecraft Launcher, open Windows Security > Firewall & network protection > Allow an app through firewall. Select Change settings, then select the legitimate Minecraft Launcher entry. If the entry is missing, select Allow another app and locate the launcher's executable.
Apply the exception only to the network types where access is needed. Tip: On a managed school or work PC, ask your administrator to review enforced firewall restrictions or a missing Microsoft Store.
Reinstall if the launcher still cannot connect
Reinstalling is the next app-level option after connection checks, account checks, and repairs. Preserve your worlds and custom installations before removing the launcher.
On Windows 11, uninstall through Start > Settings > Apps > Installed apps > Minecraft Launcher > More > Uninstall. For an alternative Windows removal route, open Start > All apps.
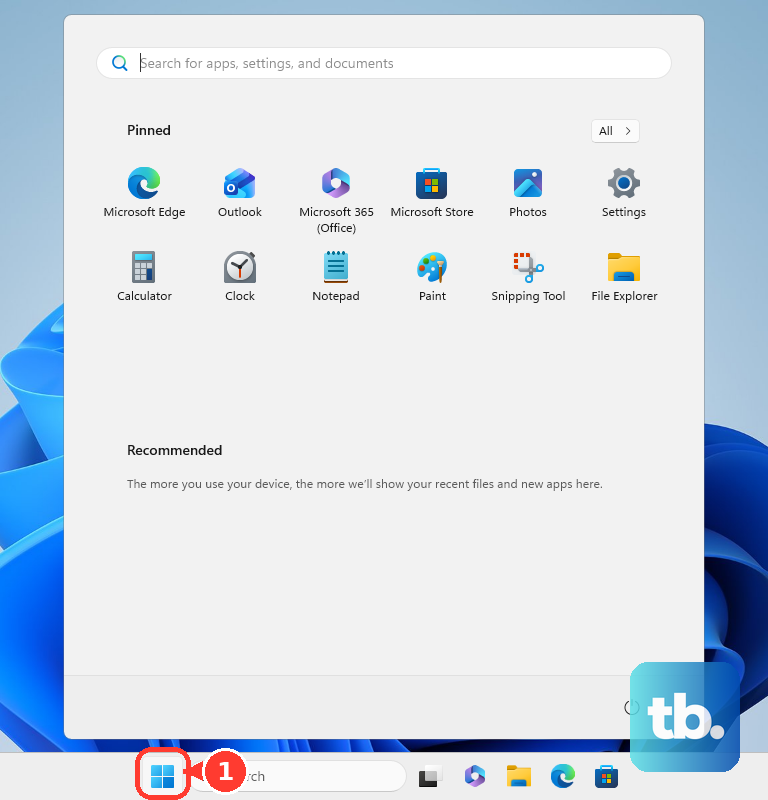
Right-click Minecraft Launcher and select Uninstall. Reinstall through Microsoft Store > Library > Minecraft Launcher > Install.
For a platform installer instead, open Minecraft's official download page. Under Other versions & platforms, choose the option for your computer: Windows 10/11, Mac, ARCH + ARCH BASED, DEBIAN + DEBIAN BASED, or Other distributions. Follow that platform's installer instructions.
If access still fails on a Mac, connect to another available network and retry Minecraft Launcher. If it works there, ask the original network's administrator or ISP to investigate.
For persistent Windows network problems, reserve network reset for last. On Windows 11, open Settings > Network & internet > Advanced network settings > Network reset. On Windows 10, use Settings > Network & internet > Status > Network reset.
Select Reset now, then select Yes. VPN configurations can require setup again afterward. If reinstalling doesn't restore access, use the Mac network comparison or Windows network diagnostics above to investigate the connection, keeping Windows network reset as the last resort.
Frequently Asked Questions
How do I renew my Mac's DHCP lease?
For a DHCP connection, open Apple menu > System Settings > Network. Select the affected network service. Open Details > TCP/IP. Select Renew DHCP Lease, then OK.
Should I change DNS to fix Minecraft Launcher?
Correct DNS when your connection has incorrect manual settings. Under the connection's IP assignment > Edit > Manual settings, enable the applicable IPv4 or IPv6 section. Correct Preferred DNS and Alternate DNS using administrator- or provider-supplied values, preserving valid IP, subnet, and gateway settings. Select Save. Changing DNS is not a universal launcher fix.
What should I do about installation error 0x80131500?
For this installation error on Windows, Minecraft documents a specific remedy. Open Control Panel > Internet Options > Advanced. Clear SSL 3.0, TLS 1.0, and TLS 1.1. Enable TLS 1.2. Enable TLS 1.3 if available. Select Apply, then OK. Restart your computer.
How do I check VPN or security-software interference on a Mac?
Open Finder > Applications and look for VPN, firewall, antivirus, parental-control, or content-filtering software. Use the relevant app's vendor instructions to temporarily turn off its filtering features. Restart after the changes. Retry Minecraft Launcher. Exact filtering controls depend on the app.