Chrome shows “DNS address could not be found” when it cannot find a DNS record for the site name. The cause sits in one of a few places: the address, the site’s domain, your router, cached DNS data, custom DNS, secure DNS, a proxy, a VPN, or a saved network setting.
Start with the quick checks, then move into the device-specific fixes that reset DNS and network behavior without using outdated Control Panel or service-restart tricks.
1. Check the site before changing settings
Start here because no local setting repairs a misspelled, expired, or misconfigured domain. Retype the web address in the browser address bar, then open the same URL in another browser.
Try the same URL on another device, and open a few unrelated websites. If only one site fails, the site address or the site’s DNS is the problem. If unrelated sites fail too, keep going.
2. Confirm the connection is actually on
Windows makes this quick. Select the Network, Sound, or Battery icons on the right side of the taskbar, then confirm Wi-Fi is on and your network shows Connected.
Also check Airplane mode. Open Settings > Network & Internet > Airplane mode, then turn Airplane mode off.
On Android, refresh the current internet connection from Quick Settings. Swipe down from the top of the screen, then touch and hold Internet. Tap Reset.
3. Restart the modem and router in order
Unplug the router power cable, then unplug the modem power cable. Remove the modem battery if the lights stay on, and wait at least 30 seconds.
Reconnect the modem and wait for the modem lights to stop blinking. Reconnect the router, wait a few minutes, then open the site again.
4. Forget the Wi-Fi network and reconnect
Use this when one saved Wi-Fi network keeps throwing DNS errors after the router restart. On Windows, open Settings > Network & internet > Wi-Fi > Manage known networks.
Select your Wi-Fi network, choose Forget, then reconnect and enter the password. On Android, open Settings > Network & internet > Internet.
Touch and hold the network name, then tap Forget. Turn Wi-Fi off and on, tap the network name, then sign in or enter the password.
5. Flush DNS on Windows and run diagnostics
Run the troubleshooter first. Open Get Help, and in Search, enter connect to network and internet.
Select Run network diagnostics, then complete the steps shown. After that, clear DNS and reset the network stack.
Search the taskbar for command prompt. Beside Command Prompt, select Run as administrator, then select Yes.
Run netsh winsock reset, then run netsh int ip reset. Run ipconfig /release, run ipconfig /renew, and run ipconfig /flushdns.
For stale name resolution only, run ipconfig /flushdns from an administrator Command Prompt.
6. Fix DNS settings on Windows Mac and Android
Wrong manual DNS settings break name lookups. Put the connection back on automatic DNS first, then set manual DNS only when you know the server values are correct.
On Windows, open Settings > Network & internet. For Wi-Fi, select Wi-Fi > Manage known networks, then choose your network. For Ethernet, select Ethernet, then choose the connected network.
Next to IP assignment, select Edit. Choose Automatic (DHCP), then select Save.
To set manual DNS on Windows 11, use the same network page. Select Edit next to IP assignment, then choose Manual.
Turn on IPv4 or IPv6. Enter Preferred DNS and Alternate DNS, choose the DNS over HTTPS setting, then select Save.
Windows 10 supports manual DNS, but not the DNS over HTTPS setting. On Mac, open Apple menu > System Settings > Network.
Select Wi-Fi or Ethernet, then choose Details > DNS. Click the Add button under DNS servers, enter the IPv4 or IPv6 DNS server, then select OK.
To renew the DHCP lease, open Details > TCP/IP and use the DHCP controls. On Android, open Settings > Network & internet > Private DNS.
Choose Off, Automatic, or Private DNS provider hostname, then tap Save. Search Settings for Private DNS when the option is not visible.
7. Clear browser DNS and remove extensions
If the internet works outside one browser, fix that browser’s DNS, cache, extensions, and secure DNS settings. In Chrome desktop, enter chrome://net-internals/#dns in the address bar and select Clear host cache.
Then enter chrome://net-internals/#sockets and select Flush socket pools. In Chrome on Android, open Chrome > More > Settings > Privacy and security.
Tap Use secure DNS, then turn Use secure DNS on or off or select another service provider. In Chrome desktop, open More > Delete browsing data.
Choose Last hour or All time. Select Cached images and files, then select Delete data.
To reset Chrome, open More > Settings > Reset settings > Restore settings to their original defaults > Reset settings. Remove Chrome extensions from More > Extensions > Manage extensions.
Turn off the extension, or select Remove and then Remove again. In Firefox desktop, open Settings > Privacy & Security.
Scroll to DNS over HTTPS, then choose the protection level or open Advanced settings. Use Manage Exceptions for sites that should not use DNS over HTTPS.
To clear Firefox DNS, enter about:networking#dns in the address bar and select Clear DNS Cache. Remove Firefox add-ons from Add-ons and themes > Extensions.
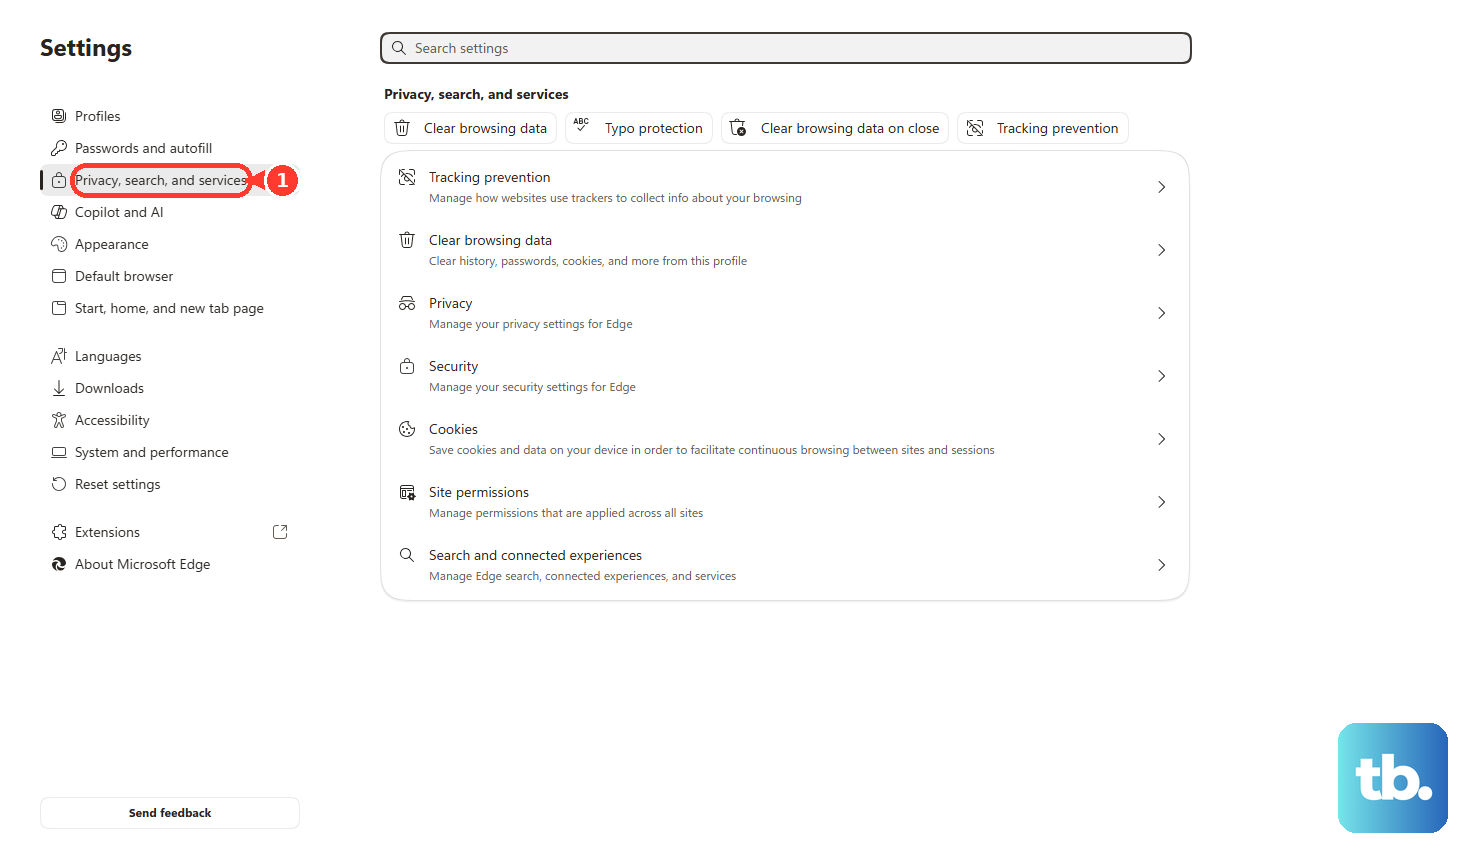
Use the toggle to disable an extension, or use the three-dot menu and select Remove. In Microsoft Edge, open Settings > Privacy, search, and services > Security > Use secure DNS and adjust the secure DNS setting.
To turn off an Edge extension, select the Extensions icon. Choose Manage extensions, then use the toggle next to the extension.
To remove one, select the Extensions icon. Choose More actions next to the extension, then select Remove from Microsoft Edge and Remove.
8. Reset VPN proxy and network profiles last
A proxy, VPN, Private Relay, or configuration profile can intercept browser traffic and create DNS-style failures. On Mac, open Apple menu > System Settings > Network.
Select the network service, then choose Details > Proxies. Turn off proxy options you do not use or correct the proxy server settings, then select OK.
In Safari on Mac with iCloud Private Relay enabled for the network, open the View menu and choose Reload and Show IP Address. On iPhone or iPad, open Settings > General > Transfer or Reset iPhone/iPad > Reset > Reset Network Settings.
This removes previously used networks and VPN settings not installed by a configuration profile or MDM, and Wi-Fi turns off and back on. To remove a user-removable iPhone or iPad profile, open Settings > General > VPN & Device Management.
Select the configuration profile, then tap Remove Profile. On Android, open Settings > Network & internet > Internet.
Tap the network, choose Edit > Advanced options, and use the Proxy menu. Choose the correct proxy configuration, then tap Save.
For a full Android or Pixel Wi-Fi reset, open Settings > System > Reset options > Reset Bluetooth & Wi-Fi > Reset settings. For Windows 11, use network reset only after the earlier fixes: open Start > Settings > Network & internet > Advanced network settings > Network reset > Reset now > Yes, then wait for the PC to restart.
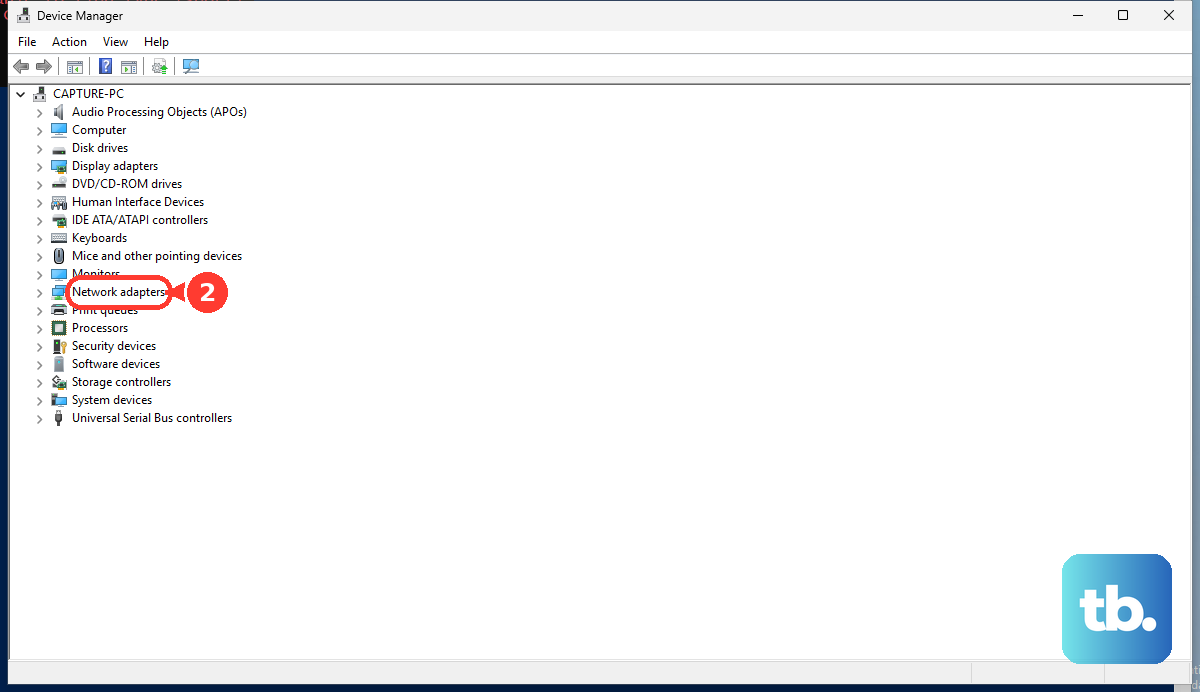
On Windows 10, use Settings > Network & internet > Status > Network reset. For a Windows adapter reinstall, search for Device Manager.
Select Device Manager, then expand Network adapters. Right-click the network adapter and choose Uninstall device.
Check Attempt to remove the driver for this device. Select Uninstall, then restart from Start > Power > Restart.
Have a backup driver from the PC manufacturer first when that PC has no internet access. Work and school devices need IT help when DNS, secure DNS, VPN, proxy, browser extensions, or profiles are locked by policy. Tell IT which browser, network, and site fail.
Frequently Asked Questions
What does DNS address could not be found mean in Chrome?
It means Chrome did not find a DNS record for the site name. Check the spelling first, then test unrelated sites to separate a site problem from a device or network problem.
What is the fastest Windows fix for DNS address could not be found?
Run Command Prompt as administrator and use ipconfig /flushdns. If the connection itself is failing, run Get Help network diagnostics and the full Microsoft reset sequence.
Does changing DNS over HTTPS help this error?
Yes, when the browser or Windows 11 secure DNS setting points to a DNS service that is unavailable or incorrect. Use the browser’s secure DNS setting, or change DNS over HTTPS from the Windows network page.
Why does the DNS error happen on a work or school laptop?
Managed devices can lock DNS, secure DNS, VPN, proxy, extensions, and profiles. Contact the organization’s IT team instead of removing policy-controlled settings yourself.