Your MSI laptop camera won’t show a picture, Windows can’t find it, or your meeting app refuses to use it. Start with the camera switch and keyboard shortcut, then check permissions before moving on to app and driver repairs. The Windows menu paths below are for Windows 11.
Unlock the webcam and check its keyboard shortcut
Start here if the preview is black or Windows cannot detect the webcam. MSI laptops have model-specific camera controls, including physical switches and keyboard shortcuts.
Move the Webcam Lock Switch to its unlocked position if your laptop has one. Its location varies by model.
Slide any privacy shutter away from the lens.
Once Windows reaches the desktop, press Fn+F6 or Fn+F4, following the camera symbol on your keyboard and your model’s manual.
On models with MSI’s documented Fn Lock behavior, use the Fn combination when the Esc FN LOCK LED is on. When that LED is off, press the camera key, F4 or F6, alone.
For the matching manual, select your complete notebook model on MSI’s download page.
Enable the camera in your MSI utility
On supported notebooks, open MSI Center > Features > General Settings and enable Camera Switch. The control’s availability depends on your model.
If your laptop came with MSI Center Pro, Dragon Center, or Creator Center, enable its camera control under System Tuner or General Settings, where present. Use the utility supplied for your exact model; these applications are not interchangeable.
No camera switch in the utility? Its absence alone does not indicate a fault. Reinstalling MSI Center will not add a control your model does not support.
Give Windows and your apps camera access
Check Windows 11’s separate controls for the camera, listed apps, and desktop applications.
- 1.Open Start > Settings > Privacy & security > Camera.
- 2.Turn on Camera access. An administrator must resolve an unavailable control.
- 3.Enable Let apps access your camera, then turn on the affected app’s switch if it is listed.
- 4.Enable Let desktop apps access your camera for browsers and desktop meeting clients. This permission is shared; Windows does not provide an individual switch for every desktop app.
- 5.Open Settings > Bluetooth & devices > Cameras. If your webcam appears under Disabled cameras, select it and choose Enable. Administrator access is required.
Find what’s blocking video in one app
A blocked permission, a competing camera app, or the wrong camera selection stops a meeting app from showing your webcam.
Open the Windows Camera app to check its preview. If the picture works there, focus on the affected app’s permissions and camera selection.
Close applications using the webcam, including Camera, other meeting clients, browser calls, and recording tools. Camera sharing is supported on some configurations; others require exclusive access.
Reopen the application you want to use.
In Zoom, open the arrow beside Start / Stop Video > Video Settings > Camera and select the built-in webcam.
In Google Meet, click the arrow beside Camera and select the built-in webcam from the camera dropdown.
In Teams Free, select the physical webcam in the video settings or meeting pre-join screen. A virtual-camera selection explains a blank or misleading preview.
Turn off Blur or the selected background effect in Teams Free if the preview shows only a background or a gray image.
For Chrome calls, open More > Settings > Privacy and security > Site settings > Camera and allow the blocked website.
Select the laptop’s physical webcam from Chrome’s camera dropdown on that page.
In Edge, open Settings > Privacy, search, and services > Site permissions > All permissions > Camera and enable Ask before accessing (recommended).
Revisit the website.
Select Allow when Edge requests camera access.
In Firefox, press Ctrl+I on the meeting website to open Page Info.
Open Permissions.
Under Use the camera, clear Use Default.
Select Allow.
If your local preview works but other people receive frozen or missing video, exit the call.
Rejoin the call.
If the problem continues, restart the browser.
Update the browser if the transmitted video still fails.
Check your internet connection if the local preview works but the call’s video remains frozen. Connection problems do not explain a webcam missing from Device Manager.
Repair an app that still won’t show video
Use app repair when the webcam works elsewhere but one application keeps failing. For a picture that is dark or distorted across apps, use the image controls below.
Open Settings > Apps > Installed apps.
Beside the affected app, select More > Advanced options > Repair, if available.
If repair fails, select Reset. This resets the app’s data and preferences.
For a traditional desktop application, open Control Panel > Programs > Programs and Features.
Right-click the affected program and select Repair, or Change if its installer provides repair there. These options depend on the application.
For a dark or distorted picture across apps, select your camera under Settings > Bluetooth & devices > Cameras.
Adjust the available Brightness or Contrast controls while watching the preview.
To restore the camera’s image controls and effects to their defaults, select Reset settings on that camera’s settings page.
Restart Windows and install camera fixes
A Windows or camera-driver fault prevents video from working even with the camera switches and permissions enabled.
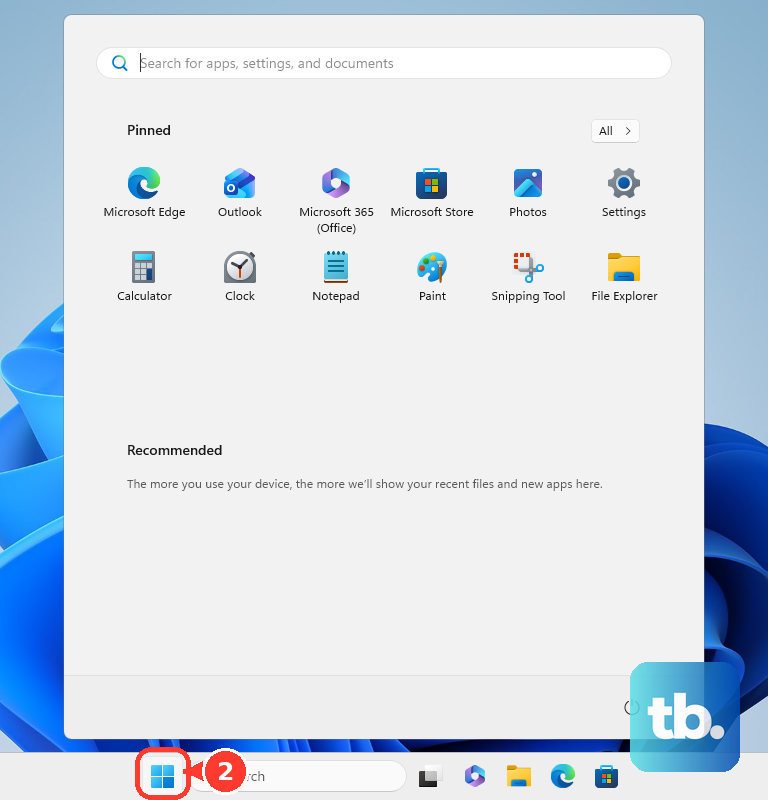
Select Start > Power > Restart. Waking the laptop from sleep does not replace a restart.
If the camera still fails, run the troubleshooter through Settings > System > Troubleshoot > Other troubleshooters > Camera > Run.
Open Settings > Windows Update > Check for updates.
Install applicable updates.
Open Advanced options > Optional updates to check for relevant drivers.
Install applicable driver updates listed there.
For Windows 11 24H2 and 25H2, KB5124010 includes a built-in-camera failure fix and improvements to the persistence of multi-app camera settings. If it is offered under Optional updates and the camera still fails, install it as an additional troubleshooting option. It is an optional preview update.
Restart the laptop after installing updates.
Open the Camera app to test again.
Restore a missing or faulty camera in Device Manager
Enable MSI’s hardware controls first, then use the option below that matches your camera’s symptom.
- 1.Right-click Start and open Device Manager. Expand Cameras; if the camera is detected but disabled, right-click it and select Enable device.
- 2.If the camera is missing, select Action > Scan for hardware changes, then restart Windows.
- 3.For a detected camera that still fails, right-click it and select Update driver. Choose the automatic driver-search option. If Windows finds nothing, check Settings > Windows Update.
- 4.If the failure began after a driver update and rollback is available, open the camera’s Properties > Driver > Roll Back Driver > Yes. Restart Windows.
- 5.If the device remains faulty, right-click the camera and select Uninstall device > Uninstall. Restart Windows, which attempts to reinstall the driver.
- 6.For MSI’s camera-related yellow-warning symptom involving Unknown USB Device (Device Descriptor Request Failed), right-click that entry and select Uninstall device. Then select Action > Scan for hardware changes. Leave unrelated USB devices alone.
Allow your camera app through Norton SafeCam
Norton SafeCam has its own camera permissions, separate from Windows. If your Norton product includes it, open Norton > Privacy > SafeCam > Open > App permissions and change the affected application from Blocked to Allowed.
If the app is missing, add it through Add Application/+ Add or Manually Select App. Set its permission to Allowed.
For a blanket camera block, return to SafeCam > Open. Under Select your preferred mode, choose Smart Mode (Recommended) instead of Block access to webcam and microphone.
Approve the intended application when Norton prompts you.
Try an EC reset before arranging repair
An embedded controller reset addresses controller or keyboard-toggle faults.
Check your exact model’s MSI reset instructions first. Model-specific instructions take precedence over the general procedure below.
Turn off the laptop.
Disconnect its power source.
Hold the power button for 30 seconds.
Reconnect AC power. AC is required for the first startup after a successful reset.
Start the laptop.
Open the Windows Camera app to test the webcam.
If it remains unusable, contact MSI customer service with your complete model identifier, the error message, and whether Windows detects the camera. Ask for diagnosis of the persistent failure, including the camera module and internal connection.
For calls while you arrange service, connect an external webcam.
Select the external webcam in your meeting application’s camera settings.
Frequently Asked Questions
Do I need to download a separate MSI webcam driver?
MSI says its built-in camera uses Windows’ driver. Installing the Windows Camera app installs the application, not a separate MSI hardware driver. Use Windows Update or Device Manager for driver maintenance.
Can two apps use my MSI camera at the same time?
Yes, on Windows 11 configurations that support camera sharing. Open Settings > Bluetooth & devices > Cameras, select the camera, and enable Allow multiple apps to use camera at the same time if available. Availability depends on the Windows build and camera.
What should I do when camera access is locked on a work or school laptop?
Ask your administrator to review the device policy Allow Use of Camera and the app-privacy policy Let Windows apps access the camera. Device restrictions, Force Deny settings, and per-app exclusions require administrator changes.
Why does my camera work in calls but fail with Windows Hello?
Windows Hello requires compatible facial-recognition hardware. On a compatible MSI model, open Settings > Accounts > Sign-in options > Facial Recognition (Windows Hello) and select Improve recognition to rescan. To replace the enrollment, select Remove, then Set up. These steps do not add Hello support to an ordinary RGB webcam.