Your USB jump drive should appear as soon as you plug it in, but sometimes it vanishes, shows an error, opens read-only, or refuses to mount. Start with the connection, then check the place where your device manages disks and external storage. The fixes below move from quick, no-risk checks to repair and erase options that change the drive.
1. Start with the port cable and power
Connection problems cause plenty of USB jump drive failures. Clear them before changing drivers or formatting anything.
- 1.Unplug the USB jump drive, then plug it back in.
- 2.Use a different USB port on the same computer.
- 3.Remove the USB hub or dock and connect the drive directly to the computer.
- 4.Reseat the USB-C adapter or cable firmly in the port.
- 5.Connect external power when the drive, hub, dock, or adapter uses its own power supply.
- 6.Test the jump drive on another Windows PC, Mac, or Chromebook.
When the drive works on another computer, repair the first computer. When it fails on every computer after direct connection and power checks, save any accessible files before you erase or rebuild the drive.
2. Make Windows show the drive
On Windows 11, turn on the USB warning system first: select Search, type usb, open USB settings, and turn Connection notifications on.
If Windows displays USB device not recognized, Use different USB port, or USB device might need more power, follow that message by connecting directly to the PC, using the correct USB-C port or cable, plugging in power, or disconnecting other USB devices.
Next, check whether Windows detects the drive without showing it in File Explorer. Right-click Start, select Disk Management, and find the USB disk.
If the disk is marked Offline, right-click the disk and choose Online.
If the volume has no letter, open Disk Management with administrator permissions, right-click the USB volume, choose Change Drive Letter and Paths, select Add or Change, choose Assign the following drive letter, pick a letter, select OK, then select Yes.
Do not use the old msdt.exe -id DeviceDiagnostic Hardware and Devices troubleshooter as a current fix. Microsoft has deprecated the Microsoft Support Diagnostic Tool and is redirecting or removing legacy inbox troubleshooters in newer Windows 11 releases.
3. Refresh Windows updates and drivers
Open Start, select Settings, then choose Windows Update.
Select Check for Windows updates. If updates appear, select Download & install, then restart when Windows asks.
For optional drivers, open Windows Update, select Advanced options, turn on Receive updates for other Microsoft products, then select Optional updates under Additional options.
Select listed driver updates, then choose Download and install.
To update the USB or storage driver directly, right-click Start, open Device Manager, expand Disk drives, Universal Serial Bus controllers, or Portable Devices, right-click the USB or storage device, choose Update driver, then select Search automatically for updated driver software.
If the drive shows an error in Device Manager, right-click the USB or storage device, choose Uninstall device, select Uninstall, then restart by right-clicking Start and choosing Shut down or sign out and Restart.
Use Windows Update before deeper disk repair, since Microsoft routes system and driver fixes through that path. Use rollback only after a recent driver change.
In Device Manager, right-click the device, choose Properties, open Driver, select Roll Back Driver, choose a reason, and select Yes.
4. Repair the Windows volume before erasing it
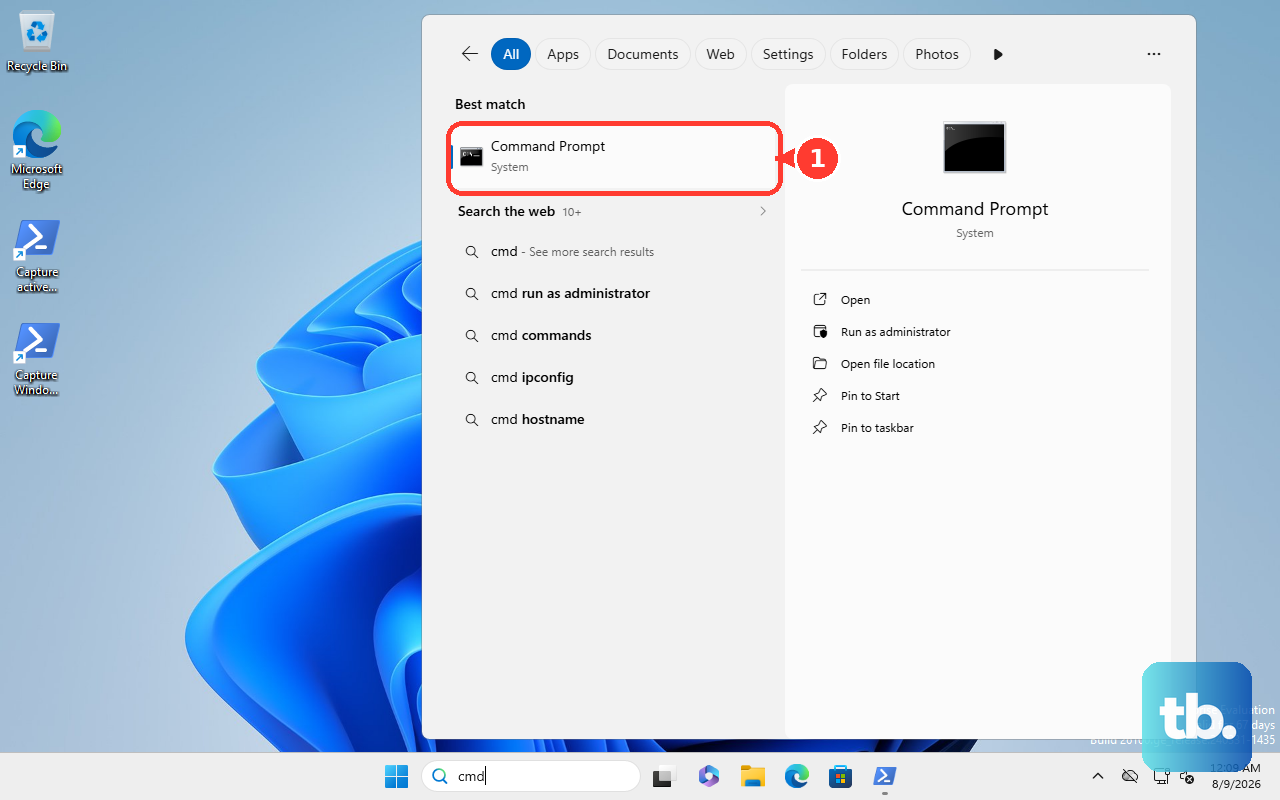
When the drive has a letter but still will not open normally, run disk repair. Right-click Command Prompt in the Start menu, choose Run as administrator, and run chkdsk X: /f, replacing X: with the USB drive letter.
Use /r for a deeper physical-sector check when you have time for a longer scan.
On some PCs, USB power management interferes with removable storage. Open Control Panel, choose Hardware and Sound, select Power Options, open Change plan settings, then choose Change advanced power settings.
Then expand USB settings, expand USB selective suspend setting, set On battery and Plugged in to Disabled, then select Apply or OK.
If USB settings is missing, the device maker or power model hides that option.
After repair, eject cleanly. In the system tray, right-click Safely Remove Hardware and Eject Media, select Eject for the drive, wait for Safe To Remove Hardware, unplug it, then reconnect it.
5. Bring the drive back on a Mac
Mac fixes split into three buckets: accessory permission, Finder visibility, and Disk Utility repair.
For a USB-C accessory prompt on Mac laptops with Apple silicon, open Apple menu, select System Settings, choose Privacy & Security, then open Accessories.
Choose an accessory connection setting, or click Allow when macOS asks.
To show external disks, open Finder, choose Finder, then Settings.
In General, select the external disk items you want on the desktop.
In Sidebar, select the items you want under Locations.
To check detection, open Disk Utility, choose View, then Show All Devices.
If the USB volume appears unmounted, select it and click Mount.
To repair the drive, select a volume in Disk Utility, click First Aid, click Run, and follow the onscreen instructions.
Repeat for each volume, each container, and then the storage device itself.
If macOS reports disabled USB devices or not enough power, disconnect and reconnect the device, use a different port, connect power when required, remove unneeded USB devices, shut down the Mac with nonessential devices unplugged, then try again.
If the drive opens but will not accept files, check the format. Apple says NTFS drives are read-only on Mac.
Copy the files elsewhere, then use Disk Utility to reformat the drive as APFS, Mac OS Extended, or exFAT for write access.
Also update macOS when the drive problem follows a system issue. Open Apple menu, select System Settings, choose General, then select Software Update.
If software is available, click Update, Upgrade, or Restart Now.
6. Open it on Chromebook Android iPhone or iPad
On a Chromebook, select the time, open Settings, choose About ChromeOS, then select Check for updates.
Restart after an update downloads.
To open the jump drive, select Launcher, open Files, then choose the external storage device on the left.
To reconnect cleanly, select Eject next to the device in Files, unplug it, then plug it back in.
If a supported storage device still will not open on ChromeOS after updates, use another computer to upload the files to Google Drive, then open Google Drive on the Chromebook.
On Android 7.0 or later, connect the USB storage device and open it with Files by Google.
Tap the notification when it appears.
If the notification does not open, remove the USB storage device and try again.
Tap the storage device you want to open, then choose Allow.
On an iPhone or iPad with USB-C, open Settings, then Privacy & Security.
Under Security, tap Wired Accessories and choose the setting you want, such as Always Ask.
Unlock the iPhone or iPad before using a storage drive, since a storage accessory always requires an unlocked device regardless of that setting, then approve the prompt when you connect the drive or accessory.
7. Erase the drive after saving files
Formatting fixes some detected but unusable drives, and it erases data on the selected volume or device. Copy anything accessible before using these options.
On Windows, right-click Start, open Disk Management, right-click the USB volume, select Format, select OK, then select OK again.
To create a new Windows volume on unallocated space, right-click the unallocated region in Disk Management, choose New Simple Volume, select Next, choose a size, select Next, accept or choose a drive letter, select Next, choose format options, then select Finish.
For an advanced Windows rebuild, open Command Prompt as administrator, run diskpart, then use list disk, select disk X, clean, create partition primary, format fs=exfat quick or format fs=ntfs quick, assign, and exit.
Confirm the disk number before clean; it removes partition and volume formatting from the selected disk.
On Mac, open Disk Utility, choose View, then Show All Devices, select the storage device, click Erase, choose GUID Partition Map when available, choose a file system format, enter a name, click Erase, then Done.
On a Chromebook, open Launcher, open Files, select the external storage device on the left, and choose Format.
Use exFAT for sharing between Mac and Windows. Use APFS or Mac OS Extended for Mac-only use.
8. Check for work school or boot restrictions
Work and school devices block removable storage through administrator controls. On managed Windows PCs, policies under Computer Configuration, Policies, Administrative Templates, System, and Removable Storage Access block read or write access.
Managed Macs control accessory security, and managed Chromebooks control external storage devices from the Google Admin console.
Test the drive on a personal device.
If it works there and stays blocked on the managed computer, contact the organization administrator.
For a bootable USB on an Intel-based Mac with the Apple T2 Security Chip, start from macOS Recovery, open Startup Security Utility, and choose Allow booting from external or removable media.
That setting applies to bootable USB drives, not ordinary file storage.
Frequently Asked Questions
Why does my USB jump drive light up but not appear?
The computer is powering the device without mounting it or assigning a visible location. Check Disk Management on Windows, Disk Utility on Mac, or Files on ChromeOS.
Will formatting fix a USB jump drive not working?
Formatting helps when the drive is detected but the volume is damaged, unallocated, or in the wrong format. It erases the selected volume or device.
Why can I read a USB drive on Mac but not save files to it?
Apple says NTFS drives are read-only on Mac. Copy the files elsewhere, then reformat the drive as APFS, Mac OS Extended, or exFAT.
What should I do when the same USB drive fails on every computer?
After another port, direct connection, power, and another computer all fail, treat the drive as the problem. Save accessible files before erase or rebuild steps.