You can also use the Google Drive app to edit photos, not just store them. You can add some effects, change the background, and use PNG pictures on top of other images on Google Drive. We will try our best to explain to you some of the ways you can use to edit your photos on Google Drive. Keep reading this article for an easy step-by-step guide.
See also: How to secure Google Drive.
Items and accounts you are going to need for this:
- A working and connected Gmail account.
- Your computer (it is going to be hard to do this on your phone, maybe you will not even have the option to do this)
- Open your Google Drive.
- And finally, an image that you want to edit (or more photos)
Steps to edit your picture
- First, log in to your Gmail account and open Google Drive
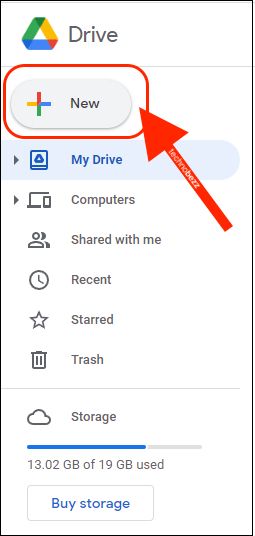
- Find the New button that has a + sign in it
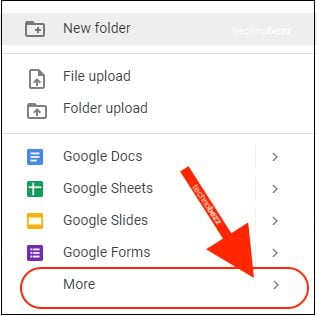
- When the small drop-down menu shows up, you can see many options. You can upload a file, make a folder, etc.
- Click More
- Next, choose Google Drawings
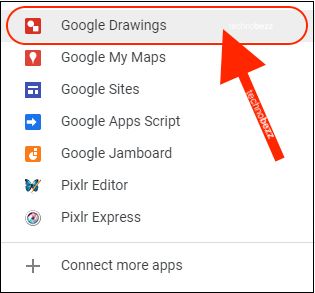
- Find the Google Drawings option and click on it
- When you click on that option, a new blank sheet will open on your screen. You can name it by clicking on the Untitled section and typing whichever name you want to give to your file.
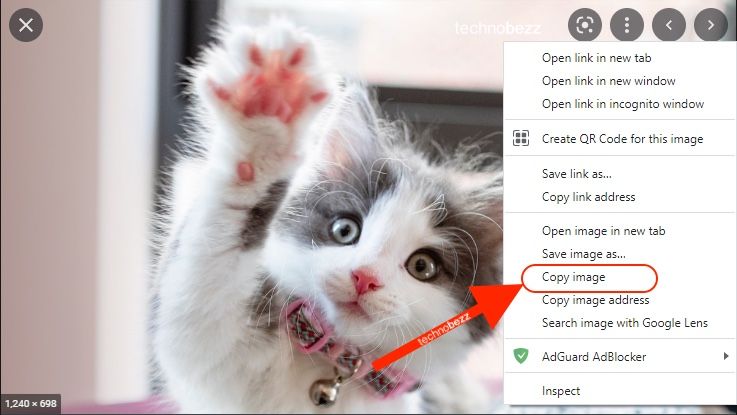
- Next, go to Google search and find whichever image you want to have for your background.
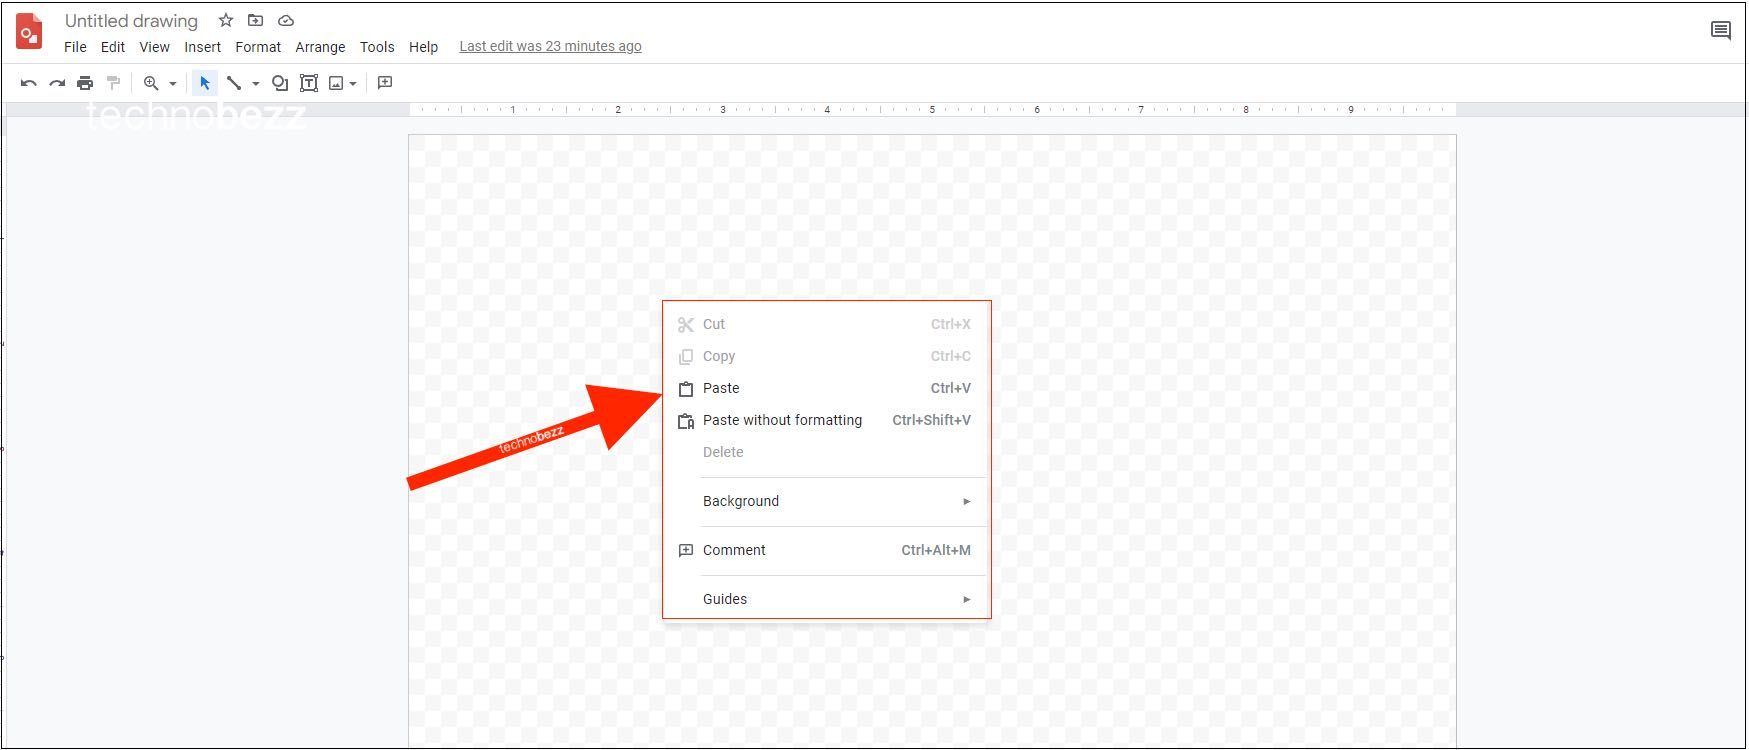
- Click on it, then right-click and choose Copy image
- Return to the Google Drive drawing, click anywhere on the white sheet, and right-click it so you can paste it by taping on the Paste button.
- The background picture you found on Google is now on the Google Drawing sheet.
- You can resize and expand or make it as small as you want. Just grab the blue edges of the picture with your cursor and move it in different directions to see how it will look.
- Also, you can move the picture to any place on your paper by clicking somewhere in the center of the photograph, holding it, and moving it. When you right-click the image you just pasted, you will see an option to Center it on the page or make it horizontal or vertical.
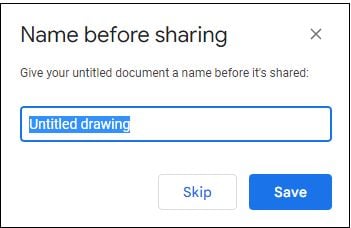
- When you are done, click on the Share button in the top-right
- Name the edit and click Save
- Copy the link to send it to someone you want
- The drawing will be saved in your Google drive.
And that is it. Keep in mind that it is better to search on Google Images for some picture that is transparent/PNG. It is better for these kinds of edits.