Logitech webcam software gets confusing because the old app name is no longer the current path. The right download depends on your webcam and what you need: image controls, firmware updates, gaming/streaming controls, or no extra app at all. Start with the current Logitech software below, then set the camera permissions and video-app selection so your webcam actually works.
1. Choose the right Logitech webcam app
Use Logi Options+ for supported Logitech webcams when you want image controls such as Crop, Exposure, Image, and Focus. Use Logi Tune for supported Logitech business and collaboration webcams when you want webcam controls, preview options, and firmware updates in one app.
Use Logitech G HUB for supported Logitech G gaming and streaming cameras, plus supported Logitech webcams that appear inside G HUB. Use no Logitech app when your webcam is a plug-and-play USB model and you only need to select it inside Zoom Workplace, Microsoft Teams, Chrome, or another video app.
Skip Logitech Webcam Software, Logitech Camera Settings, and Logitech Capture for current setup unless Logitech lists your older computer and webcam as supported for that legacy app. Pick the app by device and use case first, because installing every Logitech webcam utility only adds clutter.
2. Install Logi Options+
This fixes the common need for current Logitech webcam image controls. Open Logitech’s Logi Options+ download page, select Download, then open the downloaded installer. Follow the installer prompts, open Logi Options+, and select your Logitech webcam inside Logi Options+.
3. Set up Logi Tune
Open Logitech’s Logi Tune download page and select the download option for your operating system. Open the downloaded installer, follow the installer prompts, then open Logi Tune. Select your Logitech webcam in Logi Tune.
Use Logi Tune Desktop on Logitech’s listed current platforms: Windows 11 x64 23H2 or newer, Windows on ARM 11 24H2 or newer, or macOS 13.0 or newer.
4. Install G HUB for Logitech G cameras
Open Logitech G’s G HUB download page and select the G HUB download. Open the downloaded installer, follow the installer prompts, then open G HUB. Select your supported Logitech camera or webcam in G HUB.
5. Use a Logitech webcam without extra software
This fixes setup confusion when the webcam already works as a USB camera. Plug the webcam USB cable into your computer, then open your video app. Open the app’s Camera or Video settings, and select the Logitech webcam as the active camera.
Use this no-extra-software setup for Logitech plug-and-play business webcams listed by Logitech, including Webcam C930e, Webcam C925e, B525 HD Webcam, Business Webcam C920e, and Business Webcam C505.
6. Adjust Logitech webcam settings
In Logi Options+, select your webcam, then adjust Crop, Exposure, Image, and Focus. In Logi Tune, select your webcam, then use Field of View, Digital Zoom, image settings, preview, flip video feed, still image capture, and firmware update controls where available.
In G HUB, select your supported camera, then use supported controls such as filters, color adjustment, exposure, zoom, and streaming settings. Select the app’s Apply, Save, or firmware update control when the Logitech app shows one. Firmware controls appear only for supported webcams in the Logitech app that supports that device.
7. Allow camera access on Windows and Mac
On Windows 11, open Start, then Settings, then Privacy & security, then Camera. Turn on Camera access, then turn on Let apps access your camera. Turn on the individual Microsoft Store app camera toggle when Windows shows one, then turn on Let desktop apps access your camera for desktop apps.
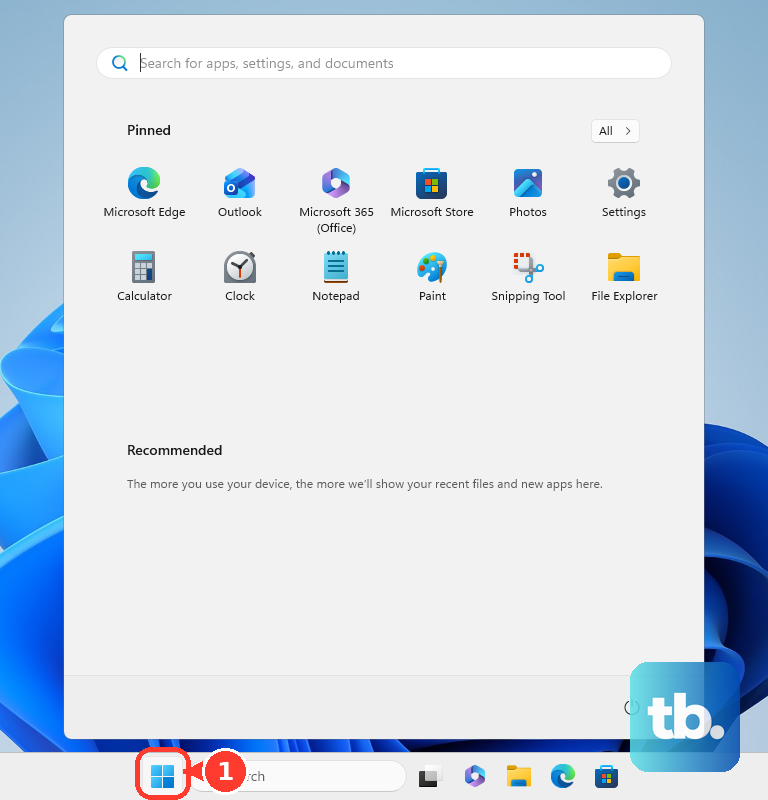
On Windows 10, open Start, then Settings, then Privacy, then Camera, select Change under Allow access to the camera on this device, and turn on Camera access for this device. On Windows 10, turn on Allow apps to access your camera, turn on your app under Choose which Microsoft Store apps can access your camera, then turn on Allow desktop apps to access your camera for browsers and meeting apps.
On macOS, open the Apple menu, then System Settings, then Privacy & Security, then Camera. Turn camera access on for each app that should use the Logitech webcam.
8. Select the Logitech webcam in video apps
In Zoom Workplace, select your profile picture, then Settings, then Video & effects, then Camera, then choose the Logitech webcam from the Camera drop-down. In Microsoft Teams, open Settings and more, then Settings, then Devices or Calls, then Video settings, then Camera, and select the Logitech webcam.
Before joining a Teams meeting, select Open device settings, then Video Settings, then choose the Logitech webcam and filters. In Chrome, open Settings, then Privacy and security, then Site settings, then Camera, and choose the camera access behavior and Logitech camera selection.
When a website asks to use the camera, select Allow. Open the webcam’s physical privacy shutter or cover before testing the camera feed. If the webcam appears in the operating system but not in your meeting app, the app’s own camera menu is the place to switch it.
9. Remove Logitech webcam software you do not need
This fixes clutter after installing the wrong Logitech app. To uninstall Logi Options+ on Windows, open Control Panel, then Programs, then Uninstall a program, double-click Options+, and follow the prompts.
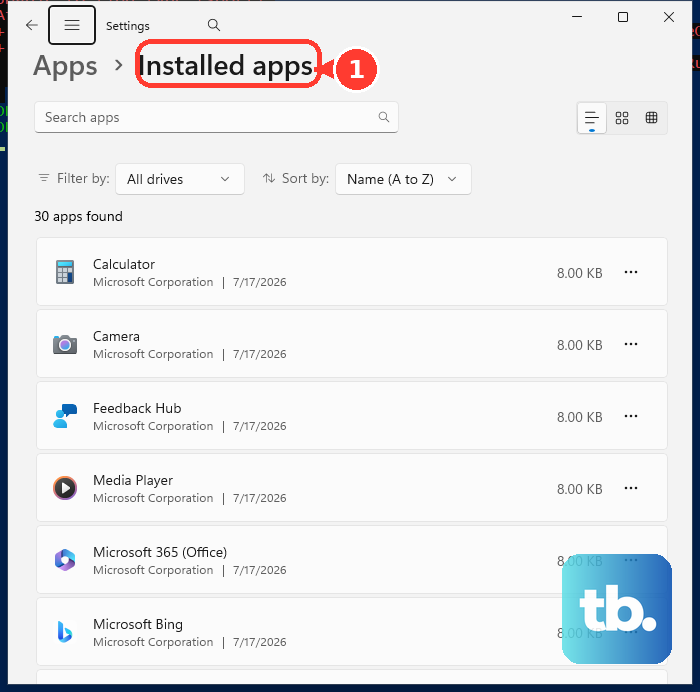
To uninstall Logi Options+ on macOS, close Options+, open Applications, right-click Options+, and choose Move to Trash. To uninstall Logi Tune on Windows 11, open Windows Settings, then Apps, then Installed apps, find Logi Tune, open the three-dot menu, select Uninstall, and follow the prompts.
To uninstall Logi Tune on Windows 10, open Windows Settings, then Apps, then Apps & features, find Logi Tune, select Uninstall, and follow the prompts. To uninstall Logi Tune on macOS, open Finder, then Applications, then drag Logi Tune to Trash.
To uninstall G HUB, remove it from your operating system’s app list, then use Logitech’s G HUB troubleshooting instructions only when the standard uninstall fails.
Frequently Asked Questions
Is Logitech Webcam Software still the app I should download?
No. Logitech Webcam Software is the older deprecated path. For current setups, use Logi Options+, Logi Tune, or Logitech G HUB depending on your webcam and use case.
Do all Logitech webcams need software?
No. Logitech lists several business webcams as plug-and-play USB cameras, so you can plug them in and select them inside your video app without installing extra Logitech software.
Which Logitech app gives me image controls?
Logi Options+ can adjust Crop, Exposure, Image, and Focus for supported webcams. Logi Tune and G HUB also provide webcam controls for supported devices.
Why does my Logitech webcam not show in Zoom or Teams?
Allow camera access in Windows or macOS privacy settings, open the video settings in Zoom Workplace or Microsoft Teams, then select the Logitech webcam as the camera.