Two Razer apps sit behind most of these problems: Synapse 4 for device settings, lighting, profiles, macros, and supported device features, and Cortex for game boosting and system tuning on Windows. Razer lists other software alongside them, including Razer Synapse Web, the Razer Chroma App, Razer Axon, and Razer Virtual Ring Light.
If the app will not install, launch, detect a device, or keep your profiles, start with the official download and move through repair before reinstalling. The steps below use Razer's current support paths and avoid outdated Synapse 3 download fixes.
1. Choose the correct Razer app first
Use Razer's official pages only. For mice, keyboards, headsets, Chroma settings, profiles, and device customization, open razer.com/synapse-4. On Windows 10 or Windows 11 64-bit, click Download for Windows. On an Apple silicon Mac running macOS 15 Sequoia or later, click Download for Mac for Razer Synapse for Mac Preview.
For game boosting and Windows optimization, open razer.com/cortex and click DOWNLOAD NOW or Install Now. Cortex is for Windows 10 64-bit and Windows 11. Do not use third-party download portals. Razer says Synapse 3 was replaced by Synapse 4, and after February 3, 2026, the Synapse 3 installer was removed from the official website while support and cloud services ended.
2. Install Synapse 4 on Windows cleanly
Open the Razer Synapse 4 download page and click Download for Windows. Razer's install article still calls this button Download Now, so treat either label as the same download. Run the installer and click Yes at the User Account Control prompt. Then click CONTINUE.
Select THE NEW RAZER SYNAPSE, then click INSTALL. Click RESTART NOW if the installer prompts for a restart. Leave Launch Razer Synapse 4 selected, then click GET STARTED!. Log in with your Razer ID.
Synapse 4 installs updates automatically in the background. When an update prompt appears on the Synapse dashboard, use that prompt to update.
3. Set up Synapse for Mac permissions
On Mac, run the installer first, then clear the permission prompts. Download the Razer Synapse for Mac installer and double-click it. Click Continue, click Continue again, then click Agree. After that, click Continue.
Click Customize to install on another drive, or click Install for the default location. Enter your Mac password or use fingerprint authentication when macOS asks. If the installer asks for driver approval, click Open System Settings. Open Settings, then open General.
Next, open Login Items & Extension, then open Driver Extensions. Enable both driver extensions. After the install finishes, launch Razer Synapse for Mac. When Synapse shows SYSTEM PERMISSION NEEDED, click it and follow the prompts until green checkmarks appear.
Razer lists these permission areas for Synapse for Mac: Driver Extensions, Input Monitoring, Bluetooth, Accessibility, Screen & System Audio Recording, Full Disk Access, and Notifications.
4. Repair Synapse before reinstalling it
Use repair when profiles disappear, a supported device stops appearing, or Synapse behaves badly after an update. It keeps the fix inside Razer's installer instead of removing every component.
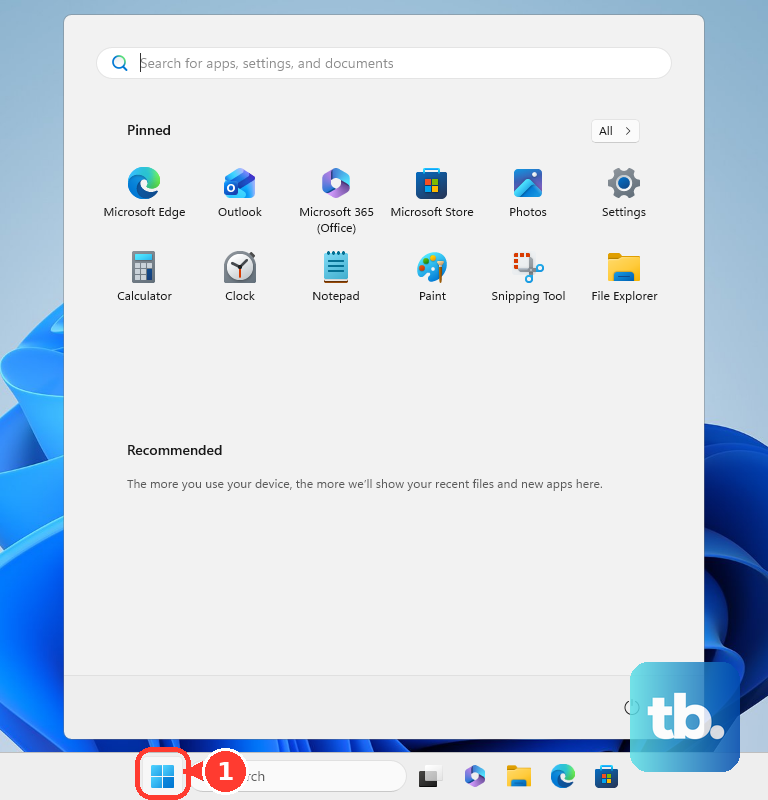
- 1.Open the Windows Start menu and search for Add or remove programs.
- 2.Find Razer Synapse.
- 3.Open the three-dot menu and click Modify.
- 4.Click Yes at User Account Control.
- 5.In the Razer Gaming Software window, click REPAIR.
For a device that Synapse does not detect, plug the Razer device directly into the computer instead of a USB hub. Restart the PC after a first install or after an update completes. Also make sure Synapse is not running in compatibility mode.
5. Reinstall Synapse when repair fails
Back up the profiles you need. Right-click the Razer Synapse 4 system-tray icon and click Exit All Apps. Open Windows Settings, click Apps, then click Installed apps. Search for Razer.
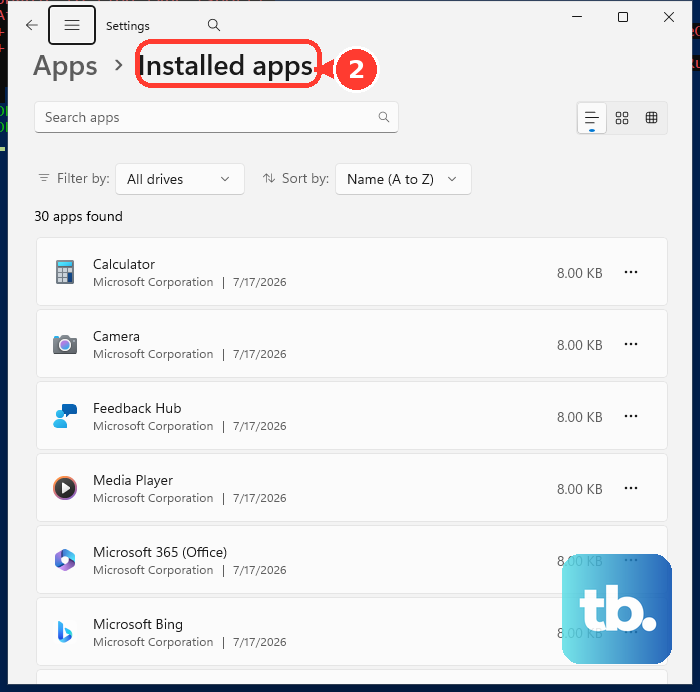
Open the ellipsis menu and click Uninstall. Click Yes at User Account Control. In RAZER GAMING SOFTWARE, open the ellipsis in the upper-right of INSTALLED APPS. Click Uninstall All, then click UNINSTALL.
Restart the PC. Download and install the latest Razer Synapse 4 from Razer. For stubborn driver or software problems after uninstalling Synapse, use Razer's Driver Clean-up Tool path. Uninstall Synapse.
Unzip the Razer Driver Clean-up Tool. Run CleanupRazerDrivers.exe. Approve the admin prompt, then reboot the PC. Reinstall Razer Synapse and log in to your Razer account.
6. Fix Synapse launch and crash problems
On Windows, right-click Razer Synapse in the system tray. Click Log In, then click LOG IN. Enter your email and password. Then click LOG IN again.
Run Razer Synapse as administrator. Make sure antivirus software is not blocking RazerAppEngine. Then open Task Manager and click Processes. Check whether RazerAppEngine is stuck at 0% CPU.
If the issue continues, use the clean reinstall path above. On Mac, open Launchpad, type Razer, and open the app. Click LOG IN. Enter your email and password, then click LOG IN.
To check the app engine, press command + space. Type Activity Monitor, then press Enter. Check CPU consumption for RazerAppEngine. If it still will not start, clean reinstall Synapse for Mac.
7. Restore modules and migrate old profiles
Missing modules live inside the Synapse dashboard flow. Scroll down on DASHBOARD to MODULES. If the module is not listed there, click DEVICES & MODULES at the top of Razer Synapse 4. Hover over the module and click INSTALL.
For Synapse 3 profile migration, keep Synapse 3 installed until migration is done. Upgrade to Razer Synapse 4. Launch Synapse 4 and log in with your Razer ID. Then go to DASHBOARD.
Open MODULES and click PROFILE MIGRATION. Expand each section. Choose the profiles, macros, or Chroma Effects you want, then click MIGRATE PROFILES. Later migrations use the same PROFILE MIGRATION module path.
If you missed Synapse 3 cloud migration before end-of-life, use Razer ID Privacy Center instead of hunting for old installers. Log in to RazerID, click Account, and open Privacy Center. Download your Razer Synapse data, then use the emailed here link. Extract the Synapse 3 folder.
Download the Profile Migration folder. Copy the contents from Razer Synapse3 Data. Open C:\ProgramData\Razer and paste Razer Synapse3 Data. Copy the cloud-profile contents from Synapse 3, then paste them into the Emily3 folder.
8. Repair Cortex apart from Synapse
Cortex has its own update, repair, reinstall, and tuning controls. Use these only for Razer Cortex problems, not Synapse device-detection problems.
To update Cortex, expand the Windows system tray. Right-click the Razer THS icon, then click Check for Updates. Click CHECK FOR UPDATES. Then click UPDATE if one is available.
To repair Cortex, right-click the Razer icon. Click Exit All Apps. Search Windows for Apps & features and open it. Click Search sort, and filter by drive.
Type Razer. Click Razer Cortex, then click Modify. Click Yes at UAC. Then click REPAIR.
After repair, launch Razer Cortex and click GET STARTED!. When Cortex will not launch, open Add or remove programs. Search for Cortex. Click Razer Cortex.
Click Uninstall. Click Uninstall again, then click Yes at UAC. Then in the Razer Gaming Software window click UNINSTALL. Select RAZER CORTEX and click UNINSTALL.
Reinstall Cortex from Razer's official Cortex page. If game, chat, or video lag starts after boosting, open Cortex. Click GAME BOOSTER and click BOOST. Turn off Auto-Boost.
If Cortex is still boosting a game, click GAME BOOSTER. Click BOOST, then click Specials. Disable Enable CPU Core. To undo System Booster tuning, click SYSTEM BOOSTER.
Click SPEED UP. Click RESTORE TO WINDOWS DEFAULT. Then restart the PC.
9. Use keyboard hardware fixes when Synapse is not needed
Some Razer keyboard features work from the keyboard. For Gaming Mode on full-sized and tenkeyless Razer keyboards, press fn + F10. On Razer Huntsman Mini and Huntsman Mini Analog, press fn + U. On Razer Huntsman V3 Pro Mini, press fn + O.
In Synapse 4, you can also open the keyboard under DEVICES. Then under GAMING MODE choose Always on or Enable in-game. Supported models can cycle onboard lighting with fn or FN + ctrl + a number. Use 1 for Off, 2 for Static, 3 for Breathing, 4 for Spectrum Cycling, 5 for Wave, 6 for Reactive, and 7 for Starlight.
BlackWidow V4 Line keyboards also support 8 for Ripple, 9 for Wheel, and 0 for Fire. For an unresponsive listed Razer keyboard, use the reset sequence for that model family.
For the BlackWidow V4 Line or Huntsman V3 Line, unplug the keyboard. Hold esc + caps + spacebar. Plug it into USB, then release the keys.
For Cynosa, BlackWidow, and Huntsman, unplug the keyboard. Hold Escape, Caps Lock, and space bar. Plug it into USB, then release the keys.
The Huntsman Elite runs the same sequence with two extra details: plug in the connector labeled RAZER. Release the keys. Then plug in the second USB connector with the lightbulb icon or Port label to power the keyboard and wrist rest underglow lighting.
For BlackWidow V3 Pro or BlackWidow V3 Mini HyperSpeed, switch it off. Unplug USB. Hold Escape, Caps Lock, and space bar. Then plug it in or switch it on.
Frequently Asked Questions
Is Razer Synapse 4 the current Razer gaming software?
Yes. Razer says Synapse 3 was replaced by Synapse 4. Use Synapse 4 for current Razer device settings, and use Cortex separately for game boosting on Windows.
Can I use Razer Synapse in a browser instead of installing it?
Razer Synapse Web Beta works at synapse.razer.com for supported devices. It handles essential customization, onboard profile management, and Chroma RGB Quick Effects, but it is a browser-based companion rather than a full Synapse 4 replacement.
Why does my Razer device not show up in Synapse?
Plug the device directly into the computer instead of a USB hub, restart after a first install or completed update, then run the Synapse repair path. Razer also says Synapse should not be running in compatibility mode.
Does On-The-Fly Macro Recording work without Synapse?
No. Razer says On-The-Fly Macro Recording requires Razer Synapse to be installed and running in the background, with the Windows system-tray icon present.