Did you forget your Dell laptop warranty details, like how long the warranty will last? Don't worry. It is pretty simple to recheck it if you want. You will need the service tag for your Dell laptop, a decent internet connection, and a web browser to check.
If you have these things, checking the warranty status of your Dell laptop is easy. Most devices come with a pre-installed browser these days. Locating the service tag of the Dell laptop is all you need to do before you are ready to find out the warranty status of your Dell laptop.

Using SupportAssist
SupportAssist is a software you can use to find the service tag for your Dell laptop. A service tag is required to check the warranty status of your Dell laptop. Most Dell devices have the SupportAssist software pre-installed. You can check whether your Dell laptop has the SupportAssist software by searching for it in the start menu of the Windows operating system desktop.
However, in case your Dell laptop does not have the SupportAssist software. You can download and install it from the official download link available on the Dell website (Go to the Dell webpage at which this download link is present). Once you have the SupportAssist software on your Dell laptop, you can quickly check the service tag of your Dell laptop.

To check it, you need to go to the start menu and search for the SupportAssist software. Once you have found the software, open it. Once you have opened the SupportAssist software, you will see the service tag written in the top-right area of the software window. Once you have found this service tag for your Dell laptop, note it down so we can proceed to the next and final step.
Using Command Prompt
You can also use the Command Prompt software of the Microsoft Windows operating system to find the service tag of your Dell laptop. To do so, open the Command Prompt. You can open it after searching for it on the start menu.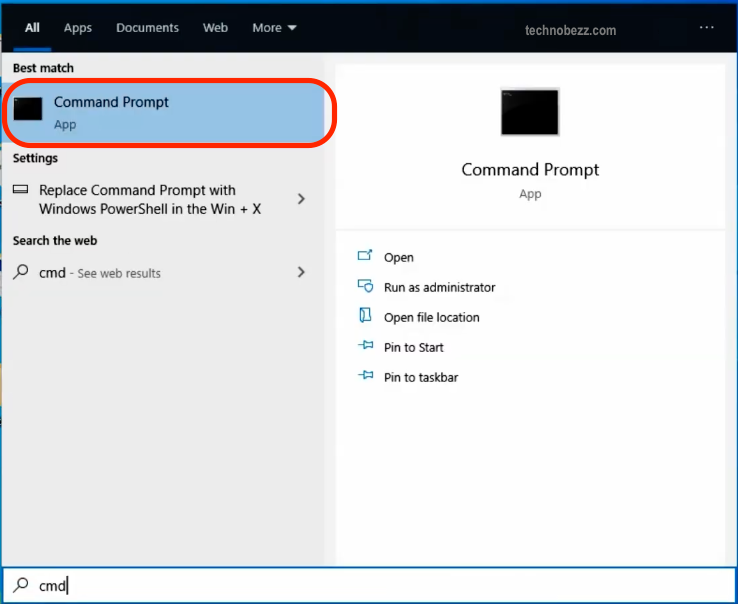
Another way to open it is by pressing the windows key with the 'R key on the keyboard, then typing "cmd" and pressing the enter key. Once you have the Command Prompt open, type 'wmic bios get serial number without quotes, and press enter. You will see your Dell laptop's serial tag (or serial number) here. Save this service tag and proceed further.
Final step
After you have located the service tag of your Dell laptop, you need to go to a Dell webpage to check its warranty status. First, open a web browser on any device that can access the internet and then go to the link: https://www.dell.com/support/home/in/en/inbsd1?app=warranty from the web browser. A webpage from the Dell website will now be opened.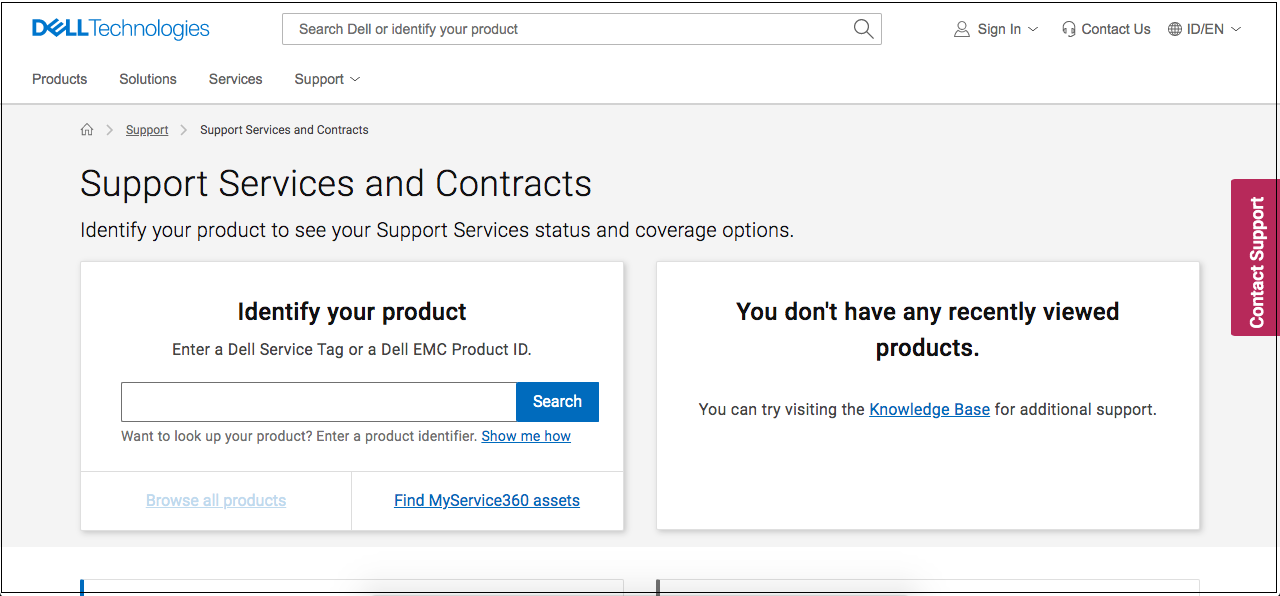
On this webpage, you must enter the service tag you found earlier. The service tag must be entered in the edit box under the heading "search support." After entering the service tag here, check to confirm that it is entered correctly, and then press enter or click on the 'search' option beside this edit box.
The Dell webpage will display the warranty status of your Dell laptop. You can note it down for future reference or remember it. You can contact Dell support services if these steps do not work out for you.
Also Read


Recent
Ottocast Car TV Mate Max Review – A Versatile In-Car Entertainment Adapter
iPhone Battery Dying In Minutes? 23 Real Fixes That Work
Ottocast Play2Video Pro Ups the Game in Affordable Car Entertainment
Ottocast OttoAibox P3 Powers a Smarter Driving Experience
How to Disable WebRTC in Your Browser Settings
Guides

Lenovo Debuts Solar-Charging Laptop That Turns 20 Minutes of Sunlight Into Hour of Video

Why Do Smartphones Get Slower Over Time?

Decoding Tech Jargon: The A to Z Cheat Sheet (Free Downloadable PDF)

How to Clear an App's Cache on Your Samsung Device

Why Are My iPhone Messages Green Instead of Blue?

Everything Google Knows About You (And How to Stop It)
