Google Chrome is a modern internet browser that allows you to surf the Web with ease. You can use it in your native language. You downloaded Google Chrome and installed it, and now you can’t wait to try it out. Then you realize that you got your install file in English, and you want to use the browser in your own language. If you don’t know English, this will be a problem because, in that case, you can use only the basic options in Google Chrome web browser and exploring all the others can be pretty complicated. But, don’t worry, this problem can be easily solved with a few simple steps. This guide will show you how to change the language in Google Chrome web browser.
You also may read: How To Add Contacts From Gmail, Outlook, And More To Windows 10’s Address Book
How To Change The Language In Google Chrome Web Browser
Follow the steps listed below:
- In the upper right corner of the browser, click on Menu icon (three horizontal lines).
- In the menu click on “Settings”.
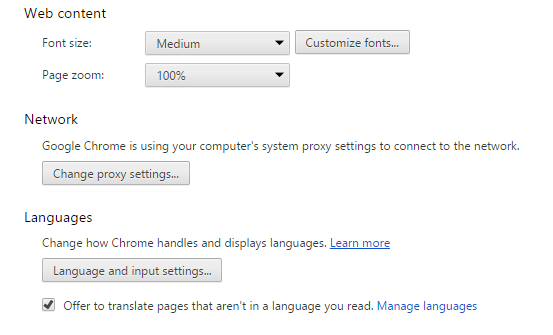
- Scroll down and click on “Show advanced settings”.
- There you will see the following: “Languages” < “Language and input settings” and click on it.
A new window will open, and you will see the language that has been set as default, which is English.
Now you must click on “Add”. A small window will open and there you will see the large list of available languages. From a drop-down menu, choose your language, for example, Spanish, and after you selected it, press “Done”.
After that, you must close Google Chrome to apply the changes. After the re-launch, you will see that the browser displays in selected language.
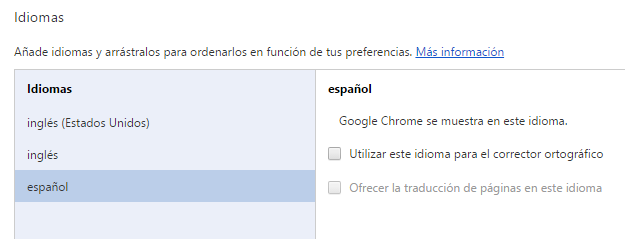
Image Source: www.technobuffalo.com
You may also read: How To Restore The Old Windows Photo Viewer In Windows 10